Panasonic SVAV50 Sd Movie - Page 11
Charging The Battery
 |
UPC - 037988251193
View all Panasonic SVAV50 manuals
Add to My Manuals
Save this manual to your list of manuals |
Page 11 highlights
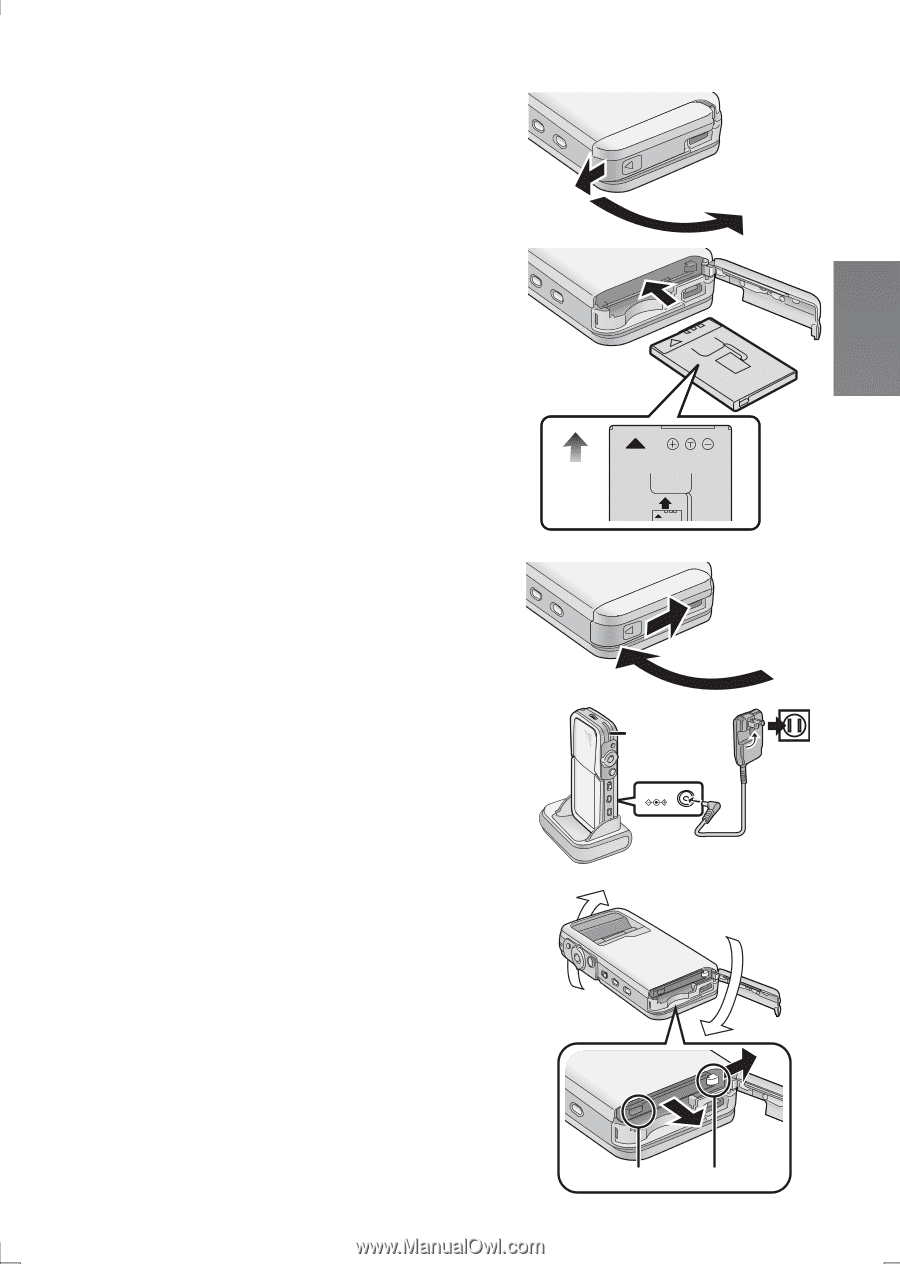
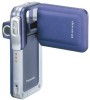
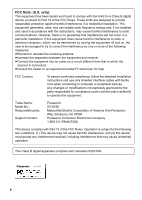
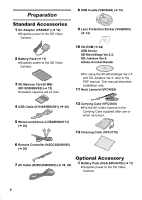
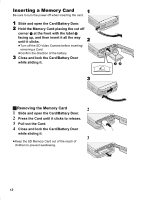
Charging the Battery 1 Be sure to turn the power switch on the camera off when charging the battery. 1 Slide and open the Card/Battery Door. 2 Insert the battery all the way. ≥Confirm the direction of the battery. 2 ≥Be sure to insert the battery until fixed with the Battery Lock. 3 Close and lock the Card/Battery Door while sliding it. 4 Place the SD Video Camera on the USB Cradle. 5 Connect the DC Input Lead to the [DC IN 4.8V] socket on the USB Cradle. 6 Connect the AC Adaptor to AC Main socket. ≥Power/Card Access Lamp 1 flashes, and 3 Charging starts. 7 Wait until Power/Card Access Lamp 1 goes off. ≥When recharging is completed, Power/Card Access Lamp goes off. ≥Under normal operation the charging light stays on during charging. If it blinks a charging problem may be occurring. Please see page 56 for more details. 1 5 6 DC IN 4.8V ª Removing the Battery 1 Slide and open the Card/Battery Door. 2 Release the Battery Lock A and incline this unit to remove the Battery. 2 ≥When you cannot remove the battery, pull out the projection part B to remove it. 3 Close and lock the Card/Battery Door while sliding it. B A 11
-
 1
1 -
2
-
3
-
4
-
5
-
 6
6 -
 7
7 -
 8
8 -
 9
9 -
 10
10 -
 11
11 -
 12
12 -
 13
13 -
 14
14 -
 15
15 -
 16
16 -
17
-
18
-
19
-
20
-
21
-
22
-
23
-
24
-
25
-
26
-
27
-
28
-
29
-
30
-
31
-
32
-
33
-
34
-
35
-
36
-
37
-
38
-
39
-
40
-
41
-
42
-
43
-
44
-
45
-
46
-
47
-
48
-
49
-
50
-
51
-
52
-
53
-
54
-
55
-
56
-
57
-
58
-
59
-
60
-
61
-
62
-
63
-
64
-
65
-
66
-
67
-
68
-
69
-
70
-
71
-
72
-
73
-
74
-
75
-
76
-
77
-
78
-
79
-
80
 |
 |