Pfaff 1214 Owner's Manual - Page 20
Dhangng, neede, sewing, easy. - sewing machine accessories
 |
View all Pfaff 1214 manuals
Add to My Manuals
Save this manual to your list of manuals |
Page 20 highlights
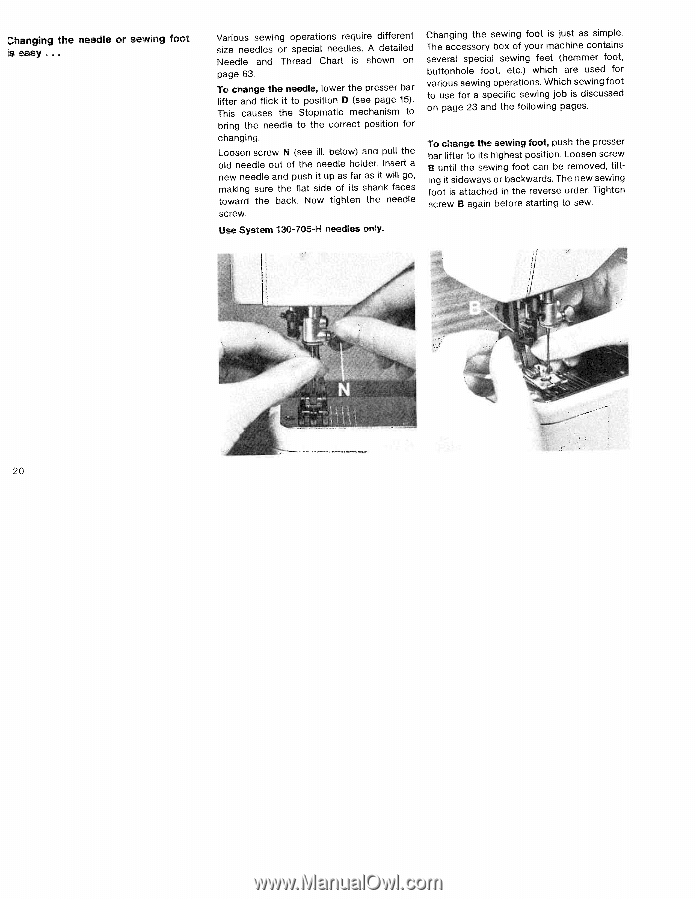
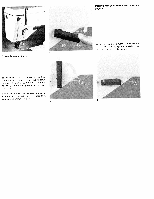
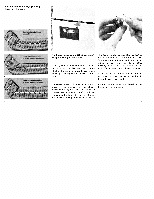
Dhangng the neede or sewing foot s easy. Various sewing operations require different size needles or special needles. A detailed Needle and Thread Chart is shown on page 63. To change the needle, lower the presser bar lifter and flick it to position D (see page 15). This causes the Stopmatic mechanism to bring the needle to the correct position for changing. Loosen screw N (see ill, below) and pull the old needle out of the needle holder. Insert a new needle and push it up as far as it will go, making sure the flat side of its shank faces toward the back. Now tighten the needle screw. Use System 130-705-H needles only. Changing the sewing foot is just as simple. The accessory box of your machine contains several special sewing feet (hemmer foot, buttonhole foot, etc.) which are used for various sewing operations. Which sewing foot to use for a specific sewing job is discussed on page 23 and the following pages. To change the sewing foot, push the presser bar lifter to its highest position. Loosen screw B until the sewing foot can be removed. tilt ing it sideways or backwards. The new sewing foot is attached in the reverse order. Tighten screw B again before starting to sew.
-
 1
1 -
2
-
3
-
4
-
5
-
6
-
7
-
8
-
9
-
10
-
11
-
12
-
13
-
14
-
 15
15 -
 16
16 -
 17
17 -
 18
18 -
 19
19 -
 20
20 -
 21
21 -
 22
22 -
 23
23 -
 24
24 -
 25
25 -
26
-
27
-
28
-
29
-
30
-
31
-
32
-
33
-
34
-
35
-
36
-
37
-
38
-
39
-
40
-
41
-
42
-
43
-
44
-
45
-
46
-
47
-
48
-
49
-
50
-
51
-
52
-
53
-
54
-
55
-
56
-
57
-
58
-
59
-
60
-
61
-
62
-
63
-
64
-
65
-
66
-
67
-
68
-
69
-
70
-
71
-
72
 |
 |