Pfaff 1214 Owner's Manual - Page 41
Quilting, stitching
 |
View all Pfaff 1214 manuals
Add to My Manuals
Save this manual to your list of manuals |
Page 41 highlights
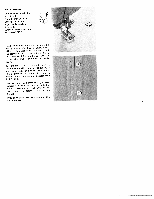
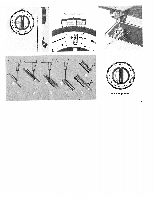
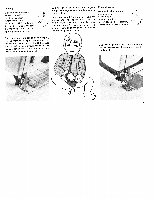
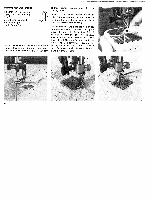
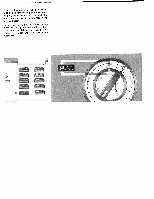
Quilting Ultra-Matic stitch selector: straigh stitch (2> or small zigzag stitch. Attach zipper foot No. 93-040 927-31 and apply the quilting gauge to the foot. Set the gauge for the desired spacing between seams. Mark the first seam on the fabric or guide the quilting gauge finger along the raw edge of the material. Having completed the first seam, move the material under the zipper foot so that the gauge finger now runs along the seam previously sewn (or marked>. For any sub sequent seam, guide the gauge finger along the preceding line of stitches. Edge stitching Ultra-Matic stitch selector: straight stitch Stitch length: 2 Attach zipper foot No. 93-040 927-31 or ordinary sewing foot No. 93-040 910-91. To attach the quilting gauge place the spring on the shank of the zipper foot so that both holes are in line. Compress it until the gauge can be easily pushed through the holes. This quilting gauge can be attached to all feet which have a hole in their shank, Guide the edge of the material along the line marking the desired stitching margin on the needle plate. I 43
-
 1
1 -
2
-
3
-
4
-
5
-
6
-
7
-
8
-
9
-
10
-
11
-
12
-
13
-
14
-
15
-
16
-
17
-
18
-
19
-
20
-
21
-
22
-
23
-
24
-
25
-
26
-
27
-
28
-
29
-
30
-
31
-
32
-
33
-
34
-
35
-
 36
36 -
 37
37 -
 38
38 -
 39
39 -
 40
40 -
 41
41 -
 42
42 -
 43
43 -
 44
44 -
 45
45 -
 46
46 -
47
-
48
-
49
-
50
-
51
-
52
-
53
-
54
-
55
-
56
-
57
-
58
-
59
-
60
-
61
-
62
-
63
-
64
-
65
-
66
-
67
-
68
-
69
-
70
-
71
-
72
 |
 |
