Pfaff creative 1472 Owner's Manual
Pfaff creative 1472 Manual
 |
View all Pfaff creative 1472 manuals
Add to My Manuals
Save this manual to your list of manuals |
Pfaff creative 1472 manual content summary:
- Pfaff creative 1472 | Owner's Manual - Page 1
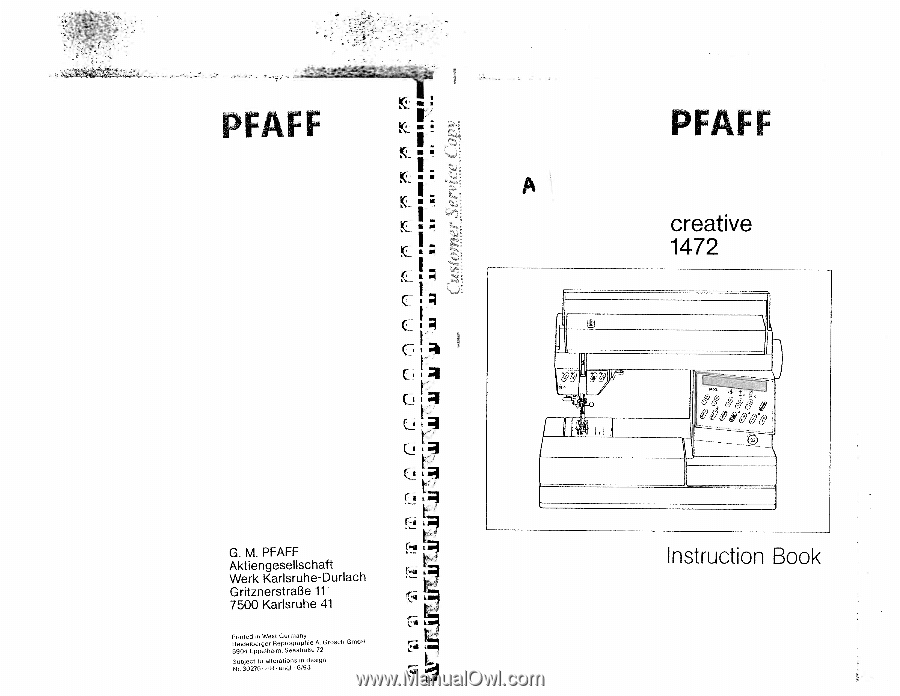
L - I; : I cI G. M. PFAFF AktiengesellSChaft Werk Karisruhe-DUrlaCh Gritznerstral3e 11 7500 Karlsruhe 41 Printed in West Germany Heidetberger Reprographie A Grosch GmbH 6904 Eppelheim. Seestratte 72 Subject to alterations in design N, 3027n HR erigt 9j93 -. F PFAFF creative 1472 Instruction Book - Pfaff creative 1472 | Owner's Manual - Page 2
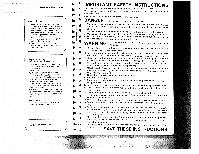
threading needle, changing needle, threading bobbin, or changing presser foot, etc. 16. Always unplug sewing machine from the electrical outlet when removing covers, lubricating, or when making any other user servicing adjustments mentioned in the instruction manual. 17. Hold plug when rewinding - Pfaff creative 1472 | Owner's Manual - Page 3
7 Parts of the sewing machine I Carrying handle 2 Folding cover 3 Hand wheel 4 Release disc 5 Keys for balance and pattern length 6 Key for program sequence and recommended sewing modes 7 Key for stitch length and pattern length 8 Stitch width keys 9 Main switch 11 Work support with accessory box - Pfaff creative 1472 | Owner's Manual - Page 4
position I For serging, appliquéing, inserting lace and basting with fringe foot. Same as program 10 (for zigzag from left needle position push pattern ; b = 1 penet rat ion Shell-edging stitch For sewing purl seams For sewing on elastic tape, darning tears and patching. Suitable for almost - Pfaff creative 1472 | Owner's Manual - Page 5
I I /IlillilfilgI I No. Description - -----_ Application ip ' Light buttonhole 7.0 to 16 mm For sewing buttonholes in blouses, shirts and linen. Jc-•.5 Light buttonhole 7.Oto44mm For sewing buttonholes in bed linen. 91 Stretch buttonhole For buttonholes in stretch fabrics (jersey, etc - Pfaff creative 1472 | Owner's Manual - Page 6
// 1 a/c//:;/i/ 70 71 72 73 74 75 76 77 78 79 80 81 82 83 84 85 86 87 88 89 9396979899 bA bO cA c0 dA A z 9X - No. Description 30-69 73-80 84-89 93 60,61 ,63 7072 81 -83 Embroidery stitch programs Scalloping edge decoration Cross stitch programs 96-99 Hem-stitching programs Application For - Pfaff creative 1472 | Owner's Manual - Page 7
Compartment A is for storing the foot control, mains lead and instruction book Important! [V [oro machine. Af!nrwarrts ° 0 kpr 47 'rn en, V/I 50( jr0 it irri ru on thu roar- no V / pro--n tho rn ion so. it h 0 J Open cover 2. 11 /Pull the power lead out of the foot control \; Plug the foot - Pfaff creative 1472 | Owner's Manual - Page 8
winding: Take hold of the work support and swing it to the left. B 7- Place the bobbin on winder 25 and turn it so that pin A engages in slot B. \ Open free arm cover 33 25 4 / a / Disengaging the sewing action: Hold the balance wheel and turn release disc 4 as shown by the arrow M (i(W7 - Pfaff creative 1472 | Owner's Manual - Page 9
Only with metal sewing foot! Swing bobbin winder thread guide 44 to the front Raise sewing foot. Switch on the dual feed. Set needle at foB position. Place bobbin on bobbin winder 25. Disen gage sewing action. Pull the needle thread under the sewing foot to the right and through guide 44 (into open - Pfaff creative 1472 | Owner's Manual - Page 10
as shown (A), pull thread through slot (B) and out of opening (C> HR 4 Inserting the bobbin case: switch off main Switch 9, lift latch A and push the bobbin case fully onto pin B Cutout C must face upwards. \ Checking the bobbin thread tension: with a brief, sharp upward movement of your hand the - Pfaff creative 1472 | Owner's Manual - Page 11
: Switch off main switch 9 Set needle at top position Raise sewing foot. Pull the thread as shown by the arrow into groove A, to the left past guide C, from below into slot B, into takeup lever 41, back to slot B and into the right hand guide on the needle holder. R ER /L / ER ER 0 ci - Pfaff creative 1472 | Owner's Manual - Page 12
C, CD CD CD CD CDCD CD CDD CD(D 3 a CD - C, 0 CD C) p CD aCD -QCD 0 CD 0 CD 0.0 C 0 CD CD -- -- -- - - - I L . La. .i il ia1 I L) l.Li L _c 0 CDCO 3 aID CD CD _ID =00 0 C, --0 0 a- o3 CDCD aCD < CD 0 00 0* çD a () a 0 Da CD CD C 0 D, DCD CDD CD CO 0 CD• 0 CD - Pfaff creative 1472 | Owner's Manual - Page 13
slippage The exclusive Pfaff snlutiun ist built in dual feed, a walking foot that simul taneously feeds the fabric from above as the feed dog moves it trom below. You can sew up to 12 fabric layers without fear of slippage I I F' I * I - 22 Swing work support 11 against the machine arm - Pfaff creative 1472 | Owner's Manual - Page 14
material cover needle hole (see illustration B) and lower the sewing foot onto it by pressing presser bar lifter 17 down wards. Position A of lever 17 is for darning. J Press the pedal. The harder you press, the faster the Creative sews. 4 Needle thread tension 39 A = setting mark Important! In - Pfaff creative 1472 | Owner's Manual - Page 15
be changed during sewing For bobbin winding disengage the sewing action. After bobbin winding engage the sewing action again. Owing to the use of electronic compo nents this machine becomes warm during operation. This is quite normal and of no consequence. Batteries: When the machine is switched on - Pfaff creative 1472 | Owner's Manual - Page 16
the full bobbin is inserted and sewing is continued Important: cover 33 must always be closed Top and bottom needle position: When the machine stops. The controls of the Creative comput er: 5 Keys for balance and pattern length 6 Key for program sequence and recommended sewing modes 7 Stitch length - Pfaff creative 1472 | Owner's Manual - Page 17
4 - ca ii ii m I lIT rTJL;l I pr ) -1' 1 - Pfaff creative 1472 | Owner's Manual - Page 18
0 0 43 00 00 50 50 1Si if 1' 4 Storing program combinations: 3 The creative computer contains 16 M memories, MO to M 15 A maximum of 3 484 programs can memory key 30 to sew the pro grams entered from the beginning By pressing the foot control the machine sews the combination from the - Pfaff creative 1472 | Owner's Manual - Page 19
and both function and indicator are switched off Key 29 has a second function for straight stitch sewing with a roundhole needle plate and straight stitch foot (special accessories) If the machine is in program 00 and you press key 29, indicator C lights up and the computer programming function - Pfaff creative 1472 | Owner's Manual - Page 20
in the display beneath the three symbols on the computer: A: dual feed engaged disengaged ic B: needle thread tension C: number of sewing foot (standard accessories) Recommendations made in this book may differ from those in the machine display. In that case both recommen dations can be used. 36 - Pfaff creative 1472 | Owner's Manual - Page 21
The work support can be lifted out (A). Open its lid and take out accessory box C. Underneath the box is an oacscheoswsosryhocwomtopaarrtrmanegnet B. Illustration sewing feet, needles and bobbins in the accessory box. A B N illltH Sewtng feet (normal accessories) OA Normal sewing foot 1A - Pfaff creative 1472 | Owner's Manual - Page 22
Clean the teed dog and the parts in the sewing hook area with a soft brush Clean the bobbin thread monitor as instructed on page 157. Apply a drop the edge guide. Be sure to use only a 15-watt light bulb in the sewing lamp. j - , s;.,.. : 42 Changing the batteries: Switch on the machine, so - Pfaff creative 1472 | Owner's Manual - Page 23
. ER ER - Special accessories Appliqué fool Part No. 93-042 941-91 Sewing Operation For appliqué work ER ER Binder (remove sewing fool holder) 98-053 cording needle size 70) ER ER ER Fringe sewing foot 93-042 943-91 Straight-stitch foot with round needle hole Needle plate with round - Pfaff creative 1472 | Owner's Manual - Page 24
Working with straight stitch, utility- and stretch stitch ER ER ER ER 1 ER 2 Tips for embroidering and sewing with the ER Pfaff Creative 1472 ER • Betore you begin, tirst try sewing on a piece of waste fabric. • Check the stitch formation and tension. • Secure the beginning and end of the - Pfaff creative 1472 | Owner's Manual - Page 25
is necessary when the straight stitch foot and the round hole needle plate are used (special accessories) Program 01 is a straight easier to place the work underthe sewing foot. Do not forget to lower the presser bar litter again! Certain seams are easier to sew with a different needle position (see - Pfaff creative 1472 | Owner's Manual - Page 26
also be wound on the bob bin and used as bobbin thread In this case, sewing thread should be used in the needle. For this sewing job the needle thread tension must be set relatively high. For topstitching, the fabric is placed in the machine wrong side up. Select the longest stitch. For topstitching - Pfaff creative 1472 | Owner's Manual - Page 27
over to one side and press Then topstitch on the face side of the tabric, using the edge of the sewing foot as a guide (Fig 1) Double lap seam sewn with the felling foot (ape cial accessory) proq J- J1 00 1I 3-S Fihnq rnt 3 If two lines of stitching are to appear on the face side of - Pfaff creative 1472 | Owner's Manual - Page 28
as you guide it during sewing. Make sure the fabric con tacts the edge of the right half of the hemmer foot as it enters the scroll 56 R R 3 I R Binding edges with the roll hemmer prrg - ___-I I- [j ER L. 3-5 * * Roll hemmer (special accessory) Use the roll hemmer foot for hemming - Pfaff creative 1472 | Owner's Manual - Page 29
presser bar lifter and remove the sewing foot to the rear 60 'H R Smocking with elastic thread Ef r prog - ;-- (J rut i Z i ° Stitch length 3 to 4 mm Bobbin thread: elastic thread, (wind tension- free on bobbin) Needle thread: sewing thread For sewing with elastic threads we recommend - Pfaff creative 1472 | Owner's Manual - Page 30
with the required zigzag stitch The material enters at the red marking on the sewing foot (Fig 2). • Preparation of the sewing foot (overlock foot No. 3) Turn screw A fully to the front The red mark B" is then on the right sewing foot side. Allow the edge of the material to he sewn to enter close - Pfaff creative 1472 | Owner's Manual - Page 31
Gather the fabric to the waist size using straight stitch Push the part prepared in this way between the elastic tape and pn it firmly (Fig 1) Elastic straps (outerwear) prog I1 13a 3-5 OA On skirts or trousers sew the strap onto the pre pared edge with elastic stitches (Fig 2) 64 ji :'- - Pfaff creative 1472 | Owner's Manual - Page 32
fL I; ! (j cI G. M. PFAFF AkUengesetlSChaft Werk KarlsruheDUrlaCh GritznerstraI3e 11 7500 Kartsruhe 41 L Printed III West GerrnarW Hrdntbn,ger RnptOWPhie A GtnsCP Giiblt 6904 Eppettteiifl. S6 e sestra 72 ubest tci atteratlOt is iii Uesigfl N. 30276 HR engl 6/93 creative 1472 Instruction Book - Pfaff creative 1472 | Owner's Manual - Page 33
Pfaff Creative 1472 offers a selection of diffe rent elastic closing and serging seams from which you can easily select the corresponding seam for all stretchable materials. F Closed overlock stitch prog -- (J I [JJ 21 25 3-5 * F * Knit-edge foot (pecial accessory undor the sewing foot, as - Pfaff creative 1472 | Owner's Manual - Page 34
/ ER ER ER Honeycomb stitch J prog 24 -- (tj jj H j 3-5 0A ER Elastic stitch or EHR overlock stitch prog I -- i {] ER Honeycomb stitch is especially suitable as a 13a 25 I 3-5 OA means of securing hems on stretchable lining materials Fold the hem double up to the hem edge and - Pfaff creative 1472 | Owner's Manual - Page 35
, adjust the needle '3 penetration point on the folded fabric edge. To do this, adjust the position of edge guide 'B' by turning regulating screw "A" so that the needle Sewing foot Pro gram Stitch length: Binder (special accessoiy) 00 2.5 mm, (Fig. a) or i3 catches only one thread in the - Pfaff creative 1472 | Owner's Manual - Page 36
selected stitch To make the patch mere durable you can sew a second seam at sewing foot width from the first Afterwards cut away the damaged material length of the darning seam is now memorized in the computer. The Pfaff Crea tive then automatically stitches over the damaged area. The programmed darn - Pfaff creative 1472 | Owner's Manual - Page 37
guide fork "G" fits around the presser bar. Release clamp "E", which then moves down onto retaining screw "F". Tighten screw "D". Draw up the bobbin thread Hold both threads until the machine has made a few stitches. First sew mending you can place the damaged part of the fabric in an embroidery - Pfaff creative 1472 | Owner's Manual - Page 38
the zipper. The zipper teeth move along the right-hand guide edge (Fig 1). Shortly before you reach the end of the seam, leave the ER needle down in the material, raise the sewing foot and open the zipper. Then lower the font again and sew the seam to the end Close the zipper. ER - Pfaff creative 1472 | Owner's Manual - Page 39
in the display. Select the length of the but tonhole using stitch length keys 7 (Fig. 1) The machine will automatically sew the selected but tonhole Before beginning the buttonhole pull the runner of the buttonhole foot fully to the front. For the following buttonholes it is best to lift the fabric - Pfaff creative 1472 | Owner's Manual - Page 40
Select the length of the buttonhole using stitchlength keys 7 (Fig. 1) The machine will automati cally sew the selected buttonhole. Before beginning the buttonhole pull the runner of the buttonhole foot fully to the front. Sew a sample buttonhole first Example: If the left seam is too short (Fig - Pfaff creative 1472 | Owner's Manual - Page 41
Before beginning the buttonhole pull the run ner of the buttonhole foot fully to the front. • Sew the first buttonhole seam at the length required (Fig 2a). The machine then automatically sews the first bartack and the return seam (Fig. 2b). Shortly before the end of the seam the machine sews - Pfaff creative 1472 | Owner's Manual - Page 42
in the display Select the required length of buttonhole with stitch length keys 7 (rig. i> The machine automatically sews the selected buttonhole Before beginning the buttonhole pull the runner of the buttonhole foot fully to the front. For the following buttonholes it is best to lift the fabric - Pfaff creative 1472 | Owner's Manual - Page 43
Before beginning the buttonhole pull the runner of the buttonhole foot fully to the front. • Sew the first buttonhole seam at the length required (Fig 2a 3) The machine then automatically sews the first bartack and the return seam (Fig 2b). Shortly before the end of seam the machine sews slowly, - Pfaff creative 1472 | Owner's Manual - Page 44
Various buttonhole bartacks Eyelet buttonholes can be sewn with three ddfe rent bartack designs. Round buttonhole with wedge tack Programm 92a This bartack design is very suitable for buttonholes in trousers and casual wear Round buttonhole with lengthwise tack Programm 92b This tack design we - Pfaff creative 1472 | Owner's Manual - Page 45
on page 90). The flashing dash wilt a then have disappeared. Note: If you interrupt sewing at the reduced sewing speed by releasing the foot control, the machine will return to the norma) sped when you start sewing again When you are working in the bartack determining mode and have selected - Pfaff creative 1472 | Owner's Manual - Page 46
a needle and tie them off anrt lower the sewing foot On normal fabrics ttre pimp threads can be • Before you start sewino press slow sewing" lrimrnert immediately trehind tire last bartack key 16 (Fig 6) • Sew the first hirftonhote seam • When the machine starts sewrng slowly (at ttr After - Pfaff creative 1472 | Owner's Manual - Page 47
and fabric apart, then wrap the stems with the threaded needle- and bobbin thread and knot the thread ends (Figs 4, 5t. To ensure that flat or small buttons do not slip away during sewing we recommend using the normal sewing foot and switching off the top feed. For some buttons it is necessary to - Pfaff creative 1472 | Owner's Manual - Page 48
the cording foot. Move the detachable work support against the machine. Choose a a gimp thread of the same colour as the outer fahric. Cording Cording foot + using the edge guide. Adjust the edge guide to the required width GuIde the material so that fold runs along the edge guide (See page 100 - Pfaff creative 1472 | Owner's Manual - Page 49
In this way, a good-looking seam is produced • For cording we recommend the appliqué foot (special accessory) lay the appliqué on the face side and baste it on. making sure it matches the fabric grain First workstep Sew along the outline of the design on the wrong R ' side (Fig. 1) Trim the - Pfaff creative 1472 | Owner's Manual - Page 50
as requi ed by adjusting the guide accordingly race the seam line for the first seam on the fabric ir guide the quilting gauge along the straight- long the first seam or the traced seam line For ach subsequent seam, guide the gauge finger ilong the preceding line of stitching (Fig 1). Juilfing can - Pfaff creative 1472 | Owner's Manual - Page 51
at the middle and ironed to one side Serge the raw edge with zigzag stitches lFi 2) Second workstep R Second workstep Baste and sew the ace onto the right material Sew over the lace erlqe nfl both sides with small, side (riq 3) dense 7igzag-stitches frr'm the face side. Cut off Secure the - Pfaff creative 1472 | Owner's Manual - Page 52
, blouses and other garments with embroidery motifs made on your Pfaff Creative. Transfer the pattern onto the face side of the fabric • Programm 77 • Stitch width: 50mm • Push the "single pattern" key. • Sew the flower centres (dots>. ER ER ER F Border 1 consists of the following programs: - Pfaff creative 1472 | Owner's Manual - Page 53
of the heart is exaciley in line with the red mark on the left side of the sewing foot Repeat this process until the motif is closed 106 Fancy seams in leather prog - Optional -3 double seam This method a sewing is commonly used forloinirig parts of diffe rent colouis le g palchworkl 107 - Pfaff creative 1472 | Owner's Manual - Page 54
from t lie o ill Si ct inwards (Fig 2) Fringe seam (cut open, Fig 3) Machine setting same as for first wnrkstep hut terfly (wings) Sew fringe seam. Engage normal sewing foot Then fold the fringes to the left or to the right and sew them on where the fringe loops come out of the fabric, selecting - Pfaff creative 1472 | Owner's Manual - Page 55
suited for valances, flounces and frills or for finishing edges. For this sewing job no threads must be drawn out of the fabric. Sew at sewing foot width along the fabric edge, using the edge of the sewing foot as a guide. Then carefully trim the excess material along the hemstitching with a small - Pfaff creative 1472 | Owner's Manual - Page 56
illustrated can be made on your Pt aft Creative in a very short time by combining all then sew it in the middle of the scallop :., i Eyelet embroidery with the eyeletting plate (special accessory) prog be tight against the pin all round Draw the bobbin thread up and hold it for the first - Pfaff creative 1472 | Owner's Manual - Page 57
embroidery it is very irn portmt to guide the emhroiderv hoop evenly and steadily. Here are the instructions for sewing the different motifs Motif 1: 2 worksteps 2 mm 2nd workstepprogram 17 stitch width 6 mm Sewing monograms with the embroidery foot prog 1012 [al E _34 2A Thread: emhroiderin - Pfaff creative 1472 | Owner's Manual - Page 58
in one M memory Distributed over 16 M memories. 4; programs can he stored cv is pro sel'mtod. al prncira ale stored in memory t • When the machine is switched oft, the stov prnqmains are rn-sintained • When the capacity of the memories is used m,. no turther programs are accepted • Ttme - Pfaff creative 1472 | Owner's Manual - Page 59
M -memory: Fig. 1 • Select the M-memory (with the left prog key 22) If you wish to sew only nne pattern serluence or just one pattern, press the key • Single pattern 27. The machine then sews until the program is L concluded, secures the stitches, and stops Fig. 2 automatically. • Select the - Pfaff creative 1472 | Owner's Manual - Page 60
Lu LJ prq pog loon All programs and program combinations can be altered to any length or width and entered in the computer Changing the stitch length Before the last program entry for a fancy pattern the stitch length has to he deteimined (using key 7) (Fig 2) This change of stitch length also - Pfaff creative 1472 | Owner's Manual - Page 61
figures push key 6 display" The stored program runs through in display 21 You can stop the program run by pushing key 6 a second time (Fig. 3) When sewing is started, or when memory key 30 is pressed, the display returns to the beginning again. Changing the pattern length at the same stitch density - Pfaff creative 1472 | Owner's Manual - Page 62
can give free rein to your creativity hy r'omhi nina various patterns The ornamental horders illustrated on this page and rtescr,bert below are oteodmd as a stimulus to your imagination • For sewing ornamental borders we recom mend usmna the fancy-stitch sewing foot No 2A. • Place tissue paper under - Pfaff creative 1472 | Owner's Manual - Page 63
the needle from strikin the needle plate. For sewing, use two reels of thread of different colours usual way, threading each needle sepa rately. See threading instructions on page 96. 126 c 0 C I C find numerous ways of expressing your R creative talent by varying or rearranging the reverse - Pfaff creative 1472 | Owner's Manual - Page 64
JL1AL WKYZ I ,' •" F\ Programming letters and number With the Watt Creative you can chesse betwee three d!ffererit types of tottering and two differe, number characters For sewing monogran and texts we recommend to press slow sewirc key 16 zbA bO cA cO dA A 0 & © cV s © -r These are used for - Pfaff creative 1472 | Owner's Manual - Page 65
22 (right, plus) enter the letters' I (Fig. 2) J 0. U R N A L by pressing 'rn em +" key 48 each time I: Push "single pattern" key 27 Sew the stored program (Fig 3). Sewing numbers bO E • Select program ThO Program numbers as described under letters. /) 6r 00 '13 27 J1 OURNAL AIR hAIL 132 - Pfaff creative 1472 | Owner's Manual - Page 66
characters are input, depending on the size of spacing ER required (Fig 1). • Spacings are programmed the same way as dot quick-selection Sewing hyphens Example:PFAFF-CREATIVE • Press right "prog" keys 22 until the dash is dis FR played in the right length (Fig. 2) 3 • Press "mom 4-" key 48 - Pfaff creative 1472 | Owner's Manual - Page 67
first M memory again To divide the text. select one Mmemory after the other with each part of the text The machine will stop after each line. Before sewing, mark the beginning of the text on the fabric After sewing. cut the joining threads between let ters, figures and spacings (Fig. 1). If you wish - Pfaff creative 1472 | Owner's Manual - Page 68
Lu!iimJT7uJrJ 4 &&1& ®/ Q 27 213 Correcting characters with the balance key Sometimes, letters or words may shift, depending on the fabric used. This can be corrected with the balance key (Fig. 2) Words or texts can only be corrected together. The letter or figure last entered is corrected - Pfaff creative 1472 | Owner's Manual - Page 69
stitch has always played an important role in the history of crabs The Pfatt Creative offers you the chance to continue this wonderful tradition with great ease Besides the crossstitch I programs 70 to 72 the sewing computer has numerous other ready-made cross-stitch bor ders in store for you - Pfaff creative 1472 | Owner's Manual - Page 70
• Fancy stitching foot No. 2A has red lines on it which make cross-stitch sewing easier for you. The crosswise lines in the foot are for deter provide some suggestions of ways to make attractive cross-stitch patterns with your Creative, instead of by hand. rr -s-s'. npc OFI I J 7T Suggest Ions - Pfaff creative 1472 | Owner's Manual - Page 71
48 • Enter programs 2 x 70 4 x 71 in the computer by pressing "mem-i-" key each time. • Sew the stored program at both sides • By pressing • "memory" key 30 and "pattern mirror" key you will save yourself the trouble of turning the material. The programmed memory can be cleared again after the work - Pfaff creative 1472 | Owner's Manual - Page 72
Second workstep • Select a free M-memorv • Puch rn em + key 48 • Enter programs 2 x 70 1 x 71 in the computer by pressing key rn em + each time • Sew the stored program at both sides along the centre line Third workstep • Select a tree M-memory. • Push rnern+" key 48. • Push beginning-al pattern key - Pfaff creative 1472 | Owner's Manual - Page 73
in the computer by pressing 'rn em +" key each time. LJ• Push "memory" key. • Push "single pattern" key. Now your pattern is stored. Second workstep: sewing a pattern • Mark the beginning point on the material. Select an M 1 memory and recall the follo wing M-memories in sequence and - Pfaff creative 1472 | Owner's Manual - Page 74
1iui-wide cording 2.5 mm 3.0mm 4.0mm Wide cording Extra wide cording Extra-wide cording Decorative designs sewn with twin needles Before you start sewing, turn the handwheel and check to make sure the needles stitch into the fabric properly. In this way, needle breakage can be largely prevented - Pfaff creative 1472 | Owner's Manual - Page 75
Refer to needle table. Let machine feed the fabric, Only guide the material lightly. When inserting the bobbin case, push it in as sewing foot or needle, switch off master switch 9. Never run a threaded machine unless there is a piece of tabric under the sewing foot, If you have to leave the machine - Pfaff creative 1472 | Owner's Manual - Page 76
feet 41 Sewing foot changing 39 Single pattern selling 35 Special accessories '14 Spool filling 17 Stitch length and pattern length setting 31 Stitch width setting 30 'r Thread trimmer 20 Twinneedle SCWiI)g 34 U Upper threading Utility Stitch programs 18, 19 46 Work support and - Pfaff creative 1472 | Owner's Manual - Page 77
Index Sewing instructions Alphabet, outline Alphabet and numbers, programming Appliquéing , 118 97 122 122 100 57 S Serging seams 66 Serging with zigzag stitch and overlock foot 62 Sewing with twin-needle 52 Shell edging 108 Smocking with elastic threads 61 Spacing between two words 136 - Pfaff creative 1472 | Owner's Manual - Page 78
C-) Cr) -' C C-) r\) CD .1 0 CD 0 0 - Pfaff creative 1472 | Owner's Manual - Page 79
cord whenever you have to leave the machine or want to clean it, oil it or change mechanical and accessory parts. c) Be sure to use only a 15-watt light bulb in the sewing lamp. d) The drive belt must never be adjusted by anyone but an authori zed Pfaff agent. Some safety rules valid for United - Pfaff creative 1472 | Owner's Manual - Page 80
IMPORTANT SAFETY INSTRUCTIONS This sewing machine is designed and manufactured for HOUSEHOLD use only. When using an electric appliance, including the following: basic safety precautions should always be followed, Read all instructions before using this sewing machine. DANGER To reduce - Pfaff creative 1472 | Owner's Manual - Page 81
4 0 (X - Pfaff creative 1472 | Owner's Manual - Page 82
length 8 Stitch width keys 9 Main switch 11 Work support with accessory box and accessory compartment 12 Sewing foot holder with sewing foot 13 Needle holder with retaining screw 14 Bobbin thread monitor 15 Needle down" key 16 "Sew-slow" key 17 Presser bar lifter 18 "Reverse" key - Pfaff creative 1472 | Owner's Manual - Page 83
- Pfaff creative 1472 | Owner's Manual - Page 84
. As a creative fashion designer you will no doubt have further questions regarding sewing problems now and then. If so, simply contact your PFAFF dealer. They will be pleased to help you whenever you wish. To make full use of the numerous fea tures of the machine, please read this instruction book - Pfaff creative 1472 | Owner's Manual - Page 85
For basting cuttings. For serging, appliqueing, inserting lace and basting with fringe foot. Same as program 10 (for zigzag from left needle position push pattern reverse key). For sewing purl seams. For sewing on elastic tape, darning tears and patching. Suitable for almost every fabric. For - Pfaff creative 1472 | Owner's Manual - Page 86
24 25 26 27 28 29 No. Description 5 Fancy elastic stitch I 6 Blind stitch I Stretch '' blind stitch 18 Light buttonhole 1 9 Button sewing 20 Edge binding stitch 21' Closed overlock stitch 22 Tricotpatching stitch 23 Pullover stitch 2A Honeycomb stitch 25 Closed overlock stitch - Pfaff creative 1472 | Owner's Manual - Page 87
I i/i/s/a4ii/ 189091929495 No. Description 8 ' Light buttonhole 7.0 to 16 mm Application For sewing buttonholes in blouses, shirts and linen. inmm F Light buttonhole 7.0 to 44 mm For sewing buttonholes in bed linen. F F 91 Stretch buttonhole For buttonholes in stretch fabrics (jersey, - Pfaff creative 1472 | Owner's Manual - Page 88
C CD -i C) C LQ a U) U' c2s2i - Pfaff creative 1472 | Owner's Manual - Page 89
r%..-l .0 II r% 0 > -I- c:II \> - Pfaff creative 1472 | Owner's Manual - Page 90
No. I Description 30-69 1 73-80 84-89 93 60,61 ,63 Embroidery stitch programs Scalloping edge decoration 70'72 81 -83 Cross stitch programs 96-99 Hem-stitching programs Application Max.width in mm For fancy seams, ornaments, borders and embroideries. 9 For table linen, napkins, bed - Pfaff creative 1472 | Owner's Manual - Page 91
down the carrying handle. Compartment A is for storing the foot control, mains lead and instruction book. 1: E irn portent! nser I two I at,tenes I a 5 L t.ed !n rertr cti' sri hni I, pages 3. however, without turnino on the machine, .p*. verde press I e 5 ' 51115! .11 5 1 .ws 5511 1151 10515 - Pfaff creative 1472 | Owner's Manual - Page 92
4 -L ( CD® Dø CD Ci) 03 C-) Co :y CD CD CD z CD 0 3 -0 4 o 0 E D ota_ D - z. C) - CD - Pfaff creative 1472 | Owner's Manual - Page 93
1'3 0 CJ) D zr :r 0 >z C 3 D 0 •0 Cn 00 C CD 0 I N 0 C,) -lay V CD D CD 0Z CD 0 CD 3 CD 0 CD (D 0 CD 0 C) C,) C 0 V 0 DC - Pfaff creative 1472 | Owner's Manual - Page 94
00 D CD C 0 D 0D V0 00 0 0 0 CD o. C a CD CA) 0(1) 0 030D oo a. 0 V 0 0 0 a. CD C V CD Da. N CD 0 0. D 0 ® CD a og CDO CoD X (DQ a- -'CD CD 0 VD > (0 CD a Q1 0 a--0 :z - Pfaff creative 1472 | Owner's Manual - Page 95
thread into guide 40, into bobbin winder tension A and around finger B. Now pass the thread to bobbin winder 25 and wind it a few times clockwise around the bobbin. Press the bobbin to the right. Then turn on the main switch, press the foot control and wind the bobbin. Press the full bobbin to the - Pfaff creative 1472 | Owner's Manual - Page 96
through the needle Only with metal sewing foot! Swing bobbin winder thread guide 44 to the front. Raise sewing foot. Switch on the dual feed. Set needle at top position. Place bobbin on bobbin winder 25. Disen gage sewing action. Pull the needle thread under the sewing foot to the right and through - Pfaff creative 1472 | Owner's Manual - Page 97
thread unwinds as shown (A), pull thread through slot (B) and out of opening (C). E E E E I I I I I I I Checking the bobbin thread tension: I with a brief, sharp upward movement of your hand the bobbin must slip downwards (turn screw D to the left for weaker tension and to the right - Pfaff creative 1472 | Owner's Manual - Page 98
4 Inserting the bobbin case: switch off main switch 9, lift latch A and push the bobbin case fully onto pin B. Cutout C must face upwards. 4 Thread reel sizes: for small spools use the small or medium unwinding disc D, for large spools use large unwinding disc E. -7 17 - Pfaff creative 1472 | Owner's Manual - Page 99
off main switch 9. Set needle at top position. Raise sewing foot. Pull the thread as shown by the arrow into groove A, to the left past guide C, from below into slot B, into takeup lever 41, back to slot B and into the right-hand guide on the needle holder. E L 4 Place the needle thread behind - Pfaff creative 1472 | Owner's Manual - Page 100
4 Swing threader to front against needle and hold it there. 4 Place thread in hook E from below. N Swing threader to rear, releasing thread at same time, and when the threader has moved upwards, pull the thread fully through the needle eye. 19 - Pfaff creative 1472 | Owner's Manual - Page 101
r3 C 4 C) 0 CD CD CD CD 3 C) 0 CD () C.) C0 a CDCD (DCD a CD -. 4 rCD CaD J D CD 0 CaD CD D 0 CDCD CD C CD ::,- g= DzC 0 - CD CD DC CD 9- o C;DC-* 3 a - - C- DDC CD a -o y CD Da CD CD - Pfaff creative 1472 | Owner's Manual - Page 102
f Dual feed This prevents shifting of the material plies during sewing. Raise the sewing foot before engaging or disengaging if. 7 To engage: push top feed 43 down wards to lock it in place. To disengage: unlock top feed by pushing - Pfaff creative 1472 | Owner's Manual - Page 103
feed. When two or more fabric layers are fed simultaneously through conven tional sewing machines, there is I always the possibility of slippage. The exclusive Pfaff solution ist built-in I dual feed, a walking foot that simul taneously feeds the fabric from above as the feed dog moves it - Pfaff creative 1472 | Owner's Manual - Page 104
Iii --- J 4 N Swing work support 11 against the machine arm. 4 Switch off main switch 9. Now place the material under the sewing foot. 4 N To place extra thick materials below the presser foot, raise presser bar lifter 17 higher and hold until fabric is in correct sewing position. \ - Pfaff creative 1472 | Owner's Manual - Page 105
needle hole (see illustration B) and lower the sewing foot onto it by L pressing presser bar lifter 17 down wards. Position A of lever 17 is for I darning. I I I I I I I I I I I I I Press the pedal. The harder you press, I the faster the Creative sews. I I I F F F 94 - Pfaff creative 1472 | Owner's Manual - Page 106
thread tension 39 A = setting mark Important! In order to obtain good sewing results it is important to check the following: 1. that the needle is in good order, 2. and the needle- or bobbin thread tension is correct. The bobbin thread tension is adjusted correctly at the works. If on checking the - Pfaff creative 1472 | Owner's Manual - Page 107
finished a seam the needle must be fully raised, Then raise presser bar lifter 17. [ F F F F F Removing the work from the machine and cutting the threads: Remove the material to the rear and pull the threads in sewing direction into thread cutter 37 in order to cut them. E F F F F F F I - Pfaff creative 1472 | Owner's Manual - Page 108
be changed during sewing. For bobbin winding disengage the sewing action. After bobbin winding engage the sewing action again. Owing to the use of electronic compo nents this machine becomes warm during operation. This is quite normal and of no consequence. Batteries: When the machine is switched on - Pfaff creative 1472 | Owner's Manual - Page 109
thread runs out, It goes out again when the full bobbin is inserted and sewing is continued. Important: cover 33 must always be closed. Top and bottom needle position: When the machine stops, the needle goes up. Press key 15 for the needle down position. Display A then lights up and the needle - Pfaff creative 1472 | Owner's Manual - Page 110
The controls of the Creative comput er: 5 Keys for balance and pattern length 6 Key for program sequence and recommended sewing modes 7 Stitch length and pattern length keys 8 Stitch width keys 21 Display 22 Four program keys 26 Pattern start key 27 Single pattern key 28 - Pfaff creative 1472 | Owner's Manual - Page 111
___________ _______ I prog () I iTh__i'm 0_i'm 0_/'m_0_i'm Program selection: When the Creative is switched on, pro gram -00- appears in display 21. Enter the required number in program dis play 21 using programming keys 22. The alphabet - Pfaff creative 1472 | Owner's Manual - Page 112
/ I I I I I 1 I I I I I I LU prog 1 A m 7 ,m 2 Stitch length and pattern length setting: Keys 7 have two functions: 1 Selection of stitch length for pro grams in which display A does not light up. The stitch length ranges from 0 to 6 mm. For some of the programs the stitch length is limi - Pfaff creative 1472 | Owner's Manual - Page 113
Balance, or correction of reverse stitches The balance control is used for correcting pattern- or program combinations which are sewn with a slight shift owing to influences by the type of material or working method used. The stitch length of the reverse stit ches of a pattern is corrected from - 7 - Pfaff creative 1472 | Owner's Manual - Page 114
Storing program combinations: The creative computer contains 16 M memories, MO to M 15. A maximum press key 6 again. Press memory key 30 to sew the pro grams entered from the beginning. By pressing the foot control the machine sews the combination from the beginning as well. Cancelling a program - Pfaff creative 1472 | Owner's Manual - Page 115
and both function and indicator are switched off. Key 29 has a second function for straight stitch sewing with a roundhole needle plate and straight stitch foot (special accessories), If the machine is in program 00 and you press key 29, indicator C lights up and the computer programming function - Pfaff creative 1472 | Owner's Manual - Page 116
function are now switched off. Progr. 85 57 39 37 37 37 prog 9 () •1' f:l? J 4 Single pattern setting: Push "single pattern" key 27. Display E lights up. The machine sews a program or a program combination and ties off beginning and end of the seam. If the key 27 is pressed while - Pfaff creative 1472 | Owner's Manual - Page 117
on the computer: I i's. uJi ee 1K engaged I disengaged a B: needle thread tension I C: number of sewing foot (standard accessories) I Recommendations made in this book may differ from those in the machine display. In that case both recommen I dations can be used. I I I I I I I - Pfaff creative 1472 | Owner's Manual - Page 118
-4 - Pfaff creative 1472 | Owner's Manual - Page 119
N 00 C 0 C,) a03 0 < 0. -0 'sgo0. tD' 00. .c) 0a g 0 (0 (0 - Pfaff creative 1472 | Owner's Manual - Page 120
the buttonhole foot, first pull the runner of the foot fully to the front and than swing the work support to the left. Fitting sewing foot: lower the presser bar lifter with the foot positioned so that pins A snap into grooves B. C and D are for attaching accessories. E is the sewing foot screw. 39 - Pfaff creative 1472 | Owner's Manual - Page 121
g Take hold of the work support and swing it out to the left. ouii F F ' -- LflHl Hfi*H1 finn130/705 1I11ij 40 F F Fr F I I I I - Pfaff creative 1472 | Owner's Manual - Page 122
needles and bobbins in the accessory box. Sewing feet (normal accessories) OA Normal sewing foot 1A Fancy stitch foot for dual feed 2A Fancy stitch foot (not for dual feed) 3 Blind stitch and overlock foot 4 Zipper and edge- sewing foot 5A Buttonhole foot 6 Darning foot 7 Hemming foot 8 Edge guide - Pfaff creative 1472 | Owner's Manual - Page 123
Clean the feed dog and the parts in the sewing hook area with a soft brush. Clean the bobbin thread monitor as instructed on page 157. Apply a drop Swing out the work support to the I left. Close the hinged top cover and swing up the carrying handle. Insert the edge guide into cutout D, push - Pfaff creative 1472 | Owner's Manual - Page 124
ries are changed, lost and when tilt the the batte machine over backwards. A battery compart ment is installed in the base. Lift cover B at the catches in recesses A and remove cover. Take out the batteries. Insert the new batteries with the plus side (+) facing upwards: Place cover B in - Pfaff creative 1472 | Owner's Manual - Page 125
purpose only. They can only be used at - Special accessories Part No. Appliqué foot 93-042 941-91 Binder (remove sewing foot holder) 98-053 484-91 Cording foot, 5 grooves (twin needle with 18-2.5 mm needle gauge) Cording foot, 7 grooves (twin needle with 1.4-1.8 mm needle gauge) 93 - Pfaff creative 1472 | Owner's Manual - Page 126
- F I ) A - Pfaff creative 1472 | Owner's Manual - Page 127
and sewing with the F Pfaff Creative 1472 F F • Before you begin, first try sewing on problem materials, you can achieve better sewing results with the left needle position. F • Exact stitching of edges is facilitated by the marking guide lines on the needle plate or by F an edge guide - Pfaff creative 1472 | Owner's Manual - Page 128
, a round-hole needle plate and a straight sewing foot with round needle hole can produce good sewing results (special accessories). • Sewing aid for thick seams In order to ensure uniform feeding at the begin ning of the seam, we recommend supporting the sewing foot with a piece of material of the - Pfaff creative 1472 | Owner's Manual - Page 129
C.) Cl) CD -' C 1%) C-) 0 CD ci 0 0 - Pfaff creative 1472 | Owner's Manual - Page 130
little lower. (otherwise between 2 and 2.5 mm. Knitted or crocheted needle thread tension materials: sew with and elastic seams. light Machine-embroidery motif embroideries set lighter, i. e. lower than silk: to obtain effective the needle thread - Pfaff creative 1472 | Owner's Manual - Page 131
Fringe foot, special accessory prog 10 -- KK ( -3 Ennge foot Stitch-width: 2 mm Needle: 80 Sewing thread: Machine embroider,' thread Basting is a useful method of transferring seam lines onto the fabric. First mark all contours with tailoring chalk on the top material ply. Sew along - Pfaff creative 1472 | Owner's Manual - Page 132
. This is necessary when the straight stitch foot and the round-hole needle plate are used (special accessories). Program 01 is a straight stitch with the Raise the sewing foot higher for heavy materials or several material plies. This makes it easier to place the work under the sewing foot. Do not - Pfaff creative 1472 | Owner's Manual - Page 133
J I riiliiiiiiiiiiiii prog S (> I 7OO &&& 4, Stretch triple straight stitch prog 0405 -- El 3-5 OA Program 04 is stretch triple straight stitch at 1.5 mm to 4.5 mm. Program 05: is stretch triple straight stitch at 3 to 6 mm (Fig. 4). Both programs can be sewn in dif ferent needle - Pfaff creative 1472 | Owner's Manual - Page 134
be wound on the bob bin and used as bobbin thread. In this case, sewing thread should be used in the needle. For this sewing job the needle thread tension must be set relatively high. For topstitching, the fabric is placed in the machine wrong side up. Select the longest stitch. For topstitching - Pfaff creative 1472 | Owner's Manual - Page 135
ED cD Change of needle position with straight stitch Through adjustment of the needle (needle posi tion), certain sewing work can be carried out easier. For example, if you wish to stitch at a nar row margin such as on collars or when inserting zippers, - Pfaff creative 1472 | Owner's Manual - Page 136
over to one side and press. Then topstitch on the face side of the fabric, using the edge of the sewing foot as a guide (Fig. 1). Double lap seam sewn with the felling foot (spe cial accessory) 00 3-5 F&Iingfaot If two lines of stitching are to appear on the face side of the lap-seamed fabric - Pfaff creative 1472 | Owner's Manual - Page 137
01 01 - Pfaff creative 1472 | Owner's Manual - Page 138
how the fabric is drawn into the hem mer foot scroll with the aid of the stitched-down threads. Fig. 2 shows how the fabric edge is fed into the hemmer foot scroll. Hold the fabric tight as you guide it during tacts the edge sewing. Make sure the fabric con of the right half - Pfaff creative 1472 | Owner's Manual - Page 139
3 Binding edges with the roll hemmer prog 10 -- lj 3-5 * * Roll hemmer (special accessory) Use the roll hemmer foot for hemming nylon, tncot and chiffon. Begin by stretching the fabric to see which way the edge curls. This is the side to which the - Pfaff creative 1472 | Owner's Manual - Page 140
line for the shirring on the face side of the fabric. Sew the first seam straight and carefully. During sewing, pull the fabric taut a little with your hands, because with . The next two or three seams can be sewn at about sewing-foot width. Finally take hold of all underthreads and pull them. I - Pfaff creative 1472 | Owner's Manual - Page 141
accessory) First mark the starting line for the shirred seams othnethseeaumndebresgidinenoinf gthepofainbtrica.nIdnspelrat ctheeanneeedlalestiact thread around the needle. Insert the elastic thread in the groove of the sewing foot in use. Lower seams the presser at about foot foot and sew - Pfaff creative 1472 | Owner's Manual - Page 142
with shirring toot (special accessory) I prog 00 I -3 [1 Shrring ftot Stitch length: 3-4 mm How to insert the shirring toot Insert the shirring foot with its rear "A" .etD:pirseesnsgeargbeatrhelifsteerwainngd remove the sewing foot to the rear. r - Pfaff creative 1472 | Owner's Manual - Page 143
Wiii I I Smocking with elastic thread prog -- I 11 H 3-5 OA Stitch length: 3 to 4 mm Bobbin thread: elastic thread, (wind tension- free on bobbin) Needle thread: sewing thread For sewing with elastic threads we recommend bBotcTabfthuahranheedrbyesdeceiriednanaisfmcuaedigeh.nrtasoayeeSatemsse - Pfaff creative 1472 | Owner's Manual - Page 144
0) -& -h > k & I ¼ - -: - - ;: ' - thft 'J* - I I I : - Pfaff creative 1472 | Owner's Manual - Page 145
0) - w - Pfaff creative 1472 | Owner's Manual - Page 146
with the required zigzag stitch. The material enters at the red marking on the sewing toot (Fig. 2). • Preparation of the sewing foot (overlock foot No. 3) Turn screw "A" fully to the front. The red mark "B" is then on the right sewing toot side. Allow the edge of the material to be sewn to enter - Pfaff creative 1472 | Owner's Manual - Page 147
: 130/705 H 80 or 130/705 H SKF 80 Wethlaietshteifdcaggseegsaomtttoinwbgietshtsiehtcwehmni-tasintsidtpcohpsilnasigcbeleefthfteoecmst.ewTunaacdkehriogvthhelyer sewing foot with a clearance of 3 mm (Fig. 3). Opevneer-tsrtaittcehthuesimngateprrioagl rtaomthe29r.igThhteanndeetdolethemluesftt (Fig - Pfaff creative 1472 | Owner's Manual - Page 148
the edge. Gather the fabric to the waist size using straight stitch. Push the part prepared in this way between the elastic tape and pin it firmly. Stitch it I ) prog I -- I L 13a 3-5 OA On skirts or trousers sew the strap onto the pre pared edge with elastic stitches (Fig. 2). I I I & - Pfaff creative 1472 | Owner's Manual - Page 149
65 - Pfaff creative 1472 | Owner's Manual - Page 150
be sewn together and This method serged in one workstep. is fast, very durable and suitable for many different materials. The rent Pfaff Creative 1472 elastic closing and offers a serging selection of diffe seams from which you can easily select the corresponding seam for all stretchable - Pfaff creative 1472 | Owner's Manual - Page 151
Closed overlock stitch * Knit-edge foot (special accessory) Needle: 70 or 80 Fashioned knit parts can easily be sewn together with a closed overlock stitch seam. To obtain a good-looking seam we recommend inserting a lightly tensioned wool thread in it (Fig. 1). - Pfaff creative 1472 | Owner's Manual - Page 152
Honeycomb stitch prog CJ L1 -- 24 3-5 OA Honeycomb stitch is especially suitable as a means of securing hems on stretchable lining materials. Fold the hem double up to the hem edge and overcast with honeycomb stitch (Fig.1). Securing hems with the double needle (T-shirt seam) prog (1 2 - Pfaff creative 1472 | Owner's Manual - Page 153
Elastic stitch or overlock stitch prog I I 13a 25 3-5 OA Overlap the material edges by 1.5 cm and overstitch each edge with: • Program 13a • Stitch length 0.5 mm (Fig. 2) or as shown by Fig. 1 I • Program 25 • Stitch width 4.5 mm • Stitch length 3.0 mm I Over-stitch the raw edge in such a - Pfaff creative 1472 | Owner's Manual - Page 154
the in place, if required. Then ew it on with straight stitches (Fig. 1). Edge-binding with Lhe binder Sewing foot: Program: Stitch length: Binder (special accessory) 00 2.5 mm, (Fig, a) or Program: Stitch width: Stitch length: 10 2.5 mm 1.5 mm, or (Fig. b) Program: 44 Pattern length - Pfaff creative 1472 | Owner's Manual - Page 155
the fabric edge. Place the fabric under the blindstitch foot and sew, making sure the folded fabric edge runs along edge guide "B" of the blindstitch foot (Fig. 1 + 2a). Before you start blindstitching, as described above (Fig. 2b). • Then start hemming, following the instructions given above. 71 - Pfaff creative 1472 | Owner's Manual - Page 156
is pinned on the face side and the fabric edge over-sewn with the selected stitch. To make the patch more durable you can sew a second seam at sewing-foot width from the first. Afterwards cut away the damaged material on the inside (Fig. 2). Darning torn fabrics prog 13a 15 ( -- 3-5 QA For - Pfaff creative 1472 | Owner's Manual - Page 157
Sewing thread: embroidering and darning thread The darning program 94 is mainly intended for darning damaged spots. Stitch over the damaged spot at the required length, then press the "reverse' key. The length of the darning seam is now memorized in the computer. The Pfaff use buttonhole foot 5A. The - Pfaff creative 1472 | Owner's Manual - Page 158
insert the foot so that it rests against its 3top. When you do so, guide fork "G" fits around the presser bar. Release clamp "E", which then moves down onto retaining screw "F". Tighten screw 'D". Draw up the bobbin thread. Hold both threads until the machine has made a few stitches. First sew a few - Pfaff creative 1472 | Owner's Manual - Page 159
Presser bar lifter: in darning position (see page 74) Sewing thread: Embroidery and darning thread Draw the wool thread through the needle hole of the darning foot and into the thread guide (Fig. 1). Place the wool thread under the darning foot. Start at the top left and place the wool thread - Pfaff creative 1472 | Owner's Manual - Page 160
F 76A - Pfaff creative 1472 | Owner's Manual - Page 161
- Pfaff creative 1472 | Owner's Manual - Page 162
zipper in first. Snap the zipper foot in at e right (Fig. 1). Place the open zipper under the ot so that its right-hand guide edge moves along e zipper teeth ( the material, raise e sewing foot, open the zipper (Fig. 5), lower the ot again and sew to the end of the seam. ur sewing tip: If you lack - Pfaff creative 1472 | Owner's Manual - Page 163
the zipper. The zipper teeth move along the right-hand guide edge (Fig. 1). Shortly before you reach the end of the seam, leave the needle down in the material, raise the sewing foot and open the zipper. Then lower the foot again and sew the seam to the end. Close the zipper. Fold the right - Pfaff creative 1472 | Owner's Manual - Page 164
the display. Select the length of the but tonhole using stitch-length keys 7 (Fig. 1). The machine will automatically sew the selected but tonhole. Before beginning the buttonhole pull the runner of the buttonhole foot fully to the front. For the following buttonholes it is best to lift the fabric - Pfaff creative 1472 | Owner's Manual - Page 165
on page 78). The flashing dash will then have disappeared. 5 Note: If you interrupt sewing at the reduced sewing speed by releasing the foot control, the machine will return to the normal speed when you start sewing again. After sewing, cut the buttonholes open (see page 94). 79 - Pfaff creative 1472 | Owner's Manual - Page 166
in the display. Select the length of the buttonhole using stitchlength keys 7 (Fig. 1). The machine will automati cally sew the selected buttonhole. Before beginning the buttonhole pull the runner of the buttonhole foot fully to the front. Changing the buttonhole width For every type of fabric, the - Pfaff creative 1472 | Owner's Manual - Page 167
quence as described on page 80). The flashing dash will then have disappeared. Note: If you interrupt sewing at the reduced sewing speed by releasing the foot control, the machine will return to the normal speed when you start sewing again. After sewing, cut the buttonholes open (see page 94). Ri - Pfaff creative 1472 | Owner's Manual - Page 168
Before beginning the buttonhole pull the run ner of the buttonhole foot fully to the front. • Sew the first buttonhole seam at the length required (Fig. 2a The machine then automatically sews the first bartack and the return seam (Fig. 2b). Shortly before the end of the seam the machine sews slowly - Pfaff creative 1472 | Owner's Manual - Page 169
fabric plies in order to maintain the same button hole length as on the three-ply buttonhole strip. Note: For sewing buttonholes on knitted or very thin materials we recommend sewing foot No. 1 A and dual feed. If the buttonhole seams do not coincide, press 'tie-off/buttonhole" key 19 to switch - Pfaff creative 1472 | Owner's Manual - Page 170
in the display. Select the required length of buttonhole with stitch-length keys 7 (Fig. 1). The machine automatically sews the selected buttonhole. Before beginning the buttonhole pull the runner of the buttonhole foot fully to the front. For the following buttonholes it is best to lift the fabric - Pfaff creative 1472 | Owner's Manual - Page 171
then have disappeared. Note: 6 If you interrupt sewing at the reduced sewing speed by releasing the foot control, the machine will return to the normal speed when you start sewing again. For programmable stretch buttonholes see next Dage. ftfter sewing, cut the buftonholes open see page 94 - Pfaff creative 1472 | Owner's Manual - Page 172
Now, only the left upper segment of the but tonhole symbol is flashing (Fig. 3). The machine then automatically sews the first bartack and the return seam (Fig. 2b). Shortly before the end of seam the machine sews slowly, stitch by stitch, in order to draw atten tion to the last bartack. One zigzag - Pfaff creative 1472 | Owner's Manual - Page 173
When key grammed second bartack. 19 is pressed again the buttonhole before is sewn fully automatically pro and the segment does not flash anymore. After sewing, cut the buttonholes open (see page 94). 87 - Pfaff creative 1472 | Owner's Manual - Page 174
- C) Cl) CD C r') .1 C-) .1 0 CD D 03 0 0 - Pfaff creative 1472 | Owner's Manual - Page 175
IL Various buttonhole baacks Eyelet buttonholes can be sewn with three diffe L rent bartack designs. Round buttonhole with wedge tack F Programm 92a F This bartack design is very suitable for F buttonholes in trousers and casual wear F Round buttonhole with lengthwise F tack F - Pfaff creative 1472 | Owner's Manual - Page 176
CD - Pfaff creative 1472 | Owner's Manual - Page 177
display. Select the length of the but tonhole using stitch-length keys 7 (Fig. 1). The machine will automatically sew the selected but tonhole. Before beginning the buttonhole pull the runner of the buttonhole foot fully to the front. 4 Correcting a buttonhole If a buttonhole does not turn out well - Pfaff creative 1472 | Owner's Manual - Page 178
as on the three-ply buttonhole strip. Note: For sewing buttonholes on knitted or very thin materials we recommend sewing toot No. I A and dual feed. Note: If you interrupt sewing at the reduced sewing speed by releasing the foot control, the machine will return to the normal speed when you start - Pfaff creative 1472 | Owner's Manual - Page 179
, • pull the buttonhole runner fully to the front and lower the sewing foot. • Before you start sewing press "slow sewing" key 16 (Fig. 6). • Sew the first buttonhole seam. • When the machine starts sewing slowly (at the E beginning of the curve), take the gimp thread from the left of ridge - Pfaff creative 1472 | Owner's Manual - Page 180
0) cCD) - Pfaff creative 1472 | Owner's Manual - Page 181
fabric apart, then wrap F the stems with the threaded needle- and bobbin thread and knot the thread ends (Figs. 4, 5). F To ensure that flat or small buttons do not slip away during sewing we recommend using the normal sewing foot and switching off the topfeed. F For some buttons it is necessary to - Pfaff creative 1472 | Owner's Manual - Page 182
96 9 E - Pfaff creative 1472 | Owner's Manual - Page 183
materials, the cording foot with 5 grooves, the large cording tongue and the neces sary double needle are used. If you wish to sew several cordings beside each another, use the grooves of the cording foot (Fig. 2). For greater distances we recommend using the edge guide. 96 F E 2E E F F F F 3L - Pfaff creative 1472 | Owner's Manual - Page 184
needle thread and bottom threads to the rear under the cording foot. Move the detachable work support against the machine. Choose a gimp thread of the same colour as the recommend using the edge guide. Adjust the edge guide to the required width. Guide the material so that fold runs along the edge - Pfaff creative 1472 | Owner's Manual - Page 185
it matches the fabric grain. First workstep Sew along the outline of the design on the wrong close to the contour seam (Fig. 2). Second workstep Sew over the raw edges of the appliqué with nar layers of tissue E paper under the fabric and sew along the edges of the design with dense, narrow - Pfaff creative 1472 | Owner's Manual - Page 186
C.) - Pfaff creative 1472 | Owner's Manual - Page 187
Edge guide Seams requi red by adjusting the guide accordingly. Trace the seam line for the first seam on the fabric E or guide the quilting gauge along the first seam or the traced seam line. For each subsequent seam, guide the gauge finger along the preceding line of stitching (Fig. 1). - Pfaff creative 1472 | Owner's Manual - Page 188
C - Pfaff creative 1472 | Owner's Manual - Page 189
sewn on at a narrow margin with straight stitch. The material underneath the lace is opened at the middle and ironed to one side. Second workstep Sew over the lace edge on both sides with small, dense zigzag-stitches from the face side. Cut off the remaining material on the reverse side - Pfaff creative 1472 | Owner's Manual - Page 190
& p H.. C.) 0 Ca) - Pfaff creative 1472 | Owner's Manual - Page 191
dresses, blouses and other garments with embroidery motifs made on your Pfaff Creative. Transfer the pattern onto the face side of the fabric Programm: 77 • Stitch width: 5.0 mm • Push the "single pattern" key. • Sew the flower centres (dots). above. First workstep: stems • Program 06 • Change the - Pfaff creative 1472 | Owner's Manual - Page 192
of the following programs: Centre motif: 64 Side motif: 39 First workstep: centre motif • Select program 64. • Sew the programmed stitch pattern. Second workstep: side motifs • Select program 39. • Sew the programmed stitch pattern along both sides of the centre motif. The second side motif can be - Pfaff creative 1472 | Owner's Manual - Page 193
• Sew the • Select program 84. Sew the programmed stitch pattern along 10 mm. • • Push the "single pattern" key. Sew the selected program (single pattern) in the centre motifs. 27 "single pattern". • Press key 15 "needle down". • Sew the heart motif and, with the needle down, turn the - Pfaff creative 1472 | Owner's Manual - Page 194
. Instead of straight stitch it is also possible to use zigzag stitch or some other program to over-stitch the double seam. This method of sewing is commonly used for joining parts of diffe rent colours (e. g. patchwork). I I I 107 - Pfaff creative 1472 | Owner's Manual - Page 195
provides nice trimming, especially on sheer, soft materials. Fold over the fabric edge once along the line which is to be decorated. During sewing, the blindstitches draw in the fabric edge at regular intervals, thus producing a shelledge effect. The stronger the needle thread ten sion, the more - Pfaff creative 1472 | Owner's Manual - Page 196
J prog 10 J 2-3 Frrnge toot Stitch width: 1,5 Stitch length: 0.5 Fringe foot: (special accessory) Second workstep (body) prog cci 1 62 ________ -- 2-31 I Pattern length: Fig. 3) Machine setting same as for first workstep but terfly" (wings) Sew fringe seam. - Pfaff creative 1472 | Owner's Manual - Page 197
the fabric edges with the program descri bed above. The needle must penetrate very closely to the edge where the threads were drawn. When E sewing the second seam, ensure that the cross threads are always tied off parallel (Fig. 1) Hem-stitching turned-in hem edges prog -- lj . 96 -3+ 2A - Pfaff creative 1472 | Owner's Manual - Page 198
suited for valances, flounces and frills or for finishing edges. For this sewing job no threads must be drawn out of the fabric. Sew at sewing-foot width along the fabric edge, using the edge of the sewing foot as a guide. Then carefully trim the excess material along the hemstitching with a small - Pfaff creative 1472 | Owner's Manual - Page 199
slightly curved, starting at the stem. Fourth workstep: eyelets • Program: 93 • Press the 'single pattern" key. • Mark the position of the eyelet, then sew it in the middle of the scallop. 061080931 EE -3+ 2A Thread: embroidering/darning thread The motif in Fig. 1 is made up of the above-men - Pfaff creative 1472 | Owner's Manual - Page 200
special accessory) prog 11 - 2-3 remuved Key: 28 pattern mirror Feed dog: dropped Presser bar lifter: in darning position (page 74) Sewing pin. The fabric must be tight against the pin all round. Draw the bobbin thread up and hold it for the first few stitches (placing presser bar lifter - Pfaff creative 1472 | Owner's Manual - Page 201
Ring of flowers Tfsplthooeewratdaeilirnllsuyt.s.ttFoHroagertiuroteihndiasearettthyttephheeeemoriifngbsehrtomtriusdbhcertooriwoyidnshesorayfoopprirt eseitesvtwyevniernlriyygngaitnhmodef different motifs: Motif 1: 2 worksteps 1st workstep:program hi reverse pattern stitch width 2 mm 2nd workstep - Pfaff creative 1472 | Owner's Manual - Page 202
Sewing monograms with the embroidery foot prog 1012 ((J [;1 -- EE -3+ 2A Thread: embroidering/darning thread Clear-lined block letters or monograms made by combining different ornamental patterns can be sewn without any - Pfaff creative 1472 | Owner's Manual - Page 203
6.0 60 6.0 70 0.35 0.4 onwards 6.0 80 6.0 90 E Pattern mirroring If you wish to sew a program in ror key" 28 in addition to the reverse, push mir selected program (Fig. ecTcahauhsneetaolsepmbcameattettoeidscnreanopwlgrliyonrsagsmreaaasc,mnufdi,srgeipnudugrtshelaheset machine stopped (Fig - Pfaff creative 1472 | Owner's Manual - Page 204
embroidery stitches and monograms Compiling various programs from OOto 99 • The Creative computer has 16 M-memories, from M 0 to M 15. memory is pre-selected, all programs are stored in memory M 0. • When the machine is switched off, the stored programs are maintained. • When the capacity of the - Pfaff creative 1472 | Owner's Manual - Page 205
by pressing the key m e m + 48 for program entry. The program numbers appear in display 21. • When you have entered all program combina tions, the machine is ready to sew. Single patterns If you wish to sew only one pattern sequence or just one pattern, press the key • "Single pattern" 27. The - Pfaff creative 1472 | Owner's Manual - Page 206
0 C.) -i D - Pfaff creative 1472 | Owner's Manual - Page 207
F iiiiiiliHThj prog 4 1151I2I1111t1tlIi prog 1 All programs and program combinations can be altered to any length or width and entered in the computer. Changing the stitch length Before the last program entry for a fancy pattern the stitch length has to be determined (using key 7) (Fig. 2). This - Pfaff creative 1472 | Owner's Manual - Page 208
- Pfaff creative 1472 | Owner's Manual - Page 209
push key 6 "display", The stored program runs through in display 21. You can stop the program run by pushing key 6 a second time (Fig. 3). When sewing is started, or when memory key 30 is pressed, the display returns to the beginning again. Correcting stored E programs E If you have entered - Pfaff creative 1472 | Owner's Manual - Page 210
-& p) M \ -'C.) c) - Pfaff creative 1472 | Owner's Manual - Page 211
You can give free rein to your creativity by combi fling various patterns. The ornamental borders illustrated on this page and described below are intended as a stimulus to your imagination. • For sewing ornamental borders we recom mend using the fancy-stitch sewing foot No. 2A. • Place tissue paper - Pfaff creative 1472 | Owner's Manual - Page 212
short straight stit ches, program 00. 3 Second workstep, middle motif • Select program 45 Sew the pattern at sewing-foot width along the fancy seam sewn before. Third workatep, final motif • Select program (93) Sew the pattern along the fancy seam sewn before. Border 3 consists of the following - Pfaff creative 1472 | Owner's Manual - Page 213
C') -1k-' -' C C) 5 CD D 0 0 V - Pfaff creative 1472 | Owner's Manual - Page 214
" key 29; this limits the stitch idth and prevents the needle from striking the ieedle plate. or sewing, use two reels of thread of different olours. Place one reel on each reel pin and ecure it usual way, threading each needle sepa ately. See threading instructions on page 96. 126 E E E E F F F - Pfaff creative 1472 | Owner's Manual - Page 215
the programmed reverse straight stitches You will creative find numerous ways of talent by varying programs: 1 x 69, 2 x 02 and enter them in the computer by pressing "mem+" key48eactime • Sew the stored program. Stitch combination 2 consists of the following programs: 38, 03 (Fig. 2) • Before - Pfaff creative 1472 | Owner's Manual - Page 216
r%) 03 TrnrrTmrrrrrTTrFrrTr - Pfaff creative 1472 | Owner's Manual - Page 217
jL I V V V•J I. 4 *4 I (0 - Pfaff creative 1472 | Owner's Manual - Page 218
A1 fiCL2EE&HLL - 3L51UEI3 I fl - Pfaff creative 1472 | Owner's Manual - Page 219
I ill ii I 1 I I 1111ff! prog h Programming letters and number With the Pfaff Creative you can chosse between three different types of lettering and two different number characters. For sewing monograms and texts we recommend to press "slow sewing" key 16. :bA :bo :cA :co :dA A Z8 ©Z These are - Pfaff creative 1472 | Owner's Manual - Page 220
22 at "-" (Fig. 1) right "prog" key 22+" :dD Input :dF in memory by pressing the mem + key 48 each time ) Push "single pattern" key 27 Sew the stored program (Fig. 3). E E F F - Pfaff creative 1472 | Owner's Manual - Page 221
(c J I '! IJ I): i1i ij prog 22 L 0 c 6& \8 27 2 Sewing block letters EbA Example: J 0 U R N A L • Before programming, select a 48 each time • Push "single pattern" key 27 • Sew the stored program (Fig. 3). JQURNAL :j Sewing numbers EbO :1 • Select program :bo Program numbers as described under - Pfaff creative 1472 | Owner's Manual - Page 222
•i CD CD BD c C3 -' II C_D 0. CD 0 0 D. CD -, .. o -CD3j 3CD c 4 0 C, CD 3 - Pfaff creative 1472 | Owner's Manual - Page 223
C,, n rn C 1 I I tEEs I::* t •1 ath & I - Pfaff creative 1472 | Owner's Manual - Page 224
(> I -o 0 4) 1 °rr& - prog () I -o 0 Sewing dots edxodat moctapncleabnbeebtsweeleeuecsnteedtdheatoslegatetetfhrusellrosfwtaointphaebovbrerrpeyevriliaeottditoe,nrf.ooArr figure in italics. Example: • Before HP programming, select a free M-memory • • Push"mem+" key 48 At key: "Prog." - Pfaff creative 1472 | Owner's Manual - Page 225
5CD •DO3 _D D 0) C) - c: - CD '< CD D 00 Boa 0 -- W' cx o 3 m -, DU) 0 D-. DD5 CD D CD 3 XD 00) :).CZ ' - Pfaff creative 1472 | Owner's Manual - Page 226
,ifntperrewesiasthcthhtehwesoinrfdgilre(sptpagaMet iiemory again. To divide the text, select one vi-memory after the other with each part of the ext. The machine will stop after each line. 3efore sewing, mark the beginning of the text on If you have missed out a letter or figure or entered - Pfaff creative 1472 | Owner's Manual - Page 227
- Pfaff creative 1472 | Owner's Manual - Page 228
' [iwJJfw. LW.' kl i0 prog 22 > g 1 48 2726 2 1 orrecting characters with the alance key ometimes, letters n the fabric used. or words may shift, depending This can be corrected with the a/eh)owlem aradnlrsced+etsot"erkpreltuekysoxer(ytoFsrif4gcmi8.ga.iu2nn)Tru. - Pfaff creative 1472 | Owner's Manual - Page 229
A - - Pfaff creative 1472 | Owner's Manual - Page 230
4% t 4 4 4 4 :'! 1; q4 ICC r . .... • . •44:•4 • .r:nrrn'rr:. . I .. ". •. . . ;.:.:::. . _.:. . 4(4? :e t L ;t(4 :41"" • '4 •r.'. • '. r"•'•''' # 4 : t 4 :; :z11;}4' Pr VI 'SI 11 rr VTI rr rTi ru iii rr ni in in in in in iii in in it it is cv - Pfaff creative 1472 | Owner's Manual - Page 231
stitch has always played an important Pole in the history of crafts. The Pfaff Creative ffers you the chance to continue this wonderful •radition with great ease. Besides the cross-stitch rograms 70 to 72 the sewing computer has umerous other ready-made cross-stitch bor iers in store for you - Pfaff creative 1472 | Owner's Manual - Page 232
make attractive cross-stitch patterns with your Creative, instead of by hand. E E time. For sewing, the programmed memories are then selected memory, Fancy stitching foot No. 2A has red lines on it which make cross-stitch sewing easier for you. The crosswise lines in the foot are for deter - Pfaff creative 1472 | Owner's Manual - Page 233
pro M3 gram according to pattern. Third workstep • Push the pattern start key. • Select program 71. • Push the single pattern key. M4 Sew the individual patterns according to design. When the programmed memories are no longer required, they can be cancelled by pressing "mem-" key. 145 - Pfaff creative 1472 | Owner's Manual - Page 234
mem+" key. • Push "memory" key. The border is now stored in the computer. Second workstep Call off the programmed M-memory for each workstep and sew according to the design. When the M-memories are no longer required they can be cancelled with 'mem-" key. Border 2 consists of the following programs - Pfaff creative 1472 | Owner's Manual - Page 235
. • Enter programs 2 x 70 4 x 71 in the computer by pressing "mem+" key each time. • Sew the stored program at both sides. • By pressing • "memory" key 30 and "pattern mirror" key you will save yourself the trouble of turning the material. The programmed memory can be cleared again after the work is - Pfaff creative 1472 | Owner's Manual - Page 236
4 consists of the following programs: 70, 71, 71, :jrst workstep (centre motif) Mark the centre-line on the material. Select program 71 and sew along the marked line. second workstep 1 Select a free M-memorv. I Push'mem-t-" key 48. I Enter programs 2 x 70 1 x 71 in the computer by pressing - Pfaff creative 1472 | Owner's Manual - Page 237
Co - Pfaff creative 1472 | Owner's Manual - Page 238
.endAssihnotswheenquafoeblnolocvweein(1fg1orferpexreaempMap-rlmaeteiosmhnoorswieeses, page 150). For M-memory indicating the programs M 3 to sewing direction M is 10 the arrow replaced by symbol U = sewing direction. First workstep • Select a free M-memory. Ml • Ml Press "mem+" key - Pfaff creative 1472 | Owner's Manual - Page 239
in the computer by pressing 'rn em +" key each time. L_J• Push "memory" key. • Push "single pattern" key. Now your pattern is stored. Second workstep: sewing a pattern • Mark the beginning point on the material. Select an M 1 memory and recall the follo wing M-memories in sequence and - Pfaff creative 1472 | Owner's Manual - Page 240
- I c. Prwiiwrsimrrrvirrrr IT N - Pfaff creative 1472 | Owner's Manual - Page 241
- Pfaff creative 1472 | Owner's Manual - Page 242
fabrics, Lastex, dc jersey fabrics, Quiana and Simplex. Medium ball point Heavy ball point Stretch-fabric needle developed especially for Pfaff. Particularly suitable for delicate stretch and knitted fabrics. Wide-meshed corsetry, Lycra, Simplex and Lastex. Acute round point Twill, workwear - Pfaff creative 1472 | Owner's Manual - Page 243
3.0 mm 4.0 mm Suitable for Medium-wide cording Wide cording Extra wide cording Extra-wide cording Decorative designs sewn with twin needles Before you start sewing, turn the handwheel and check to make sure the needles stitch into the fabric properly. In this way, needle breakage can be largely - Pfaff creative 1472 | Owner's Manual - Page 244
new needle and push it up as far as it will go. Insert new needle. Refer to needle table. Let machine feed the fabric. Only guide the material lightly. When inserting the bobbin case, push it in as far as it will go. Check upper and lower tensions. Use first-class thread only - Pfaff creative 1472 | Owner's Manual - Page 245
run Fuse is defective. Insert new iuse. Important: Before exchanging either sewing foot or needle, switch off master switch 9. Never run a threaded machine unless there is a piece of fabric under the sewing foot. If you have to leave the machine, even for a short while, be sure to switch off the - Pfaff creative 1472 | Owner's Manual - Page 246
€ E 4 L) - Pfaff creative 1472 | Owner's Manual - Page 247
41 Sewing foot changing 39 Single pattern setting 35 10, 11 Special accessories 44 28 Spool fitting i Stitch length and pattern length setting 31 Stitch width setting 30 24 T Thread trimmer 26 Twin-needle sewing 34 27 U Upper threading Utility stitch programs 42 w Work support and - Pfaff creative 1472 | Owner's Manual - Page 248
instructions , bartacks 3uttonholes, eyelet 3uttonholes, with gimp thread 3uttonholes, cutting open 3uttons, sewing on 78, 79 80, 81 78, 79 80, 81 82, 83 84 52 156, 157 109 0 Gathering with elastic thread Gathering with shirring foot Gathering, straight stitch 59 - 60 58 - H Hem-stitching - Pfaff creative 1472 | Owner's Manual - Page 249
, checking stored Programs, correction of 72 116, 118 116, 118 97 122 122 S Serging seams 66 Serging with zigzag stitch and overlock foot 62 Sewing with twin-needle 52 Shell edging 108 Smocking with elastic threads 61 Spacing between two words 136 Spacing mark 136 Special marks 133 - Pfaff creative 1472 | Owner's Manual - Page 250
h-i N) V N / ' N, Li! 4 A I WI ii s ia t• Ii E II 1I (11 1S ' 111 ir is is is is rw is' - Pfaff creative 1472 | Owner's Manual - Page 251
e9 l - Pfaff creative 1472 | Owner's Manual - Page 252
K K K K K I G. M. PFAFF I Aktiengesellschaft Werk Karisruhe-DurlaCh 1 Gritznerstraf3e 11 7500 Karlsruhe 41 Printed in West Germany Heidelberger Reprographie A. Grosch GmbH 6904 Eppelheim Seestral3e 72 Subject to alterations in design. Nr. 30276 HR engl. 6/93
-
 1
1 -
 2
2 -
 3
3 -
 4
4 -
 5
5 -
 6
6 -
 7
7 -
8
-
9
-
10
-
11
-
12
-
13
-
14
-
15
-
16
-
17
-
18
-
19
-
20
-
21
-
22
-
23
-
24
-
25
-
26
-
27
-
28
-
29
-
30
-
31
-
32
-
33
-
34
-
35
-
36
-
37
-
38
-
39
-
40
-
41
-
42
-
43
-
44
-
45
-
46
-
47
-
48
-
49
-
50
-
51
-
52
-
53
-
54
-
55
-
56
-
57
-
58
-
59
-
60
-
61
-
62
-
63
-
64
-
65
-
66
-
67
-
68
-
69
-
70
-
71
-
72
-
73
-
74
-
75
-
76
-
77
-
78
-
79
-
80
-
81
-
82
-
83
-
84
-
85
-
86
-
87
-
88
-
89
-
90
-
91
-
92
-
93
-
94
-
95
-
96
-
97
-
98
-
99
-
100
-
101
-
102
-
103
-
104
-
105
-
106
-
107
-
108
-
109
-
110
-
111
-
112
-
113
-
114
-
115
-
116
-
117
-
118
-
119
-
120
-
121
-
122
-
123
-
124
-
125
-
126
-
127
-
128
-
129
-
130
-
131
-
132
-
133
-
134
-
135
-
136
-
137
-
138
-
139
-
140
-
141
-
142
-
143
-
144
-
145
-
146
-
147
-
148
-
149
-
150
-
151
-
152
-
153
-
154
-
155
-
156
-
157
-
158
-
159
-
160
-
161
-
162
-
163
-
164
-
165
-
166
-
167
-
168
-
169
-
170
-
171
-
172
-
173
-
174
-
175
-
176
-
177
-
178
-
179
-
180
-
181
-
182
-
183
-
184
-
185
-
186
-
187
-
188
-
189
-
190
-
191
-
192
-
193
-
194
-
195
-
196
-
197
-
198
-
199
-
200
-
201
-
202
-
203
-
204
-
205
-
206
-
207
-
208
-
209
-
210
-
211
-
212
-
213
-
214
-
215
-
216
-
217
-
218
-
219
-
220
-
221
-
222
-
223
-
224
-
225
-
226
-
227
-
228
-
229
-
230
-
231
-
232
-
233
-
234
-
235
-
236
-
237
-
238
-
239
-
240
-
241
-
242
-
243
-
244
-
245
-
246
-
247
-
248
-
249
-
250
-
251
-
252
 |
 |
*
•
•
L
-
I;
:
I
cI
—.
F
PFAFF
creative
1472
PIAcF
G.
M.
PFAFF
AktiengesellSChaft
Werk
Karisruhe-DUrlaCh
Gritznerstral3e
11
7500
Karlsruhe
41
Printed
in
West
Germany
Heidetberger
Reprographie
A
Grosch
GmbH
6904
Eppelheim.
Seestratte
72
Subject
to
alterations
in
design
N,
3027n
HR
erigt
9j93
Instruction
Book