Pioneer AVIC-X920BT Installation Manual - Page 11
Yellow/Black, Blue/White
 |
UPC - 884938104241
View all Pioneer AVIC-X920BT manuals
Add to My Manuals
Save this manual to your list of manuals |
Page 11 highlights
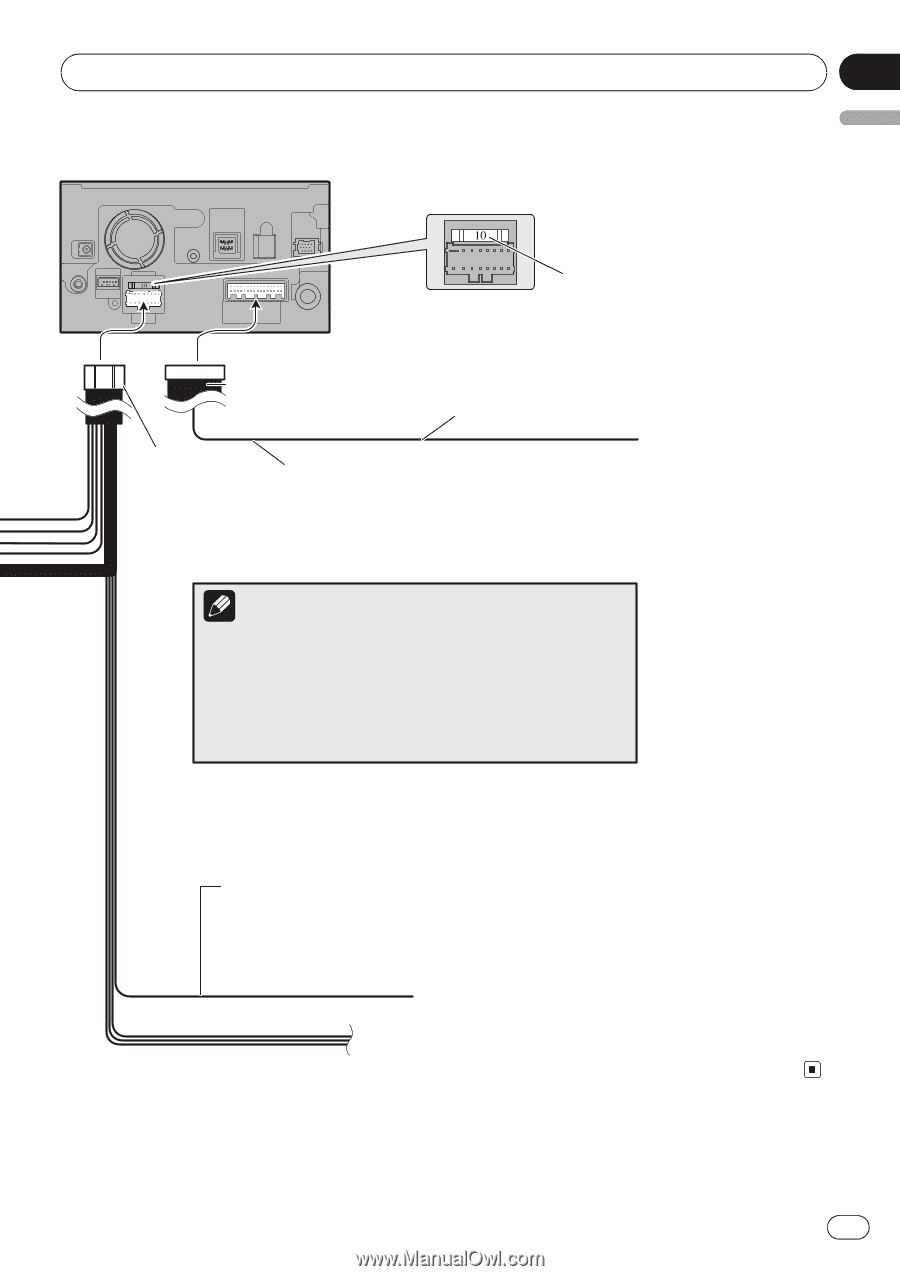
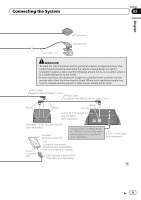
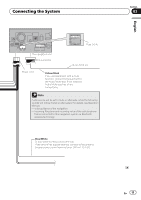
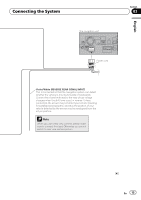
Connecting the System Fuse (10 A) The navigation unit RCA connector 15 cm (5-7/8 in.) Power cord Yellow/Black If you use equipment with a mute function, connect that equipment to the Audio Mute lead. If not, keep the Audio Mute lead free of any connections. Note Audio source will be set to mute or attenuate, while the following sounds will not be muted or attenuated. For details, see Operation Manual. - voice guidance of the navigation - incoming Ring tone and incoming voice of the cellular phone that is connected to this navigation system via Bluetooth wireless technology Blue/White To auto-antenna relay control terminal. If the vehicle has a glass antenna, connect to the antenna booster power control terminal (max. 300 mA 12 V DC). English Section 03 En 11
-
 1
1 -
2
-
3
-
4
-
5
-
 6
6 -
 7
7 -
 8
8 -
 9
9 -
 10
10 -
 11
11 -
 12
12 -
 13
13 -
 14
14 -
 15
15 -
 16
16 -
17
-
18
-
19
-
20
-
21
-
22
-
23
-
24
-
25
-
26
-
27
-
28
-
29
-
30
-
31
-
32
-
33
-
34
-
35
-
36
-
37
-
38
-
39
-
40
-
41
-
42
-
43
-
44
-
45
-
46
-
47
-
48
-
49
-
50
-
51
-
52
-
53
-
54
-
55
-
56
 |
 |