Pioneer AVIC-X920BT Installation Manual - Page 2
Contents - installation
 |
UPC - 884938104241
View all Pioneer AVIC-X920BT manuals
Add to My Manuals
Save this manual to your list of manuals |
Page 2 highlights
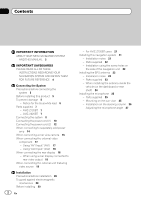
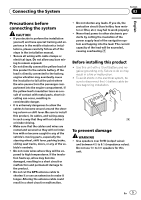
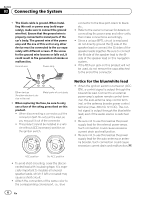
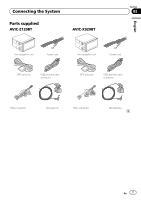
Contents IMPORTANT INFORMATION ABOUT YOUR NEW NAVIGATION SYSTEM AND THIS MANUAL 3 IMPORTANT SAFEGUARDS PLEASE READ ALL OF THESE INSTRUCTIONS REGARDING YOUR NAVIGATION SYSTEM AND RETAIN THEM FOR FUTURE REFERENCE 4 Connecting the System Precautions before connecting the system 5 Before installing this product 5 To prevent damage 5 - Notice for the blue/white lead 6 Parts supplied 7 - AVIC-Z120BT 7 - AVIC-X920BT 7 Connecting the system 8 Connecting the power cord (1) 10 Connecting the power cord (2) 12 When connecting to separately sold power amp 14 When connecting a rear view camera 16 When connecting the external video component 17 - Using "AV1 Input" (AV1) 17 - Using "AV2 Input" (AV2) 18 When connecting the rear display 18 - When using a rear display connected to rear video output 18 When connecting the external unit featuring video source 19 Installation Precautions before installation 20 To guard against electromagnetic interference 20 Before installing 20 2 En - For AVIC-Z120BT users 21 Installing this navigation system 21 - Installation notes 21 - Parts supplied 22 - Installation using the screw holes on the side of the navigation unit 22 Installing the GPS antenna 23 - Installation notes 23 - Parts supplied 23 - When installing the antenna inside the vehicle (on the dashboard or rear shelf) 24 Installing the microphone 25 - Parts supplied 25 - Mounting on the sun visor 25 - Installation on the steering column 26 - Adjusting the microphone angle 27
-
 1
1 -
 2
2 -
 3
3 -
 4
4 -
 5
5 -
 6
6 -
 7
7 -
 8
8 -
9
-
10
-
11
-
12
-
13
-
14
-
15
-
16
-
17
-
18
-
19
-
20
-
21
-
22
-
23
-
24
-
25
-
26
-
27
-
28
-
29
-
30
-
31
-
32
-
33
-
34
-
35
-
36
-
37
-
38
-
39
-
40
-
41
-
42
-
43
-
44
-
45
-
46
-
47
-
48
-
49
-
50
-
51
-
52
-
53
-
54
-
55
-
56
 |
 |