Pioneer BDP-V6000 Owner's Manual - Page 7
Before you start - remote control
 |
UPC - 012562957227
View all Pioneer BDP-V6000 manuals
Add to My Manuals
Save this manual to your list of manuals |
Page 7 highlights
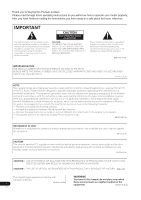
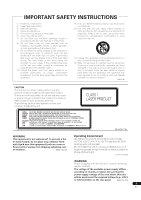
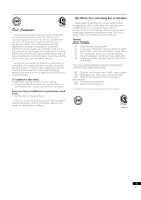
Chapter 1 01 Before you start What's in the box • Remote control x 1 • Video/audio cable (yellow/white/red plugs) x 1 • AA/R6 dry cell batteries x 2 • Power cord x 1 • Rack mount bracket x 2 • Underplate x 1 • Included gray screw x 2 • Warranty card • Operating instructions (this document) A large Phillips screwdriver ( No. 2) is required to mount the rack mount bracket. Please procure one. Putting the batteries in the remote control 1 Open the rear cover. Press lightly on this part and slide into the direction of the arrow. 2 Insert the batteries (AA/R6 x 2). Insert as indicated by the / marks into the battery compartment. Insert the negative () side first. Caution • Do not use any batteries other than the ones specified. Also, do not use a new battery together with an old one. • When loading the batteries into the remote control, set them in the proper direction, as indicated by the polarity marks ( and ). • Do not heat batteries, disassemble them, or throw them into flames or water. • Batteries may have different voltages, even if they look similar. Do not use different kinds of batteries together. • To prevent leakage of battery fluid, remove the batteries if you do not plan to use the remote control for a long period of time (1 month or more). If the fluid should leak, wipe it carefully off the inside of the case, then insert new batteries. If a battery should leak and the fluid should get on your skin, flush it off with large quantities of water. • When disposing of used batteries, please comply with governmental regulations or environmental public institution's rules that apply in your country/area. • WARNING Do not use or store batteries in direct sunlight or other excessively hot place, such as inside a car or near a heater. This can cause batteries to leak, overheat, explode or catch fire. It can also reduce the life or performance of batteries. D3-4-2-3-3_En Software updating When the software is updated, product information concerning this product may be made public on the Pioneer website. Check the update or service information concerning this product. 3 Close the rear cover. Close securely (a click should be heard). 7 En
-
 1
1 -
 2
2 -
 3
3 -
 4
4 -
 5
5 -
 6
6 -
 7
7 -
 8
8 -
 9
9 -
 10
10 -
 11
11 -
 12
12 -
13
-
14
-
15
-
16
-
17
-
18
-
19
-
20
-
21
-
22
-
23
-
24
-
25
-
26
-
27
-
28
-
29
-
30
-
31
-
32
-
33
-
34
-
35
-
36
-
37
-
38
-
39
-
40
-
41
-
42
-
43
-
44
-
45
-
46
-
47
-
48
-
49
-
50
-
51
-
52
-
53
-
54
-
55
-
56
-
57
-
58
-
59
-
60
-
61
-
62
-
63
-
64
-
65
-
66
-
67
-
68
-
69
-
70
-
71
-
72
-
73
-
74
-
75
-
76
 |
 |
