Pioneer VSX-1015TX Owner's Manual
Pioneer VSX-1015TX Manual
 |
View all Pioneer VSX-1015TX manuals
Add to My Manuals
Save this manual to your list of manuals |
Pioneer VSX-1015TX manual content summary:
- Pioneer VSX-1015TX | Owner's Manual - Page 1
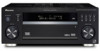
AUDIO/VIDEO MULTI-CHANNEL RECEIVER VSX-1015TX Register your product at www.pioneerelectronics.com • Protect your new investment The details of your purchase will be on file for reference in the event of an insurance claim such as loss or theft. • Receive free tips, updates and service bulletins on - Pioneer VSX-1015TX | Owner's Manual - Page 2
Pioneer product. Please read through these operating instructions so you will know how to operate your model properly. After you have finished reading the instructions can be determined by turning the equipment off and receiving antenna. - Increase the separation between the equipment and receiver. - Pioneer VSX-1015TX | Owner's Manual - Page 3
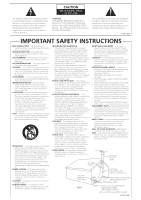
servicing) instructions in the literature accompanying the appliance. D1-4-2-3_En IMPORTANT SAFETY INSTRUCTIONS READ INSTRUCTIONS - All the safety and operating instructions Electrical Code, ANSI/NFPA 70, provides information with regard to proper grounding of the mast and supporting structure, - Pioneer VSX-1015TX | Owner's Manual - Page 4
terminals 20 Hints on speaker placement 21 THX speaker system setup 22 AC outlet 22 Power cord caution 23 Operating other Pioneer components 23 04 Controls and displays Front panel 24 Display 26 Remote control 28 Operating range of remote control unit 30 05 Listening to your system - Pioneer VSX-1015TX | Owner's Manual - Page 5
Troubleshooting 66 Power 66 No sound 67 Other audio problems 68 Video 69 Settings 70 Display 70 Remote control 71 Resetting the main unit 71 Switching the speaker impedance 71 Surround sound formats 72 Dolby 72 DTS 72 Windows Media® Audio 9 Professional 73 About THX 73 Specifications - Pioneer VSX-1015TX | Owner's Manual - Page 6
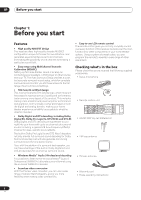
what's in the box Please check that you've received the following supplied accessories: • Setup microphone • Remote control unit • AA/IEC R6P dry cell batteries x2 • AM loop antenna • FM wire antenna • Warranty card • These operating instructions SR DISC ENTER CLASS MENU INPUT ATT FL DIMMER - Pioneer VSX-1015TX | Owner's Manual - Page 7
ENTER AUDIO/VIDEO MULTI-CHANNEL RECEIVER DVD/LD TV/SAT VSX-1015TX CD DVR/VCR TACPDE-R/M/ D VIDEO1 TUNER MASTER VOLUME VIDEO2 Installing the receiver • When installing this governmental regulations or environmental public instruction's rules that apply in your country or area. 7 En - Pioneer VSX-1015TX | Owner's Manual - Page 8
to Surround Sound This receiver was designed with the easiest possible setup in mind, so with the following quick setup guide, you should have your can simply leave the receiver in the default settings. • Be sure to complete all connections before connecting this unit to an AC power source. 1 Hook up - Pioneer VSX-1015TX | Owner's Manual - Page 9
guide 02 3 Connect your speakers. A complete setup of eight speakers (including the subwoofer) is shown here but everyone's home setup will vary. Simply connect the speakers you have in the manner shown below. The receiver ) SELECTABLE INPUT Powered subwoofer SW • a few turns until there is - Pioneer VSX-1015TX | Owner's Manual - Page 10
5 minute guide Note • sure you've set the video input on your TV to this receiver. Check the manual that came with the TV if you don't know how to do in the receiver's display, indicating that the DVD input is selected. If it isn't, press DVD/LD on the remote control to set the receiver to the - Pioneer VSX-1015TX | Owner's Manual - Page 11
channel delay and channel level. After you have set up the microphone provided with your system, the receiver the microphone at ear level using a table or a chair. 3 Press RECEIVER on the remote System ] [ 2. AUTO MCACC ] [ 3. MANUAL MCACC ] [ 4. Manual SP Setup ] [ 5. Input Assign ] [ - Pioneer VSX-1015TX | Owner's Manual - Page 12
5 minute guide 6 Follow the instructions on-screen. 2. AUTO MCACC • Set microphone • Turn on Sub Woofer 9 Make sure 'OK' is selected, then press ENTER. A progress report is displayed on-screen while the receiver outputs more test tones to determine the optimum receiver settings for channel level - Pioneer VSX-1015TX | Owner's Manual - Page 13
system. 1 Turn on the power of the playback component (for example a DVD player), your TV and subwoofer (if you have one). • If your source is the TV's built-in tuner, then switch to the channel you want to watch, otherwise make sure that the TV's video input is set to this receiver. (For example - Pioneer VSX-1015TX | Owner's Manual - Page 14
• Before making or changing any connections, switch off the power and disconnect the power cord from the AC outlet. About cable types Video cables optical cables should be used to connect digital components to this receiver. Coaxial digital audio cable Optical cable • When connecting optical cables - Pioneer VSX-1015TX | Owner's Manual - Page 15
. With composite and S-video sources, they must be connected using the same type of video cable as you used to connect the recorder to the receiver. • Also note that this feature is available with NTSC signals only. For a PAL signal, make sure you've used the same type of cable for - Pioneer VSX-1015TX | Owner's Manual - Page 16
the coaxial output from the component to coaxial input on the receiver). This receiver has four digital inputs (two coaxial inputs and two optical inputs unit. When connecting your equipment, always make sure the power is turned off and the power cord is disconnected from the AC outlet. • The arrows - Pioneer VSX-1015TX | Owner's Manual - Page 17
you need to hook up four plugs to the receiver (a set of stereo inputs and a set of connecting your equipment, always make sure the power is turned off and the power cord is disconnected from the AC outlet. OUTPUT SELECTABLE DVD/multi-channel decoder with multi-channel analog output jacks 17 En - Pioneer VSX-1015TX | Owner's Manual - Page 18
S-video jacks (quality descends in this order) on the rear of the receiver instead of the regular video jacks. See About the video converter on page your TV. When connecting your equipment, always make sure the power is turned off and the power cord is disconnected from the AC outlet. • The arrows - Pioneer VSX-1015TX | Owner's Manual - Page 19
and fully extend vertically along a window frame or another suitable place that gives good reception. AM loop antenna Assemble the antenna and connect to the receiver as shown above. The ground terminal ( ) helps reduce radio noise (it is not an earthing plug). Attach (if necessary) and face in the - Pioneer VSX-1015TX | Owner's Manual - Page 20
terminal. Also make sure the positive and negative (+/-) terminals on the receiver match those on the speakers. • You can use speakers with a sure to complete all connections before connecting this unit to the AC power source. Front speakers L R Center speaker C Surround speakers Surround back - Pioneer VSX-1015TX | Owner's Manual - Page 21
single banana plugs. (Refer to speaker manual for details.) • To achieve the . • If you are using a THX certified subwoofer use the THX INPUT jack on the subwoofer (if your above or below the TV so that the sound of the center channel is localized at the TV screen. Also, make sure the center - Pioneer VSX-1015TX | Owner's Manual - Page 22
3-D view of 7.1 channel speaker setup AC outlet Power supplied through this outlet is turned on and off by the receiver's power switch. Total electrical power consumption of connected equipment should not exceed 100 W (0.8 A). AC OUTLET AC 120 V 60Hz SWITCHED 100W (0 . 8A) MAX THX speaker system - Pioneer VSX-1015TX | Owner's Manual - Page 23
grounding purposes. IN OUT CONTROL Receiver CONTROL IN OUT Remote control unit Other Pioneer products with CONTROL terminals Connect to CONTROL terminal of other Pioneer products Note • If you want to control all your components using this receiver's remote control, refer to Controlling the - Pioneer VSX-1015TX | Owner's Manual - Page 24
VIDEO MULTI-CHANNEL RECEIVER VSX-1015TX DVD/LD Power indicator lights when the receiver is on. 3 LISTENING MODE SELECT Use with the MULTI JOG dial to select the various listening modes (page 31). 4 ENTER 5 Character display See Display on page 26. 6 Remote sensor Receives the signals from the remote - Pioneer VSX-1015TX | Owner's Manual - Page 25
LISTESNEILNEGCMT ODE MULTI JOG ENTER AUDIO/VIDEO MULTI-CHANNEL DVD/LD TV/SAT RECEIVER VSX-1015TX CD DVR/VCR TACPDE-R/M/ D VIDEO1 TUNER MASTER on page 18. 21 MCACC SETUP MIC jack Use to connect the supplied microphone. 22 FL DIMMER Dims or brightens the display. 23 INPUT ATT Attenuates - Pioneer VSX-1015TX | Owner's Manual - Page 26
4 Program format indicators These change according to which channels are active in Dolby and DTS encoded sources. LS receiver is on, this lights to indicate Neo:6 processing (see Listening in surround sound on page 31 for more on this). 6 Listening mode indicators THX Lights when one of the Home THX - Pioneer VSX-1015TX | Owner's Manual - Page 27
(page 38). 13 TUNER indicators STEREO Lights when a stereo FM broadcast is being received in auto stereo mode. MONO Lights when the mono mode is set using the MPX button see Using the SR+ mode with a Pioneer plasma display on page 61). 16 SLEEP Lights when the receiver is in sleep mode (page 39). 27 En - Pioneer VSX-1015TX | Owner's Manual - Page 28
ST ST 6 T.EDIT ENTER BAND SYSTEM TUNE GUIDE SETUP TV CONTROL RETURN 7 TV VOL INPUT SELECT TV CH VOL 14 8 9 10 DTVON/OFF REC DTVINFO MUTE TUNER DISPLAY REC STOP MPX AUDIO THX CH RETURN SUBTITLE HDD DVD CH CH RECEIVER CONTROL STANDARD ADV.SURR STEREO ACOUSTIC SIGNAL MIDNIGHT - Pioneer VSX-1015TX | Owner's Manual - Page 29
52 for more on this). TV Use to turn on/off the power of the TV. TV VOL +/- Use to DVD/HDD recorders. 9 RECEIVER CONTROL buttons THX Press to select a Home THX listening mode (page 32). (page 38). EFFECT/CH SEL Press repeatedly to select a channel, then use -/+ to adjust the level (page 47). Also - Pioneer VSX-1015TX | Owner's Manual - Page 30
near a device that is emitting infrared rays. • The receiver is operated simultaneously with another infrared remote control unit. STANDBY/ON LISTESNEILNEGCMT ODE MULTI JOG ENTER 30 30 AUDIO/VIDEO MULTI-CHANNEL DVD/LD RECEIVER VSX-1015TX TV/SAT CD DVR/VCR TACPDE-R/M/ D VIDEO1 TUNER - Pioneer VSX-1015TX | Owner's Manual - Page 31
With WMA9 Pro, sound problems may occur depending on your computer system. WMA9 Pro 7.1 channel 96kHz sources will be downsampled to 5.1 channel 48kHz. • If stereo playback as necessary. MPX AUDIO THX CH RETURN SUBTITLE HDD DVD CH CH RECEIVER CONTROL STANDARD ADV.SURR STEREO ACOUSTIC SIGNAL - Pioneer VSX-1015TX | Owner's Manual - Page 32
display shows the mode you selected, then after a few seconds, shows THX CINEMA. RECEIVER • Press THX to select a THX listening mode. With two channel sources, press THX repeatedly to select a matrix-decoding process for the THX CINEMA mode (see Listening in surround sound above for an explanation - Pioneer VSX-1015TX | Owner's Manual - Page 33
to see which you like. MPX AUDIO THX CH RETURN SUBTITLE HDD DVD CH CH RECEIVER CONTROL STANDARD ADV.SURR STEREO ACOUSTIC SIGNAL by pressing +/-. Dolby Pro Logic IIx Music settings When listening to 2-channel sources in Dolby Pro Logic IIx Music mode, there are three further parameters - Pioneer VSX-1015TX | Owner's Manual - Page 34
• STEREO - The audio is heard with your surround settings (such as channel level) and you can still use digital processing (such as the Midnight, more on Acoustic Calibration Equalization. MPX AUDIO THX CH RETURN SUBTITLE HDD DVD CH CH RECEIVER CONTROL STANDARD ADV.SURR STEREO ACOUSTIC SIGNAL - Pioneer VSX-1015TX | Owner's Manual - Page 35
and digital inputs on the rear of the receiver to select between input signals. MPX AUDIO THX CH RETURN SUBTITLE HDD DVD CH CH RECEIVER CONTROL STANDARD ADV.SURR STEREO ACOUSTIC SIGNAL DTS signals. For more details, refer to the instruction manual supplied with your DVD player. 35 En - Pioneer VSX-1015TX | Owner's Manual - Page 36
your system Using the surround back channel (Extended mode) • Default setting: Extended ON You can have the receiver automatically use 6.1 or 7.1 the surround back channel with DTS 96kHz/24 bit or PCM 96/88.2kHz sources. Type of source Extended mode Standard / THX Multichannel Stereo sources - Pioneer VSX-1015TX | Owner's Manual - Page 37
encoded. In this case you can have the receiver only apply this effect to 6.1 encoded sources like the Virtual Surround Back mode with headphones, or with the THX or STEREO / DIRECT modes. • You can only use • You can't hear the virtual surround back channel with DTS 96kHz/24 bit, PCM 96/88.2kHz - Pioneer VSX-1015TX | Owner's Manual - Page 38
: DIALOG E OFF The Dialog Enhancement feature localizes dialog in the center channel to make it stand out from other background sounds in a TV or movie soundtrack. MPX AUDIO THX CH RETURN SUBTITLE HDD DVD CH CH RECEIVER CONTROL STANDARD ADV.SURR STEREO ACOUSTIC SIGNAL MIDNIGHT/ AUTO SURR EQ - Pioneer VSX-1015TX | Owner's Manual - Page 39
CD-R/TAPE TUNER RECEIVER 1 Turn on the power of the playback component. 2 Turn on the power of the receiver. 3 Select the receiver being left on all night. Use the remote control to set the sleep timer. MPX AUDIO THX CH RETURN SUBTITLE HDD DVD CH CH RECEIVER channel levels can be set. 39 En - Pioneer VSX-1015TX | Owner's Manual - Page 40
MANUAL MCACC ] [ 4. Manual SP Setup ] [ 5. Input Assign ] [ 6. Other Setup ] Enter : Select Return : Exit RECEIVER receiver and your TV. Use the RECEIVER button to switch on. • If headphones are connected to the receiver, disconnect them. 2 Press RECEIVER on the remote speaker channels with - Pioneer VSX-1015TX | Owner's Manual - Page 41
Select 'MANUAL MCACC' from the System Setup menu. See Making receiver settings to connect the setup microphone to the front panel this. Also see Other problems when using the Auto MCACC switch it on and turn up the volume to the Channel Distance on page 42). The last five settings are specifically - Pioneer VSX-1015TX | Owner's Manual - Page 42
simply use / (cursor up/down) to select it. 4 When you're finished, press RETURN. You will return to the Manual MCACC setup menu. Enter:Next Return:Cancel 3 Select each channel in turn and adjust the distance as necessary. Use / (cursor left/right) to adjust the delay of the speaker you selected to - Pioneer VSX-1015TX | Owner's Manual - Page 43
Microphone [ ] Speaker YES/NO [ ] 3c. EQ AUTO Setting Now Analyzing••• Surround Analyzing Channel Level [ ] Acoustic Cal EQ [ ] Return:Cancel Return:Cancel As the receiver to start. 1 Select 'EQ Data Copy' from the Manual MCACC setup menu. 3.MANUAL MCACC [ a .Fine Ch Level ] [ b . - Pioneer VSX-1015TX | Owner's Manual - Page 44
/ (cursor up/down) to select TRIM then use / (cursor left/right) to raise or lower the channel level for the current speaker. 4 When you're finished, press RETURN. You will return to the Manual MCACC setup menu. Checking your Acoustic Calibration EQ settings After you have completed an automatic or - Pioneer VSX-1015TX | Owner's Manual - Page 45
, press RETURN. You will return to the Manual MCACC setup menu. Manual speaker setup This receiver allows you to make detailed settings to optimize 4. Manual SP Setup [ a . Speaker Setting ] [ b. Crossover Network ] [ c . Channel Level ] [ d. Speaker Distance ] [ e . THX Audio Setting - Pioneer VSX-1015TX | Owner's Manual - Page 46
from the Manual SP Setup menu. 4. Manual SP Setup [ a . Speaker Setting ] [ b. Crossover Network ] [ c . Channel Level ] [ d. Speaker Distance ] [ e . THX Audio Setting ears judge which sounds best. If you're having problems, the easiest option is to route all the bass sounds to the - Pioneer VSX-1015TX | Owner's Manual - Page 47
above. 1 Select 'Crossover Network' from the Manual SP Setup menu. 4. Manual SP Setup [ a . Speaker Setting ] [ b . Crossover Network ] [ c . Channel Level ] [ d . Speaker Distance ] [ e . THX Audio Setting ] Channel Level Using the channel level settings, you can adjust the overall - Pioneer VSX-1015TX | Owner's Manual - Page 48
're finished, press RETURN. You will return to the Manual SP Setup menu. Tip • You can change the channel levels at any time by using EFFECT/CH SEL and +/- on the remote control. You can set separate levels for the listening modes (Standard, Home THX, Advanced and Stereo/Direct) as well as for the - Pioneer VSX-1015TX | Owner's Manual - Page 49
the automatic (search) and manual (step) tuning functions. GUIDE SETUP TV CONTROL RETURN TV VOL INPUT SELECT TV CH VOL DTVON/OFF REC DTVINFO MUTE TUNER DISPLAY REC STOP MPX AUDIO THX CH RETURN SUBTITLE HDD DVD CH CH RECEIVER the number buttons on the remote control. 1 Press the TUNER - Pioneer VSX-1015TX | Owner's Manual - Page 50
have the receiver store the frequency for easy recall whenever you want to listen to that station. This saves the effort of manually tuning in the number buttons on the remote control to recall the station preset. Note • If the receiver is left disconnected from the AC power outlet for over a month - Pioneer VSX-1015TX | Owner's Manual - Page 51
RECEIVER TV VOL INPUT SELECT TV CH VOL DTVON/OFF REC DTVINFO MUTE TUNER DISPLAY REC STOP MPX AUDIO THX CH RETURN SUBTITLE HDD DVD CH CH RECEIVER instruction manual if you're unsure. 5 Start recording, then start playback of the source component. Note • The receiver -CHANNEL RECEIVER VSX- - Pioneer VSX-1015TX | Owner's Manual - Page 52
to the Pioneer preset code to use this receiver's built-in tuner. • You can cancel or exit any of the steps by pressing RECEIVER. To go back a step, press RETURN. • After one minute of inactivity, the remote automatically exits the operation. Selecting preset codes directly RECEIVER INPUT SELECT - Pioneer VSX-1015TX | Owner's Manual - Page 53
assigning a preset code. 1 While pressing the RECEIVER button, press and hold the 1 button. The remote LCD display shows GUIDE SETUP TV CONTROL RETURN TV VOL INPUT SELECT TV CH VOL DTVON/OFF REC DTVINFO MUTE TUNER DISPLAY REC STOP MPX AUDIO THX CH RETURN SUBTITLE HDD DVD CH CH RECEIVER - Pioneer VSX-1015TX | Owner's Manual - Page 54
presets This will erase all preset remote control preset codes and programmed buttons. 1 While pressing the RECEIVER button, press and hold the 1 button. The remote LCD display shows SETUP. 2 Press the DVD/LD MULTI CONTROL button. 3 Use / (cursor left/right) to select RESET then press and hold ENTER - Pioneer VSX-1015TX | Owner's Manual - Page 55
This remote control can control components after entering the proper codes or teaching the receiver the commands (see Setting the remote to the previously selected channel. Cable TV/Satellite TV/TV/ DTV DTV MENU Press to display the DTV menu. DTV GUIDE Use as the GUIDE button for navigating - Pioneer VSX-1015TX | Owner's Manual - Page 56
This remote control can control these components after entering the proper codes or teaching the receiver the commands (see Setting the remote to of previous tracks or chapters. CD/MD/CD-R/DVD/LD player Go back channels (channel -). DVR/VCR Press to advance to the start of the next track or - Pioneer VSX-1015TX | Owner's Manual - Page 57
/ Fast rewinds/fast forwards the tape. & Navigates DVD menu/options. ENTER GUIDE Press to access the DVD player setup screen. CH +/- Selects channels. Selects tracks. AUDIO Changes the audio language or channel. SUBTITLE Displays/changes the subtitles on multilingual DVDs. HDD (SHIFT + CH - Pioneer VSX-1015TX | Owner's Manual - Page 58
switch off the power and disconnect the power cord from the power outlet. Plugging the speakers on page 20. Make sure to review Hints on speaker placement on page 21 when placing Manual speaker setup on page 45. However, if SP B is selected above, no sound is heard from the subwoofer (the LFE channel - Pioneer VSX-1015TX | Owner's Manual - Page 59
speaker cords to the speaker terminal on the receiver. Using a banana plug for the second connection 't matter which set (front or surround back) is powering which part (Hi or Low) of the speaker. severely damage the amplifier. See your speaker manual for more information. • If your speakers have - Pioneer VSX-1015TX | Owner's Manual - Page 60
VIDEO Important • If you connect to a Pioneer plasma display using an SR+ cable, you will need to point the remote control at the plasma display remote sensor to control the receiver. In this case, you won't be able to control the receiver using the remote control if you switch the plasma display - Pioneer VSX-1015TX | Owner's Manual - Page 61
Pioneer plasma displays on page 65 for more on setting up the receiver. DVD player Satellite receiver, etc RECEIVER INPUT SELECT SOURCE DVD AUDIO IN STANDBY/ON LISTENING MODE SELECT ENTER MULTI JOG TV/SAT AUDIO IN AUDIO/VIDEO MULTI-CHANNEL RECEIVER VSX MASTER VOLUME VSX-1015TX To make - Pioneer VSX-1015TX | Owner's Manual - Page 62
ST BAND SYSTEM TUNE GUIDE SETUP TV CONTROL RETURN TV VOL INPUT SELECT TV CH VOL DTVON/OFF REC DTVINFO MUTE TUNER DISPLAY REC STOP MPX CHRETURN AUDIO SUBTITLE HDD DVD 1 Switch on the receiver and your TV. Use the RECEIVER button to switch on. 2 Press RECEIVER on the remote control, then - Pioneer VSX-1015TX | Owner's Manual - Page 63
ST BAND SYSTEM TUNE GUIDE SETUP TV CONTROL RETURN TV VOL INPUT SELECT TV CH VOL DTVON/OFF REC DTVINFO MUTE TUNER DISPLAY REC STOP MPX CHRETURN AUDIO SUBTITLE HDD DVD 1 Switch on the receiver and your TV. Use the RECEIVER button to switch on. 2 Press RECEIVER on the remote control, then - Pioneer VSX-1015TX | Owner's Manual - Page 64
LFE channel (LFE Attenuator Setup on page 65). • SR+ Setup - Specify how you want to control your Pioneer plasma display (SR+ Setup for Pioneer with dual mono encoded Dolby Digital and DTS soundtracks. Tip • While the receiver is in standby (using the front panel), press the STANDBY/ON button while - Pioneer VSX-1015TX | Owner's Manual - Page 65
. See also Using this receiver with a Pioneer plasma display on page 60 and Using the SR+ mode with a Pioneer plasma display on page 61 setting) • ATT 10dB - 10dB of limiting • LFE OFF - No sound from LFE channel 3 When you're finished, press RETURN. You will return to the Other Setup menu. - Pioneer VSX-1015TX | Owner's Manual - Page 66
. AMP ERR blinks in the display, then the power automatically switches off. The MCACC blinks and the power does not turn on. • The receiver has a serious problem. • Do not try to turn on the receiver. Contact a Pioneer authorized independent service company for assistance. OVERHEAT blinks in the - Pioneer VSX-1015TX | Owner's Manual - Page 67
receiver (see Connecting up on page 14). • Sound is muted or the volume is turned down. • Press MUTE or adjust the volume accordingly. • Speakers are turned page 46. • The surround and/or center levels are turned down. • Check the levels in Channel Level on page 47. • The surround and/or center - Pioneer VSX-1015TX | Owner's Manual - Page 68
turned off. DTS signal out is on. Refer to the instruction manual supplied with the DVD player. • The digital output level is turned Turn off the equipment causing the noise or move it away from the receiver. • Place the antenna farther away from the equipment causing the noise. A multi channel - Pioneer VSX-1015TX | Owner's Manual - Page 69
positive/negative speaker terminals on the receiver are matched with the corresponding terminals connected to the same power source are not input of the subwoofer. • The subwoofer channel can be delayed slightly if run through correctly. Refer to the instruction manual supplied is incorrect. with - Pioneer VSX-1015TX | Owner's Manual - Page 70
remote control repeatedly to select a different brightness. You can't get DIGITAL to display • There is a problem channel on your DVD player. the one currently playing is actually PCM. See the operating instructions that came with your DVD player. When playing certain discs, none of the receiver - Pioneer VSX-1015TX | Owner's Manual - Page 71
from the CONTROL IN jack and use jack. remote normally (see Operating other Pioneer components on page 23). • The preset code settings are wrong. • The batteries wore out and the system settings were cleared. • Input the correct preset code. • Reset the proper system settings. The SR cable is - Pioneer VSX-1015TX | Owner's Manual - Page 72
Surround DTS Digital Surround is a 5.1-channel audio coding system from Digital Theater Systems Inc. channel localization (with two channel sources, the ".1" subwoofer channel is generated by bass management in the receiver). Two modes (Cinema and Music) are available using DTS Neo:6 with two channel - Pioneer VSX-1015TX | Owner's Manual - Page 73
Microsoft Corporation. WMA9 Pro can support up to 5.1/7.1 channel playback with sampling rates up THX Select2 requirements cover every aspect of the product including pre-amplifier and power com. Only receiver and controller products bearing the THX Surround EX logo, when in the THX Surround EX mode, - Pioneer VSX-1015TX | Owner's Manual - Page 74
in Surround EX, you can manually select the THX Surround EX playback mode, otherwise THX Select2 Cinema mode will apply ASA processing to provide optimum replay. THX MusicMode For the replay of multi-channel music the THX MusicMode should be selected. In this mode THX ASA processing is applied to - Pioneer VSX-1015TX | Owner's Manual - Page 75
(without package 15.4 kg (34 lb) Furnished Parts Microphone (for Auto MCACC setup 1 AA/IEC R6P dry cell batteries 2 Remote control 1 AM loop antenna 1 FM wire antenna 1 Warranty card 1 These operating instructions Note • Specifications and the design are subject to possible modifications - Pioneer VSX-1015TX | Owner's Manual - Page 76
or if you wish to purchase replacement parts, operating instructions, service manuals, or accessories, please call the number shown below. 8 0 0 - 4 2 1 - 1 4 0 4 Please do not ship your product to Pioneer without first calling the Customer Support Division at the above listed number for assistance
-
 1
1 -
 2
2 -
 3
3 -
 4
4 -
 5
5 -
 6
6 -
 7
7 -
8
-
9
-
10
-
11
-
12
-
13
-
14
-
15
-
16
-
17
-
18
-
19
-
20
-
21
-
22
-
23
-
24
-
25
-
26
-
27
-
28
-
29
-
30
-
31
-
32
-
33
-
34
-
35
-
36
-
37
-
38
-
39
-
40
-
41
-
42
-
43
-
44
-
45
-
46
-
47
-
48
-
49
-
50
-
51
-
52
-
53
-
54
-
55
-
56
-
57
-
58
-
59
-
60
-
61
-
62
-
63
-
64
-
65
-
66
-
67
-
68
-
69
-
70
-
71
-
72
-
73
-
74
-
75
-
76
 |
 |
AUDIO/VIDEO MULTI-CHANNEL
RECEIVER
VSX-1015TX
Operating Instructions
Register your product at
www.pioneerelectronics.com
• Protect your new investment
The details of your purchase will be on file for reference in the event of an
insurance claim such as loss or theft.
• Improve product development
Your input helps us continue to design products that meet your needs.
• Receive a free Pioneer newsletter
Registered customers can opt in to receive a monthly newsletter.
• Receive free tips, updates and service bulletins on
your new product