Pioneer VSX-1015TX Owner's Manual - Page 71
Additional information, Resetting the main unit, Switching the speaker impedance
 |
View all Pioneer VSX-1015TX manuals
Add to My Manuals
Save this manual to your list of manuals |
Page 71 highlights
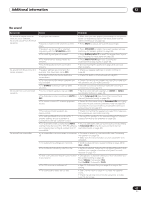
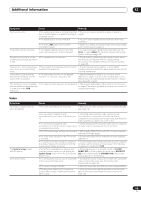
Additional information 12 Remote control Symptom Cannot be remote controlled. Other components can't be operated with the system remote. Cause Remedy • The remote control batteries have worn out. • Replace the batteries (see Loading the batteries on page 7). • Too far away or improper angle of operation. • Operate within 23 feet and a 30º angle of the remote sensor on the front panel (see Operating range of remote control unit on page 30). • There is an obstacle between the receiver • Remove the obstacle or move to another place. and the remote control. • Strong light such as fluorescent light is • Avoid exposing the remote sensor on the front panel to shining onto the unit's remote control sensor. direct light. • Something is plugged into the CONTROL IN • Unplug the cable from the CONTROL IN jack and use jack. remote normally (see Operating other Pioneer components on page 23). • The preset code settings are wrong. • The batteries wore out and the system settings were cleared. • Input the correct preset code. • Reset the proper system settings. The SR cable is connected, but • The SR cable hasn't been connected the connected components can't properly. be operated with the remote. • Reinsert the SR cable, making sure it's connected to the right jack (see Operating other Pioneer components on page 23). • The rest of the component connections have not been made. • Make sure an analog connection has been made between the units. • The component you have hooked up is not a • This feature only works with Pioneer products. Pioneer product. Note • If the unit does not operate normally due to external effects such as static electricity disconnect the power plug from the outlet and insert again to return to normal operating conditions. Resetting the main unit Use this procedure to reset all the receiver's settings to the factory default. Use the front panel controls to do this. 1 Switch the receiver into standby. 2 While holding down the TONE button, press and hold the STANDBY/ON button for about three seconds. 3 When you see RESET? appear in the display, press ENTER. OK? shows in the display. 4 Press SYSTEM SETUP to confirm. OK appears in the display to indicate that the receiver has been reset to the factory default settings. Switching the speaker impedance We recommend using speakers of 8Ω with this system, but it is possible to switch the impedance setting if you plan to use speakers with a 6Ω impedance rating. • With the receiver in standby, press STANDBY/ ON while holding down the SPEAKERS button. Each time you do this, you switch between the impedance settings: • SP 6 OHM - Use this setting if your speakers are rated at 6Ω. • SP 8 OHM - Use this setting if your speakers are rated at 8Ω or more. 71 En
-
 1
1 -
2
-
3
-
4
-
5
-
6
-
7
-
8
-
9
-
10
-
11
-
12
-
13
-
14
-
15
-
16
-
17
-
18
-
19
-
20
-
21
-
22
-
23
-
24
-
25
-
26
-
27
-
28
-
29
-
30
-
31
-
32
-
33
-
34
-
35
-
36
-
37
-
38
-
39
-
40
-
41
-
42
-
43
-
44
-
45
-
46
-
47
-
48
-
49
-
50
-
51
-
52
-
53
-
54
-
55
-
56
-
57
-
58
-
59
-
60
-
61
-
62
-
63
-
64
-
65
-
 66
66 -
 67
67 -
 68
68 -
 69
69 -
 70
70 -
 71
71 -
 72
72 -
 73
73 -
 74
74 -
 75
75 -
 76
76
 |
 |