ProForm 400 H Elliptical English Manual - Page 11
Orient the Right Upper Body Arm 5 so
 |
View all ProForm 400 H Elliptical manuals
Add to My Manuals
Save this manual to your list of manuals |
Page 11 highlights
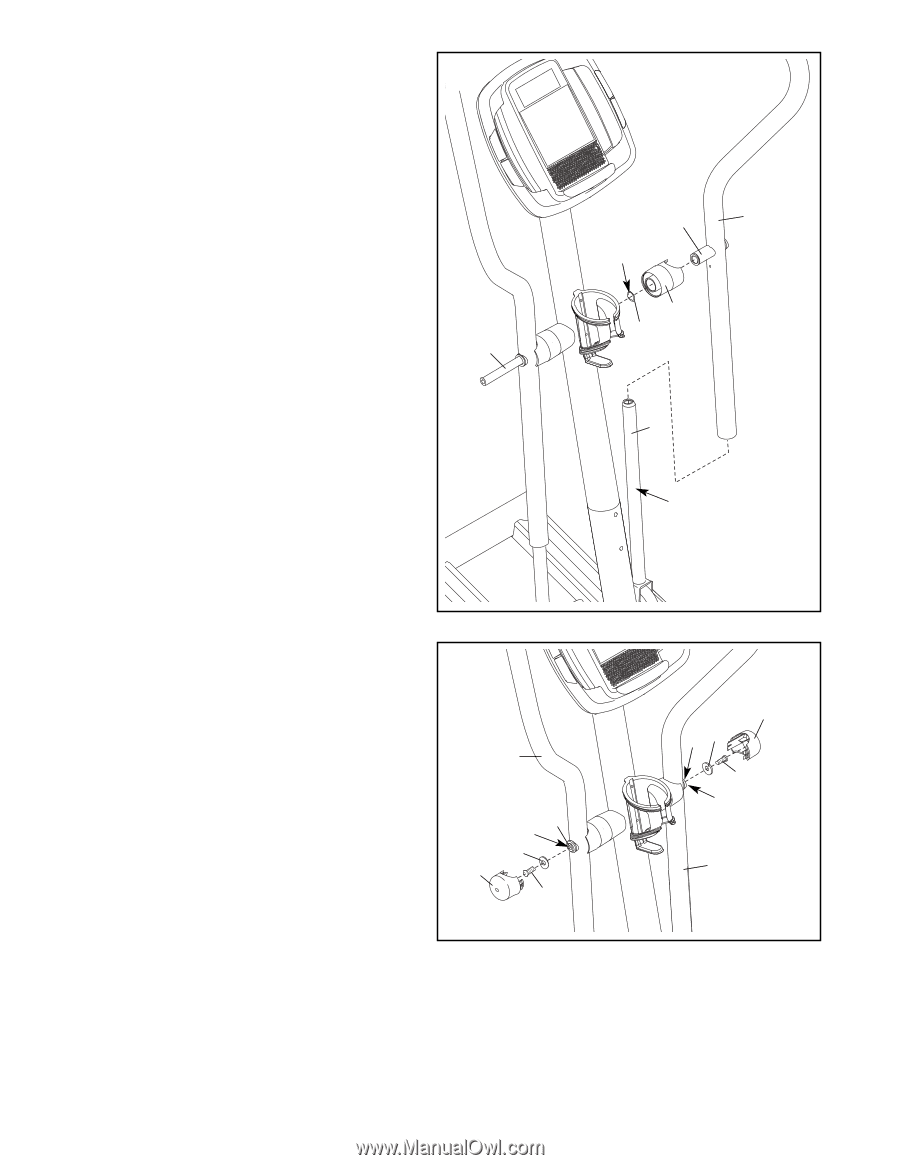
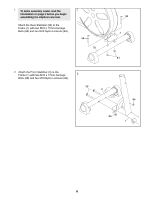
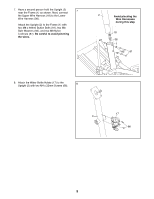
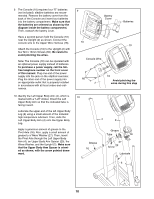
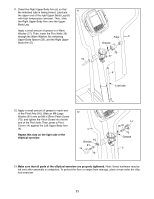
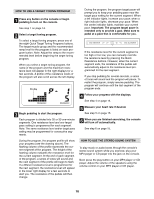
11. Orient the Right Upper Body Arm (5) so that 11 the indicated tube is facing inward. Lubricate the upper end of the right Upper Body Leg (6) with high-temperature lubricant. Then, slide the Right Upper Body Arm onto the Upper Body Leg. Apply a small amount of grease to a Wave Washer (27). Then, insert the Pivot Axle (16) through the Wave Washer, the remaining Upper Body Spacer (29), and the Right Upper Body Arm (5). 16 Tube 5 Grease 29 27 6 Lubricate 12. Apply a small amount of grease to each end of the Pivot Axle (16). Slide an M8 Large Washer (81) onto an M8 x 25mm Patch Screw (70), and tighten the Patch Screw into the left end of the Pivot Axle. Then, press a Pivot Cover (14) against the Left Upper Body Arm (4). Repeat this step on the right side of the elliptical exerciser. 12 4 16 Grease 81 14 70 14 16 81 70 Grease 5 13. Make sure that all parts of the elliptical exerciser are properly tightened. Note: Some hardware may be left over after assembly is completed. To protect the floor or carpet from damage, place a mat under the elliptical exerciser. 11
-
 1
1 -
2
-
3
-
4
-
5
-
 6
6 -
 7
7 -
 8
8 -
 9
9 -
 10
10 -
 11
11 -
 12
12 -
 13
13 -
 14
14 -
 15
15 -
 16
16 -
17
-
18
-
19
-
20
-
21
-
22
-
23
-
24
 |
 |