Reebok Trainer Rx 3.5 Bike English Manual - Page 12
Right Pedal 16
 |
View all Reebok Trainer Rx 3.5 Bike manuals
Add to My Manuals
Save this manual to your list of manuals |
Page 12 highlights
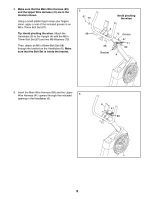
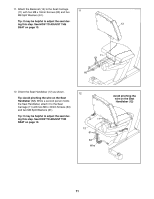
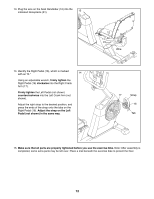
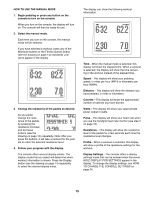
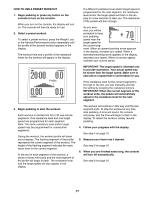
13. Plug the wire on the Seat Handlebar (12) into the indicated Receptacle (91). 13 14. Identify the Right Pedal (16), which is marked with an “"R.”" 14 Using an adjustable wrench, firmly tighten the Right Pedal (16) clockwise into the Right Crank Arm (17). Firmly tighten the Left Pedal (not shown) counterclockwise into the Left Crank Arm (not shown). Adjust the right strap to the desired position, and press the ends of the strap onto the tabs on the Right Pedal (16). Adjust the strap on the Left Pedal (not shown) in the same way. 12 91 Wire 17 Strap 16 Tab 15. Make sure that all parts are properly tightened before you use the exercise bike. Note: After assembly is completed, some extra parts may be left over. Place a mat beneath the exercise bike to protect the floor. 12
-
 1
1 -
2
-
3
-
4
-
5
-
6
-
 7
7 -
 8
8 -
 9
9 -
 10
10 -
 11
11 -
 12
12 -
 13
13 -
 14
14 -
 15
15 -
 16
16 -
 17
17 -
18
-
19
-
20
-
21
-
22
-
23
-
24
-
25
-
26
-
27
-
28
-
29
-
30
-
31
-
32
 |
 |
