Roku HD110 User Guide
Roku HD110 Manual
 |
View all Roku HD110 manuals
Add to My Manuals
Save this manual to your list of manuals |
Roku HD110 manual content summary:
- Roku HD110 | User Guide - Page 1
User Guide HD110, HD210, HD410, HD810, HD1010, and HD2000 MATCHES: • BrightSign HD110, HD210, HD410, HD810, HD1010 Software Version: 3.0.1 www.brightsign.biz - Roku HD110 | User Guide - Page 2
Copyright Copyright © 2008-2009 by BrightSign, a division of Roku, Inc. All rights reserved. Roku, the Roku logo, and the BrightSign logo are trademarks of Roku, Inc. Other brand and product names are trademarks or registered trademarks of their respective holders. • • • ii • • • - Roku HD110 | User Guide - Page 3
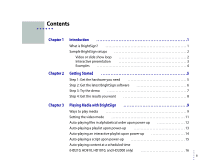
Step 2: Get the latest BrightSign software 6 Step 3: Try the demo 7 Step 4: Get the results you want 8 Chapter 3 Playing Media with BrightSign 9 Ways to play media 9 Setting the video mode -playing content at a scheduled time (HD210, HD810, HD1010, and HD2000 only) 16 • • • • iii • • - Roku HD110 | User Guide - Page 4
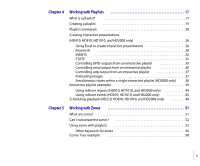
Chapter 4 Working with Playlists 17 What is a playlist 17 Creating a playlist 19 Playlist commands 20 Creating interactive presentations (HD410, HD810, HD1010, and HD2000 only 26 Using Excel to create interactive presentations 26 Keywords 28 EVENTS 32 STATE 35 Controlling GPIO outputs from - Roku HD110 | User Guide - Page 5
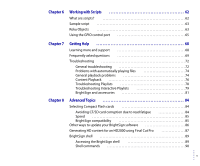
more and support 68 Frequently asked questions 69 Troubleshooting 72 General troubleshooting 72 Problems with automatically playing files 74 General playback problems 74 Content Playback 76 Troubleshooting Playlists 78 Troubleshooting Interactive Playlists 79 BrightSign and accessories - Roku HD110 | User Guide - Page 6
to your network 101 Configuring BrightSign using DHCP 102 Using a manual IP configuration 102 Proxy servers 103 Networking software options 104 Using the NetworkTimer keyword 105 Product Specifications 106 BrightSign features 106 Supported media types 109 Supported input devices 111 USB - Roku HD110 | User Guide - Page 7
device, such as a button board or keyboard, for interactive presentations, and since BrightSign is compatible with standard media authoring software, you can choose the tools you use to create your content. Because BrightSign has no moving parts, it is durable, reliable, and an ideal replacement for - Roku HD110 | User Guide - Page 8
needs. Video or slide show loop Place a video or set of still images on a Secure Digital (SD) or CompactFlash (CF) card, and connect BrightSign to a display. (CF cards are supported on the HD2000 only.) You can use any of the following methods to connect to a display: • Use a VGA cable to connect to - Roku HD110 | User Guide - Page 9
Interactive presentation By connecting powered speakers to BrightSign, you can add audio to your display, and you can add interactivity by connecting an input device such as a keyboard, touch screen, button board, or LED. The example below uses an off-the-shelf USB keyboard. 3 • • - Roku HD110 | User Guide - Page 10
Examples Here are some examples of what you can do with BrightSign: • Display a looping video with DVD+ quality on a one zone, slideshow in a second zone, and on the HD210, HD1010 and HD2000, an RSS feed in a third zone • (HD210, HD810, HD1010, and HD2000 only) Schedule any of the above to play at a - Roku HD110 | User Guide - Page 11
Started Step 1: Get the hardware you need To start using your BrightSign, you need the following hardware: Display Any monitor, TV, or Elo touch screen with one of the following types of inputs: • VGA • Component (HD810, HD1010, and HD2000 only) • HDMI Storage card Either of the following: • CF - Roku HD110 | User Guide - Page 12
Look for the version number below the Roku logo on your screen. Tip: You can also check the BrightSign software version using the shell (see BrightSign shell for details). 2 Download the latest software. a Go to the BrightSign web site www.brightsign.biz/support. b Click the Software Downloads link - Roku HD110 | User Guide - Page 13
or mouse. It's easy to try if you have a BrightSign. Follow these steps: 1 Go to www.brightsign.biz/support/demos. 2 Download the demo for your BrightSign model: • HD2000: Click the HD2000 Demo link. • HD110, HD210, HD410, HD810, and HD1010: Click the HDCompact Demo link. 3 Unzip the BrightSignDemo - Roku HD110 | User Guide - Page 14
the SD card you created in the previous set of steps. Step 4: Get the results you want Now you're ready to start using your BrightSign. Just add your content (see Supported media types for details on the types of files you can use) and follow the directions in Playing - Roku HD110 | User Guide - Page 15
media files on a BrightSign device: • Play media automatically from an SD card when you turn on a BrightSign • Play media via a script on an SD card • Use the serial shell commands to test media playback NOTE: BrightSign HD110, HD210, HD410, HD810, and HD1010 videomode), then BrightSign scales the - Roku HD110 | User Guide - Page 16
BrightSign can autoplay the following types of media: • MPEG-2 video. You can use a single file as a loop, or multiple files. On the HD2000, MPEG-2 files must be program streams. On the HD110, HD210, HD410, HD810, and HD1010 Microsoft Excel (or any editor that supports CSV files, such as OpenOffice - Roku HD110 | User Guide - Page 17
display attached to your BrightSign. On the HD110, HD210, HD410, HD810, and HD1010, first BrightSign checks to see if a VGA display is attached. If it finds a VGA display, it sets the video resolution to the best mode supported by the VGA display and by BrightSign. If BrightSign doesn't find a VGA - Roku HD110 | User Guide - Page 18
your files into the root directory of an SD card. See the list of supported file types on the previous page. 2 Insert the SD card into your BrightSign. 3 Turn on your BrightSign. After a few moments, BrightSign plays the video and repeats it automatically to create a loop. EXAMPLE 1: SD card with - Roku HD110 | User Guide - Page 19
still graphics, audio files, or video files you included in the playlist into the root of your SD card. 4 Insert the SD card into your BrightSign. 5 Turn on your BrightSign. After a few moments, BrightSign plays the playlist and loops it automatically. EXAMPLE 2: SD card with playlist files 13 • • - Roku HD110 | User Guide - Page 20
presentations (HD410, HD810, HD1010, and HD2000 only) for details). 2 Copy your media files and your interactive playlist into the root directory of an SD card. 3 Insert the SD card into your BrightSign. 4 Turn on your BrightSign. After a few moments, BrightSign runs the interactive playlist and - Roku HD110 | User Guide - Page 21
with Scripts for details). 2 Copy the script into the root directory of your SD card. 3 Insert the SD card into your BrightSign. 4 Turn on your BrightSign. After a few moments, BrightSign runs the script and plays the media referenced in the script. EXAMPLE 4: SD card with script files 15 • • - Roku HD110 | User Guide - Page 22
editor and name the file AUTOSCHEDULE.TXT (see Scheduling playback (HD210, HD810, HD1010, and HD2000 only) for details). 2 Copy AUTOSCHEDULE.TXT into the root Insert the SD card into your BrightSign. 5 Turn on your BrightSign. After a few moments, BrightSign plays the appropriate content. EXAMPLE 5: - Roku HD110 | User Guide - Page 23
Chapter 4 Working with Playlists What is a playlist? A BrightSign playlist is a text file that ends in BSP (BrightSign Playlist). It contains the names of the files you want to play and the order in which you want to play them. Files in a playlist - Roku HD110 | User Guide - Page 24
can also mix media types in a single playlist and trigger GPIO (General Purpose Input/Output) pins. In addition to filenames, there is a set of commands that you can use in a BrightSign playlist. For example slide4.bmp You can download a sample playlist from www.brightsign.biz/support/demos. 18 • • - Roku HD110 | User Guide - Page 25
files to your SD card: • Your playlist (the file you created in steps 1-3) • Media files referenced in your playlist EXAMPLE 1: Playlist file 5 Do either of the following: • Play time (see Auto-playing content at a scheduled time (HD210, HD810, HD1010, and HD2000 only) for details). 19 • • - Roku HD110 | User Guide - Page 26
BMP, MP3, MPG (HD2000 only), VOB (HD2000 only), TS (HD110, HD210, HD410, HD810, and HD1010), PNG, JPG Any line that is a file name and that is useful for debugging. (HD2000 only) audiomode # (default is 1) BrightSign provides 5.1 audio decoding that is controlled via the audiomode command. If your - Roku HD110 | User Guide - Page 27
can set the volume level by specifying a value between 0 and 100. For example: volume 100 is full volume. videomode (HD110, HD210, HD410, HD810, and HD1010 default is 1024x768x75p; HD2000 default is 1280x720x60p) Set the output framebuffer format. The options are: HD2000 • VGA: • 1024x768x60p - Roku HD110 | User Guide - Page 28
HD110, HD210, HD410, HD810, and HD1010: • VGA: • 1024x768x75p • 1360x768x60p • Component: • 720x576x50p • 720x480x60p • 1280x720x60p • 1280x720x50p • 1280x720x59.94p • 1920x1080x50i • 1920x1080x59.94i • 1920x1080x60i • HDMI: • 1024x768x75p • 1360x768x60p • 720x576x50p • 720x480x60p • 1280x720x60p • - Roku HD110 | User Guide - Page 29
Viewmode (default is 0) You can use a view mode that is different from the default by setting the mode prior to starting video playback. The view_mode values are: • 0: Scales the video to fill the screen without maintaining the aspect ratio. Images may appear stretched. • 1: Centers the - Roku HD110 | User Guide - Page 30
only) Sets the specified GPIO port as an input port. GPIOEnableOutput (HD410, HD810, and HD1010 only) Sets the specified GPIO port as an output port. GPIOOn , ,... Turns on the specified GPIO outputs. All other GPIO output ports are - Roku HD110 | User Guide - Page 31
set or clear one of the GPIO outputs. • For the HD410, HD810, and HD1010, the number can be any integer between 0 and 7. For example: lighton 3 sets lighton 17 sets LED 0 on the button board. waitbuttonany (HD410, HD810, HD1010, and HD2000 only) Use this command when you want the playlist to pause - Roku HD110 | User Guide - Page 32
Creating interactive presentations (HD410, HD810, HD1010, and HD2000 only) With BrightSign you can create presentations that respond to input from the user (capabilities vary by model, see Product Specifications for details on features supported by your model.) For example, you can let customers - Roku HD110 | User Guide - Page 33
a comma-separated CSV file with periods as the decimal separator (international defaults may vary). Below is a section of the AUTOPLAY.CSV file from the BrightSign demo. Due to space limitations, it does not include all the columns. The columns not shown here are similar to the 5 right-hand columns - Roku HD110 | User Guide - Page 34
: • 1024x768x60p • 1280x768x60p HD210, HD410, HD810, and HD1010: • 1024x768x75p • 1360x768x60p • 720x576x50p • 720x480x60p • 1280x720x60p NOTE: The front panel button is not supported on the HD2000. If you use a script to change the video mode, BrightSign reboots and sets the video mode based on - Roku HD110 | User Guide - Page 35
IMAGEMODE • 0: Centers the image and no scaling takes place. If the image is bigger than the screen, BrightSign crops the image. • 1: Scales the image to fit so that it is fully viewable with its aspect ratio maintained. • 2: Scales and crops the image so - Roku HD110 | User Guide - Page 36
VIDEOPLAYERAUDIOVOLUME (HD2000 only) Sets the volume when playing a video. The volume parameter can be any number between 0 and 100. AUDIOPLAYERAUDIOOUTPUT (HD2000 only) Sets the audio output when playing an audio file. • 0: Outputs analog audio. • 1: Outputs USB audio. • 2: - Roku HD110 | User Guide - Page 37
) Sets the specified GPIO port as an output port. SerialPortSpeed (HD410, HD810, HD1010, and HD2000 only) Sets the baud rate for the serial line. Supported baud rates are: 1800, 2000, 2400, 3600, 4800, 7200, 9600, 12800, 14400, 19200, 23040, 28800, 38400, 57600, 115200. SerialPortMode - Roku HD110 | User Guide - Page 38
want to respond to, you must make an entry in this row. You do not need to enter events you don't use. BrightSign supports the following event types: elo (HD810, HD1010, and HD2000 only) Triggers with a USB Mouse or Elo Touch Screen press within a rectangular touch area. Use this format to define - Roku HD110 | User Guide - Page 39
that covers the entire screen when not in the main menu). NOTE: You can also use elor instead of elo. They are interchangeable. eloc (HD810, HD1010, and HD2000 only) Triggers with a USB Mouse or Elo Touch Screen press within a circular touch. Use this format to define the touch area: eloc:x:y:radius - Roku HD110 | User Guide - Page 40
event to move on to another state after the audio ends. The format is: audioend.There are no parameters. TIP: See Using rollover regions (HD810, HD1010, and HD2000 only) for two additional events you can use with interactive playlists. 34 • • - Roku HD110 | User Guide - Page 41
the user presses the elo touch screen or clicks the mouse in the right spot to trigger the elo:110:180:350:400 event, then BrightSign jumps to the new state CARS.TS. Look at the STATE rows in the demo example; notice one of these rows starts with CARS.TS - Roku HD110 | User Guide - Page 42
enters the ppt10.bmp state, LED's 0, 2, and 4 are turned off; and the other LED's are unaffected. product1.bmp:gpios() When BrightSign enters the product1.bmp state, All LED's are turned off. Controlling serial output from an interactive playlist To control serial output for a particular state - Roku HD110 | User Guide - Page 43
To control udp output for a particular state, add a udp command to the second column of the state specification in the interactive playlist. When BrightSign enters the udp state, the specified string is output via the ethernet connector. The format is: udpSend: Preloading images The autoplay - Roku HD110 | User Guide - Page 44
Simultaneous states within a single interactive playlist (HD2000 only) Within a single interactive playlist, you can create an interactive presentation with simultaneous states. For example, you can: • Play an HDMI slide show at the same time as an analog audio file. • Plays a video with English - Roku HD110 | User Guide - Page 45
Interactive playlist examples The BrightSign demo shows that you can design powerful interactive signs using interactive playlists. The following examples illustrate how easy it is to use and understand interactive - Roku HD110 | User Guide - Page 46
screen. One touch or click starts the slideshow. When this demo starts, BrightSign displays MENU.BMP since it's in the first STATE position. • There is and there is a mouse click or touch screen input anywhere onscreen, BrightSign displays PIC1.BMP. • Pictures 1 - 6 all have timeout entries. - Roku HD110 | User Guide - Page 47
EXAMPLE 3: Slideshow that advances only when a click / touch occurs Example 3 has only 1 event, the same elo event as Example 2. • There is an elo event entry for each image, so the next image plays when there is a mouse click or touch activity anywhere onscreen. • There are no timeout events in - Roku HD110 | User Guide - Page 48
4 plays two videos and three images and it contains five events: three button events, a timeout event, and a videoend event. When Example 4 starts, BrightSign displays MENU.BMP, since it's in the first STATE position. • If the menu is being displayed, pressing button 1 starts the attract video - Roku HD110 | User Guide - Page 49
EXAMPLE 5: Simultaneous states in a single interactive playlist 43 • • - Roku HD110 | User Guide - Page 50
and audio output for video. In this case, the keyword VideoPlayerAudioOutput directs BrightSign to output stereo PCM via the SPDIF audio connector. This machine uses events to control its audio playback. Using rollover regions (HD810, HD1010, and HD2000 only) In the previous section, Using Excel to - Roku HD110 | User Guide - Page 51
Using rollover events (HD810, HD1010, and HD2000 only) You can define either a rectangular or circular rollover region. To setup a rollover region, use either of the following keywords in the events - Roku HD110 | User Guide - Page 52
• off_bitmap represents the name of the bitmap image that displays when the mouse is not within the defined region. • x_origin,y_origin represents the coordinates for the center of the rollover image. EXAMPLE 6: Rectangular rollover region Example 6 shows what you would enter in the interactive - Roku HD110 | User Guide - Page 53
that each of the three images have a rollover region that is 96 pixels long by 43 pixels tall. • When the cursor is outside this area, BrightSign displays NEXT_NOTLIT.BMP. • When the cursor is inside this area - Roku HD110 | User Guide - Page 54
long by 43 pixels tall. • When the cursor is outside this area, BrightSign displays BACK_NOTLIT.BMP. • When the cursor is inside this area, BrightSign displays BACK_LIT.BMP. Scheduling playback (HD210, HD810, HD1010, and HD2000 only) You can play videos, still images, and playlists at scheduled - Roku HD110 | User Guide - Page 55
following a date/time specification must be an interactive playlist file, playlist file, video file, or image file. When the date/time event occurs, BrightSign stops playing the current file and begins playing the new file. The following is an example AUTOSCHEDULE.TXT file: */*/*-MON-01:00 weekday - Roku HD110 | User Guide - Page 56
/12/25-*-16:16 music.bsp 2010/1/*-WED-16:00 video.ts 2010/1/*-*-07:00 breakfast.bsp 2010/1/*-*-14:00 demo.csv In this example, BrightSign displays the image IMAGE.PNG starting on December 15, 2009 at 3:20 PM. On December 25, at 4:16 PM, the playlist MUSIC.BSP starts. The - Roku HD110 | User Guide - Page 57
Chapter 5 Working with Zones What are zones? With BrightSign zones you can divide the screen into rectangles and play different content in each rectangle. You can create the following types of zones: • VideoORImages: This zone supports videos and images. You can create only one zone with video ( - Roku HD110 | User Guide - Page 58
EXAMPLE 1: Multi-zone examples Can I customize the zones? Here are some of the things you can customize in your zones: • Background screen color: Specify the background color for the display. • Font: Choose a true type font for Text and RSS playback. • Parameters: Control settings for RSS and Text - Roku HD110 | User Guide - Page 59
Using zones with playlists The easiest way to use zones is with playlists. Here are a few examples of how to add zones to your playlists: EXAMPLE 2: 5 zones with clock and RSS 53 • • - Roku HD110 | User Guide - Page 60
Example 2 shows a presentation with five zones: • Zone 1 is the main video zone. • Zone 2 is the clock zone in the top right. • Zones 3 and 4 are the two image zones to the right. • Zone 5 is the RSS zone at the bottom. The following explains each line in the Example 2 playlist: • EnableZones: This - Roku HD110 | User Guide - Page 61
The three numbers after the RSS dimensions represent the following: • 3 (1st number): Represents the number of lines to display • 0 (2nd number): Indicates whether the text is animated or static (0 for animated, 1 for static) • 4 (3rd number): Represents the number of seconds to display each segment - Roku HD110 | User Guide - Page 62
Example 3 is similar to Example 2, but the RSS zone is replaced with a Text zone. The following explains the Text zone entry: • DefineZone TEXT: This keyword creates a text zone. In addition to providing the size and location of the zone, you must also specify the strings you want to display by - Roku HD110 | User Guide - Page 63
When specifying the color values, the a (alpha) value is optional. If you don't specify an alpha value, it defaults to 255. The alpha value has no effect on the foreground text color or background screen color. However, the alpha value does effect the background color for individual zones (RSS, Text - Roku HD110 | User Guide - Page 64
the demo, so you can see how the playlist controls the demo. You can download the Comix Tour demo (1080i) at this location: www.brightsign.biz/support/demos. Main Video Zone Background color Image Zone (playlist #1) Text Zone with custom TrueType font EXAMPLE 4: Screen capture of the Comix Tours - Roku HD110 | User Guide - Page 65
The sections that follow show the playlist for Comix Tours demo: Global settings EnableZones VideoMode 1920x1080x60i BackgroundScreenColor 181:181:181 'color gray71 Zone 1 - video or images REM DefineZone VideoOrImages 40,60,1344,756 audiochan 0 'analog audio NewEnglandFishingWithFlyByLogo- - Roku HD110 | User Guide - Page 66
Zone 3 - images REM DefineZone Images 1384,520,536,356 Slideinterval 4 '4 seconds between images Transition 19 ' slides from right ZoneWorld_00.png ZoneWorld_01.png ZoneWorld_02.png ZoneWorld_03.png ZoneWorld_04.png ZoneWorld_05.png ZoneWorld_06.png ZoneWorld_07.png ZoneWorld_08.png ZoneWorld_09. - Roku HD110 | User Guide - Page 67
ZoneWorld_26.png ZoneWorld_27.png ZoneWorld_28.png ZoneWorld_29.png ZoneWorld_30.png ZoneWorld_31.png ZoneWorld_32.png ZoneWorld_33.png ZoneWorld_34.png ZoneWorld_35.png Zone 4 - text REM DefineZone Text 160,890,1600,120 3 0 1 ForegroundTextColor 75:75:75'silver 16 BackgroundTextColor 200:200:200:0 - Roku HD110 | User Guide - Page 68
without any knowledge of scripts to accomplish common goals such as playing video loops or slideshows (see Playing Media with BrightSign). By using interactive playlists, you can create more sophisticated presentations that include input from a touch screen or mouse. However, to create the - Roku HD110 | User Guide - Page 69
cable. 5 On your PC, run HyperTerminal (see BrightSign shell for details). 6 Turn on BrightSign and wait for the Roku> shell prompt to appear. 7 Type: script following two manuals: • Roku BrightScript Reference: Describes the scripting language • Roku Object Reference: Describes Roku Objects, such - Roku HD110 | User Guide - Page 70
is to look at or modify existing scripts. You can find links to example scripts at www.brightsign.biz/support/demos. You can also test BrightScript commands using the shell. Here is an example: Welcome to the Roku Shell version 3.04 Release Type '?' for help or 'help ' for help on - Roku HD110 | User Guide - Page 71
HD810, and HD1010, the GPIO BrightSign to evaluate the GPIO port and test scripts that read these buttons or set these LEDs. For more information on using Roku's test button / LED board, see the BrightSign Compact Button Board Hardware Reference Manual also available at www.brightsign.biz/support - Roku HD110 | User Guide - Page 72
Here is an example of a script for the HD410, HD810, or HD1010 that flashes an LED for half a second each time the user presses a button on the BrightSign button/LED board. print "BrightSign Button-LED Test Running" p = CreateObject("roMessagePort") tmr = CreateObject("roMessagePort") gpio = - Roku HD110 | User Guide - Page 73
for the HD2000 flashes an LED for half a second each time the user presses a button on the BrightSign button/LED board. print "BrightSign Button-LED Test Running" p = CreateObject("roMessagePort") tmr = CreateObject("roMessagePort") gpio = CreateObject("roGpioControlPort") gpio.SetPort(p) event_loop - Roku HD110 | User Guide - Page 74
the following BrightSign documents at www.brightsign.biz.support: • BrightSign Installation and Regulatory Guide • BrightSign User Guide (this guide) • BrightSign HD2000 Hardware Guide • BrightSign Compact Button Board Hardware Reference Manual • BrightSign BrightScript Reference • BrightSign Object - Roku HD110 | User Guide - Page 75
of 50Hz and 59.94/60Hz. The following video frame rates are supported: • 1080: 23.98p, 24p, 25p, 29.97p, 30p, and 59.94/60p • 720: 23.98p, 29.97p, and 30p How do I create portrait mode content on BrightSign? You can create portrait mode content from your authoring application (e.g. PhotoShop, After - Roku HD110 | User Guide - Page 76
are active at the same time (HD810 and HD1010 have component). Can I synchronize multiple BrightSign units? Yes, you can synchronize multiple BrightSign units. NOTE: The HD110 does not support synchronization. How accurate is synchronization? BrightSign is accurate within 1.5 - 2 frames when you - Roku HD110 | User Guide - Page 77
can connect up to 18 HD2000s to a single Master unit. The HD410, HD810, and HD1010 support up to 24 units connected via GPIO. The HD810 and HD1010 plus the Expander module, can support up to 78 BrightSign units connected via GPIO. You can connect up to 7 Expander modules with each Expander adding - Roku HD110 | User Guide - Page 78
this section, contact customer support at www.brightsign.biz/support for assistance. General troubleshooting Before attempting to resolve any playback problem on your BrightSign, please start with this checklist. 1 Download a BrightSign demo from www.brightsign.biz/support/demos and confirm that it - Roku HD110 | User Guide - Page 79
up properly / Err light is on or flashing (HD110, HD210, HD410, HD810, and HD1010 only) 1 Try starting BrightSign without a flash card inserted. 2 Try reinstalling the firmware. You can download the latest firmware at www.brightsign.biz/support, under Software Downloads. NOTE: If the error LED - Roku HD110 | User Guide - Page 80
use an MPG or VOB file extension. 3 See General playback problems and Content Playback for more troubleshooting tips. General playback problems If you're having general problems playing content with BrightSign, try the following: 1 Download the BrightSign demo and make sure it plays (see Step 3: Try - Roku HD110 | User Guide - Page 81
HD2000 also supports 1280x768. For playlists (AUTOPLAY.BSP) and interactive playlists (AUTOPLAY.CSV), add the following line to correct the video output: • HD2000: VIDEOMODE 1024x768x60p • HD110, HD210, HD410, HD810, and HD1010: VIDEOMODE 1024x768x75p No audio during playback BrightSign defaults to - Roku HD110 | User Guide - Page 82
this section to troubleshoot the problem. My Image files don't play on BrightSign If your image HD2000 doesn't support progressive or CMYK JPEG files. My video files don't play on BrightSign If your maximum resolution of 1920x1080 • (HD110, HD210, HD410, HD810, and HD1010 only) Make sure videos are - Roku HD110 | User Guide - Page 83
by the wrong audio codec. 1 (HD110, HD210, HD410, HD810, and HD1010 only) Make sure the audio is MPEG BrightSign. 2 Make sure the video has an audio layer. 3 Try re-encoding the video, or using a different application to encode the video. 4 See General playback problems for more troubleshooting - Roku HD110 | User Guide - Page 84
file meets the following requirements: • MP3s with a 44Khz or 48Khz • (HD2000 only) WAV files are also supported Troubleshooting Playlists Before attempting to resolve any playlist problems on BrightSign, please start with this checklist. 1 Make sure the playlist and your content are in the root of - Roku HD110 | User Guide - Page 85
using Notepad on the PC or TextEdit on the Mac. Playlists must be plain text files. Troubleshooting Interactive Playlists Before attempting to resolve any interactive playlist problems on BrightSign, please start with this checklist. 1 Make sure the interactive playlist and your content are in the - Roku HD110 | User Guide - Page 86
) that's not clearly defined. If your interactive playlist fails when you provide input, there's a problem with the file that's supposed to play when that button is pressed or the mouse is used. ). For additional information, see the "Editing CSV..." technote at www.brightsign.biz/support. 80 • • - Roku HD110 | User Guide - Page 87
light. 1 Download and reinstall the BrightSign software (see Step 2: Get the latest BrightSign software for details). 2 If reinstalling the BrightSign software doesn't fix the problem, contact BrightSign Customer Support at www.brightsign.biz/support. BrightSign software update fails 1 Confirm that - Roku HD110 | User Guide - Page 88
works with many different brands of USB mice. Before troubleshooting the mouse, download the BrightSign Demo, and try using your mouse with the demo (see Step 3: Try the demo for details). If the mouse works with the demo, then the problem is with your script or the coordinates used in the - Roku HD110 | User Guide - Page 89
. To use a keyboard, you must write a custom script. The buttons supported by the AUTOPLAY.CSV are for input from the GPIO port. 1 Disconnect the keyboard from BrightSign and reconnect it. 2 Connect your keyboard to BrightSign using a USB hub. 3 Try a different USB keyboard. Elo touch screen - Roku HD110 | User Guide - Page 90
are a wide range of performance, compatibility, and reliability issues among CF/SD card brands and models. BrightSign strongly recommends that you use industrial rated CF/SD cards with BrightSign. We have tested industrial rated CF/SD cards from the following brands: • Transcend • PQI • Simpletech - Roku HD110 | User Guide - Page 91
a block that is becoming susceptible to read errors, and moving blocks around in the NAND chip that are repeatedly read over and over. A typical BrightSign application includes an attract video loop. If this video is fairly short, then a small number of flash blocks are read repeatedly. Over a month - Roku HD110 | User Guide - Page 92
software 1 Download the latest software. a Go to the BrightSign web site www.brightsign.biz/support. b Click the Software Downloads link. c Compare the software version number with the number on your BrightSign screen. d If your BrightSign software is older than the software on the web site - Roku HD110 | User Guide - Page 93
• If you named the file UPDATE.ROK, the file deletes when the update finishes and the unit reboots. NOTE: If the card was formatted with NTFS or HFS+, then the UPDATE.ROK file does not delete and the unit does not reboot after the update. • If you named the file UPDATE_SAVE.ROK, the upgrade file - Roku HD110 | User Guide - Page 94
5 In the Inspector window, click Encoder (second button from the left) and make sure that the resolution, frame rate, and aspect ratio are correct. NOTE: Most HD sources (HDCAM, HDV etc) set the resolution to 1440x1080. Therefore, if you're creating 1080i or 720p content, you need to click Change - Roku HD110 | User Guide - Page 95
the shell. You can simply put your content on a CF/SD card and configure it to auto-play on power-up (see Playing Media with BrightSign). Accessing the BrightSign shell You may find it useful to use the shell to test various options or for debugging. Follow these steps to access the shell - Roku HD110 | User Guide - Page 96
HD1010 • 115200 baud • 8 data bits • No parity • 1 stop bit • NO flow control • TTY mode enabled 4 Create a CF/SD card with some test files on it (BMP graphics, 48 kHz MP3 files, MPEG-2 video, etc), and then insert the card into the BrightSign of BrightSign software does not support hot-swapping - Roku HD110 | User Guide - Page 97
To play a video named MYVIDEO.TS on the SD card, use: videoplay myvideo.ts To play a video with a space in its name, such as MY VIDEO.TS, use: videoplay "my video.ts" To change the volume level (0 - 100) to 75% when playing a video or audio, use: videoplay volume 75 audioplay volume 75 To change the - Roku HD110 | User Guide - Page 98
card do not need the CF:/ or SD:/ prefixes. Testing CF/SD cards BrightSign works with most CF/SD cards, but is not compatible with all CF/SD the following result: Roku> dir / opendir[/] Error: can't open dir If the readperf command fails, you get the following result: Roku> readperf bigfile.ts SET - Roku HD110 | User Guide - Page 99
shell enables you to test playback and see debug output. From the BrightSign shell you can start your script manually and view output from the script. Manually starting a script You can start a script from the shell by using the script command. 1 Follow the directions earlier in this section - Roku HD110 | User Guide - Page 100
playlist, it must be named AUTOPLAY.CSV 5 Insert your CF/SD card into BrightSign, and add power. 6 When the Roku prompt appears, type the following: script run.brs Testing custom scripts To make troubleshooting your custom scripts much easier, we recommend adding check and print statements, like - Roku HD110 | User Guide - Page 101
prompt appears, type the following: script run.brs Multi-run script limitations Currently when a script terminates, BrightSign does not free resources allocated by Roku Objects. This means that if you use the script shell command to run a script, and the script exits, you may not be able to run - Roku HD110 | User Guide - Page 102
.) To manually update using the BrightSign shell: 1 Copy the UPDATE.ROK file onto your CF/SD card. 2 Insert the CF/SD card in your BrightSign and apply power. 3 When the Roku > prompt appears in the BrightSign shell, type the following: update update.rok NOTE: We are continuing to add support for - Roku HD110 | User Guide - Page 103
be organized into different registry sections if desired. Interactive playlists support writing to the registry, deleting from the registry, and custom script that includes the roRegistry object (see the BrightSign Object Reference Manual for additional information). The number of registry keys and - Roku HD110 | User Guide - Page 104
Unlike other entries in this part of the state table, this entry executes only the CopyRegistry command and does not transition to a new state. BrightSign simply copies the contents of the registry into a comma separated value format, so that you can easily import the information into a spreadsheet - Roku HD110 | User Guide - Page 105
The script is named SETDATETIME.BRS and is available at www.brightsign.biz/support in the software download section. Instructions for using the date/time script: 1 Go to www.brightsign.biz/support and click the Software Downloads link. 2 Click the SetDateTime Script link to download the SETDATETIME - Roku HD110 | User Guide - Page 106
display aspect ratios with the various BrightScreen options is confusing. In this section we try to clarify what you can expect. Displaying videos BrightSign treats video and images a little differently. When a video is playing back, it is displayed by default in what is known in BrightSignese as - Roku HD110 | User Guide - Page 107
modes, it is best to use a component input monitor. Connecting BrightSign to your network The HD210, HD1010, and HD2000 include a built-in 10/100Mbps Ethernet port, and support DHCP for automatic network configuration. BrightSign uses http protocol to communicate over your network using port 80-the - Roku HD110 | User Guide - Page 108
is easier than using the system shell. You can download a manual IP configurations script from the BrightSign website. Follow these steps to manually configure your IP settings: 1 Go to www.brightsign.biz/support and click the Software Downloads link. 2 Download and unzip the MANUAL_IP_CONFIGURATION - Roku HD110 | User Guide - Page 109
) nc.AddDNSServer(208.67.220.220) nc.Apply() a=RebootSystem() REM End of script Proxy servers There are three ways you might connect the BrightSign to a server on the Internet. • Direction connection: BrightSign has a routeable IP address and is accessible to the outside world. We do not recommend - Roku HD110 | User Guide - Page 110
• HTTP / socks proxy: BrightSign does not currently support HTTP proxy or socks proxy configurations. Although BrightSign has a private IP address, it cannot make connections to the Internet by itself. Instead it has to connect to a proxy server and ask it to make the connection to the Internet. - Roku HD110 | User Guide - Page 111
you can update an RSS feed every 15 minutes. The syntax is as follows: NetworkTimer "Minutes" "Item to update" NetworkTimer 15 RSS • NetworkTimer: Instructs BrightSign to check your network folder for new content at regular intervals based on the date/time parameter you specify. For example, you can - Roku HD110 | User Guide - Page 112
Specifications BrightSign features Display HD110 X X X X X X X HD110 X HD110 X X X HD210 X X X X X X X HD210 X HD210 X X X HD410 X X X X X X X HD410 X HD410 X X X HD810 X X X X X X X HD810 X HD810 X X X HD1010 HD2000 X X X X X X X X X X X X X HD1010 HD2000 X X X HD1010 - Roku HD110 | User Guide - Page 113
power consumption HD110 X X HD110 HD110 X X X X HD210 X X HD210 HD210 X X X X HD410 X X HD410 HD410 X X X X HD810 X X HD810 X X X X X X X HD810 X X X X HD1010 HD2000 X X X X X HD1010 HD2000 X X X X X X X X X X X X X X HD1010 HD2000 X X X X X X X X X X X 10 - Roku HD110 | User Guide - Page 114
data storage via eeprom USB mass storage device support HD110 X X X X HD110 X X X X HD210 X X X X X HD210 X X X X X HD410 X X X X X X X HD410 X X X X HD810 X X X X X X X X X HD810 X X X X X X HD1010 HD2000 X X X X X X X X X X X X X X X X X X X X X X X HD1010 HD2000 - Roku HD110 | User Guide - Page 115
Supported media types BrightSign supports the following media types: MPEG-2 video files (program streams on the HD2000-VOB/MPG files, or transport streams on the HD110, HD210, HD410, HD810, and HD1010-TS files) These are the same types of files that are found on DVDs. You can create MPEG-2 video - Roku HD110 | User Guide - Page 116
mono files that meet the following parameters: • 48 kHz • 44.1 kHz NOTE: BrightSign has no sample rate conversion. Certain USB speakers only support a sample rate of 48 kHz. When using a USB speaker with this characteristic, BrightSign outputs all audio at this rate regardless of the sample rate it - Roku HD110 | User Guide - Page 117
software you can connect the following devices to a BrightSign: TIP: If you have specific requests for device support, contact [email protected]. We are constantly adding new device support and the ones we pick are customer driven. • Elo Touch Screens • Many brands of USB Keyboards - Roku HD110 | User Guide - Page 118
has tested the following mice with BrightSign: Type Connection Brand Model Ball Wired Belkin F8E841-BLK Optical Wireless Belkin F8E874 Optical Wired Dynex DX-OM20 Optical Wireless Kensington 72216 Optical Wired Logitech M-
-
 1
1 -
 2
2 -
 3
3 -
 4
4 -
 5
5 -
 6
6 -
 7
7 -
8
-
9
-
10
-
11
-
12
-
13
-
14
-
15
-
16
-
17
-
18
-
19
-
20
-
21
-
22
-
23
-
24
-
25
-
26
-
27
-
28
-
29
-
30
-
31
-
32
-
33
-
34
-
35
-
36
-
37
-
38
-
39
-
40
-
41
-
42
-
43
-
44
-
45
-
46
-
47
-
48
-
49
-
50
-
51
-
52
-
53
-
54
-
55
-
56
-
57
-
58
-
59
-
60
-
61
-
62
-
63
-
64
-
65
-
66
-
67
-
68
-
69
-
70
-
71
-
72
-
73
-
74
-
75
-
76
-
77
-
78
-
79
-
80
-
81
-
82
-
83
-
84
-
85
-
86
-
87
-
88
-
89
-
90
-
91
-
92
-
93
-
94
-
95
-
96
-
97
-
98
-
99
-
100
-
101
-
102
-
103
-
104
-
105
-
106
-
107
-
108
-
109
-
110
-
111
-
112
-
113
-
114
-
115
-
116
-
117
-
118
 |
 |
User Guide
HD110, HD210, HD410, HD810, HD1010, and HD2000
MATCHES:
•
BrightSign HD110, HD210, HD410, HD810, HD1010 Software Version: 3.0.1
www.brightsign.biz