Ryobi RLS1351 Operation Manual - Page 11
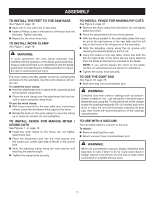
To Install The Feet To The Saw Base - saw blade
 |
View all Ryobi RLS1351 manuals
Add to My Manuals
Save this manual to your list of manuals |
Page 11 highlights
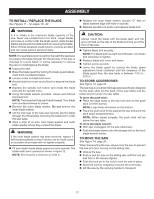
ASSEMBLY TO install the feet to the saw base See Figure 6, page 18. Align hole in foot with hole in saw base. Insert a Phillips screw in the bottom of the foot and into the base. Tighten securely. Repeat for the other three feet. to install WORK CLAMP See Figure 7, page 19. WARNING: In some operations, the work clamp assembly may interfere with the operation of the blade guard assembly. Always make sure there is no interference with the blade guard prior to beginning any cutting operation to reduce the risk of serious personal injury. The work clamp provides greater control by clamping the workpiece to the saw table. Use the work clamp on all nonrip cuts. To install the work clamp: Hold the attachment bolt in place while unscrewing and removing the clamp knob. Place the work clamp over the attachment bolt and se- cure in place using the clamp knob. To use the work clamp: With fence mounted to the saw table (see instructions below), place the workpiece firmly against the fence. Rotate the knob on the work clamp to move the clamp up or down as needed. Do not overtighten. TO INSTALL FENCE for making miter / cross cuts See Figures 7 - 8, page 19. Install the work clamp to the fence. Do not tighten attachment bolt. Place the attachment bolt into the miter groove and the locator pin (under right side of fence) in the anchor hole. Slide the adjusting clamp along the miter groove until reaching the desired angle. Tighten the clamp knob securely. TO INSTALL FENCE for making rip cuts See Figure 9, page 19. Remove the work clamp from the fence. Do not tighten attachment bolt. Place the attachment bolt into the rip groove. With the fence parallel to the saw table, place the loca- tor pin in the right groove of the saw table and the left side of the fence in the left groove of the saw table. Slide the adjusting clamp along the rip groove until reaching the desired distance for the cut. Using the scales on the saw table, check that both the left and right sides of the fence are the same distance from the blade so the fence is squared to the blade. NOTE: If you cannot square the fence to the blade, contact an authorized service center for assistance. Tighten the clamp knob securely. TO use the DUST BAG See Figure 10, page 19. Slide dust bag onto dust exhaust port. WARNING: Collected dust from surface coatings such as polyurethanes, linseed oil, etc., can self-ignite in the dust bag or elsewhere and cause fire. To reduce the risk of fire, always empty the dust bag frequently (10-15 minutes) and never store or leave the tool without totally emptying its dust bag. Also follow the recommendations of the coatings manufacturers. TO USE WITH A VACUUM You can easily attach a vacuum to the saw. To attach: Remove dust bag from saw. Attach vacuum hose to dust exhaust port. WARNING: When not connected to vacuum, always install the dust bag back on saw. Failure to do so could cause dust or foreign objects to be thrown into the face or eyes which could result in possible serious injury. 11
-
 1
1 -
2
-
3
-
4
-
5
-
 6
6 -
 7
7 -
 8
8 -
 9
9 -
 10
10 -
 11
11 -
 12
12 -
 13
13 -
 14
14 -
 15
15 -
 16
16 -
17
-
18
-
19
-
20
-
21
-
22
-
23
-
24
-
25
-
26
-
27
-
28
-
29
-
30
-
31
-
32
-
33
-
34
-
35
-
36
-
37
-
38
-
39
-
40
-
41
-
42
-
43
-
44
-
45
-
46
-
47
-
48
-
49
-
50
-
51
-
52
-
53
-
54
-
55
-
56
 |
 |