Ryobi RLS1351 Operation Manual - Page 13
Operation - laminate saw
 |
View all Ryobi RLS1351 manuals
Add to My Manuals
Save this manual to your list of manuals |
Page 13 highlights
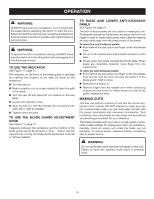
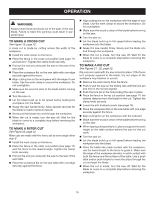
OPERATION WARNING: Do not allow familiarity with tools to make you careless. Remember that a careless fraction of a second is sufficient to inflict serious injury. WARNING: Always wear eye protection with side shields marked to comply with ANSI Z87.1. Failure to do so could result in objects being thrown into your eyes, resulting in possible serious injury. WARNING: Do not use any attachments or accessories not recommended by the manufacturer of this tool. The use of attachments or accessories not recommended can result in serious personal injury. APPLICATIONS This product has been designed only for the purpose listed below: Cutting laminate, engineered, and solid, hardwood floor- ing material WARNING: NEVER make adjustment to any cutting angle while the saw is running and the blade is rotating. Any slip can result in contact with the blade causing serious personal injury. AVOIDING KICKBACK Inspect the work for knots or nails before beginning a cut. Knock out any loose knots with a hammer. Never saw into a loose knot or nail. Always use the fence when rip cutting. This helps prevent twisting the wood in the cut. Always use clean, sharp, and properly set blades. Never make cuts with dull blades. To avoid pinching the blade, support the work properly before beginning a cut. When making a cut, use steady, even pressure. Never force cuts. Do not cut wet or warped lumber. Use extra caution when cutting some prefinished or composition wood products as the anti-kickback pawls may not always be effective. Always guide your workpiece with both hands or with push sticks and/or push blocks. Keep your body in a balanced position to be ready to resist kickback should it occur. Never stand directly in line with the blade. Clean the saw, blade guard, under the throat plate, and any areas where saw dust or scrap workpieces may gather. Use the right type of blade for the cut being made. Always use the riving knife for every operation where it is allowed. The use of this device will greatly reduce the risk of kickback. cutting aids See Figure 15, page 21. Push sticks are devices that may be used for pushing a workpiece through the blade in any rip cut. When ripping narrow stock, always use a push stick or push block so your hands do not come within 3 inches of the saw blade. They can be made in various sizes and shapes from scrap wood and used in a specific project. The stick must be narrower than the workpiece, with a 90˚ notch in one end and shaping for a grip on the other end. A push block has a handle fastened by recessed screws from the underside. Use push blocks for narrow cuts and all non-through cuts. CAUTION: Be sure the screws in a push block are recessed to avoid damaging the saw or workpiece. to use on/off switch See Figure 16, page 21. This saw is equipped with a switch assembly that has a built-in locking feature. This feature is intended to prevent unauthorized and possible hazardous use by children and others. TO TURN YOUR SAW ON: With the switch key inserted into the switch, lift the switch to turn on. TO TURN YOUR SAW OFF: Press the switch down to turn off. TO lock your saw: Press the switch down. Remove the switch key from the switch and store in a safe, secure location. WARNING: ALWAYS remove the switch key when the tool is not in use and keep it in a safe place. In the event of a power failure, turn the switch off and remove the key. This action will prevent the tool from accidentally starting when power returns. 13
-
 1
1 -
2
-
3
-
4
-
5
-
6
-
7
-
 8
8 -
 9
9 -
 10
10 -
 11
11 -
 12
12 -
 13
13 -
 14
14 -
 15
15 -
 16
16 -
 17
17 -
 18
18 -
19
-
20
-
21
-
22
-
23
-
24
-
25
-
26
-
27
-
28
-
29
-
30
-
31
-
32
-
33
-
34
-
35
-
36
-
37
-
38
-
39
-
40
-
41
-
42
-
43
-
44
-
45
-
46
-
47
-
48
-
49
-
50
-
51
-
52
-
53
-
54
-
55
-
56
 |
 |