Ryobi RLS1351 Operation Manual - Page 14
Making Cuts
 |
View all Ryobi RLS1351 manuals
Add to My Manuals
Save this manual to your list of manuals |
Page 14 highlights
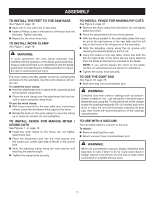
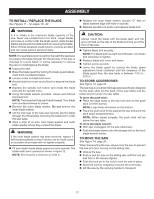
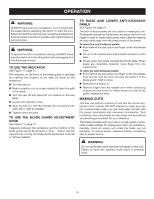
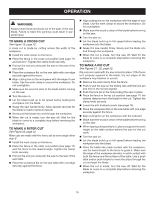
OPERATION WARNING: ALWAYS make sure your workpiece is not in contact with the blade before operating the switch to start the tool. Failure to heed this warning may cause the workpiece to be kicked back toward the operator and result in serious personal injury. Warning: To reduce the risk of accidental starting, Always make sure the switch is in the off position before plugging tool into the power source. To use the indicator See Figure 17, page 21. The indicator on the front of the blade guard is provided for marking the location of the saw cut (kerf) on the workpiece. Turn the saw on. Make a practice cut on scrap material to learn the path of the blade. Turn the saw off and leave the cut material on the saw table. Loosen the indicator screw. Align the saw cut with the indicator by moving the indi- cator left or right as needed. Tighten screw securely. To use the blade guard adjustment knob See Figure 17, page 21. Clearance between the workpiece and the bottom of the blade guard should be between 1/16 in. - 3/32 in. Set the clearance by turning the blade guard adjustment knob left or right as needed. To raise and lower anti-kickback pawls See Figure 18, page 21. The anti-kickback pawls are only used for making rip cuts. These pawls are spring-loaded and very sharp. Use only one finger to raise or lower these pawls while carefully keeping all body parts away from the sharp points of the pawls. To lower the anti-kickback pawls: From behind the saw, place one finger under the release lever. Lift up on the release lever and maintain pressure on the lever. Slowly lower the pawls towards the throat plate. When pawls are completely lowered, move finger from the release lever. To raise the anti-kickback pawls: From behind the saw, place one finger under the release lever and lift until the lever touches the bottom of the blade guard. Hold in place. Push the lock button in. Remove finger from the release lever while continuing to push the lock button in. When hands are clear of the pawls, release the lever. Making CUTS This saw can perform a variety of cuts that are not all mentioned in this manual. DO NOT attempt to make any cuts not covered here unless you are thoroughly familiar with the proper procedures and necessary accessories. Your local library has many books on saw usage and specialized woodworking procedures for your reference. The blade provided with your saw is a high-quality combination blade suitable for ripping and cross cut operations. Carefully check all setups and rotate the blade one full revolution to assure proper clearance before connecting saw to power source. WARNING: Do not use blades rated less than the speed of this tool. Failure to heed this warning could result in personal injury. 14
-
 1
1 -
2
-
3
-
4
-
5
-
6
-
7
-
8
-
 9
9 -
 10
10 -
 11
11 -
 12
12 -
 13
13 -
 14
14 -
 15
15 -
 16
16 -
 17
17 -
 18
18 -
 19
19 -
20
-
21
-
22
-
23
-
24
-
25
-
26
-
27
-
28
-
29
-
30
-
31
-
32
-
33
-
34
-
35
-
36
-
37
-
38
-
39
-
40
-
41
-
42
-
43
-
44
-
45
-
46
-
47
-
48
-
49
-
50
-
51
-
52
-
53
-
54
-
55
-
56
 |
 |