Samsung CLX2160N User Manual (ENGLISH) - Page 33
Original type, Changing the default copy settings, Setting copy timeout
 |
UPC - 635753710205
View all Samsung CLX2160N manuals
Add to My Manuals
Save this manual to your list of manuals |
Page 33 highlights
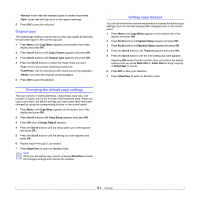
•Normal: works well with standard typed or printed documents. •Dark: works well with light print or faint pencil markings. 5 Press OK to save the selection. Original type The original type setting is used to improve the copy quality by selecting the document type for the current copy job. 1 Press Menu until Copy Menu appears on the bottom line of the display and press OK. 2 Press Scroll buttons until Copy Feature appears and press OK. 3 Press Scroll buttons until Original Type appears and press OK. 4 Press the Scroll buttons to select the image mode you want. •Text: Use for documents containing mostly text. •Text/Photo: Use for documents with mixed text and photographs. •Photo: Use when the originals are photographs. 5 Press OK to save the selection. Changing the default copy settings The copy options, including darkness, original type, copy size, and number of copies, can be set to those most frequently used. When you copy a document, the default settings are used unless they have been changed by using the corresponding buttons on the control panel. 1 Press Menu until Copy Menu appears on the bottom line of the display and press OK. 2 Press Scroll buttons until Copy Setup appears and press OK. 3 Press OK when Change Default appears. 4 Press the Scroll buttons until the setup option you want appears and press OK. 5 Press the Scroll buttons until the setting you want appears and press OK. 6 Repeat steps 4 through 5, as needed. 7 Press Stop/Clear to return to Standby mode. Note While you are setting copy options, pressing Stop/Clear cancels the changed settings and restores the defaults. Setting copy timeout You can set the time the machine waits before it restores the default copy settings, if you do not start copying after changing them on the control panel. 1 Press Menu until Copy Menu appears on the bottom line of the display and press OK. 2 Press Scroll buttons until System Setup appears and press OK. 3 Press Scroll buttons until Machine Setup appears and press OK. 4 Press the Scroll buttons until Timeout appears and press OK. 5 Press the Scroll buttons until the time setting you want appears. Selecting Off means that the machine does not restore the default settings until you press Black Start or Color Start to begin copying, or Stop/Clear to cancel. 6 Press OK to save your selection. 7 Press Stop/Clear to return to Standby mode. 6.2
-
 1
1 -
2
-
3
-
4
-
5
-
6
-
7
-
8
-
9
-
10
-
11
-
12
-
13
-
14
-
15
-
16
-
17
-
18
-
19
-
20
-
21
-
22
-
23
-
24
-
25
-
26
-
27
-
 28
28 -
 29
29 -
 30
30 -
 31
31 -
 32
32 -
 33
33 -
 34
34 -
 35
35 -
 36
36 -
 37
37 -
 38
38 -
39
-
40
-
41
-
42
-
43
-
44
-
45
-
46
-
47
-
48
-
49
-
50
-
51
-
52
-
53
-
54
-
55
-
56
-
57
-
58
-
59
-
60
-
61
-
62
-
63
-
64
-
65
-
66
-
67
-
68
-
69
-
70
-
71
-
72
-
73
-
74
-
75
-
76
-
77
-
78
-
79
-
80
-
81
-
82
-
83
-
84
-
85
-
86
-
87
-
88
-
89
-
90
-
91
-
92
-
93
-
94
-
95
-
96
-
97
-
98
-
99
-
100
-
101
-
102
-
103
-
104
-
105
-
106
-
107
-
108
-
109
-
110
-
111
-
112
-
113
-
114
-
115
-
116
-
117
-
118
 |
 |