Samsung CLX2160N User Manual (ENGLISH) - Page 48
Maintaining the toner cartridge, Toner cartridge storage, Expected cartridge life - streaks
 |
UPC - 635753710205
View all Samsung CLX2160N manuals
Add to My Manuals
Save this manual to your list of manuals |
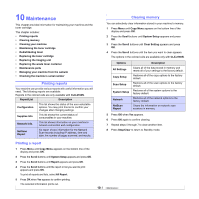
Page 48 highlights
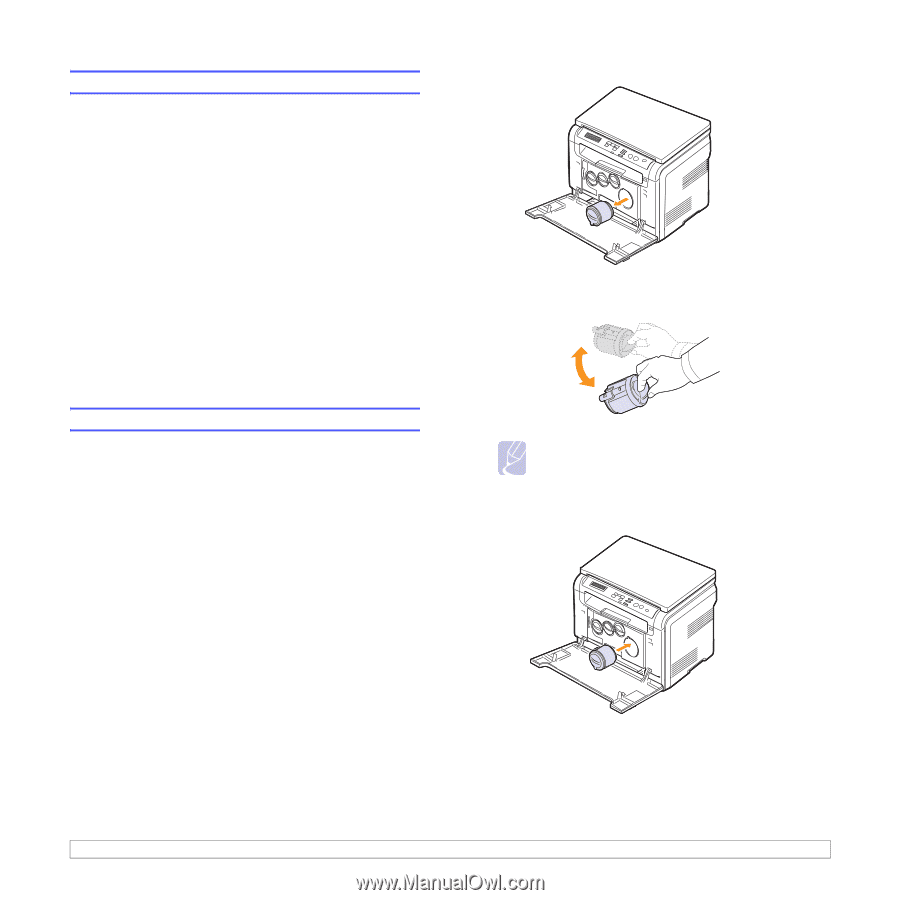
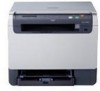
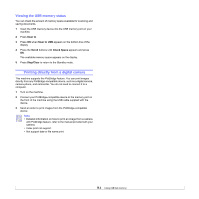
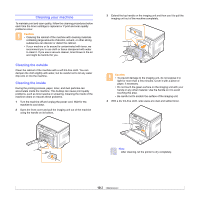
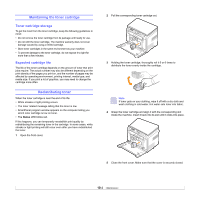
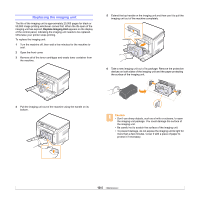
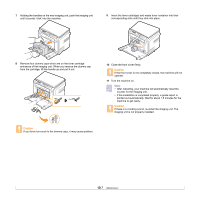
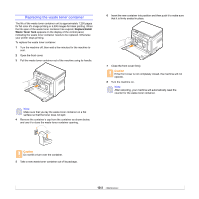
Maintaining the toner cartridge Toner cartridge storage To get the most from the toner cartridge, keep the following guidelines in mind: • Do not remove the toner cartridge from its package until ready for use. • Do not refill the toner cartridge. The machine warranty does not cover damage caused by using a refilled cartridge. • Store toner cartridges in the same environment as your machine. • To prevent damage to the toner cartridge, do not expose it to light for more than a few minutes. Expected cartridge life The life of the toner cartridge depends on the amount of toner that print jobs require. The actual number may also be different depending on the print density of the pages you print on, and the number of pages may be affected by operating environment, printing interval, media type, and media size. If you print a lot of graphics, you may need to change the cartridge more often. Redistributing toner When the toner cartridge is near the end of its life: • White streaks or light printing occurs. • The toner related message telling that the toner is low. • SmartPanel program window appears on the computer telling you which color cartridge is low on toner. • The Status LED blinks red. If this happens, you can temporarily reestablish print quality by redistributing the remaining toner in the cartridge. In some cases, white streaks or light printing will still occur even after you have redistributed the toner. 1 Open the front cover. 2 Pull the corresponding toner cartridge out. 3 Holding the toner cartridge, thoroughly roll it 5 or 6 times to distribute the toner evenly inside the cartridge. Note If toner gets on your clothing, wipe it off with a dry cloth and wash clothing in cold water. Hot water sets toner into fabric. 4 Grasp the toner cartridge and align it with the corresponding slot inside the machine. Insert it back into its slot until it clicks into place. 5 Close the front cover. Make sure that the cover is securely closed. 10.4
-
 1
1 -
2
-
3
-
4
-
5
-
6
-
7
-
8
-
9
-
10
-
11
-
12
-
13
-
14
-
15
-
16
-
17
-
18
-
19
-
20
-
21
-
22
-
23
-
24
-
25
-
26
-
27
-
28
-
29
-
30
-
31
-
32
-
33
-
34
-
35
-
36
-
37
-
38
-
39
-
40
-
41
-
42
-
 43
43 -
 44
44 -
 45
45 -
 46
46 -
 47
47 -
 48
48 -
 49
49 -
 50
50 -
 51
51 -
 52
52 -
 53
53 -
54
-
55
-
56
-
57
-
58
-
59
-
60
-
61
-
62
-
63
-
64
-
65
-
66
-
67
-
68
-
69
-
70
-
71
-
72
-
73
-
74
-
75
-
76
-
77
-
78
-
79
-
80
-
81
-
82
-
83
-
84
-
85
-
86
-
87
-
88
-
89
-
90
-
91
-
92
-
93
-
94
-
95
-
96
-
97
-
98
-
99
-
100
-
101
-
102
-
103
-
104
-
105
-
106
-
107
-
108
-
109
-
110
-
111
-
112
-
113
-
114
-
115
-
116
-
117
-
118
 |
 |