Samsung HT BD8200 User Manual (ENGLISH) - Page 17
Installing batteries in the Remote Control, POPUP MENU, TITLE MENU button - no sound
 |
UPC - 036725616981
View all Samsung HT BD8200 manuals
Add to My Manuals
Save this manual to your list of manuals |
Page 17 highlights
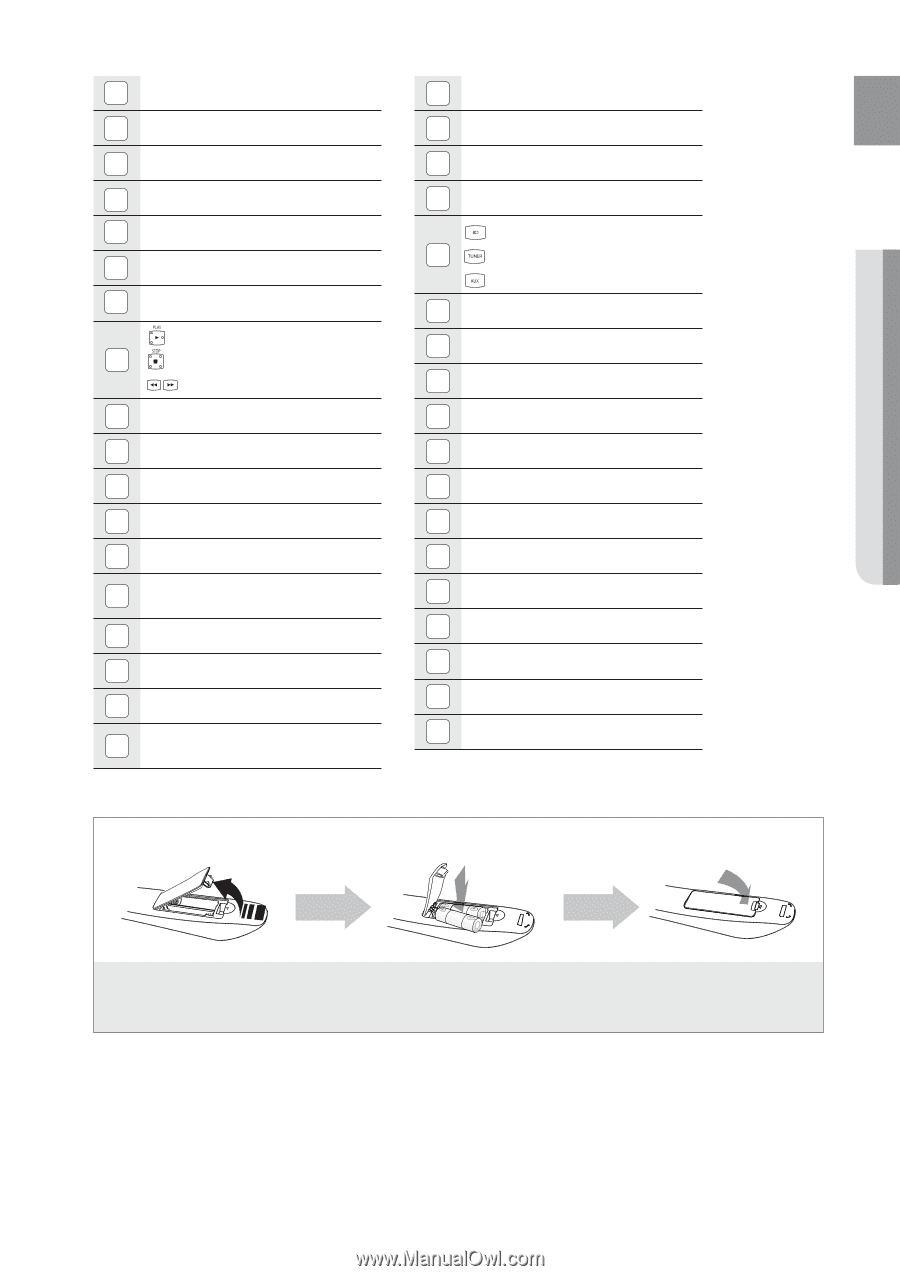
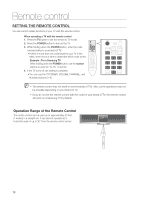
ENG ● REMOTE CONTROL 1 POWER button 2 BD RECEIVER button 3 TV button 4 Number (0~9) buttons 5 AUDIO button 6 STEP button 7 Tuning Preset/CD Skip buttons PLAY button 8 STOP button SEARCH buttons 9 VOLUME button 10 V-SOUND button 11 MENU button 12 Cursor/ENTER button 13 INFO button 14 COLOR Buttons : RED(A), GREEN (B), YELLOW(C), BLUE(D) 15 POPUP MENU, TITLE MENU button 16 TUNER MEMORY button 17 CANCEL button 18 SLEEP button 19 MO/ST button 20 DISC MENU button 21 OPEN/CLOSE button 22 DIMMER button BD button 23 TUNER button AUX button 24 SOURCE button 25 SUBTITLE button 26 PAUSE button 27 MUTE button 28 TUNING/CH button 29 RETURN button 30 EXIT button 31 ZOOM button (JPEG Only) 32 PIP button 33 REPEAT button 34 DSP button 35 REPEAT A-B button 36 SLOW button Installing batteries in the Remote Control 1. Lift the cover at the back of the remote control upward as shown. 2. Install two AAA size batteries. Make sure to match the "+" and "-" ends of the batteries with the diagram inside the compartment. 3. Replace the cover. Assuming typical TV usage, the batteries last for about one year. 17
-
 1
1 -
2
-
3
-
4
-
5
-
6
-
7
-
8
-
9
-
10
-
11
-
 12
12 -
 13
13 -
 14
14 -
 15
15 -
 16
16 -
 17
17 -
 18
18 -
 19
19 -
 20
20 -
 21
21 -
 22
22 -
23
-
24
-
25
-
26
-
27
-
28
-
29
-
30
-
31
-
32
-
33
-
34
-
35
-
36
-
37
-
38
-
39
-
40
-
41
-
42
-
43
-
44
-
45
-
46
-
47
-
48
-
49
-
50
-
51
-
52
-
53
-
54
-
55
-
56
-
57
-
58
-
59
-
60
-
61
-
62
-
63
-
64
-
65
-
66
-
67
-
68
-
69
-
70
-
71
-
72
-
73
-
74
-
75
-
76
-
77
-
78
-
79
-
80
-
81
-
82
-
83
-
84
-
85
-
86
-
87
-
88
-
89
-
90
-
91
-
92
-
93
-
94
-
95
-
96
 |
 |