Samsung HT-TXQ120 Quick Guide (easy Manual) (ver.1.0) (English) - Page 27
Setting the Audio, Setting the AV SYNC, Setting the DRC Dynamic Range Compression - subwoofer
 |
UPC - 036725616660
View all Samsung HT-TXQ120 manuals
Add to My Manuals
Save this manual to your list of manuals |
Page 27 highlights
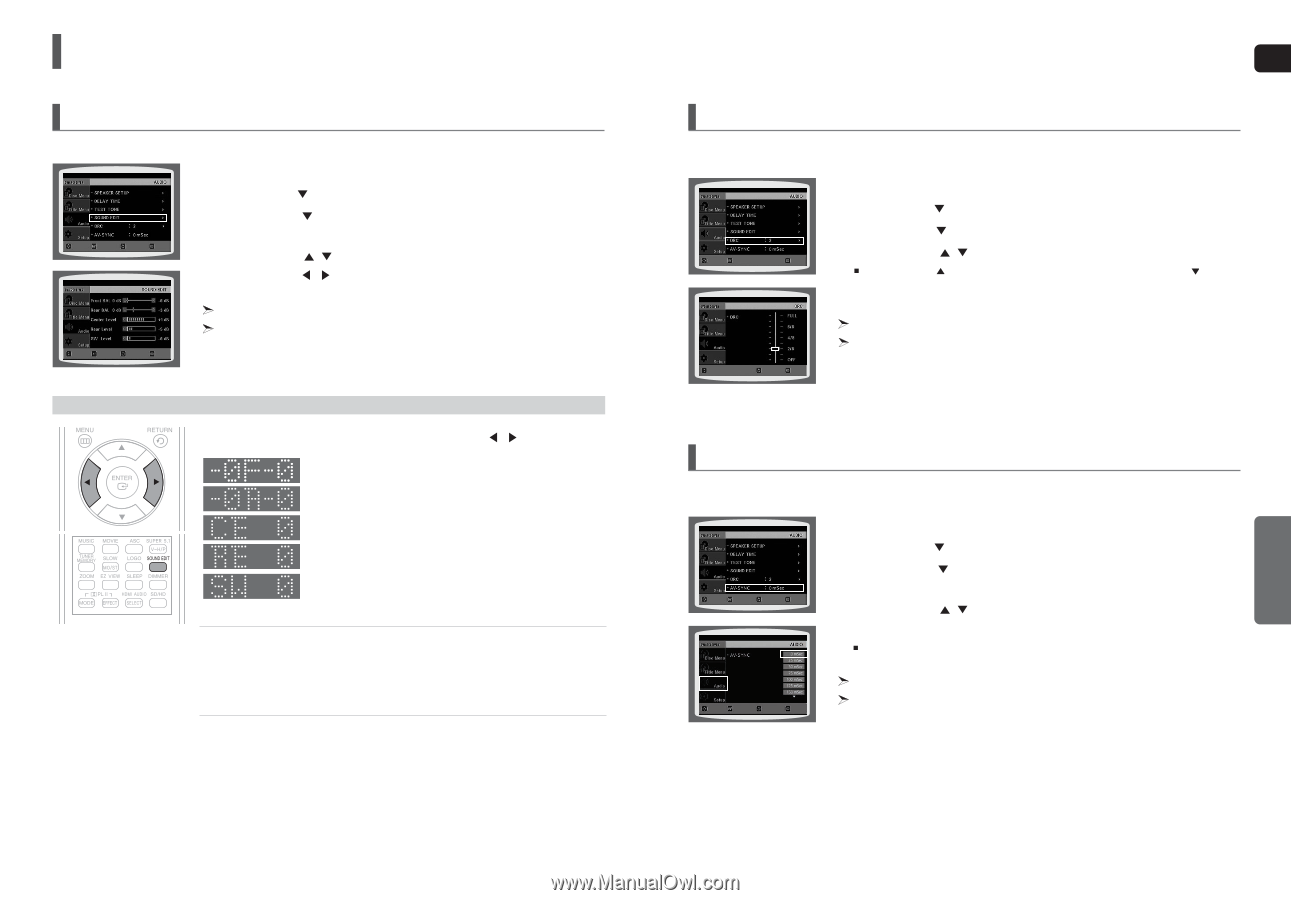
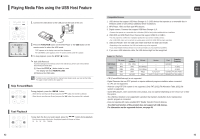
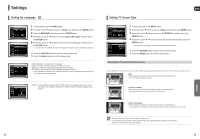
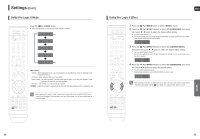
Settings (Con't) Setting the Audio You can adjust the balance and level for each speaker. MOVE ENTER RETURN EXIT 1 In Stop mode, press the MENU button. 2 Press the Cursor button to move to and then press the ENTER button. 3 Press the Cursor button to move to and then press the ENTER button. 4 Press the Cursor , button to select and adjust the desired item. Press the Cursor , button to adjust the settings. MOVE ENTER RETURN EXIT Press the RETURN button to return to the previous level. Press the MENU button to exit the setup screen. Manually Adjusting the Speaker Volume and Balance with the SOUND EDIT Button. Press the SOUND EDIT button and then press the Cursor , button. Adjusting Front/Rear Speaker Balance • You can select between 0, -6, and OFF. • The volume decreases as you move closer to -6. Adjusting Center/Rear/Subwoofer Speaker Level • The volume level can be adjusted in steps from +6dB to -6dB. • The sound gets louder as you move closer to +6dB and quieter as you get closer to -6dB. ENG Setting the DRC (Dynamic Range Compression) This feature balances the range between the loudest and quietest sounds. You can use this function to enjoy Dolby Digital sound when watching movies at low volume at night. MOVE ENTER 1 In Stop mode, press the MENU button. 2 Press the Cursor button to move to and then press the ENTER button. 3 Press the Cursor button to move to and then press the ENTER button. 4 Press the Cursor , button to adjust the DRC. EXIT When the Cursor button is pressed, the effect is greater, and when the Cursor button is pressed, the effect is smaller. CHANGE RETURN EXIT Press the RETURN button to return to the previous level. Press the MENU button to exit the setup screen. SETUP Setting the AV SYNC Video may look slower than the audio if it is connected to a digital TV. If this occurs, adjust the audio delay time to to match the video. MOVE ENTER RETURN EXIT 1 In Stop mode, press the MENU button. 2 Press the Cursor button to move to and then press the ENTER button. 3 Press the Cursor button to move to and then press the ENTER button. 4 Press the Cursor , button to select the AV-SYNC Delay Time and then press the ENTER button. You can set the audio delay time between 0 ms and 300 ms. Set it to the optimal status. MOVE ENTER RETURN EXIT Press the RETURN button to return to the previous level. Press the MENU button to exit the setup screen. 52 53
-
 1
1 -
2
-
3
-
4
-
5
-
6
-
7
-
8
-
9
-
10
-
11
-
12
-
13
-
14
-
15
-
16
-
17
-
18
-
19
-
20
-
21
-
 22
22 -
 23
23 -
 24
24 -
 25
25 -
 26
26 -
 27
27 -
 28
28 -
 29
29 -
 30
30 -
 31
31 -
 32
32 -
33
-
34
-
35
-
36
 |
 |