Samsung SCH-R710 User Manual (user Manual) (ver.f6) (English) - Page 57
Create and Send Picture Messages
 |
View all Samsung SCH-R710 manuals
Add to My Manuals
Save this manual to your list of manuals |
Page 57 highlights
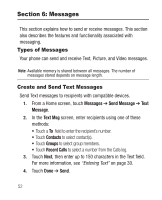
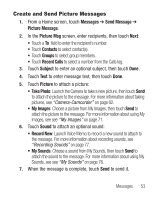
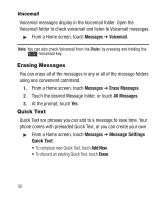
Create and Send Picture Messages 1. From a Home screen, touch Messages ➔ Send Message ➔ Picture Message. 2. In the Picture Msg screen, enter recipients, then touch Next: • Touch a To field to enter the recipient's number. • Touch Contacts to select contact(s). • Touch Groups to select group members. • Touch Recent Calls to select a number from the Calls log. 3. Touch Subject to enter an optional subject, then touch Done. 4. Touch Text to enter message text, then touch Done. 5. Touch Picture to attach a picture: • Take Photo: Launch the Camera to take a new picture, then touch Send to attach the picture to the message. For more information about taking pictures, see "Camera-Camcorder" on page 62. • My Images: Choose a picture from My Images, then touch Send to attach the picture to the message. For more information about using My Images, see see "My Images" on page 71. 6. Touch Sound to attach an optional sound: • Record New: Launch Voice Memo to record a new sound to attach to the message. For more information about recording sounds, see "Recording Sounds" on page 77. • My Sounds: Choose a sound from My Sounds, then touch Send to attach the sound to the message. For more information about using My Sounds, see see "My Sounds" on page 76. 7. When the message is complete, touch Send to send it. Messages 53
-
 1
1 -
2
-
3
-
4
-
5
-
6
-
7
-
8
-
9
-
10
-
11
-
12
-
13
-
14
-
15
-
16
-
17
-
18
-
19
-
20
-
21
-
22
-
23
-
24
-
25
-
26
-
27
-
28
-
29
-
30
-
31
-
32
-
33
-
34
-
35
-
36
-
37
-
38
-
39
-
40
-
41
-
42
-
43
-
44
-
45
-
46
-
47
-
48
-
49
-
50
-
51
-
 52
52 -
 53
53 -
 54
54 -
 55
55 -
 56
56 -
 57
57 -
 58
58 -
 59
59 -
 60
60 -
 61
61 -
 62
62 -
63
-
64
-
65
-
66
-
67
-
68
-
69
-
70
-
71
-
72
-
73
-
74
-
75
-
76
-
77
-
78
-
79
-
80
-
81
-
82
-
83
-
84
-
85
-
86
-
87
-
88
-
89
-
90
-
91
-
92
-
93
-
94
-
95
-
96
-
97
-
98
-
99
-
100
-
101
-
102
-
103
-
104
-
105
-
106
-
107
-
108
-
109
-
110
-
111
-
112
-
113
-
114
-
115
-
116
-
117
-
118
-
119
-
120
-
121
-
122
-
123
-
124
-
125
-
126
-
127
-
128
-
129
-
130
-
131
-
132
-
133
-
134
-
135
-
136
-
137
-
138
-
139
-
140
-
141
-
142
-
143
-
144
-
145
-
146
-
147
-
148
-
149
-
150
 |
 |