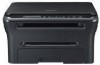
Samsung SCX-4300 User Manual (ENGLISH) - Page 21
Making connections, Turning the machine on, power, receptacle, warming, up please wait - paper jam 2
 |
UPC - 635753611021
View all Samsung SCX-4300 manuals
Add to My Manuals
Save this manual to your list of manuals |
Page 21 highlights
3 Squeeze the paper width guide, as shown and slide it to the stack of paper until it lightly touches the side of the stack. NOTES: • Do not push the paper width guide far enough to cause the materials to warp. • If you do not adjust the paper width guide, it may cause paper jams. NOTE: When using the USB connection, your machine provides two USB modes; Fast and Slow. Fast is the default mode. Some PC users may experience poor USB function in the default mode. If this occurs, select Slow mode to achieve successful results. For details about changing the USB mode, see page 9.7. Turning the machine on 1 Plug one end of the supplied power cord into the power receptacle on the machine and the other end into a properly grounded AC outlet. 2 Press the power switch to turn the machine on. warming up please wait appears on the display indicating that the machine is now on. Making connections 1 Connect a USB cable to the USB connector on your machine. You need to buy a USB 2.0 compliant cable that is not longer than 3 m. To the USB port on your computer 2 Connect the other end of the cable to the USB port on your computer. See your computer User's Guide if you need help. To view your display text in another language, see page 2.6. CAUTION: • The fuser area inside of the rear cover of your machine becomes very hot when in use. Take care not to burn your fingers when you access this area. • Do not disassemble the machine with power on. If you do, you may receive an electric shock. 2.5 Getting started
-
 1
1 -
2
-
3
-
4
-
5
-
6
-
7
-
8
-
9
-
10
-
11
-
12
-
13
-
14
-
15
-
 16
16 -
 17
17 -
 18
18 -
 19
19 -
 20
20 -
 21
21 -
 22
22 -
 23
23 -
 24
24 -
 25
25 -
 26
26 -
27
-
28
-
29
-
30
-
31
-
32
-
33
-
34
-
35
-
36
-
37
-
38
-
39
-
40
-
41
-
42
-
43
-
44
-
45
-
46
-
47
-
48
-
49
-
50
-
51
-
52
-
53
-
54
-
55
-
56
-
57
-
58
-
59
-
60
-
61
-
62
-
63
-
64
-
65
-
66
-
67
-
68
-
69
-
70
-
71
-
72
-
73
-
74
-
75
-
76
-
77
-
78
-
79
-
80
-
81
-
82
-
83
-
84
-
85
-
86
-
87
-
88
-
89
-
90
-
91
-
92
-
93
-
94
-
95
-
96
-
97
 |
 |
