Samsung SRD-1670DC User Manual - Page 13
Remote Control
 |
View all Samsung SRD-1670DC manuals
Add to My Manuals
Save this manual to your list of manuals |
Page 13 highlights
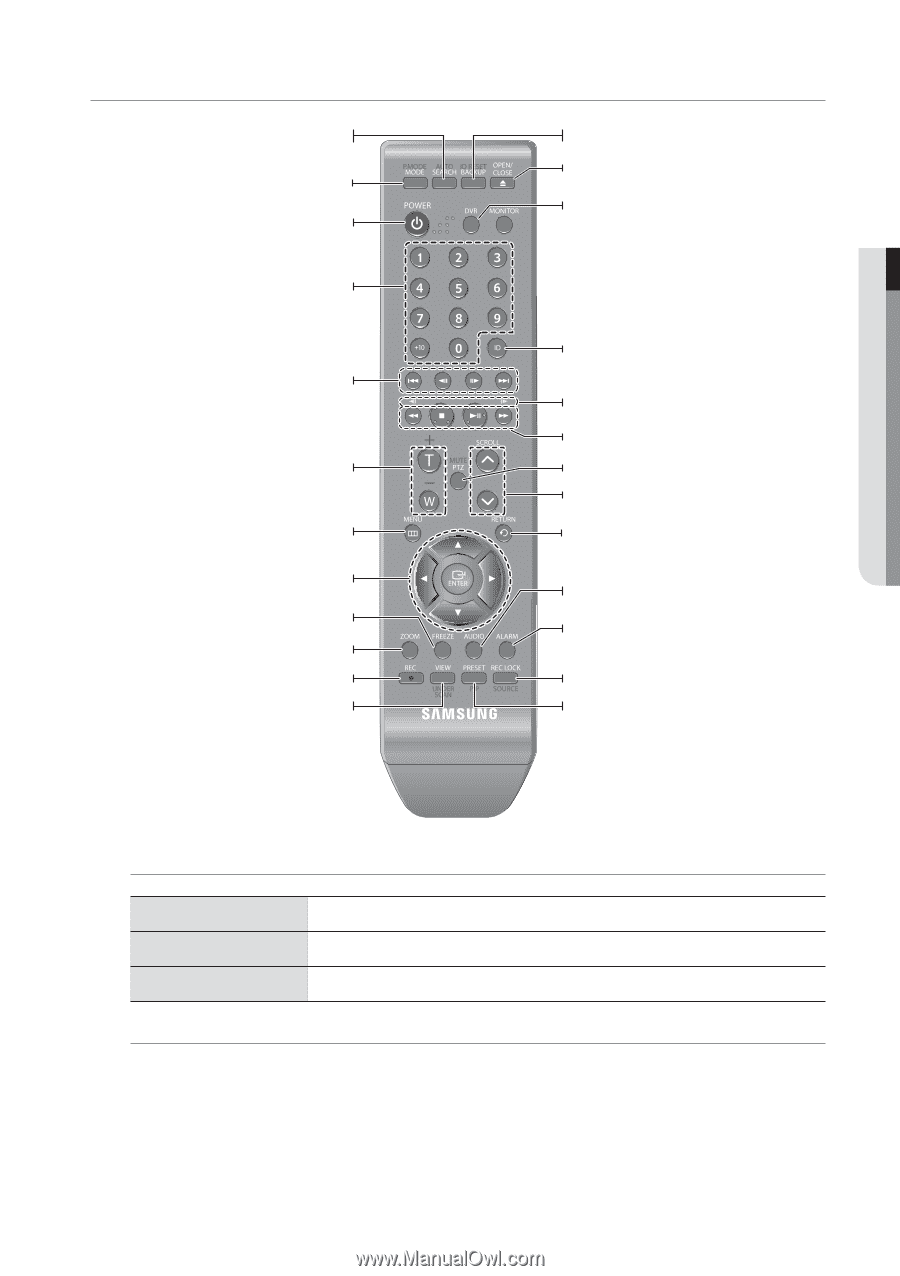
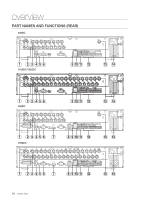
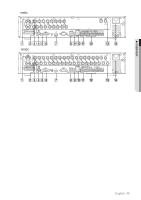
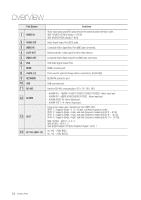
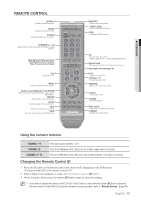
OVERVIEW REMOTE CONTROL SEARCH Displays the search menu. MODE Changes the screen mode. POWER Displays the Exit pop up screen. NUMBER [0~+10] Used as the numeric input keys, or displays a single channel. Skip Backward (by unit time), Slow Rewind, Slow Forward, Skip Forward (by unit time) T/W Zooms in or out. MENU Goes to the system menu screen. Up/Down/Left/Right ENTER Moves the cursor up/down/left/right, and runs the Select Menu. FREEZE Freezes the screen temporarily. ZOOM Runs the digital zoom (x2) function. REC Starts or ends the live recording. VIEW Runs the View function in the PTZ mode. BACKUP Displays the Backup Menu. OPEN/CLOSE Opens or closes the CD tray. DVR Activates the DVR function. ID Sets the ID of the system. Select 2 digits from 0 ~ 9 while pressing the ID Key. Move Frame While paused, moves to the previous/next frame. FR, STOP, PLAY/PAUSE, FF PTZ Displays or ends PTZ. SCROLL ,. Moves the menu scroll. RETURN Returns to the previous screen. AUDIO Turns Audio on/off. ALARM Cancels the Alarm. REC LOCK Selects the recording lock function. PRESET Displays the Preset Setup. Using the numeric buttons CHANNEL 1-9 CHANNEL 10 CHANNEL 11-16 Press each button between 1 to 9. Press the [+10] button first, then press the 0 button again within 3 seconds. Press the [+10] button first, then press any number between 1 to 6 within 3 seconds. Changing the Remote Control ID 1. Press the ID button of the remote control and check the ID displayed on the DVR screen. The factory default ID of the remote control is 00. 2. Enter 2 digits of your selection in order, while pressing the system [ID] button. 3. When ID input is done, press the system [ID] button again to check the setting. M If you want to change the remote control ID to 08: Press 0 and 8 in order while the system [ID] button is pressed. Remote control's ID and DVR's ID should be matched for proper operation. Refer to "Remote Devices". (Page 48) English _13
-
 1
1 -
2
-
3
-
4
-
5
-
6
-
7
-
 8
8 -
 9
9 -
 10
10 -
 11
11 -
 12
12 -
 13
13 -
 14
14 -
 15
15 -
 16
16 -
 17
17 -
 18
18 -
19
-
20
-
21
-
22
-
23
-
24
-
25
-
26
-
27
-
28
-
29
-
30
-
31
-
32
-
33
-
34
-
35
-
36
-
37
-
38
-
39
-
40
-
41
-
42
-
43
-
44
-
45
-
46
-
47
-
48
-
49
-
50
-
51
-
52
-
53
-
54
-
55
-
56
-
57
-
58
-
59
-
60
-
61
-
62
-
63
-
64
-
65
-
66
-
67
-
68
-
69
-
70
-
71
-
72
-
73
-
74
-
75
-
76
-
77
-
78
-
79
-
80
-
81
-
82
-
83
-
84
-
85
-
86
-
87
-
88
-
89
-
90
-
91
-
92
-
93
-
94
-
95
-
96
-
97
-
98
-
99
-
100
-
101
-
102
-
103
-
104
-
105
-
106
-
107
-
108
-
109
-
110
-
111
-
112
-
113
-
114
-
115
-
116
-
117
-
118
-
119
-
120
-
121
-
122
-
123
-
124
-
125
-
126
-
127
-
128
 |
 |