Samsung U32D970Q User Manual
Samsung U32D970Q Manual
 |
View all Samsung U32D970Q manuals
Add to My Manuals
Save this manual to your list of manuals |
Samsung U32D970Q manual content summary:
- Samsung U32D970Q | User Manual - Page 1
UHD Monitor User Manual U32D970 The color and the appearance may differ depending on the product, and the specifications are subject to change without prior notice to improve the performance. BN46-00430A-07 - Samsung U32D970Q | User Manual - Page 2
? 24 Supported calibrators 24 Connecting to Headphones or Speakers 36 Connecting the Power 36 Tidying Up the Connected Cables 37 Connecting the Product to a PC as a USB HUB 38 Connecting a PC to the Product 38 Utilizing the Product as a USB HUB 39 Driver - Samsung U32D970Q | User Manual - Page 3
Table of contents Response Time 48 Configuring the Response Time 48 View Calibration Values 49 Viewing the Software 81 Removing the Software 81 Troubleshooting Guide Requirements Before Contacting Samsung Customer Service Center 82 Testing the Product 82 Checking the Resolution and - Samsung U32D970Q | User Manual - Page 4
Table of contents Specifications General 87 PowerSaver 90 Standard Signal Mode Table 91 Appendix Contact SAMSUNG WORLD WIDE 93 Responsibility for the Pay Service(Cost to Customers) 102 Not a product defect 102 A Product damage caused by customer's fault 102 Others 102 Correct - Samsung U32D970Q | User Manual - Page 5
manual. Use or reproduction of this manual in parts or entirety without the authorization of Samsung Electronics is prohibited. Microsoft, Windows are registered trademarks of Microsoft Corporation. VESA to read this user manual). -- (b) you bring the unit to a repair center and there is no defect - Samsung U32D970Q | User Manual - Page 6
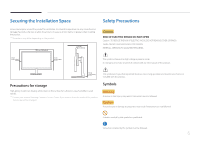
ultrasonic wave humidifier is used nearby. ――Contact your nearest Samsung Customer Service Center if you want to clean the inside of the product (Service fee will be charged.) Symbols Warning A serious or fatal injury may result if instructions are not followed. Caution Personal injury or damage to - Samsung U32D970Q | User Manual - Page 7
Wet a soft and dry cloth in water and wring thoroughly to clean the exterior of the product. 5 Connect the power cord to the product when cleaning is finished. 6 Power on the product and computer. Electricity and Safety ――The following images are for reference only. Real-life situations may differ - Samsung U32D970Q | User Manual - Page 8
by an electric shock. Only use the power cord provided with your product by Samsung. Do not use the power cord with other products. ! •• A fire or electric shock may result. Keep the power socket where the power cord is connected unobstructed. •• The power cord must be disconnected to cut off - Samsung U32D970Q | User Manual - Page 9
or a significant presence of moisture, or a place where the product will operate continuously for an SAMSUNG extended period of time) may seriously affect its performance. ! •• Be sure to consult Samsung Customer Service Center if you want to install the product at such a place. 9 - Samsung U32D970Q | User Manual - Page 10
or modify the product yourself. •• A fire or electric shock may result. •• Contact Samsung Customer Service Center for repairs. ! Before moving the product, turn off the power switch and disconnect the power cable and all other connected cables. •• Damage to the cord may result in a fire or electric - Samsung U32D970Q | User Manual - Page 11
product. Then contact Samsung Customer Service Center. •• Product failure, an electric shock or fire may result. ! -_- ! ! ! Leaving the screen fixed on a stationary image for an extended period of time may cause afterimage burn-in or defective pixels. •• Activate power-saving mode or a moving - Samsung U32D970Q | User Manual - Page 12
be relieved. Correct posture to use the product ! Do not touch the screen when the product has been turned on for an extended period of time as it will become hot. Store small accessories out of the reach of children. ! Use the product in the correct posture as follows: Exercise caution - Samsung U32D970Q | User Manual - Page 13
depending on the country. Quick Setup Guide Warranty card (Not available in some locations) User manual DP cable (P.35) Regulatory guide Mini DP to DP gender (Optional) Natural Color Expert Data Sheet HDMI cable (P.35) USB 3.0 cable (P.38) Power cable (P.36) Wall-mount bracket Cleaning - Samsung U32D970Q | User Manual - Page 14
the input source (DVI, HDMI, DisplayPort1, DisplayPort2). When PIP/PBP is set to On and the Function Key Guide is displayed, press to set the Source for PIP/PBP. ――If you power on the product or change the input source by pressing the button, a message that shows the changed input source - Samsung U32D970Q | User Manual - Page 15
to "PowerSaver(P.90)" in the product specifications. ――To reduce power consumption, it is best to remove the power cable when not using the product for an extended period of time. When a control button on the product is pressed, the Function Key Guide will be displayed before the onscreen menu opens - Samsung U32D970Q | User Manual - Page 16
without notice to improve quality. ――To maximize the picture quality, a graphics card that supports the UHD (3840x2160) resolution is recommended. Port ON Description Connect the power cord for your monitor to the POWER IN port on the back of the product. Connects to a source device via a DVI - Samsung U32D970Q | User Manual - Page 17
Installation ――The color and shape of parts may differ from what is shown. Specifications are subject to change without notice to improve quality. Caution Take extra care to ensure your hand does not get stuck in the rotating area or the height adjustment area. This could injure your hand. Do not - Samsung U32D970Q | User Manual - Page 18
differ from what is shown. Specifications are subject to change without notice to improve quality. Before Installation ――Power the product off and remove the power cable from the power socket. 1 Place a protective cloth or cushion on a flat surface. 4 Next, place the product with the face down - Samsung U32D970Q | User Manual - Page 19
the specifications. ――Do not use screws that do not comply with the VESA standards. Do not attach the wall-mount kit or desktop stand using excessive force. The product may get damaged or fall and cause personal injury. Samsung shall not be held liable for any damage or injury caused by using - Samsung U32D970Q | User Manual - Page 20
Adjusting the Product Tilt and Height Rotating the Monitor Screen ――The color and shape of parts may differ from what is shown. Specifications are subject to change without notice to improve quality. You can rotate your monitor as shown below. 1 2 3 -1.5˚(-1.5˚,+1.5˚) ~ 91.5˚(-1.5˚,+1.5˚) - - Samsung U32D970Q | User Manual - Page 21
you to use the product securely even in public places. ――The locking device shape and locking method depend on the manufacturer. Refer to the user guide provided with your anti-theft locking device for details. To lock an anti-theft locking device: 1 Fix the cable of your anti-theft locking device - Samsung U32D970Q | User Manual - Page 22
manual CD provided with the product into the CD-ROM drive. 2 Follow the instructions 7 (32 bit or 64 bit) and Windows 8 (32 bit or 64 bit), Windows 8.1 (32 bit function, update the graphics card driver to the latest version. 5 Windows and L keys at the same time to lock the Windows operating system. - Samsung U32D970Q | User Manual - Page 23
Rotating the monitor When rotating the monitor, the rotation angle is displayed on the monitor screen. Caution 1 If the MagicRotation Auto software is not installed on the monitor, contents on the screen cannot be rotated. The OSD can still rotate by 90° and display properly. 2 Once rotated, the - Samsung U32D970Q | User Manual - Page 24
Windows 8.1 32 & 64 Windows Vista 32 & 64 Windows 7 32 & 64 Windows 8 32 & 64 Windows 8.1 32 & 64 Windows Vista 32 & 64 Windows 7 32 & 64 Windows 8 32 & 64 Windows 8.1 32 & 64 Windows Vista 32 & 64 Windows 7 32 & 64 Windows 8 32 & 64 Windows 8.1 32 & 64 Supported operating systems (Mac) Mac OS - Samsung U32D970Q | User Manual - Page 25
Samsung Electronics to display optimized colors customized by users. ――This product supports can change according to operating time. NCE Program Installation/Uninstallation the main screen, go to CD-ROM AutoPlay Manual NCE folder. Next, install using the Natural Color board and network conditions. 25 - Samsung U32D970Q | User Manual - Page 26
the product to a USB port on the PC using the USB cable. 2 Connect the calibrator to a USB port on the product. ――Install the driver (which is usually provided with a calibration program) provided by the calibrator manufacturer first before connecting the calibrator. 3 The connected calibrator will - Samsung U32D970Q | User Manual - Page 27
Features of the NCE Program Layout and Menu Items on the NCE Home Screen Select Profile List to view information on each profile. Select the Start button to perform calibration. 1 5 3 4 1 Select a tab to perform the desired functions. 2 If the Profile List does not contain a profile, select - Samsung U32D970Q | User Manual - Page 28
Layout and Menu Items on the Uniformity Screen Perform calibration for Uniformity to optimize the display uniformity of the monitor. 1 2 3 Overview and Functions of the Verification Screen This screen allows you to verify the difference between the current monitor picture quality and the target - Samsung U32D970Q | User Manual - Page 29
Starting Calibration If the Profile List does not contain a profile, select Default and then start calibration. If the Profile List contains profiles, select a profile to edit or calibrate the profile. Go to "Home screen - System settings - Profile Mode." Basic mode 1 Select Default or a profile - Samsung U32D970Q | User Manual - Page 30
4 Configure the Black Level setting. If you do not adjust the black level setting by moving the slider button, the minimum brightness will automatically be applied. 6 Configure the R/G/B Gamma settings. If you configure LUT, the gamma curve of sRGB will be applied. •• If Linear Gray is selected, - Samsung U32D970Q | User Manual - Page 31
the connected calibrator, then click Next. •• Attach the calibrator to the indicated spot on the screen, then click Next. ――Set the screensaver time to at least 30 minutes before starting measurement. ――The calibration process will be performed in full screen. To cancel a calibration that is in - Samsung U32D970Q | User Manual - Page 32
the connected calibrator, then click Next. •• Attach the calibrator to the indicated spot on the screen, then click Next. ――Set the screensaver time to at least 30 minutes before starting measurement. ――The calibration process will be performed in full screen. To cancel a calibration that is in - Samsung U32D970Q | User Manual - Page 33
3 After calibration, you can compare the screens before and after the calibration using the After / Before buttons. Click Save to save the calibration results to Calibration on the monitor. 33 - Samsung U32D970Q | User Manual - Page 34
――Before connecting a source device, read the user manual provided with it. The number and locations of power cable during connection may damage the product. ――Check the types of ports at the back of the product you want to connect. ――To maximize the picture quality, a graphics card that supports - Samsung U32D970Q | User Manual - Page 35
power cable. HDMI IN DP IN 1, DP IN 2 1 Connect the HDMI cable to the HDMI IN port on the back of the product and the HDMI port on the PC. 2 Press to change the input source to HDMI. ――If audio is supported the cable type. ――The product does not support UHD resolution when an HDMI-DVI cable is - Samsung U32D970Q | User Manual - Page 36
exterior may differ depending on the product. To use the product, connect the power cable to a power outlet and the POWER IN port on the product. AUDIO OUT POWER IN ON 1 Connect an audio output device such as headphones or speakers to AUDIO OUT on the product. ――If the stereo cable is connected - Samsung U32D970Q | User Manual - Page 37
Tidying Up the Connected Cables 1 Remove the COVER-CABLE by sliding it down with both hands 4 in the direction indicated by the arrow. 2 Insert and fix the cables in the slot. 5 Hold the bottom of the stand neck securely with your left hand and use the thumb of your right hand to slide up - Samsung U32D970Q | User Manual - Page 38
the product to a PC. However, to take full advantage of the USB 3.0 function, connect a USB 3.0 cable between the PC and the product. Ensure the PC supports USB 3.0. 38 - Samsung U32D970Q | User Manual - Page 39
multiple source devices to the USB ports on the product at the same time without connecting them to a PC. If multiple source devices are connected ――An external mass-storage HDD requires an external power supply. Be sure to connect it to a power source. ――High-speed charging is possible using the - Samsung U32D970Q | User Manual - Page 40
contained on the CD supplied with the product. ――If the file provided is faulty, visit the Samsung homepage (http://www.samsung.com/) and download the file. 1 Insert the user manual CD provided with the product into the CD-ROM drive. 2 Click "Windows Driver". 3 Follow the instructions given on the - Samsung U32D970Q | User Manual - Page 41
Picture Color Mode Brightness Contrast Sharpness Color Dual Color Mode Response Time Custom 100 75 60 ▶ ▶ Faster Choose a color mode 1 Press any button on the front of the product to display the Function Key Guide. Next, press corresponding menu screen. to display the 2 Press 3 Press to move - Samsung U32D970Q | User Manual - Page 42
any button on the front of the product to display the Function Key Guide. Next, press corresponding menu screen. to display the 2 Press to move •• Movie: Select this mode when the surroundings are dark. This will save power and reduce eye fatigue. •• Custom: Select this mode when you want to - Samsung U32D970Q | User Manual - Page 43
Contrast Sharpness Color Dual Color Mode Response Time Custom 100 75 60 ▶ ▶ Faster Adjust the brightness level. Values closer to 100 mean a brighter screen. Configuring Brightness 1 Press any button on the front of the product to display the Function Key Guide - Samsung U32D970Q | User Manual - Page 44
Contrast Sharpness Color Dual Color Mode Response Time Custom 100 75 60 ▶ ▶ Faster Adjust the contrast level. Values closer to 100 mean a bigger light/ dark contrast. Configuring Contrast 1 Press any button on the front of the product to display the Function Key Guide - Samsung U32D970Q | User Manual - Page 45
Contrast Sharpness Color Dual Color Mode Response Time Custom 100 75 60 ▶ ▶ Faster Adjust the sharpness of the picture. Values closer to 100 mean a sharper image. Configuring Sharpness 1 Press any button on the front of the product to display the Function Key Guide - Samsung U32D970Q | User Manual - Page 46
Picture Color Mode Brightness Contrast Sharpness Color Dual Color Mode Response Time Custom 100 75 60 ▶ ▶ Faster Configure color settings. Configuring Color 1 Press any button on the front of the product to display the Function Key Guide - Samsung U32D970Q | User Manual - Page 47
screens. Picture Color Mode Brightness Contrast Sharpness Color Dual Color Mode Response Time Custom 100 75 60 ▶ ▶ Faster Split the screen and Press any button on the front of the product to display the Function Key Guide. Next, press corresponding menu screen. to display the 2 Press to move - Samsung U32D970Q | User Manual - Page 48
any button on the front of the product to display the Function Key Guide. Next, press corresponding menu screen. to display the 2 Press to move to Picture and press on the product. 3 Press to move to Response Time and press on the product. •• Standard / Faster / Fastest 4 Press to move to - Samsung U32D970Q | User Manual - Page 49
Sharpness Color Dual Color Mode Response Time View Calibration Values HDMI Black front of the product to display the Function Key Guide. Next, press corresponding menu screen. to display green, red and blue. ――These options can be manually customized using the Natural Color Expert program. 6 Press - Samsung U32D970Q | User Manual - Page 50
available in HDMI mode. Picture Sharpness Color Dual Color Mode Response Time View Calibration Values HDMI Black Level Reset Color Mode Normal Low Press any button on the front of the product to display the Function Key Guide. Next, press corresponding menu screen. to display the 2 Press to move - Samsung U32D970Q | User Manual - Page 51
Time View Calibration Values HDMI Black Level Reset Color Mode 60 ▶ ▶ Faster ▶ Normal ▶ Reset the current color mode to its default settings. Configuring Reset Color Mode 1 Press any button on the front of the product to display the Function Key Guide settings. Response Time View Calibration - Samsung U32D970Q | User Manual - Page 52
와이드 picture displayed on Wide 3 screen. 3 ▶ Changing the Image Size 1 Press any button on the front of the product to display the Function Key Guide. Next, press corresponding menu screen. to display the 2 Press to move to Screen and press on the product. 3 Press to move to Image Size - Samsung U32D970Q | User Manual - Page 53
when the following conditions are satisfied. The function may not be supported depending on the ports provided with the product. ――A digital output 576p, 720p, or 1080p and monitor can display normally (Not every model can support all of these signals.). ――This can only be set when the external input - Samsung U32D970Q | User Manual - Page 54
on the screen to the left or right. Configuring H-Position & V-Position 1 Press any button on the front of the product to display the Function Key Guide. Next, press corresponding menu screen. to display the 2 Press to move to Screen and press on the product. 3 Press to move to H-Position or - Samsung U32D970Q | User Manual - Page 55
the main screen at the same time the another source device is displayed click Detect on the PC. (Instructions are based on Windows 7.) If picture quality, a graphics card that supports the following resolutions is recommended: ―― manually change the resolution to the optimum resolution using the - Samsung U32D970Q | User Manual - Page 56
on the model. Enable or disable the PIP/PBP Mode function. 1 Press any button on the front of the product to display the Function Key Guide. Next, press corresponding menu screen. to display the 2 Press to move to Screen and press on the product. 3 Press to move to PIP/PBP and - Samsung U32D970Q | User Manual - Page 57
any button on the front of the product to display the Function Key Guide. Next, press corresponding menu screen. to display the 2 Press to •• : Split the screen into four parts to enable PBP mode. PBP mode supports a maximum of four input sources and features an optimal resolution of 1920 x 1080 - Samsung U32D970Q | User Manual - Page 58
. Select the position of the sub-screen from the available options. 1 Press any button on the front of the product to display the Function Key Guide. Next, press corresponding menu screen. to display the 2 Press to move to Screen and press on the product. 3 Press to move to PIP/PBP and - Samsung U32D970Q | User Manual - Page 59
model. Set which screen you want to hear the sound for. 1 Press any button on the front of the product to display the Function Key Guide. Next, press corresponding menu screen. to display the 2 Press to move to Screen and press on the product. 3 Press to move to PIP/PBP and - Samsung U32D970Q | User Manual - Page 60
(available in PBP mode(Size )) 스P크IP/린PBP P화IP면/P크BP기Mode S수ize평 위치 P수os직iti위on치 S동ou시n화d 면So모u드rce Source Image Size Contrast&Color 와이O드n 3 3 ▶ Set which screen you want to hear the sound for. • • / (available in PBP mode(Size )) 스P크IP/린PBP P화IP면/P크BP기Mode S수ize평 위치 P수os직iti위on치 S동ou시n화d 면So - Samsung U32D970Q | User Manual - Page 61
differ depending on the model. Select the source for each screen. 1 Press any button on the front of the product to display the Function Key Guide. Next, press corresponding menu screen. to display the 2 Press to move to Screen and press on the product. 3 Press to move to PIP/PBP and - Samsung U32D970Q | User Manual - Page 62
source for the device displayed on each of the divided screens. 1 Press any button on the front of the product to display the Function Key Guide. Next, press corresponding menu screen. to display the 2 Press to move to Screen and press on the product. 3 Press to move to PIP/PBP and - Samsung U32D970Q | User Manual - Page 63
sources for the devices displayed on the main and sub screens. 1 Press any button on the front of the product to display the Function Key Guide. Next, press corresponding menu screen. to display the 2 Press to move to Screen and press on the product. 3 Press to move to PIP/PBP and - Samsung U32D970Q | User Manual - Page 64
Press any button on the front of the product to display the Function Key Guide. Next, press corresponding menu screen. to display the 2 Press to move to , 720p, or 1080p and monitor can display normally (Not every model can support all of these signals.). -- This can only be set when the external - Samsung U32D970Q | User Manual - Page 65
Press any button on the front of the product to display the Function Key Guide. Next, press corresponding menu screen. to display the 2 Press to move to , 720p, or 1080p and monitor can display normally (Not every model can support all of these signals.). -- This can only be set when the external - Samsung U32D970Q | User Manual - Page 66
Contrast and Color(Red, Green and Blue)for the sub screen. 1 Press any button on the front of the product to display the Function Key Guide. Next, press corresponding menu screen. to display the 2 Press to move to Screen and press on the product. 3 Press to move to PIP/PBP and - Samsung U32D970Q | User Manual - Page 67
the Contrast and Color(Red, Green and Blue)for each screen. 1 Press any button on the front of the product to display the Function Key Guide. Next, press corresponding menu screen. to display the 2 Press to move to Screen and press on the product. 3 Press to move to PIP/PBP and - Samsung U32D970Q | User Manual - Page 68
not be applied to other functions on your PC. Options Language Display Time Set the menu language. Deutsch English Español Français Italiano Press any button on the front of the product to display the Function Key Guide. Next, press corresponding menu screen. to display the 2 Press to move - Samsung U32D970Q | User Manual - Page 69
how long the menu window will remain on screen for when it is not in use. Configuring Display Time 1 Press any button on the front of the product to display the Function Key Guide. Next, press corresponding menu screen. to display the 2 Press to move to Options and press on the product - Samsung U32D970Q | User Manual - Page 70
panel. Settings Eco Saving USB Super Charging PC/AV Mode DisplayPort Ver. Source Detection Key Repeat Time Off Timer Off 해제 Minimum ▶ Maximum ▶ ▶ Auto Acceleration ▶ Adjust the power consumption of the product to save energy. -- The displayed image may differ depending on the model - Samsung U32D970Q | User Manual - Page 71
Mode DisplayPort Ver. Source Detection Key Repeat Time Off Timer Off ▶ ▶ ▶ Auto Acceleration connected devices. ――To properly charge USB devices in power-saving mode, set USB Super Charging to On of the product to display the Function Key Guide. Next, press corresponding menu screen. to display - Samsung U32D970Q | User Manual - Page 72
. Source Detection Key Repeat Time Off Timer Off ▶ ▶ ▶ Auto DisplayPort1 해제 source. ▶ 자동PC 가속반복PC ▶ ――Supplied for the wide models only such as 16:9 or or DisplayPort2) is in power saving mode or is displaying the product to display the Function Key Guide. Next, press corresponding menu screen. - Samsung U32D970Q | User Manual - Page 73
Saving USB Super Charging PC/AV Mode DisplayPort Ver. Source Detection Key Repeat Time Off Timer Off ▶ ▶ ▶ Auto Acceleration ▶ Select your Displayport. Displayport 1.1 supports HBR 1, while 1.2 supports HBR 2. 설D정isplayPort Ver. D에is코pl세ay이P빙ort1 DPCis/pAlVay모Po드rt2 1.1 해제 1.2 최소 최대 Select - Samsung U32D970Q | User Manual - Page 74
Mode DisplayPort Ver. Source Detection Key Repeat Time Off Timer Reset All Auto Manual Decide how input sources will be detected . ▶ ▶ ▶ Configuring Source Detection 1 Press any button on the front of the product to display the Function Key Guide - Samsung U32D970Q | User Manual - Page 75
sec 자동 No Repeat ▶ Configure the response rate of a button when the button is pressed. -- The displayed image may differ depending on the model. Configuring Key Repeat Time 1 Press any button on the front of the product to display the Function Key Guide. Next, press corresponding menu screen - Samsung U32D970Q | User Manual - Page 76
Mode DisplayPort Ver. Source Detection Key Repeat Time Off Timer Reset All ▶ ▶ ▶ front of the product to display the Function Key Guide. Next, press corresponding menu screen. to display the does not power off automatically. •• On: Activate the off timer so that the product powers off automatically - Samsung U32D970Q | User Manual - Page 77
to automatically turn off after a certain time period. -- The displayed image may front of the product to display the Function Key Guide. Next, press corresponding menu screen. to display the 4 hours after the product powers on. This is done in accordance with power supply regulations. If you do not - Samsung U32D970Q | User Manual - Page 78
USB Super Charging PC/AV Mode DisplayPort Ver. Source Detection Key Repeat Time Off Timer Reset All ▶ ▶ ▶ Auto Acceleration ▶ Return all 1 Press any button on the front of the product to display the Function Key Guide. Next, press corresponding menu screen. to display the 2 Press to move to - Samsung U32D970Q | User Manual - Page 79
current input source, frequency and resolution. Displaying Information 1 Press any button on the front of the product to display the Function Key Guide. Next, press to display the corresponding menu screen. 2 Press appear. to move to Information. The current input source, frequency and resolution - Samsung U32D970Q | User Manual - Page 80
to / (PBP Mode). 1 Press any button on the front of the product (when no menu screen is displayed) to display the Function Key Guide. Next, press . 2 Press the button to alternate between the Brightness and Contrast settings. 3 Adjust the Brightness, Contrast using the buttons. -- The displayed - Samsung U32D970Q | User Manual - Page 81
CD-ROM. 3 When the Installation Wizard appears, click Next. 4 Follow the instructions given on the screen to proceed with installation. ――The software may not work icon does not appear, press the F5 key. Restrictions and Problems with the Installation (Easy Setting Box) The Easy Setting Box - Samsung U32D970Q | User Manual - Page 82
Chapter 11 Troubleshooting Guide Requirements Before Contacting Samsung Customer Service Center Before calling Samsung Customer Service Center, test your product as follows. If the problem persists, contact Samsung Customer Service Center. If the screen remains blank, check the PC system, video - Samsung U32D970Q | User Manual - Page 83
by the PC or graphics card. To resolve the problem, adjust the screen size in the HDMI or DVI adjust the screen size, update the graphics card driver to the latest version. (Please contact the graphics adjust the screen settings.) Screen issue Issues The power LED is off. The screen will not switch - Samsung U32D970Q | User Manual - Page 84
White does not really look white. There is no image on the screen and the power LED blinks every 0.5 to 1 second. Text is blurry. Remove any accessories (video settings, referring to Standard Signal Mode Table (P.91) in this manual and the Information menu on the product. Adjust Brightness and - Samsung U32D970Q | User Manual - Page 85
device. Connect the device using an HDMI cable or a DP cable. Solutions If a beeping sound is heard when your PC is booting, have your PC serviced. Solutions The USB data transfer feature is not available when the USB Super Charging feature is set to On. To use the USB data transfer - Samsung U32D970Q | User Manual - Page 86
manual for your PC or graphics card for further instructions on adjustment. Q & A Question How can I change the frequency? How can I change the resolution? How do I set power adjust the resolution. •• Windows Vista: Set power-saving mode in Control Panel Appearance and Personalization Personalize - Samsung U32D970Q | User Manual - Page 87
area H V - Dimensions (W x H x D) D General Model Name Panel Size Display area Pixel Pitch Dimensions (W x H x D) / Weight Without Stand With Stand VESA Mounting Interface H W U32D970 32 Class (31.5 Inches / 80 cm) 697.92 mm (H) x 392.58 mm (V) 27.5 Inches (H) x 15.5 Inches (V) 0.18175 mm - Samsung U32D970Q | User Manual - Page 88
Model Name Display Color Color Gamut Coverage Maximum Pixel Clock Power Supply Signal connectors Environmental conditions U32D970 1.07B (True 10 bit) AdobeRGB 99.5 % (Typical), 99 % (Minimum) 533.25 MHz (DP) This product uses 100 to 240V. Refer - Samsung U32D970Q | User Manual - Page 89
safety requirements for medical electrical systems. Any person who forms a system is therefore responsible for the system to comply with the requirements of IEC 60601-1-1. If in doubt find the nearest recycling location, go to our website: www.samsung.com/recyclingdirect or call, (877) 278 - 0799 89 - Samsung U32D970Q | User Manual - Page 90
vary in different operating conditions or when settings are changed. ――SOG(Sync On Green) is not supported. ――To reduce the power consumption to 0, turn off the switch at the back or disconnect the power cord. Disconnect the power cable if you will not be using the product for an extended period of - Samsung U32D970Q | User Manual - Page 91
modes, the screen may be blank even though the power LED turns on. In such a case, change the settings according to the card user manual. Resolution Horizontal Frequency Vertical Frequency (Hz) Pixel Clock (MHz) (kHz) Sync Polarity (H/V) IBM, 640 x 350 31.469 70.086 25.175 +/- VESA, 640 - Samsung U32D970Q | User Manual - Page 92
of times per second allows you to view natural pictures. The repeat frequency is called "vertical frequency" or "refresh rate" and is indicated in Hz. Resolution VESA, 800 x 600 VESA, 800 x 600 VESA, 800 x 600 VESA, 1024 x 768 VESA, 1024 x 768 VESA, 1024 x 768 VESA, 1152 x 864 VESA, 1280 x 800 VESA - Samsung U32D970Q | User Manual - Page 93
products, please contact the SAMSUNG customer care center. NORTH AMERICA U.S.A 1-800-SAMSUNG (726-7864) http://www.samsung.com/us/support CANADA 1-800-SAMSUNG (726-7864) http://www.samsung.com/ca/support (English) http://www.samsung.com/ca_fr/support (French) LATIN AMERICA ARGENTINE BOLIVIA - Samsung U32D970Q | User Manual - Page 94
http://www.samsung.com/latin/support (Spanish) http://www.samsung.com/latin_en/support (English) http://www.samsung.com/latin/support (Spanish) http://www.samsung.com/latin_en/support (English) http://www.samsung.com/latin_en/support (English) http://www.samsung.com/mx/support http://www.samsung.com - Samsung U32D970Q | User Manual - Page 95
http://www.samsung.com/latin_en/support (English) http://www.samsung.com/latin/support (Spanish) http://www.samsung.com/latin_en/support (English) http://www.samsung.com/latin/support (Spanish) http://www.samsung.com/latin_en/support (English) http://www.samsung.com/ve/support 0800 - SAMSUNG (0800 - Samsung U32D970Q | User Manual - Page 96
http://www.samsung.com/hu/support 800-SAMSUNG (800.7267864) http://www.samsung.com/it/support 8000-7267 http://www.samsung.com/lv/support 8-800-77777 http://www.samsung.com/lt/support 261 03 710 http://www.samsung.com/support 020 405 888 http://www.samsung.com/support 0900-SAMSUNG (0900 - Samsung U32D970Q | User Manual - Page 97
www.samsung.com/ch_fr/support (French) http://www.samsung.com/uk/support http://www.samsung.com/support http://www.samsung.com/support http://www.samsung.com/support http://www.samsung.com/support http://www.samsung.com/support http://www.samsung.com/kz_ru/support http://www.samsung.com/support 97 - Samsung U32D970Q | User Manual - Page 98
samsung.com/cn/support http://www.samsung.com/hk/support (Chinese) http://www.samsung.com/hk_en/support (English) http://www.samsung.com/support http://www.samsung.com/au/support http://www.samsung.com/id/support http://www.samsung.com/jp/support http://www.samsung.com/my/support http://www.samsung - Samsung U32D970Q | User Manual - Page 99
www.samsung.com/nz/support http://www.samsung.com/ph/support http://www.samsung.com/sg/support http://www.samsung.com/tw/support http://www.samsung.com/th/support http://www.samsung.com/vn/support http://www.samsung.com/in/support http://www.samsung.com/in/support http://www.samsung.com/support http - Samsung U32D970Q | User Manual - Page 100
.samsung.com/eg/support http://www.samsung.com/iran/support http://www.samsung.com/Levant/support (English) http://www.samsung.com/ae/support (English) http://www.samsung.com/ae_ar/support (Arabic) http://www.samsung.com/n_africa/support http://www.samsung.com/ae/support (English) http://www.samsung - Samsung U32D970Q | User Manual - Page 101
://www.samsung.com/support http://www.samsung.com/support http://www.samsung.com/support http://www.samsung.com/africa_en/support http://www.samsung.com/support http://www.samsung.com/africa_fr/support http://www.samsung.com/support http://www.samsung.com/support http://www.samsung.com/support http - Samsung U32D970Q | User Manual - Page 102
by; •• External impact or drop. •• Use of supplies or separatly sold product unspecified by Samsung. •• Repair from a person besides an engineer of outsourcing service company or partner of Samsung Electronics Co., Ltd. •• Remodeling or repairing the product by customer. •• Using it with incorrect - Samsung U32D970Q | User Manual - Page 103
to the environment or human health from uncontrolled waste disposal, please separate these items from other types of waste and recycle them responsibly to promote the sustainable reuse of material resources. Household users should contact either the retailer where they purchased this product, or - Samsung U32D970Q | User Manual - Page 104
and is measured in Hz. A scanning rate of 60Hz means that the screen refreshes 60 times per second. The screen scanning rate depends on the performance of the graphics cards in your produce an optimum display environment. The monitor uses VESA DDC (international standard) to execute Plug & Play. 104
-
 1
1 -
 2
2 -
 3
3 -
 4
4 -
 5
5 -
 6
6 -
 7
7 -
8
-
9
-
10
-
11
-
12
-
13
-
14
-
15
-
16
-
17
-
18
-
19
-
20
-
21
-
22
-
23
-
24
-
25
-
26
-
27
-
28
-
29
-
30
-
31
-
32
-
33
-
34
-
35
-
36
-
37
-
38
-
39
-
40
-
41
-
42
-
43
-
44
-
45
-
46
-
47
-
48
-
49
-
50
-
51
-
52
-
53
-
54
-
55
-
56
-
57
-
58
-
59
-
60
-
61
-
62
-
63
-
64
-
65
-
66
-
67
-
68
-
69
-
70
-
71
-
72
-
73
-
74
-
75
-
76
-
77
-
78
-
79
-
80
-
81
-
82
-
83
-
84
-
85
-
86
-
87
-
88
-
89
-
90
-
91
-
92
-
93
-
94
-
95
-
96
-
97
-
98
-
99
-
100
-
101
-
102
-
103
-
104
 |
 |
UHD Monitor
User Manual
The color and the appearance may differ depending on the
product, and the specifications are subject to change without
prior notice to improve the performance.
U32D970
BN46-00430A-07