Sanyo AWM-2800 Instruction Manual
Sanyo AWM-2800 Manual
 |
View all Sanyo AWM-2800 manuals
Add to My Manuals
Save this manual to your list of manuals |
Sanyo AWM-2800 manual content summary:
- Sanyo AWM-2800 | Instruction Manual - Page 1
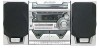
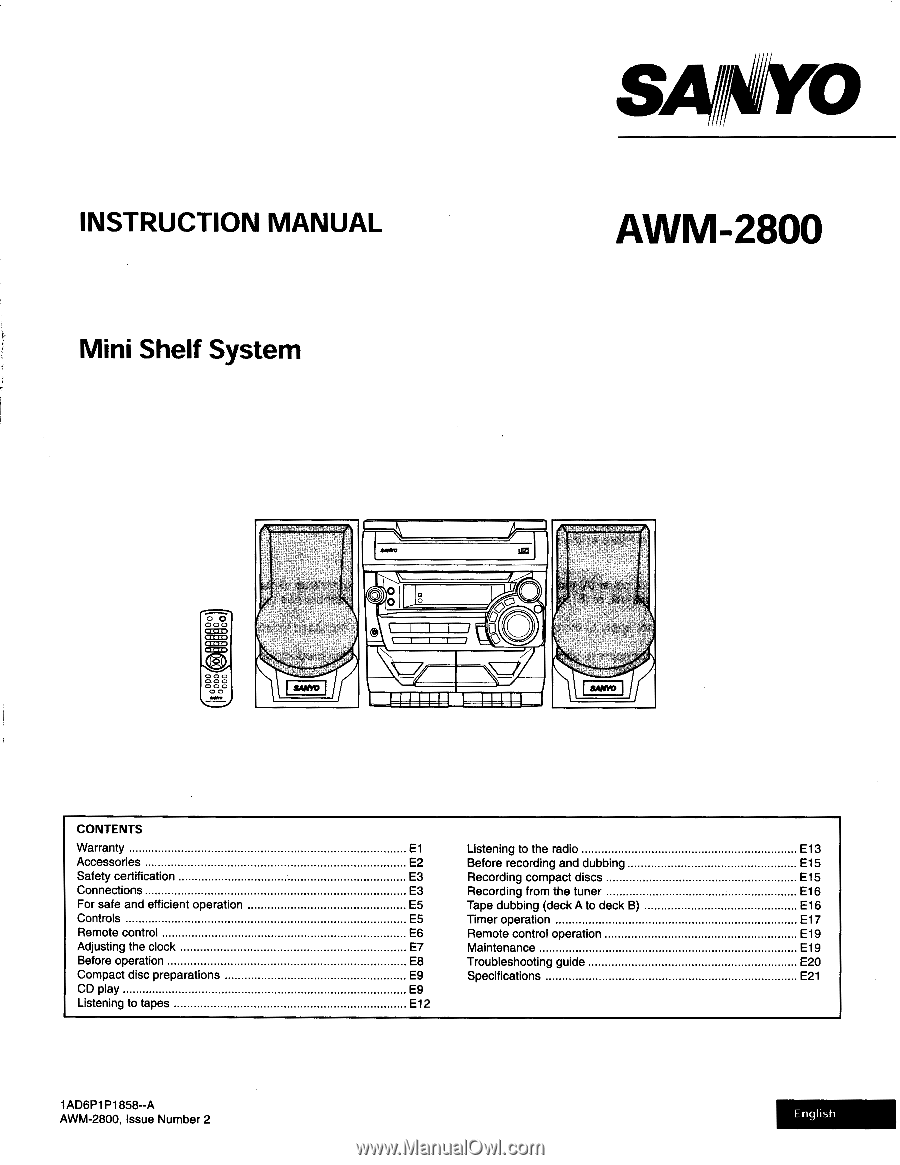
INSTRUCTION MANUAL Mini Shelf System SANYO AWM-2800 0 00 a 1 1 I \ 1 \ ''' 000 000 000 00 SANYO SANYO CONTENTS Warranty Accessories Safety certification Connections For safe and efficient operation Controls Remote control Adjusting the clock Before operation Compact disc preparations CD play - Sanyo AWM-2800 | Instruction Manual - Page 2
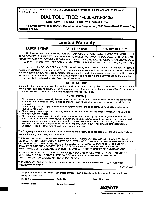
necessitated by any cause beyond the control of SANYO including, but not limited to, any malfunction, defect or failure caused by or resulting from unauthorized service or parts, improper maintenance, operation contrary to furnished instructions, shipping or transit accidents, modification or repair - Sanyo AWM-2800 | Instruction Manual - Page 3
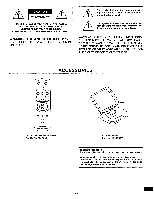
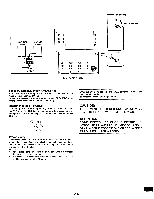
OR BACK). NO USER-SERVICEABLE PARTS INSIDE. REFER SERVICING TO QUALIFIED SERVICE PERSONNEL. WARNING: TO operating and maintenance instructions in the literature 0 0 0 swiro REMOTE CONTROLlERRe.....:1 RB-S390 wireless remote control Part No. 645 059 8258 s AM loop antenna Part No. 645 059 8265 - Sanyo AWM-2800 | Instruction Manual - Page 4
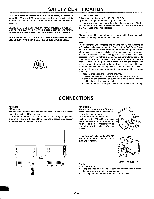
ANYONE EXCEPT PROPERLY QUALIFIED SERVICE PERSONNEL. US FCC INFORMATION This device complies with Part 15 of the FCC Changes or modifications not expressly approved by Sanyo may void the user's authority to operate and used in accordance with the instructions, may cause harmful interference to radio - Sanyo AWM-2800 | Instruction Manual - Page 5
and the other wire to the black terminal (-). Headphones jack (PHONES) Connect a pair of stereo headphones ( 32 ohms, not available from SANYO) to the PHONES jack for monitoring or for private listening. The speakers are automatically disconnected when headphones are connected. PHONES O Power supply - Sanyo AWM-2800 | Instruction Manual - Page 6
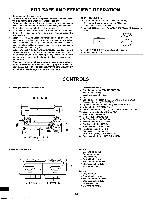
34 5 6 who 2 1 20 19 18 17 16 14 12 11 15 13 CONTROLS 1. Power button (o/ON) 2. Sound preset button (SOUND PRESET) 3. Remote sensor (IR) 4. Disc trays (inside the door) 5. Display 6. Sound preset indicators (ROCK, CLASSIC, POPS, JAZZ) 7. Preset tuning button (V PRESET A) 8. Open/Close - Sanyo AWM-2800 | Instruction Manual - Page 7
No. 10, press [+10], then [0]. To select No. 25, press [+10] twice, then [5]. 0 0 0 Two "AAA" batteries (not supplied) NOTE: Remove the batteries if the remote control is not to be used for a month or more. Batteries left in the unit may leak and cause damage. IMPORTANT NOTE: SPENT OR DISCHARGED - Sanyo AWM-2800 | Instruction Manual - Page 8
the demonstration mode. To cancel this mode, press [(1)/ON]. Example: To Set "PM 6:30" Use the remote control for this operation. •TUNMIGRME SET, DISC C.NGE 3,5 4,6 >CI cnS5.L7EE7PRnn 1,2 SANYO \ ,...REM0TE CONTROLLER 1. Press [TIMER]. "AM 12:00" blinks on the display. 5. Press [TIME SET] - or - Sanyo AWM-2800 | Instruction Manual - Page 9
off the power, press [ o/ON ] again. • When the power cord is connected to the AC outlet, the unit will respond to commands from the remote control. - Selecting the function Press [FUNCTION] to select the desired function. Each time [FUNCTION] is pressed, the display changes as follows: CD TAPE - Sanyo AWM-2800 | Instruction Manual - Page 10
, may damage the surfaces of the disc. IMPORTANT INFORMATION Sanyo CD changers have built-in error compensation circuits to correct problem, check the operation of the CD changer as follows, before having the unit serviced. Play a new disc. If the CD changer operates normally, the skipping problem - Sanyo AWM-2800 | Instruction Manual - Page 11
) REPEAT 1 (Repeat one track) DISC (Normal play mode) NOTE: During programmed play, only "REPEAT" and "REPEAT 1" can be selected. Random play (Remote control only) 1. Press [RANDOM] repeatedly to select the random play mode. The display changes as follows: - TUNING/TIME SET. DISC CHANGE PRESET - Sanyo AWM-2800 | Instruction Manual - Page 12
control can also be used. / os I*&cCp) oTuR MEMORY 17 fl / I 3. Select track 2 by pressing [ ]. • The number buttons on the remote control can also be used. - TUNING + C) TR copc®) C7 \ I / MEMORY u n • I\ 4. Press [MEMORY]. MEMORY 01 TR O® u OOIIn U \ 1/ MEMORY n - UL 10. Select - Sanyo AWM-2800 | Instruction Manual - Page 13
LISTENING TO TAPES Deck A is for playback only; Deck B is for both playback and recording. Pause Use normal tapes only. Press [II] to temporarily stop playback or or recording. Press it again to resume operation. who O O 3 3 B A No 4 2,5 4 2,5 1. Press [FUNCTION] to select "TAPE". - Sanyo AWM-2800 | Instruction Manual - Page 14
2,4 1. Tune in the station to be preset as described in "Automatic tuning" or "Manual tuning". 2. Press [MEMORY]. MEMORY \ 1/ MEMORY In „ I LJ J. I LJ z 3. Press [PRESET] A or V (or press [PRESET] + or - on the remote control) to select the channel number to be preset while "CH" and "MEMORY - Sanyo AWM-2800 | Instruction Manual - Page 15
poor, press [FM MODE] to change to monaural reception. 1. Press [BAND] to select AM or FM. BAND 2. Press [PRESET] A or V (or [PRESET] + or - on the remote control) to select the desired program number. PRESET • The number buttons on the - Sanyo AWM-2800 | Instruction Manual - Page 16
BEFORE RECORDING AND DUBBING Accidental erasure prevention tabs (for protecting valuable recordings) Accidental erasure can be prevented by breaking out the tabs on the end of the cassette tape (where the tape is not exposed) using a screwdriver or similar implement. If a tab is broken out in error - Sanyo AWM-2800 | Instruction Manual - Page 17
RECORDING FROM THE TUNER 1. Tune in the radio station to be recorded. 2. Load a blank cassette into deck B. 3. Press [•]. Recording starts. why • 0 441 O A 4. Press [N/A] to stop recording at any time. When the end of the tape is reached, automatic stop will be activated. 3 2,4 TAPE DUBBING - Sanyo AWM-2800 | Instruction Manual - Page 18
TIMER OPERATION Before setting the timer, make sure that the clock is set to the present time. See "ADJUSTING THE CLOCK". Use the remote control for timer operation. USING THE WAKE UP TIMER Set the wake-up time, source to be heard and volume level. At the set time, - Sanyo AWM-2800 | Instruction Manual - Page 19
in operation Press [SLEEP]. "SLEEP" disappears from the display. The timer is also released if the power is switched off. 2. Press [TIMER] on the remote control for at least 2 seconds so that the display blinks. TIMER C3C D 3. Change the setting as explained above. TO CANCEL THE TIMER/TO USE THE - Sanyo AWM-2800 | Instruction Manual - Page 20
CONTROL OPERATION rey NOTE: The buttons on the remote control perfom similar functions to similarly marked buttons on the front panel. Operation (Common section) Power On/Off O/ON Adjust volume - or + VOLUME Select sound - Sanyo AWM-2800 | Instruction Manual - Page 21
TROUBLESHOOTING GUIDE If you have followed the instructions and are having difficulty operation the unit, locate the SYMPTOM in the left column below. Check the corresponding POSSIBLE CAUSE and CORRECTIVE ACTION columns to locate and remedy the problem. SYMPTOM POSSIBLE CAUSE CORRECTIVE ACTION - Sanyo AWM-2800 | Instruction Manual - Page 22
REMOTE CONTROL Power requirements: Dimensions (W x H x D): Weight: 2 "AAA" batteries Approx. 1.9" x 5.7" x 0.8" Approx. 2 oz. (without batteries) AWM INFORMATION Because its products are subject to continuous improvement, SANYO reserves the right to modify product designs and specifications without
-
 1
1 -
 2
2 -
 3
3 -
 4
4 -
 5
5 -
 6
6 -
 7
7 -
8
-
9
-
10
-
11
-
12
-
13
-
14
-
15
-
16
-
17
-
18
-
19
-
20
-
21
-
22
 |
 |
SANYO
INSTRUCTION
MANUAL
Mini
Shelf
System
'''
000
000
000
00
SANYO
0
0
0
1
1
I
\
1
\
a
AWM-2800
SANYO
CONTENTS
Warranty
El
Listening
to
the
radio
E13
Accessories
E2
Before
recording
and
dubbing
E15
Safety
certification
E3
Recording
compact discs
E15
Connections
E3
Recording
from
the
tuner
E16
For
safe
and
efficient
operation
E5
Tape
dubbing
(deck
A
to
deck
B)
El
6
Controls
E5
Timer
operation
El
7
Remote
control
E6
Remote
control
operation
E19
Adjusting
the
clock
E7
Maintenance
E19
Before
operation
E8
Troubleshooting
guide
E20
Compact
disc
preparations
E9
Specifications
E21
CD
play
E9
Listening
to
tapes
E12
1
AD6P1P1858--A
AWM-2800,
Issue
Number
2
English