Seagate ST3500601XS-RK Quick Start Guide - Page 8
Format initialise for Macintosh OS, How to reformat and/or partition your drive
 |
UPC - 763649002087
View all Seagate ST3500601XS-RK manuals
Add to My Manuals
Save this manual to your list of manuals |
Page 8 highlights
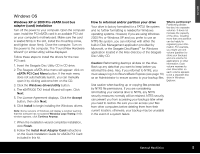
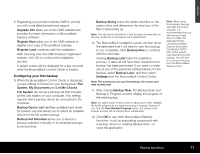
ENGLISH What is partitioning? Partitioning divides the disc into separate volumes. It does not increase the capacity of the drive. Creating more than one partition can be helpful in organising your information. For example, you might use one volume (partition) to store your backups and one volume for applications or other information. Each volume receives its own volume icon, so each volume appears to be a separate disc drive on your Macintosh desktop. Partitioning is not required if you use the Apple-provided Disk Utility to create a Mac OS Extended format volume.. 9. The Authentication window displays. Type your user name and password in the fields provided and click OK. 10. A note appears asking you to restart your computer after installation. Click Restart. Once the computer restarts, attach the data cable from your external SATA drive to one of the available eSATA ports on the PCI card. Turn on the drive: an icon representing the SATA drive will appear on the Mac OS X desktop. Format (initialise) for Macintosh OS Your new Seagate external hard drive is factory formatted with a FAT32 file format. Although your Macintosh operating system may recognise and mount your new drive with this format, FAT32 is not recommended for use with a Macintosh OS. You must format your drive using one of the Mac OS format types before you use it with your Macintosh operating system. Reformatting takes only a few seconds using Apple's Disk Utility, which comes with your Mac OS. Caution: Formatting destroys all data on the drive. If you have data that you want to keep, back up the data before formatting the drive. Seagate is not responsible for lost data. How to reformat and/or partition your drive 1. Open Disk Utility, which is located in Applications/Utilities. 2. Select the disc that you want to reformat and/or partition in the left column. Be sure to select the new drive, and not an existing drive that may contain data, because reformatting and/or partitioning erases all data on the selected drive. 3. Click Partition if you want to partition your drive, or click Erase to reformat the drive as one volume. Partitioning is not required; if you select Partition, continue to the next step. For Erase, you need do no more. 4. Choose the number of partitions from the Volume Scheme pop-up menu. Click each partition and enter a name, select a format, and enter a size for each partition. (You can also drag the partitions to change the size.) Select the Mac OS Extended format for each partition unless you have a specific need to select any other available Volume Format option. 5. Click Partition, and then click Partition again. Your drive appears on your desktop with the volume label(s) you entered in the steps above. If you elected to partition the drive to create two or more volumes, each volume will have a drive icon and label. 8 Quick Start Guide
-
 1
1 -
2
-
 3
3 -
 4
4 -
 5
5 -
 6
6 -
 7
7 -
 8
8 -
 9
9 -
 10
10 -
 11
11 -
 12
12 -
 13
13 -
14
-
15
-
16
 |
 |
