Sharp MX-M232D Operation Guide
Sharp MX-M232D Manual
 |
View all Sharp MX-M232D manuals
Add to My Manuals
Save this manual to your list of manuals |
Sharp MX-M232D manual content summary:
- Sharp MX-M232D | Operation Guide - Page 1
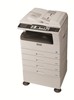
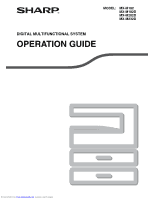
MODEL: MX-M182 MX-M182D MX-M202D MX-M232D DIGITAL MULTIFUNCTIONAL SYSTEM OPERATION GUIDE Downloaded from www.Manualslib.com manuals search engine - Sharp MX-M232D | Operation Guide - Page 2
CONNECTING A USB CABLE 10 ● USING THE MACHINE AS A SHARED PRINTER 11 CONFIGURING THE PRINTER DRIVER ........ 12 SETTING UP BUTTON MANAGER 13 TROUBLESHOOTING 15 2 BEFORE USING THE MACHINE PART NAMES AND FUNCTIONS 17 ● OPERATION PANEL 19 ● OPERATION IN COPY, PRINT, SCAN, AND FAX MODES 21 POWER - Sharp MX-M232D | Operation Guide - Page 3
A TWAIN-COMPLIANT APPLICATION 75 ● SCANNING FROM A WIA-COMPLIANT APPLICATION (Windows XP/Vista/7 79 ● SCANNING FROM THE "Scanner and Camera Wizard" (Windows XP 80 6 TROUBLESHOOTING TROUBLESHOOTING 82 ● MACHINE/COPYING PROBLEMS 83 ● PRINTING AND SCANNING PROBLEMS .... 87 INDICATORS AND DISPLAY - Sharp MX-M232D | Operation Guide - Page 4
AN ADMINISTRATOR PASSWORD 110 PROGRAMMING AN ADMINISTRATOR PASSWORD 111 SYSTEM SETTINGS LIST 112 USING THE SYSTEM SETTINGS 113 ● ACCOUNT CONTROL 114 ● DEVICE CONTROL 117 ● OPERATION SETTING 118 ● ENERGY SAVE 120 ● COPY SETTINGS 121 3 Downloaded from www.Manualslib.com manuals search engine - Sharp MX-M232D | Operation Guide - Page 5
INTRODUCTION This manual describes the copier, printer, and scanner functions of the MX-M182/MX-M182D/MX-M202D/MX-M232D digital multifunctional system. Note • Where "MX-XXXX" appears in this manual, please substitute the name of your model for "XXXX". For the name of your model, see "DIFFERENCES - Sharp MX-M232D | Operation Guide - Page 6
11" x 17") Start Guide 50%, 70%, 81%, 86%, 100%, 115%, 122%, 141%, 200% (50%, 64%, 77%, 95%, 100%, 121%, 129%, 141%, 200%) Although AB series size indications are shown on the operation panel of this manual, inch series indications are displayed on the inch series machines. 5 Downloaded from www - Sharp MX-M232D | Operation Guide - Page 7
the machine. The printer driver includes the Print Status Window. This is a utility that monitors the machine and informs you of the printing status, the name of the document currently being printed, and error messages. Scanner driver The scanner driver allows you to use the scanning function of the - Sharp MX-M232D | Operation Guide - Page 8
• The screen images in this manual are mainly for Windows Vista. With other versions of Windows, some screen images may be different from those in this manual. • If an error message appears, follow the instructions on the screen to solve the problem. After the problem is solved, the installation - Sharp MX-M232D | Operation Guide - Page 9
"Next" button. Follow the on-screen instructions. When "The installation of the SHARP software is complete." appears, click the "OK" button. • If you are using Windows Vista/7 and a Caution security warning window appears, be sure to click "Install this driver software anyway". • If you are running - Sharp MX-M232D | Operation Guide - Page 10
13 Follow the instructions in the Plug and Play window to install the driver. Follow the on-screen instructions. Caution • If you are using Windows Vista/7 and a security warning window appears, be sure to click "Install this driver software anyway". • If you are running Windows 2000/XP and - Sharp MX-M232D | Operation Guide - Page 11
the latest driver (which may enable a higher speed), contact the manufacturer of your PC card. • Connection is also possible using a USB 1.1 port on your computer. However, the specifications will be USB 1.1 specifications (Full-Speed). Downloaded from www.Manualslib.com manuals search engine 10 - Sharp MX-M232D | Operation Guide - Page 12
the machine will be used as a shared printer on a Windows network, follow these steps to install the printer driver in the client computer. To configure the appropriate settings in the print server, see the operation manual or help file of your operating Note system. 1 Perform steps 2 through 6 in - Sharp MX-M232D | Operation Guide - Page 13
" menu. Repeat for each tray. 2 Click the "SHARP MX-XXXX" printer driver icon and select "Properties" from the "Organize" menu. • In Windows 7, right-click the "SHARP MX-XXXX" printer driver icon, and then click "Printer properties". • In Windows XP/2000, select "Properties" from the "File" menu - Sharp MX-M232D | Operation Guide - Page 14
and Printers". • In Windows XP, click the "start" button, select "Control Panel" and click "Printers and Other Hardware", and then click "Scanners and Cameras". 2 Click the "SHARP MX-XXXX" icon and select "Properties". • In Windows 7, right-click the "SHARP MX-XXXX" icon and select "Scan properties - Sharp MX-M232D | Operation Guide - Page 15
scan settings for each of scan menu 1 through 6 can be changed with the setting window of Button Manager. For the factory default settings of the scan menu and the procedures for configuring Button Manager settings, see "BUTTON MANAGER SETTINGS" (p.74). Downloaded from www.Manualslib.com manuals - Sharp MX-M232D | Operation Guide - Page 16
TROUBLESHOOTING If the software is not installed correctly, check the following items on your computer. The driver cannot be installed (Windows 2000/XP) If the driver cannot be installed in Windows 2000/XP, follow these steps to check your computer's settings. 1 Click the "start" button and then - Sharp MX-M232D | Operation Guide - Page 17
Programs". • In Windows 2000, double-click the "Add/Remove Programs" icon. 3 Select the driver from the list, and remove the software. For more information, refer to your operating manual or to the help files for your operating system. 4 Restart your computer. 5 If "SHARP MX-XXXX" appears - Sharp MX-M232D | Operation Guide - Page 18
is installed) and print jobs are delivered to this tray. 9 Operation panel Contains operation keys and indicator lights. 10 Front cover Open to remove paper misfeeds or replace the toner cartridge. 11 Tray 1 Tray 1 can hold approximately 250 sheets of copy paper (80 g/m2 (20 lbs.)). 12 Tray 2 Tray - Sharp MX-M232D | Operation Guide - Page 19
the photoconductive drum (green portion) when removing the misfed paper. Doing so may damage the drum and cause smudges on copies. 29 Fusing unit paper guide Open to remove misfed paper. The model name is on the front cover of the Note machine. Downloaded from www.Manualslib.com manuals search - Sharp MX-M232D | Operation Guide - Page 20
4 [SCAN] key / indicator Press to select scan mode. To use the machine as a network scanner, see the "Operation Guide (NETWORK copies. 9 [OK] key Press to enter the selected setting. 10 Numeric keys Use to select the number of copies. 11 [C] Downloaded from www.Manualslib.com manuals search engine - Sharp MX-M232D | Operation Guide - Page 21
default settings. (p.22) 26 [START] key ( ) / indicator Copying is possible when this indicator is on. Press the key to start copying. This indicator blinks when auto power shut-off mode has activated. Press the key to return to normal operation. Downloaded from www.Manualslib.com manuals search - Sharp MX-M232D | Operation Guide - Page 22
operation Copy output Interrupted operation Printing Scanning Faxing Scanning originals Copying Output Yes*1 No No No Printing Output Yes*2 No No Printing faxes No No Scanning Scanning an original No No No No Scanning of paper or toner, or when the drum cartridge reaches its - Sharp MX-M232D | Operation Guide - Page 23
system settings. (p.118) In the default state the display shown below appears. The default state of the display may vary depending on settings in the system settings. Ready to copy. AUTO 100% A4 AUTO *The screen is that of the MX-M232D. Downloaded from www.Manualslib.com manuals search engine 22 - Sharp MX-M232D | Operation Guide - Page 24
on the market, and some cannot be used with this machine. Before using special paper, contact your authorised service representative. ● Before using other than SHARP recommended paper, make a test copy to see if the paper is suitable. 23 Downloaded from www.Manualslib.com manuals search engine - Sharp MX-M232D | Operation Guide - Page 25
into place. 2 Note • Do not load paper higher than the line on the tray (up to 250 sheets). • Do not add paper to the loaded paper. It may cause multiple feed of paper. • A5 and reload it. • Straighten curled paper before using it. Downloaded from www.Manualslib.com manuals search engine 24 - Sharp MX-M232D | Operation Guide - Page 26
closure flap). • Special papers except SHARP recommended transparency film, labels, and envelopes must be fed one sheet at a time through the bypass tray a laser printer or plain paper fax machine. This may cause smudges or unclean images. 25 Downloaded from www.Manualslib.com manuals search engine - Sharp MX-M232D | Operation Guide - Page 27
, clasps, strings, holes, or windows. • Envelopes with rough fibres, is out of paper or out of toner, the paper size setting can be changed ID CARD COPY ED COPY SPECIAL MODES LEX SCAN LEX SCAN ORIG. SIZE ENTER ACC PAPER SIZE SET 3 Downloaded from www.Manualslib.com manuals search engine 26 - Sharp MX-M232D | Operation Guide - Page 28
orientation. (This function does not operate when using the bypass tray COPY EXPOSURE PAPER SE SCAN COLOUR MODE RESOLUT The ID CARD COPY ED COPY SPECIAL MODES LEX SCAN LEX SCAN ORIG. SIZE ENTER ACC PAPER SIZE SET 3 the auto tray switching function will not operate. 6 Press the [ ] key. - Sharp MX-M232D | Operation Guide - Page 29
print, and scan modes, see p.114. For the counts in fax mode, see the "Operation Guide (FACSIMILE EXPANSION (factory default setting), the base screen appears. (p.22) * In copy mode and print mode, the number of sheets remaining until Downloaded from www.Manualslib.com manuals search engine 28 - Sharp MX-M232D | Operation Guide - Page 30
, parts outside of the original will be copied black, causing excessive use of toner. Note If the original is a non-standard size or the size was not A SPECIAL SIZE ORIGINAL" (p.36). • To use the bypass tray, select it manually. 4 Set the number of copies. Note If you are making two or more - Sharp MX-M232D | Operation Guide - Page 31
. Downloaded from www.Manualslib.com manuals search engine Note • The centre tray can hold a maximum of 250 sheets (150 sheets when . 3 5 Press the [START] key ( ) to begin copying. MNO The copies are delivered to the WXYZ centre tray. @.-_ The default output mode for copying from the - Sharp MX-M232D | Operation Guide - Page 32
is selected with the [PAPER SELECT] key. Auto paper select resumes operation when the [CA] key is pressed or when "Auto clear time" original may cause misfeeds. • When you set multiple sheets of thick original, if the original is not fed, Downloaded from www.Manualslib.com manuals search engine - Sharp MX-M232D | Operation Guide - Page 33
original is copied onto the same type of paper, differences in the original size, scanning location (document glass or document feeder tray), selected paper tray, enlargement/reduction ratio A3 paper A5 (2) A3 A5 copy image A3 paper 3 Downloaded from www.Manualslib.com manuals search engine 32 - Sharp MX-M232D | Operation Guide - Page 34
is selected, the exposure can be manually adjusted to 5 levels. Auto This is the default exposure mode. In this mode, or [ ] key. PQ EXPOSURE AUTO AUTO ED COPY LEX SCAN LEX SCAN TEXT PHOTO ACC 3 Adjust the exposure level as needed with the Downloaded from www.Manualslib.com manuals search engine - Sharp MX-M232D | Operation Guide - Page 35
does not operate when the copies (factory default setting) can starting a long copy run, remove any sheets that remain in the centre tray. During output of the copy job, exercise care as the job may stop frequently due to the centre tray becoming full. Downloaded from www.Manualslib.com manuals - Sharp MX-M232D | Operation Guide - Page 36
[ ] key. PQ SPECIAL FUNCTION ID CARD COPY ED COPY SPECIAL MODES LEX SCAN LEX SCAN ORIG. SIZE ENTER ACC PAPER SIZE SET 3 Press the [OK] key. BACK the horizontal and vertical dimensions of the original. 35 Downloaded from www.Manualslib.com manuals search engine 5 Press the [OK] key. OK - Sharp MX-M232D | Operation Guide - Page 37
special size, the display will prompt the user to set the original size. To 64 mm to 432 mm (2-1/2" to 17") can be entered for the width, and any number from 64 SCAN LEX SCAN ACC 8 Press the [START] key ( ). MNO Copying begins. WXYZ @.-_ AD-END Downloaded from www.Manualslib.com manuals search - Sharp MX-M232D | Operation Guide - Page 38
the [START] key ( ). WXYZ • To cancel automatic ratio selection, press the [AUTO IMAGE] key again. • When copying from the SPF/RSPF, automatic ratio selection mode will automatically disable after the [START] key is pressed and the original is scanned. 37 Downloaded from www.Manualslib.com manuals - Sharp MX-M232D | Operation Guide - Page 39
SCAN ACC [ ] key: Select a larger preset ratio [ ] key: Select a smaller preset ratio [ ] key: Decrease the ratio in increments of 1% [ ] key: Increase the ratio in increments of 1% • Preset reduction ratios are: 86%, 81%, 70%, 50% and 25% (95%, 77%, 64 Downloaded from www.Manualslib.com manuals - Sharp MX-M232D | Operation Guide - Page 40
ZOOM" with the [ ] or [ ] key. PQ SPECIAL MODES DUAL PAGE COPY ED COPY 2in1/4in1 LEX SCAN LEX SCAN XY ZOOM ACC [OK]:ADJUST 5 Press the [OK] key. OK XY ZOOM 115% ZOOM 100% X: in increments of 1% with the [ ] or [ ] keys. 39 Downloaded from www.Manualslib.com manuals search engine - Sharp MX-M232D | Operation Guide - Page 41
Y 99% You will return to the base B4 AUTO screen. 10 Make sure that the desired paper tray is selected. If the auto . 11 Select any other copy settings as needed and press the [START] key ( ). MNO WXYZ @.-_ AD-END Note If the [ Downloaded from www.Manualslib.com manuals search engine 40 - Sharp MX-M232D | Operation Guide - Page 42
AUTOMATIC TWO-SIDED COPYING (MX-M182D/MX-M202D/MX-M232D) Two originals placed on the document glass can be copied onto each side of a single sheet of paper. In addition, an RSPF can be used to copy two originals onto one sheet of paper, or one two-sided original onto two sheets of paper, or one two - Sharp MX-M232D | Operation Guide - Page 43
then adjust the original guides to the width of your COPY MODE 1 to 1 ED COPY 1 to 2 LEX SCAN LEX SCAN 2 to 2 ACC BINDING CHANGE OFF 4 If you wish START] key ( ). To stop copying in the middle of WXYZ a run, press the [C] key. Downloaded from www.Manualslib.com manuals search engine 42 - Sharp MX-M232D | Operation Guide - Page 44
the back side of the copy on the document glass. Close the SPF/RSPF and press the [START] key ( ). MNO WXYZ @.-_ AD-END • The copy will be delivered to the centre tray , touch the [READ-END] key ( ) after scanning the last original. 43 Downloaded from www.Manualslib.com manuals search engine - Sharp MX-M232D | Operation Guide - Page 45
SCAN T ORIGINAL SIZE DUPLEX SCAN COPY MODE 1 to 1 1 to 2 2 to 2 The duplex mode selection screen appears. 3 Select "2 to 2" with the [ ] or [ ] key, or with the [2-SIDED COPY] key. PQ COPY MODE 1 to 1 ED COPY LEX SCAN LEX SCAN 1 to 2 2 to 2 ACC Downloaded from www.Manualslib.com manuals - Sharp MX-M232D | Operation Guide - Page 46
glass, and then adjust the original guides to the width of your originals and SCAN LEX SCAN 2 to 1 ACC BINDING CHANGE OFF PY AN 6 Set the number of copies and press the [START] key ( ). To stop copying in the middle of WXYZ a run, press the [C] key. 45 Downloaded from www.Manualslib.com manuals - Sharp MX-M232D | Operation Guide - Page 47
USING THE BYPASS TRAY To perform manual two-sided copying, follow these steps. Example: Copying originals A and B onto each side of one sheet of paper Original A Original B Copy If you are using the MX-M182D/MX-M202D/ MX-M232D The MX-M182D/MX-M202D/MX-M232D is equipped standard with an automatic - Sharp MX-M232D | Operation Guide - Page 48
dual page originals on individual sheets of paper. Original Copy MODES MARGIN SHIFT ED COPY ERASE LEX SCAN LEX SCAN DUAL PAGE COPY ACC [OK]:OFF OK]:ADJUST 47 Downloaded from www.Manualslib.com manuals search engine 5 copy settings as needed and press the [START] key ( ). MNO WXYZ @.-_ AD- - Sharp MX-M232D | Operation Guide - Page 49
as a scanner, and default operating. The copy settings will automatically revert to the settings selected for the copy run before the run was interrupted. 6 Replace the previous original(s) and press the [START] key ( ). The interrupted copy run will resume. Downloaded from www.Manualslib.com manuals - Sharp MX-M232D | Operation Guide - Page 50
selection" are in operation and the original is 122) Note • Rotation copy will not operate when a copy is enlarged to a 1 copy is used (p.51), rotation copy will operate even if disabled in the system settings. Orientation of (Group copy) The machine can scan standard originals (A4 (8-1/2" x 11")) - Sharp MX-M232D | Operation Guide - Page 51
scanned, "Memory is full." will appear in the display. To start copying the originals that have been scanned to that point, press the [START] key ( ). To cancel the copy job, press the [CA] key. • The optional memory board (MX and regions. Downloaded from www.Manualslib.com manuals search engine 50 - Sharp MX-M232D | Operation Guide - Page 52
Multiple originals can be copied onto a single sheet of paper in a selected layout pattern. ON LINE DATA SPECIAL FUNCTION LINE DATA COPY EXPOSURE PAPER SE SCAN COLOUR MODE RESOLUT The special function screen will appear. SPECIAL FUNCTION Downloaded from www.Manualslib.com manuals search engine - Sharp MX-M232D | Operation Guide - Page 53
51). 10 Select START] key scanned (after only one original has been scanned for 2 in 1 or after three originals or less have been scanned for 4 in 1), press the [READ-END] key ( ). • To cancel the 2 in 1 or 4 in 1 settings, select "OFF" in step 7. Downloaded from www.Manualslib.com manuals - Sharp MX-M232D | Operation Guide - Page 54
is selected, rotating copying will not operate even if the condition for rotate copying is met. • The default margin shift setting can be changed in SHIFT" selected. 53 Downloaded from www.Manualslib.com manuals search engine 7 Select other copy settings as needed and press the [START] key ( ). - Sharp MX-M232D | Operation Guide - Page 55
partially erased. • The default setting for the erasure width can key. PQ ED COPY LEX SCAN LEX SCAN ACC The edge erase settings screen 10 mm (0~20) 6 Select the desired erase mode with the [ ] or [ ] key. "EDGE", "CENTRE" or "EDGE+CENTRE" can be selected. Downloaded from www.Manualslib.com manuals - Sharp MX-M232D | Operation Guide - Page 56
when "OFF" is selected. 8 Press the [OK] key. OK You will return to the base screen. 9 Select other copy settings as needed and press the [START] key ( ). MNO To cancel an edge erase WXYZ setting, return to the edge erase @.-_ settings screen and select "OFF". AD-END 55 - Sharp MX-M232D | Operation Guide - Page 57
single sheet of the rotation copy function does not operate. 1 Place the original on the SCAN CARD SHOT ACC [OK]:CHANGE Downloaded from www.Manualslib.com manuals search engine 5 Press the [OK] key. 3 OK CARD SHOT SIZE(mm) X: 86 Y: 54 The card shot screen appears. Note The default - Sharp MX-M232D | Operation Guide - Page 58
the [START] key ( ). MNO The front side of the card is WXYZ scanned. @.-_ AD-END 9 Turn the original over on the document glass. 10 Press the [START] key ( ). Copying will start after both sides of the original have been scanned. 57 Downloaded from www.Manualslib.com manuals search engine - Sharp MX-M232D | Operation Guide - Page 59
SIZE A5-A3 SIZE (Factory default setting) Front Back Front scan area and scan number (1 page) cannot be changed. Scan area is: X: 54 + 5 mm (1/4") (margin), Y: 86 + 10 SCAN LEX SCAN ORIG. SIZE ENTER ACC PAPER SIZE SET 4 Press the [OK] key. OK Downloaded from www.Manualslib.com manuals search - Sharp MX-M232D | Operation Guide - Page 60
-END Scanning of one side begins. • Press the [READ-END] key to print only one side. 6 Turn the ID card to the other side, and press the [START] key ( ). When scan finished, Copy will begin. Note To cancel ID card copy, press the [CA] key. 59 Downloaded from www.Manualslib.com manuals search engine - Sharp MX-M232D | Operation Guide - Page 61
panel is lit. 2 Start WordPad and open the document that you wish to print. If the ONLINE indicator is not on, press the [PRINT] key to switch to printer mode and then use the [ ] key to select "ONLINE". COPY Ready to print. PRINT ON LINE DATA ONLINE SCAN OFFLINE 3 Select "Print" from - Sharp MX-M232D | Operation Guide - Page 62
FUNCTIONS 4 Make sure that "SHARP MX-xxxx" is selected as the printer. If you need to change any print settings, click the "Preferences" button to open the printer driver setup screen. The printer driver setup screen will appear. Windows 2000 does not have the "Preferences" button in this dialog - Sharp MX-M232D | Operation Guide - Page 63
in the "start" menu, select "Control Panel", select "Printers and Other Hardware", and then select "Printers and Faxes". 2 Click the "SHARP MX-XXXX" printer driver icon. 3 Select "Properties" from the "Organize" menu. 4 • In Windows 7, right-click the "SHARP MX-XXXX" printer driver icon, and - Sharp MX-M232D | Operation Guide - Page 64
printer driver setup screen. When a restriction is in effect, an information icon ( ) will appear next to the setting. Click the icon to view an explanation of the restriction. 1 2 3 4 5 6 7 8 9 10 a list of options. 63 Downloaded from www.Manualslib.com manuals search engine 7 "OK" button - Sharp MX-M232D | Operation Guide - Page 65
[6-Up] If you select the "Border" checkbox, borderlines will be printed around each page. The order can be viewed in the print image in the printer driver setup screen. Note "PRINTER DRIVER SETTING SCREEN" (p.63) Downloaded from www.Manualslib.com manuals search engine 64 - Sharp MX-M232D | Operation Guide - Page 66
document on A4 or Letter size paper. 1 Click the "Paper" tab in the printer driver setup screen. 2 Select the original size (A3 or Ledger) of the print image tab in the printer driver setup screen. 2 Check the "Rotate 180 degrees" box. 65 Downloaded from www.Manualslib.com manuals search engine - Sharp MX-M232D | Operation Guide - Page 67
and lines that are faint and difficult to see. ABCD ABCD 1 Click the "Advanced" tab in the printer driver setup screen. 2 Check the "Text To Black" box and/or the "Vector To Black" box. • other than white lines and areas in black. Downloaded from www.Manualslib.com manuals search engine 66 - Sharp MX-M232D | Operation Guide - Page 68
you wish to print (for example "CONFIDENTIAL"), and start printing. Print sample You can enter text to create your own custom watermark. For details on watermark settings, view printer driver Help. "PRINTER DRIVER SETTING SCREEN" (p.63) 67 Downloaded from www.Manualslib.com manuals search engine - Sharp MX-M232D | Operation Guide - Page 69
PRINTER FUNCTIONS TWO-SIDED PRINTING The machine can print on both sides of the paper. bound at the side. bound at the top. 1 Click the "Main" tab in the printer driver setup screen. 2 Select "2-Sided(Book)" or "2-Sided(Tablet)". Downloaded from www.Manualslib.com manuals search engine 68 - Sharp MX-M232D | Operation Guide - Page 70
to select those settings the next time you need to use them. SAVING SETTINGS AT THE TIME OF PRINTING (User Settings) Settings can be saved from any tab of the printer driver properties window. Settings configured on each tab are listed at the time of saving, allowing you to check the settings as - Sharp MX-M232D | Operation Guide - Page 71
icon The status icons appear to alert you to printer errors. Nothing appears when printing is taking place normally. The icons are explained below. Follow the instructions in the status window to solve the problem. Icon Print Status An error has occurred that requires immediate attention. An - Sharp MX-M232D | Operation Guide - Page 72
*3 WIA (Windows Imaging Acquisition) is a Windows function that allows a scanner, digital camera or other imaging device to communicate with an image processing application. The WIA driver for this machine can only be used in Windows XP/Vista/7. 71 Downloaded from www.Manualslib.com manuals search - Sharp MX-M232D | Operation Guide - Page 73
key, [PRINT] key, or [FAX] key can be pressed in scanner mode to switch to the corresponding mode. • For restrictions on using copy, printer, or fax mode while in scanner mode, or using scanner mode while in copy, printer, or fax mode, see "OPERATION IN COPY, PRINT, SCAN, AND FAX MODES" (p.21). 72 - Sharp MX-M232D | Operation Guide - Page 74
the Button Manager setup window (Scan Button Destination Settings screen) and then click the setting. 1 2 3 Full Colour 4 5 6 7 8 1 Tab Click to set scan menu options. Each tab contains scan settings for the scan menu. 2 "Application Selection" area Select the start-up application here. 3 "Show - Sharp MX-M232D | Operation Guide - Page 75
the Button Manager icon does not appear on the task bar, click the "Start" button, select "All Programs" ("Programs" in Windows 2000), select "Sharp Button Manager AA", and then click "Button Manager" to start Button Manager. 2 Click the tab of the scan menu that you want to set up. 3 Select the - Sharp MX-M232D | Operation Guide - Page 76
the scanner depends upon the application. For more information, refer to the manual or the help file of your application. 3 Select "SHARP MFP TWAIN AA", and click the "Select" button. Note • If you are using Windows XP/Vista/7, you can also select "WIA-SHARP MX-XXXX" to scan using the WIA driver - Sharp MX-M232D | Operation Guide - Page 77
, assign a file name and save the file. Note To cancel a scanning job after the "Scan" button has been clicked, press the [Esc] key on your keyboard or the [C] key ( ) or [CA] key ( ) on the operation panel. SCANNER FUNCTIONS 5 Downloaded from www.Manualslib.com manuals search engine 76 - Sharp MX-M232D | Operation Guide - Page 78
are correct. Note To cancel a scanning job after the "Scan" button is clicked, press the [Esc] key on your keyboard or the [C] key ( ) or [CA] key ( ) on the machine. 7 "Close" button Click to close the scanner driver setup screen. 77 Downloaded from www.Manualslib.com manuals search engine - Sharp MX-M232D | Operation Guide - Page 79
entire preview image. Click the "Auto Scan Area Judgement" button to automatically set the scanning area to the entire preview image. Preview image Preview screen 5 5 "Help" button Click to display the help file for the scanner driver. Downloaded from www.Manualslib.com manuals search engine 78 - Sharp MX-M232D | Operation Guide - Page 80
ON THE MACHINE" (p.72). 2 Start Paint and then click the "File" menu and select "From Scanner or Camera". The scan screen of the WIA driver will appear. Note If you have WIA drivers for other devices installed in your computer, the "Select Device" screen will open. Select "SHARP MX-XXXX" and click - Sharp MX-M232D | Operation Guide - Page 81
scanning, refer to "SCANNING USING THE KEYS ON THE MACHINE" (p.72). 2 Click the "start" button, click "Control Panel", click "Printers and Other Hardware", and then click "Scanners the format. To begin scanning, click the "Next" button. Downloaded from www.Manualslib.com manuals search engine 80 - Sharp MX-M232D | Operation Guide - Page 82
the "Next" button. If you are ready to end the session, click "Nothing. I'm finished working with these pictures". 8 Click the "Finish" button. The "Scanner and Camera Wizard" closes and the scanned image is saved in the specified folder. 81 Downloaded from www.Manualslib.com manuals search engine - Sharp MX-M232D | Operation Guide - Page 83
can be easily resolved by the user. If you are unable to solve the problem using the troubleshooting guide, turn off the power switch and unplug the machine, and contact your authorised service representative. MACHINE/COPYING PROBLEMS The machine does not operate...83 Copies are too dark or too - Sharp MX-M232D | Operation Guide - Page 84
are off. The machine returns to normal operation when the [START] key is pressed, when a print job or fax is received, or when scanning from a computer is started. * Except when print hold for the fax 22 22 - 22 33 29, 30 29, 30 35 26 23 - 83 Downloaded from www.Manualslib.com manuals search engine - Sharp MX-M232D | Operation Guide - Page 85
Problem Paper misfeed. TROUBLESHOOTING all pieces of misfed paper. Several sheets of paper stick together. → Fan the guides on the bypass tray do not match the width of the paper. → Adjust the guides in lower paper tray or in the 250-sheet or 2 x 250-sheet paper feed unit. → A5 (5-1/2" x 8-1/2") - Sharp MX-M232D | Operation Guide - Page 86
TROUBLESHOOTING Problem non-standard size, the size cannot be detected. Manually select a size close to the original size, scanner glass for the SPF/RSPF is dirty. → Clean the long, narrow scanning the copies in the paper output tray and press the [START] key ( ) to resume copying. The tray is out - Sharp MX-M232D | Operation Guide - Page 87
Problem The display turns off. Lighting fixture flickers. TROUBLESHOOTING Cause and solution Any other indicators turned off. → If other indicators are lit, the machine is in "Preheat mode". Press any key on the operation panel to resume normal operation. START indicator blinks. → The machine is - Sharp MX-M232D | Operation Guide - Page 88
"Devices and Printers". In Windows XP, click the "start" button, and then click "Printers and Faxes". In Windows 2000, click the "Start" button, select "Settings" and then click "Printers". 2 If the "SHARP MX-XXXX" printer driver icon is shown but you still cannot print, the printer driver may not - Sharp MX-M232D | Operation Guide - Page 89
driver setup screen. If you need to use the ROPM function, divide the pages of the print data into two or more print jobs. → The memory allocated to the printer function can be changed in the system setting "MEM. FOR PRINTER". Simultaneous use of two or more application software programs. → Start - Sharp MX-M232D | Operation Guide - Page 90
TROUBLESHOOTING Problem The printed image is darker or lighter than expected. Poor scanning quality. Cause and solution The setting for the print density is not appropriate. → You can adjust the print density on the printer driver. Click the "Advanced" tab in the printer driver setup screen, and - Sharp MX-M232D | Operation Guide - Page 91
TROUBLESHOOTING Problem Unable to scan the image. Scanner transfer speed is slow. Cause and solution If scanning is not possible, shut down your computer, turn off the machine's power switch, and unplug the machine's power cord. Next, start your computer, restore power to the machine, and try - Sharp MX-M232D | Operation Guide - Page 92
the job. An optional memory board (MX-EB14) can be installed to increase the original scanning capacity. Memory can be expanded to a maximum of 256 MB (128 MB of expansion memory). < >: Tray number < >: Size of paper that should be loaded 91 Downloaded from www.Manualslib.com manuals search engine - Sharp MX-M232D | Operation Guide - Page 93
the surface of the drum will cause dirty copies. (p.94) (p.97) (p.98) (See below) (p.94) (p.93) (p.98) (p.98) (p.98) Misfeed locations in the optional 2 x 250-sheet paper feed unit . Close the right side cover. Right side cover Downloaded from www.Manualslib.com manuals search engine 92 - Sharp MX-M232D | Operation Guide - Page 94
TROUBLESHOOTING in the display to the document feeder tray and press the [START] key ( ). Copying will resume from the originals that still path." will be cleared and copying will be possible. 93 Downloaded from www.Manualslib.com manuals search engine Note • When closing the side cover, press - Sharp MX-M232D | Operation Guide - Page 95
the fusing unit when removing misfed paper. Doing so may cause a burn or injury. Caution Do not touch the photoconductive drum (green portion) when removing the misfed paper. Doing so may damage the drum and cause smudges on copies. Downloaded from www.Manualslib.com manuals search engine 94 - Sharp MX-M232D | Operation Guide - Page 96
TROUBLESHOOTING B. Misfeed in the fusing area 1 Push gently on both ends of the front cover and open it. 4 Lift the fusing unit release levers, to return them to their operating positions. 2 Turn the roller rotating knob in the direction of the arrow. Roller rotating knob 5 Close the front cover - Sharp MX-M232D | Operation Guide - Page 97
Misfeed in the transport area 1 Open the fusing paper guide by pressing down the green-labeled projection on the guide and remove the misfed paper. Be careful not to tear again to make sure that no pieces of paper remain. Downloaded from www.Manualslib.com manuals search engine TROUBLESHOOTING 6 96 - Sharp MX-M232D | Operation Guide - Page 98
TROUBLESHOOTING MISFEED IN THE UPPER PAPER TRAY Note Make sure that there is no misfed paper in the tray before pulling it out. sure that no pieces of paper remain. 3 Close the upper paper tray. Push the upper paper tray in completely. 97 Downloaded from www.Manualslib.com manuals search engine - Sharp MX-M232D | Operation Guide - Page 99
TROUBLESHOOTING MISFEED IN THE LOWER PAPER TRAY Note • Make sure that there is no misfed paper in the tray before pulling it out. (p.94) • Use the following procedure to remove misfeeds that occur in the 250-sheet paper feed unit/2 x 250-sheet paper feed unit. 1 Open the lower side cover. Grasp - Sharp MX-M232D | Operation Guide - Page 100
up, press the [START] key ( ) to resume copying. • When the toner cartridge replacement required icon ( ) appears in the display, little toner remains and thus copies may be faint. 1 Push on both ends of the front cover and open it. 4 Insert the toner cartridge along the guides until it locks in - Sharp MX-M232D | Operation Guide - Page 101
to keep the machine operating smoothly, including viewing copy count, and scan count, the toner level indicator, and cleaning the machine. CHECKING THE TOTAL OUTPUT COUNT To check the total number of pages output in copy, print, and fax modes and the total scan count in scanner mode, hold down - Sharp MX-M232D | Operation Guide - Page 102
the document cover/SPF/RSPF, or the scanner for originals coming from the SPF/RSPF ( underside of the document cover/SPF/RSPF and the scanning window on the document glass with a soft, clean cloth original scanning glass with the glass cleaner. 101 Downloaded from www.Manualslib.com manuals search - Sharp MX-M232D | Operation Guide - Page 103
. Paper feed roller CLEANING THE TRANSFER CHARGER If copies start becoming streaky or blotchy, the transfer charger may be the arrow two or three times. If the white sheet metal is smudged with toner, wipe it with a soft, clean cloth. 3 Downloaded from www.Manualslib.com manuals search engine 102 - Sharp MX-M232D | Operation Guide - Page 104
SCAN default setting, press the [C] key. 5 Press the [SPECIAL FUNCTION] key. SPECIAL FUNCTION You will return to the base screen. 3 Press the [OK] key. BACK OK GHI PQRS DISPLAY CONTRAST PY AN The display contrast adjustment screen will appear. 103 Downloaded from www.Manualslib.com manuals - Sharp MX-M232D | Operation Guide - Page 105
equipment and supplies, contact your authorised service representative. SPECIFICATIONS (PRINTER AND SCANNER) PRINTER FUNCTION Specifications Print speed* Resolution Memory Emulation Interface connector Interface cables MX-182/MX-M182D Max. 18 ppm MX-M202D Max. 20 ppm MX-M232D Max. 23 - Sharp MX-M232D | Operation Guide - Page 106
Scanning speed Input Data Output Data Scanning colours Protocol Interface Drop out colour Supported operating systems Void area Interface cables Scanner utilities Flatbed scanner Document glass/SPF/RSPF Cold cathode fluorescent lamp Factory default: 150 dpi Setting range: 50 dpi - 9600 dpi Sheets - Sharp MX-M232D | Operation Guide - Page 107
as standard equipment. Reversing single pass feeder (AR-RP10) MX-M182 No MX-M182D/MX-M202D/ MX-M232D Yes*1 Single pass feeder (AR-SP10) Yes Yes Document cover (AR-VR7) Standard Yes 250-sheet paper feed unit (AR-D36) Yes Yes 2 x 250-sheet paper feed unit (AR-D37) Yes Yes Job separator - Sharp MX-M232D | Operation Guide - Page 108
/64" (D) x 5-13/64" (H)) * The detectable original sizes vary by country and region. DOCUMENT COVER Specifications Weight Dimensions AR-VR7 Approx. 1.5 kg (3.31 lbs.) 586 mm (W) x 426 mm (D) x 30 mm (H) (23-5/64" (W) x 16-50/64" (D) x 1-12/64" (H)) 107 Downloaded from www.Manualslib.com manuals - Sharp MX-M232D | Operation Guide - Page 109
machine 590 mm (W) x 477 mm (D) x 111 mm (H) 590 mm (W) x 477 mm (D) x 211 mm (H) (23-15/64" (W) x 18-25/32" (D) x 4-11/32" (H)) (23-15/64" (W) x 18-25/32" (D) x 8-5/16" (H)) Approx. 5.5 kg (12.2 lbs.) Approx. 10 kg (22.1 lbs.) 8 Downloaded from www.Manualslib.com manuals search engine 108 - Sharp MX-M232D | Operation Guide - Page 110
user are paper and toner cartridge. For best copying results, be sure to use only SHARP products. Only genuine SHARP consumables carry the Genuine Supplies label. GENUINE SUPPLIES PROPER STORAGE ● Store the supplies of production. 109 Downloaded from www.Manualslib.com manuals search engine - Sharp MX-M232D | Operation Guide - Page 111
printer function, an account number must be entered at the user password can be programmed.) Refer to the Start Guide for the factory default administrator password. To change the administrator password, see "PROGRAMMING AN ADMINISTRATOR PASSWORD" (p.111). Downloaded from www.Manualslib.com manuals - Sharp MX-M232D | Operation Guide - Page 112
PQRS TUV WXYZ @.-_ ACC. #-C READ-END INTERRU MODE SELECT CHANGE ADMIN PW COPIER PRINTER SCANNER • If this is the first time you are programming the administrator password, enter the factory default code. (Refer to the Start Guide) • " " appears for each digit that you enter. • The special modes - Sharp MX-M232D | Operation Guide - Page 113
CARD SHOT DEFAULT DEFAULT TRAY SET DEFAULT EXPOSURE STREAM FEEDING ROTATION COPY SORT AUTO SELECT PHOTO MODE DEFAULT LIMIT OF COPIES DISABLE AUTO PAPER SELECTION DISABLE 2-SIDED COPY Page 121 121 121 121 122 122 122 122 122 123 123 123 123 123 9 Downloaded from www.Manualslib.com manuals search - Sharp MX-M232D | Operation Guide - Page 114
OK GHI PQRS Enter admin password. PY ADMIN PASSWORD: AN ----- The administrator password entry screen appears. 4 Enter the administrator password with the numeric keys. ABC DEF GHI JKL MNO PQRS TUV WXYZ @.-_ ACC. #-C READ-END INTERRU MODE SELECT CHANGE ADMIN PW COPIER PRINTER SCANNER - Sharp MX-M232D | Operation Guide - Page 115
, and scan mode. To enable auditing mode for fax mode, see the "Operation Guide (FACSIMILE scanning. Auditing mode is initially disabled for all modes (factory default setting). Select "AUDITING MODE" and press the [OK] key. The following screen will appear. AUDITING MODE COPIER PRINTER SCANNER - Sharp MX-M232D | Operation Guide - Page 116
SYSTEM SETTINGS GUIDE Resetting a single account 1 Select "RESET 1 ACC." with the [ keys to enter a five-digit account number (00000 to 99999). The administrator password cannot be used as an account number. 3 Press the [OK] key. "-----". 115 Downloaded from www.Manualslib.com manuals search engine - Sharp MX-M232D | Operation Guide - Page 117
GUIDE key and then press the [OK] key. 2 Select "COPIER" or "PRINTER" mode with the [ ] or [ ] key. 3 Enter , the machine will not allow operation for one minute if an incorrect is initially disabled (factory default setting). To prohibit Downloaded from www.Manualslib.com manuals search engine 116 - Sharp MX-M232D | Operation Guide - Page 118
* This function is not available in some countries and regions. 117 Downloaded from www.Manualslib.com manuals search engine MEM. FOR PRINTER (When the dual function board is installed) The machine is equipped with memory that stores scanned original image data. Part of this memory is also used to - Sharp MX-M232D | Operation Guide - Page 119
if the operation panel is not used for the duration of time set with this program following the end of a copy job. Time selections are "0 sec.", "10 sec.", "20 sec.", "60 sec.", "90 sec." and "120 sec.". The factory default setting is 60 seconds. Downloaded from www.Manualslib.com manuals search - Sharp MX-M232D | Operation Guide - Page 120
GUIDE key repeat is initially set to operate (factory default setting). To disable auto key repeat users other than the administrator from easily changing the paper size setting. "DISABLE PAPER SIZE SET" is initially disabled (factory default setting). 119 Downloaded from www.Manualslib.com manuals - Sharp MX-M232D | Operation Guide - Page 121
operation (PRINTER) toner consumption by approximately 10% in the automatic and text, exposure modes. Copies will be lighter but still adequate for general use. Selection of this mode has no effect on the photo mode. The function is initially disabled (factory default setting). Downloaded - Sharp MX-M232D | Operation Guide - Page 122
toner save mode, select this program and press the [OK] key again to clear the check mark in the check box. COPY SETTINGS These programs are used to enable various copy functions. To access one of these programs, select "COPIER set the default erasure width. The factory default setting is "10 mm (1/2 - Sharp MX-M232D | Operation Guide - Page 123
selected when the [EXPOSURE] key is pressed. The factory default setting is "AUTO". Select "DEFAULT EXPOSURE" and press the [OK] key. The following screen will appear. DEFAULT EXPOSURE AUTO AUTO TEXT PHOTO Downloaded from www.Manualslib.com manuals search engine 1 Select the exposure mode with the - Sharp MX-M232D | Operation Guide - Page 124
GUIDE SORT AUTO SELECT (When the dual function board is installed) This program is used to select the default for printed photos, providing sharp images and good expression of SIDED COPY (Only on models that support two-sided printing) Use this Downloaded from www.Manualslib.com manuals search engine - Sharp MX-M232D | Operation Guide - Page 125
OPERATION GUIDE Downloaded from www.Manualslib.com manuals search engine MXM232D-EX1
-
 1
1 -
 2
2 -
 3
3 -
 4
4 -
 5
5 -
 6
6 -
 7
7 -
8
-
9
-
10
-
11
-
12
-
13
-
14
-
15
-
16
-
17
-
18
-
19
-
20
-
21
-
22
-
23
-
24
-
25
-
26
-
27
-
28
-
29
-
30
-
31
-
32
-
33
-
34
-
35
-
36
-
37
-
38
-
39
-
40
-
41
-
42
-
43
-
44
-
45
-
46
-
47
-
48
-
49
-
50
-
51
-
52
-
53
-
54
-
55
-
56
-
57
-
58
-
59
-
60
-
61
-
62
-
63
-
64
-
65
-
66
-
67
-
68
-
69
-
70
-
71
-
72
-
73
-
74
-
75
-
76
-
77
-
78
-
79
-
80
-
81
-
82
-
83
-
84
-
85
-
86
-
87
-
88
-
89
-
90
-
91
-
92
-
93
-
94
-
95
-
96
-
97
-
98
-
99
-
100
-
101
-
102
-
103
-
104
-
105
-
106
-
107
-
108
-
109
-
110
-
111
-
112
-
113
-
114
-
115
-
116
-
117
-
118
-
119
-
120
-
121
-
122
-
123
-
124
-
125
 |
 |
MODEL:
MX-M182
MX-M182D
MX-M202D
MX-M232D
DIGITAL MULTIFUNCTIONAL SYSTEM
OPERATION GUIDE
Downloaded from
www.Manualslib.com
manuals search engine