Sharp PN-A601 PN-A601 Professional LCD Monitor Operation Manual - Page 14
■ Connection with the control kit optional, For the monitor in, landscape orientation
 |
View all Sharp PN-A601 manuals
Add to My Manuals
Save this manual to your list of manuals |
Page 14 highlights
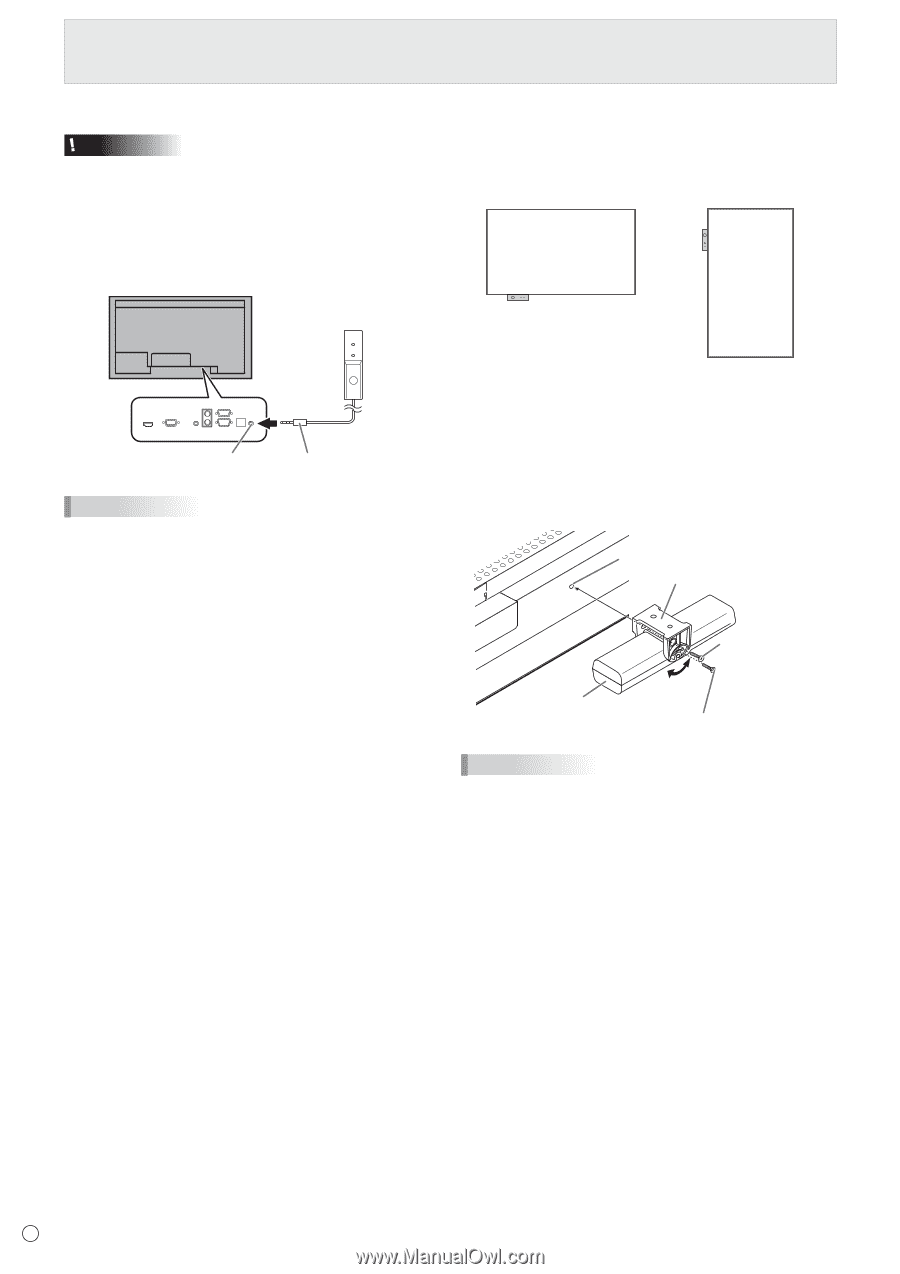
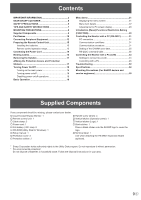
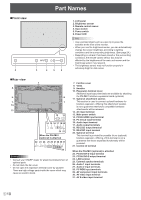
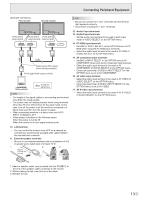
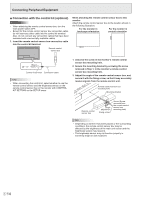
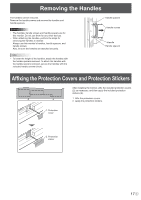
Connecting Peripheral Equipment ■ Connection with the control kit (optional) Caution • When attaching the remote control sensor box, turn the main power switch OFF. • Except for the remote control sensor box connection cable, do not insert any other cable into the control kit terminal. Also, do not connect any connection cables that have been extended with commercially available cables. 1. Insert the remote control sensor box connection cable into the control kit terminal. Remote control sensor box When attaching the remote control sensor box to this monitor Attach the remote control sensor box to the location shown in the following illustration; For the monitor in landscape orientation For the monitor in portrait orientation Control kit terminal Connection cable TIPS • When connecting the control kit, select whether to use the remote control sensor and the brightness sensor on the remote control sensor box or the monitor with CONTROL KIT SETTING on the SETUP menu. 1. Unscrew the screw in the monitor's remote control sensor box mounting hole. 2. Secure the mounting bracket by screwing the screw removed in Step 1. in the monitor's remote control sensor box mounting hole. 3. Adjust the angle of the remote control sensor box, and secure it with the fixing screw, so that it may accurately receive signals from the remote control unit. Remote control sensor box mounting hole Mounting bracket Remote control sensor box Angle adjustment Fixing screw Screw (Screw removed from the remote control sensor box mounting hole) TIPS • Depending on where it has been placed or the surrounding conditions, the remote control sensor box may be affected by the brightness of the main unit screen and the brightness sensor may respond. • The brightness sensor may not function properly in extremely bright or dark locations. E 14
-
 1
1 -
2
-
3
-
4
-
5
-
6
-
7
-
8
-
 9
9 -
 10
10 -
 11
11 -
 12
12 -
 13
13 -
 14
14 -
 15
15 -
 16
16 -
 17
17 -
 18
18 -
 19
19 -
20
-
21
-
22
-
23
-
24
-
25
-
26
-
27
-
28
-
29
-
30
-
31
-
32
-
33
-
34
-
35
-
36
-
37
-
38
-
39
-
40
-
41
-
42
-
43
-
44
-
45
-
46
-
47
-
48
-
49
-
50
-
51
-
52
-
53
-
54
-
55
-
56
-
57
-
58
-
59
-
60
 |
 |