Sharp PN-A601 PN-A601 Professional LCD Monitor Operation Manual - Page 23
Audio, Setup, Menu Items, Copy To User
 |
View all Sharp PN-A601 manuals
Add to My Manuals
Save this manual to your list of manuals |
Page 23 highlights
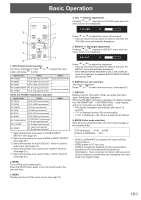
Menu Items USER Adjusts each item when the WHITE BALANCE is set to USER. R-CONTRAST.....Adjusts bright-toned red component. G-CONTRAST....Adjusts bright-toned green component. B-CONTRAST.....Adjusts bright-toned blue component. R-OFFSET..........Adjusts dark-toned red component. G-OFFSET..........Adjusts dark-toned green component. B-OFFSET..........Adjusts dark-toned blue component. COPY TO USER Copies the value set for PRESET to the USER setting. Select "ON" and then press MENU . GAMMA Selects the gamma. USER sets the gamma to the sent value (see page 35). (In PIP mode, the main side setting is reflected in the image.) When using LOCAL DIMMING, it controls the brightness per area. So, the gamma may differ from the set value. LOCAL DIMMING Automatically controls the backlight brightness per area according to the image. Increasing the level of this setting will result in higher contrast of the image, and will lower the monitor power consumption. Light leakage and/or a ring-like appearance may be seen depending on the image. Change the setting in this situation. (In PIP mode, the main side setting is reflected in the image.) POWER LIMITED Can be set when LOCAL DIMMING is HIGH. Set the value so that it is smaller than the set power consumption (see page 55.) by adjusting the brightness, etc. DISPLAY COLOR PATTERN Displays a color pattern. Can be displayed while the menu screen is displayed, so you can refer to the pattern while adjusting the image. OFF No pattern display. WHITE White single color pattern display. RED Red single color pattern display. GREEN Green single color pattern display. BLUE Blue single color pattern display. USER Red/green/blue mixed color pattern display. When USER is selected, set each color's level. RESET Resets the values of the PICTURE menu items to the factory preset values. Select "ON" and then press MENU . nAUDIO TREBLE Adjusts the volume of treble-level sound. BASS Adjusts the volume of bass-level sound. BALANCE Adjusts the balance of the audio sound between right and left. RESET Resets the values of the AUDIO menu items to the factory preset values. Select "ON" and then press MENU . nSETUP OSD H-POSITION Adjusts the horizontal display position of menu screen. OSD V-POSITION Adjusts the vertical display position of menu screen. SCREEN MOTION Residual images are reduced by moving the screen. PATTERN1 The whole screen moves vertically and horizontally. PATTERN2 A black screen spreads from the bottom of the screen and then shrinks to the bottom of the screen. If the monitor is installed in the portrait orientation, a black screen spreads from the left end of the screen and then shrinks to the left end of the screen. PATTERN3 A black bar moves from the left end to the right end of the screen. If the monitor is installed in the portrait orientation, a black bar moves from the top to the bottom of the screen. PATTERN4 Black screens appear from both the top and bottom of the screen, and the displayed image is compressed into the central field. If the monitor is installed in the portrait orientation, the screen is compressed from the left and right ends. PATTERN1 PATTERN2 PATTERN3 PATTERN4 MOTION TIME 1 Specify a time period (operating interval) until SCREEN MOTION starts. MOTION TIME 2 Specify a time period during which SCREEN MOTION operates (time period during which the screen will move). MONITOR Select the installation direction of the monitor. LANDSCAPE............Horizontal orientation PORTRAIT Vertical orientation 23 E
-
 1
1 -
2
-
3
-
4
-
5
-
6
-
7
-
8
-
9
-
10
-
11
-
12
-
13
-
14
-
15
-
16
-
17
-
 18
18 -
 19
19 -
 20
20 -
 21
21 -
 22
22 -
 23
23 -
 24
24 -
 25
25 -
 26
26 -
 27
27 -
 28
28 -
29
-
30
-
31
-
32
-
33
-
34
-
35
-
36
-
37
-
38
-
39
-
40
-
41
-
42
-
43
-
44
-
45
-
46
-
47
-
48
-
49
-
50
-
51
-
52
-
53
-
54
-
55
-
56
-
57
-
58
-
59
-
60
 |
 |
