Sharp XE-A42S XE-A42S Operation Manual in English and Spanish - Page 6
Parts And Their Functions - ink
 |
View all Sharp XE-A42S manuals
Add to My Manuals
Save this manual to your list of manuals |
Page 6 highlights
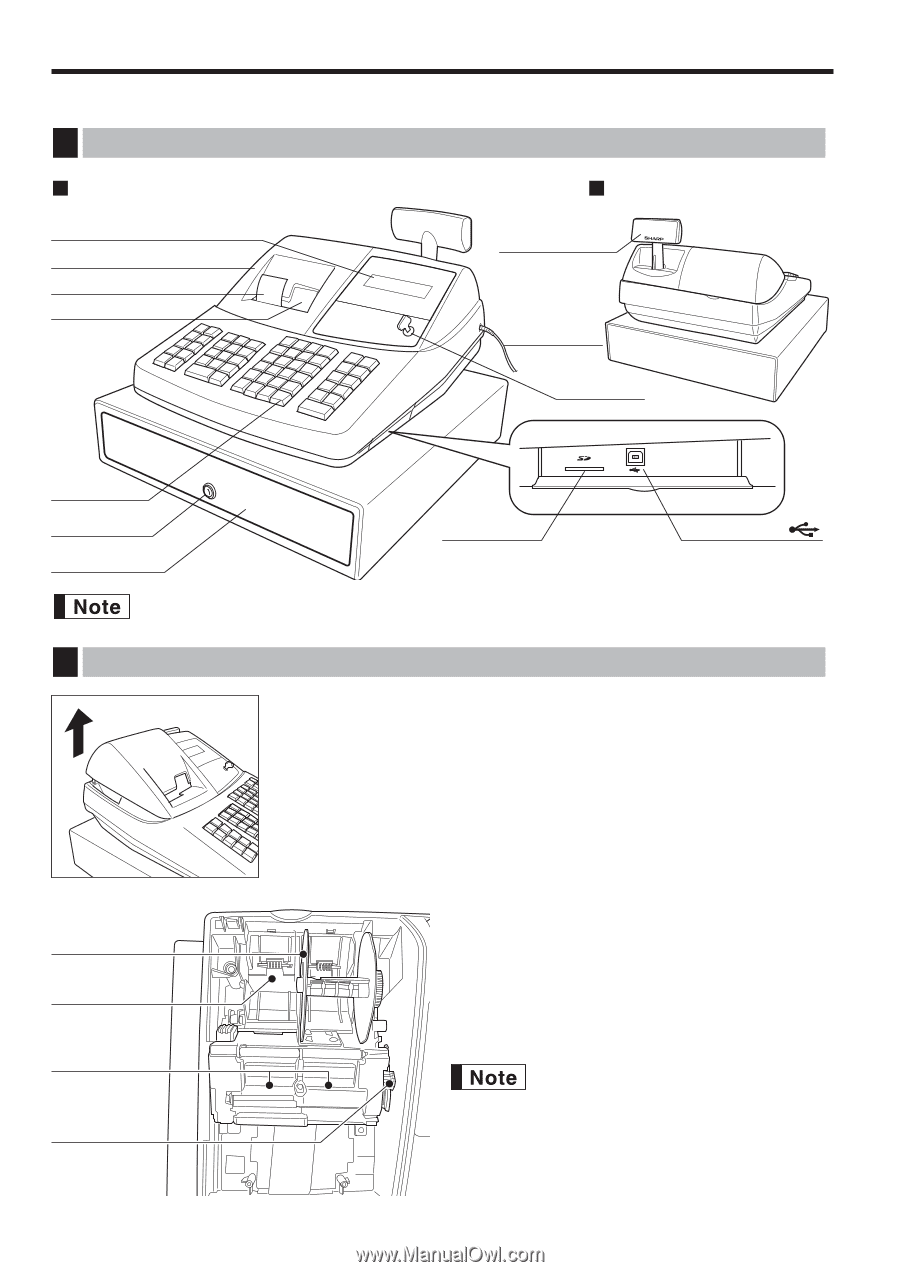
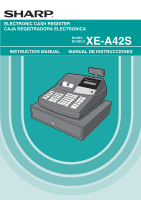
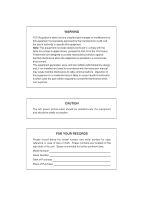
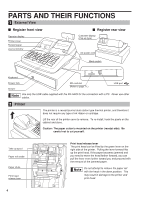
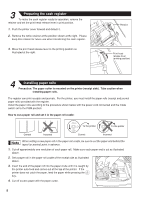
PARTS AND THEIR FUNCTIONS 1 External View Register front view Operator display Printer cover Receipt paper Journal window Register rear view Customer display (Pop-up type) AC power cord Mode switch Keyboard Drawer lock Drawer SD card slot (Refer to page 71.) USB port Use only the USB cable supplied with the XE-A42S for the connection with a PC. Never use other cables. 2 Printer The printer is a receipt/journal dual station type thermal printer, and therefore it does not require any type of ink ribbon or cartridge. Lift the rear of the printer cover to remove. To re-install, hook the pawls on the cabinet and close. Caution: The paper cutter is mounted on the printer (receipt side). Be careful not to cut yourself. Take-up spool Paper roll cradle Paper chute Print head release lever Print head release lever The print head can be lifted by the green lever on the right side of the printer. Pulling the lever forward lifts up the print head. If the paper becomes jammed and you need to move the head farther forward, you can pull the lever even further toward you and proceed with the removal of the jammed paper. Do not attempt to remove the paper roll with the head in the down position. This may result in damage to the printer and print head. 4
-
 1
1 -
 2
2 -
 3
3 -
 4
4 -
 5
5 -
 6
6 -
 7
7 -
 8
8 -
 9
9 -
 10
10 -
 11
11 -
 12
12 -
13
-
14
-
15
-
16
-
17
-
18
-
19
-
20
-
21
-
22
-
23
-
24
-
25
-
26
-
27
-
28
-
29
-
30
-
31
-
32
-
33
-
34
-
35
-
36
-
37
-
38
-
39
-
40
-
41
-
42
-
43
-
44
-
45
-
46
-
47
-
48
-
49
-
50
-
51
-
52
-
53
-
54
-
55
-
56
-
57
-
58
-
59
-
60
-
61
-
62
-
63
-
64
-
65
-
66
-
67
-
68
-
69
-
70
-
71
-
72
-
73
-
74
-
75
-
76
-
77
-
78
-
79
-
80
-
81
-
82
-
83
-
84
-
85
-
86
-
87
-
88
-
89
-
90
-
91
-
92
-
93
-
94
-
95
-
96
-
97
-
98
-
99
-
100
-
101
-
102
-
103
-
104
-
105
-
106
-
107
-
108
-
109
-
110
-
111
-
112
-
113
-
114
-
115
-
116
-
117
-
118
-
119
-
120
-
121
-
122
-
123
-
124
-
125
-
126
-
127
-
128
-
129
-
130
-
131
-
132
 |
 |