Singer 5500 Fashion Mate Instruction Manual - Page 45
Cosido De Botones
 |
View all Singer 5500 Fashion Mate manuals
Add to My Manuals
Save this manual to your list of manuals |
Page 45 highlights
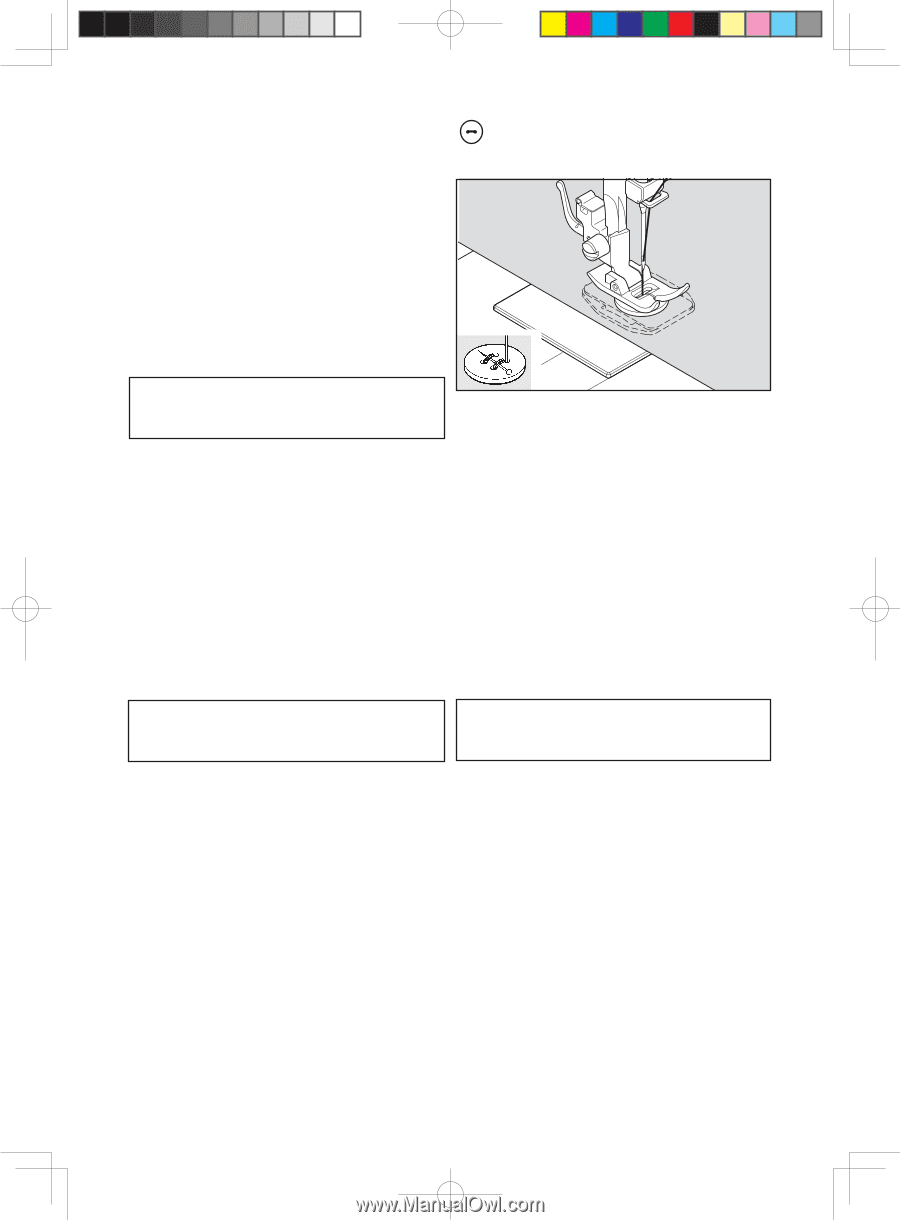
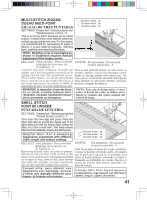
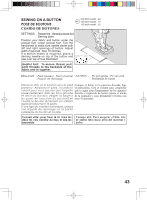
SEWING ON A BUTTON POSE DE BOUTONS COSIDO DE BOTONES SETTINGS : Presser foot - General purpose foot : Darning plate Position your fabric and button under the presser foot. Lower presser foot. Turn the handwheel to make sure needle clears both left and right openings of button. Adjust width if required. Sew 10 stitches. If a button shank is required, place a darning needle on top of the button and sew over top of it as illustrated. Helpful hint: To secure thread, pull both threads to the backside of the fabric and tie together. 100 stitch model : 90 80 stitch model : 73 60 stitch model : 55 RÉGLAGES : Pied presseur - Pied universel AJUSTES : Pie prensatelas - Pie universal : Plaque de reprisage. : Prensatelas de cierres Placez le tissu et le bouton sous le pied Coloque el botón en la posición deseada, baje presseur. Abaissez le pied. Tournez le el prensatelas, Gire el volante para comprobar volant pour vous assurez que l'aiguille que la aguja entra limpiamente en los agujeros passe nettement dans les trous gauche derecho e izquierdo de botón (ajuste el ancho et droit du bouton (régler la largeur de la puntada) y cosa lentamente el botón con d u p o i n t e n f o n c t i o n d u b o u t o n ) e t unas 10 puntadas. coudre le bouton lentement en utilisant approximativement 10 points. Si une tige de maintien est requise, placez une aiguille de reprisage sur la partie supérieure du bouton et coudre. Conseil utile: pour fixer le fil, tirez les deux fils vers l'arrière du tissu et liez-les ensemble. Consejo útil: Para asegurar el hilo, tire de ambos hilos hacia atrás del material y átelos. 43
-
 1
1 -
2
-
3
-
4
-
5
-
6
-
7
-
8
-
9
-
10
-
11
-
12
-
13
-
14
-
15
-
16
-
17
-
18
-
19
-
20
-
21
-
22
-
23
-
24
-
25
-
26
-
27
-
28
-
29
-
30
-
31
-
32
-
33
-
34
-
35
-
36
-
37
-
38
-
39
-
 40
40 -
 41
41 -
 42
42 -
 43
43 -
 44
44 -
 45
45 -
 46
46 -
 47
47 -
 48
48 -
 49
49 -
 50
50 -
51
-
52
-
53
-
54
-
55
-
56
-
57
-
58
-
59
-
60
-
61
-
62
-
63
-
64
 |
 |