Singer M1000 Mending Machine M1000 Stitch Applications Guide - Page 5
English - mending sewing machine
 |
View all Singer M1000 Mending Machine manuals
Add to My Manuals
Save this manual to your list of manuals |
Page 5 highlights
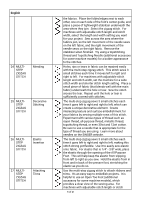
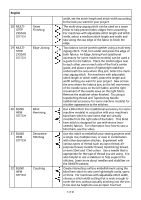
English 24 MULTISTEP ZIGZAG STITCH Mending 25 MULTISTEP ZIGZAG STITCH Decorative Stitching 26 MULTISTEP ZIGZAG STITCH Elastic Insertion 27 MULTISTEP ZIGZAG STITCH Attaching Trims the fabrics. Place the folded edges next to each other, one on each side of the foot's center guide, and place a piece of lightweight stabilizer underneath the area where they join. Select the zigzag stitch. For machines with adjustable stitch length and stitch width, select the length and width setting you want for your project. Sew across the area where the fabrics join, so the left movement of the needle sews on the left fabric, and the right movement of the needle sews on the right fabric. Remove the stabilizer when finished. Try using a topstitching thread and Topstitching Needle (additional accessory for some machine models) for a bolder appearance to the stitches. Holes, rips or tears in fabric can be repaired easily with the multi-step zigzag stitch. This stitch sews 3 small stitches each time it moves left to right and right to left. For machines with adjustable stitch length and stitch width, set the machine for a wide stitch width and shorter stitch length setting. Place a small piece of fabric (that blends well with the main fabric) underneath the hole or tear. Sew the stitch arcoss the tear. Repeat until the hole or tear is sufficiently covered with stitches. The multi-step zigzag sews 3 small stitches each time it goes left to right and right to left, which can create a unique decorative element. Create interesting texture and surface embellishment for your fabrics by sewing multiple rows of this stitch. Experiment with various types of thread such as rayon thread, all-purpose thread, metallic thread, topstitching thread, or even 30wt and 12wt cotton. Be sure to use a needle that is appropriate for the type of thread you are using. Learn more about needles on the SINGER website. The multi-step zigzag sews 3 small stitches each time it goes left to right and right to left, making this stitch strong yet flexible. Use it to easily sew elastic onto fabric. For elastic that is 1/4" - 3/8" wide, place the elastic through the opening of the All-Purpose Foot. This will help keep the elastic from slipping from left to right as you sew. Hold the elastic from in front and in back of the presser foot, stretching the elastic as you do so. Use the multi-step zigzag stitch to attach ribbons and trims. It's an easy way to embellish projects. It is helpful to use an Open Toe Foot (additional accessory for some machine models), which provides a clear view of the sewing area. For machines with adjustable stitch length or stitch 5 of 21
-
 1
1 -
 2
2 -
 3
3 -
 4
4 -
 5
5 -
 6
6 -
 7
7 -
 8
8 -
 9
9 -
 10
10 -
 11
11 -
12
-
13
-
14
-
15
-
16
-
17
-
18
-
19
-
20
-
21
 |
 |
