Sony DCRHC21 Operating Guide
Sony DCRHC21 - MiniDV Handycam Camcorder Manual
 |
UPC - 027242669819
View all Sony DCRHC21 manuals
Add to My Manuals
Save this manual to your list of manuals |
Sony DCRHC21 manual content summary:
- Sony DCRHC21 | Operating Guide - Page 1
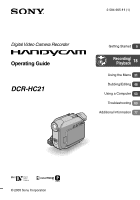
2-584-905-11 (1) Digital Video Camera Recorder Operating Guide DCR-HC21 Getting Started 9 Recording/ Playback 18 Using the Menu 31 Dubbing/Editing 48 Using a Computer 53 Troubleshooting 63 Additional Information 77 © 2005 Sony Corporation - Sony DCRHC21 | Operating Guide - Page 2
this manual thoroughly, and maintenance (servicing) instructions in the literature USB, etc.) again. For customers in the U.S.A. and CANADA RECYCLING LITHIUM-ION BATTERIES 2 Lithium-Ion batteries Conformity Trade Name: SONY Model No.: DCR-HC21 Responsible Party: Sony Electronics Inc. Address: - Sony DCRHC21 | Operating Guide - Page 3
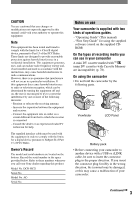
whenever you call your Sony dealer regarding this product. Model No. DCR-HC21 Serial No. Model No. AC- Serial No. Notes on use Your camcorder is supplied with two kinds of operations guides. - "Operating Guide" (This manual) - "First Step Guide" for using the supplied software (stored on the - Sony DCRHC21 | Operating Guide - Page 4
and sound are recorded without any problems. • Compensation for the contents of camcorder, storage media, etc. • TV color systems differ depending on the countries/regions. To view your recordings on a TV, you need an NTSC manual • The images of the LCD screen and the viewfinder used in this manual - Sony DCRHC21 | Operating Guide - Page 5
5 - Sony DCRHC21 | Operating Guide - Page 6
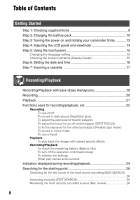
the battery pack 10 Step 3: Turning the power on and holding your camcorder firmly Guide 15 Step 6: Setting the date and time 16 Step 7: Inserting a cassette 17 Recording/Playback Recording/Playback with ease (Easy Handycam manually (EDIT SEARCH 26 Reviewing the most recently recorded scenes (Rec - Sony DCRHC21 | Operating Guide - Page 7
menu items 31 Operation button items 32 Menu items 38 MANUAL SET menu 40 - PROGRAM AE/P EFFECT, etc. AUDIO MODE/REMAIN SETUP MENU menu 45 - CLOCK SET/USB STREAM/LANGUAGE, etc. OTHERS menu 46 - WORLD TIME Guide" on your computer 53 Installing the software and "First Step Guide" on a - Sony DCRHC21 | Operating Guide - Page 8
Creating a DVD (Direct Access to "Click to DVD 60 Troubleshooting Troubleshooting 63 Warning indicators and messages 74 Additional Information Using your camcorder abroad 77 Usable cassette tapes 78 About the "InfoLITHIUM" battery pack 79 About i.LINK 80 Maintenance and precautions 81 Using - Sony DCRHC21 | Operating Guide - Page 9
(p. 10) Shoe cover (1) Attached to the camcorder. Operating Guide (This manual) (1) Getting Started Power cord (1) (p. 10) Wireless Remote Commander (1) (p. 28) A button-type lithium battery is already installed. A/V connecting cable (1) (p. 30, 48) USB cable (1) (p. 53) Shoulder Strap (1) (p. 85 - Sony DCRHC21 | Operating Guide - Page 10
and charging starts. 5 The CHG (charge) lamp turns off when the battery is fully charged. Disconnect the AC Adaptor from the DC IN jack. 3 Connect the AC Adaptor to the DC IN jack on your camcorder. 10 To remove the battery pack Turn off the power, then press PUSH button and remove the - Sony DCRHC21 | Operating Guide - Page 11
for an extended period (p. 79). To use an outside power source You can operate your camcorder using the power from the wall outlet by making the same connections as you do when charging the battery pack. The battery pack will not lose its charge in this case. Charging time Approximate time (min - Sony DCRHC21 | Operating Guide - Page 12
as between a wall and furniture. • Do not short-circuit the DC plug of the AC Adaptor or battery terminal with any metallic objects. This may cause a malfunction. PRECAUTION • Even if your camcorder is turned off, AC power (house current) is still supplied to it while connected to the wall outlet - Sony DCRHC21 | Operating Guide - Page 13
for about 5 seconds. The length of the Strap Belt is adjustable. 4 Hold the camcorder as illustrated below. To turn off the power Slide the POWER switch up to OFF ( you leave your camcorder without any operation attempted for approximately 5 minutes, to save battery power. ([A.SHUT OFF], p. 46). 13 - Sony DCRHC21 | Operating Guide - Page 14
viewfinder The LCD panel Open the LCD panel 90 degrees to the camcorder (), then rotate it to the best angle to record or play (). you close the LCD panel to avoid wearing down the battery, etc. Viewfinder 90 degrees (max.) 1 90 degrees to the camcorder • Do not press the buttons on the LCD frame - Sony DCRHC21 | Operating Guide - Page 15
panel. Place your hand on the rear side of the LCD panel to support it. Then, touch the buttons displayed on the screen. DISP/BATT INFO indicator for guide. DISP GUIDE END 3 Touch the area including the indicator that you want to check. DISP GUIDE STBY END 1/3 EXPOSURE: MANUAL FOCUS: MANUAL(NEAR - Sony DCRHC21 | Operating Guide - Page 16
you turn on your camcorder. • If you do not use your camcorder for about 3 months, the built-in rechargeable battery gets discharged and the date battery and then set the date and time again (p. 83). POWER switch Skip to step 4 when you set the clock for the first time. 1 Touch [MENU]. MANUAL - Sony DCRHC21 | Operating Guide - Page 17
lever OPEN/EJECT lever Lid Getting Started The cassette compartment automatically comes out and opens up. 2 Insert a cassette with its window facing up, then press . Window-side Push the center of the back of the cassette lightly. The cassette compartment automatically slides back in. Do not - Sony DCRHC21 | Operating Guide - Page 18
is set to OFF (CHG), slide it down while pressing the green button. 2 Press EASY . The EASY lamp lights up in blue. Easy Handycam operation ON The message appears. 3 Start recording. Press REC START/STOP (or ). The indicator () changes [STBY] to [REC]. To stop recording, press (or - Sony DCRHC21 | Operating Guide - Page 19
EASY again. The EASY lamp turns off and all the settings are returned to the previous situation. • When you touch and MENU during Easy Handycam operation, only the available functions are displayed on the screen and the functions which don't appear go back to the default setting (p. 32, 38 - Sony DCRHC21 | Operating Guide - Page 20
Recording LENS COVER Slide the LENS COVER switch to OPEN. PHOTO POWER switch REC START/ STOP REC START/ STOP 1 Slide the POWER switch in the direction of the arrow to turn on the CAMERA lamp. If the POWER switch is set to OFF (CHG), slide it down while pressing the green button. 2 Start - Sony DCRHC21 | Operating Guide - Page 21
Playback 1 Slide the POWER switch in the direction of the arrow repeatedly to turn on the PLAY/EDIT lamp. 2 Start playing back. Touch , then touch to start playback. A C B Stop Play/Pause toggles as you touch it Rewind/Fast forward • Playback automatically stops if pause is engaged for - Sony DCRHC21 | Operating Guide - Page 22
infrared port with your fingers or other objects. • Adjust the focus manually ([FOCUS], p. 32) when it is hard to focus automatically. • Do record in mirror mode Open the LCD panel 90 degrees to the camcorder (), then rotate it 180 degrees towards the subject (). Close view: (Telephoto) - Sony DCRHC21 | Operating Guide - Page 23
seconds. Keep the button pressed to view it for about 20 seconds. Remaining battery (approx.) BATTERY INFO BATTERY CHARGE LEVEL 0% 50% 100% REC TIME AVAILABLE LCD SCREEN : 64 min VIEWFINDER Commander (p. 28) towards the remote sensor to operate your camcorder. Internal stereo microphone 23 - Sony DCRHC21 | Operating Guide - Page 24
Indicators displayed during recording/playback Recording 12 3 45 Viewing 1 27 4 5 6 Remaining battery (approx.) Recording mode ( or ) (45) Recording status ([STBY] (standby) or [REC] (recording)) Time code (hour: minute: second: frame)/Tape counter (hour: minute: second)/Tape photo - Sony DCRHC21 | Operating Guide - Page 25
input (50) Zero set memory (28) Meaning Self-timer recording (34) NightShot plus (22) Warning (74) Meaning Flexible spot meter (32)/ Manual exposure (33) Manual focus (32) Backlight (22) Indicator Meaning PROGRAM AE (40) Picture effect (40) White balance (33) Wide select (42) SteadyShot off - Sony DCRHC21 | Operating Guide - Page 26
SPOT FOCUS SPOT DISP FOCUS METER GUIDE MENU FADER END EXPO- SCH for about 5 seconds, and the camcorder enters the standby mode at the can do this operation. Searching manually (EDIT SEARCH) You can search recording to start. Reviewing the most recently recorded scenes (Rec review) You can view - Sony DCRHC21 | Operating Guide - Page 27
touch [EXEC] . 5 Touch . 60min STBY 0:00:00 EDIT FN The last few seconds of the most recently recorded scene are played back. Then, your camcorder is set to the standby. Recording/Playback 27 - Sony DCRHC21 | Operating Guide - Page 28
before using the Remote Commander. Insulation sheet 23). • To change the battery, see page 84. Searching quickly for a desired scene (Zero set not available during Easy Handycam operation. • Point the Remote Commander towards the 28 remote sensor to operate your camcorder (p. 1 During playback - Sony DCRHC21 | Operating Guide - Page 29
on the PLAY/ EDIT lamp. 2 Press SEARCH M. to select [DATE SEARCH]. 3 Press (previous)/(next) to select a recording date. Each time you press or , your camcorder searches for the previous or next date from the current point on the tape. 60min 0:00:00:00 30min DATE -01 SEARCH To cancel - Sony DCRHC21 | Operating Guide - Page 30
TV Use any of the connection as shown in the following illustration. Connect your camcorder to the wall outlet using the supplied AC Adaptor for this operation (p. 11). Refer also to the instruction manuals supplied with the devices to be connected. A/V OUT jack 1 (Yellow) (White) (Red) IN VCRs - Sony DCRHC21 | Operating Guide - Page 31
Using the menu items Follow the instructions below to use each of the items listed after you do not have to touch . To use menu items For details of the items, see page 40. MANUAL SET PROGRAM AE P EFFECT FLASH MODE FLASH LVL AUTO SHTR STBY OTHERS WORLD TIME BEEP A.SHUT OFF COMMANDER DISP - Sony DCRHC21 | Operating Guide - Page 32
in parentheses appear when the items are selected. The available functions during Easy Handycam operation are marked with *. See page 31 for details on selecting button items set [SPOT METER], [EXPOSURE] is automatically set to [MANUAL]. DISP GUIDE (Display Guide)* See page 15. MENU* See page 38. - Sony DCRHC21 | Operating Guide - Page 33
touch . END SCH (END SEARCH) See page 26. EXPOSURE You can fix the brightness of a picture manually. When recording indoors on a clear day, for instance, you can avoid backlight shadows on people next to the window by fixing the exposure to that of the wall side of the room. 60min AUTO STBY 0:00 - Sony DCRHC21 | Operating Guide - Page 34
to [ AUTO]. • When you have changed the battery pack while [ AUTO] is selected, or you bring your camcorder outdoors from inside the house while using fixed exposure, . [VOLUME] is displayed during Easy Handycam operation. END SCH (END SEARCH) See page 26. DISP GUIDE (Display Guide)* See page 15. - Sony DCRHC21 | Operating Guide - Page 35
brightness with / . BURN DVD When your camcorder is connected to a Sony VAIO series personal computer, you can easily camcorder is connected to a personal computer, you can easily burn the picture recorded on the tape to a CD-R (Direct Access to Video CD Burn). For details, see "First Step Guide - Sony DCRHC21 | Operating Guide - Page 36
• You will not hear the recorded sound. You may see mosaic-like images of the previously played picture. A DUB CTRL (Audio dubbing) See page 50. REC CTRL (Recording control) See page 50. 36 - Sony DCRHC21 | Operating Guide - Page 37
37 Using the Menu - Sony DCRHC21 | Operating Guide - Page 38
Menu items MANUAL SET menu (p. 40) PROGRAM AE P EFFECT FLASH MODE DISP TAPE SET menu (p. 45) REC MODE AUDIO MODE REMAIN SETUP MENU menu (p. 45) CLOCK SET* USB STREAM LANGUAGE* DEMO MODE Position of lamp: CAMERA PLAY/EDIT × × × × × × × × × × × - Sony DCRHC21 | Operating Guide - Page 39
Available menu items () vary depending on the position of the lamp. * These functions are available during Easy Handycam operation. OTHERS menu (p. 46) WORLD TIME BEEP* A.SHUT OFF COMMANDER DISP OUT REC LAMP Position of lamp: CAMERA PLAY/EDIT × Using the Menu 39 - Sony DCRHC21 | Operating Guide - Page 40
MANUAL SET menu - PROGRAM AE/P EFFECT, etc. The default settings are marked Select to shoot distant subjects clearly. This setting also prevents your camcorder from focusing on glass or metal mesh in windows that comes in between the camcorder and the subject. • Items with one asterisk (*) can be - Sony DCRHC21 | Operating Guide - Page 41
Pictures appear as an illustration with strong contrast. PASTEL • The setting returns to [NORMAL] when you disconnect the power source from your camcorder for more than 5 minutes. AUTO SHTR (Auto shutter) Automatically activates the electronic shutter to adjust the shutter speed when recording in - Sony DCRHC21 | Operating Guide - Page 42
not display screen. / - or + on the LCD ON Displays / - and + on the LCD screen, and enables the EDIT SEARCH function and Rec review (p. 26). N.S.LIGHT (NightShot Light) When using the NightShot plus (p. 22) function to record, you can record clearer pictures by setting [N.S.LIGHT], which emits - Sony DCRHC21 | Operating Guide - Page 43
back with sub sound or the right channel sound. • You can play back, but cannot record a dual sound track cassette on your camcorder. • The setting returns to [STEREO] when you have the power source disconnected from your camcorder for more than 5 minutes. AUDIO MIX See page 51. Using the Menu 43 - Sony DCRHC21 | Operating Guide - Page 44
BRT NORMAL Standard brightness. BRIGHT Brightens the LCD screen. • When you connect your camcorder to outside power sources, [BRIGHT] is automatically selected for the setting. • When you select [BRIGHT], battery life is reduced by about 10 percent during recording. LCD COLOR You can adjust the - Sony DCRHC21 | Operating Guide - Page 45
appear or sound may be interrupted when you play back the tape on other camcorders or VCRs. • When you mix recordings in the SP mode and in the See page 16. USB STREAM You can view the pictures displayed on the screen of your camcorder on your computer (USB Streaming) via the USB cable. See page 59 - Sony DCRHC21 | Operating Guide - Page 46
. The indicators in parentheses appear when the items are selected. See page 31 for details on selecting menu items. WORLD TIME When using your camcorder abroad, you can set the time difference by touching / , the clock will be adjusted in accordance with the time difference. If you set the - Sony DCRHC21 | Operating Guide - Page 47
Using the Menu • The setting returns to [ON] when you have the power source disconnected from your camcorder for more than 5 minutes. DISP OUT (Display output) LCD Shows displays such as the time code on the LCD screen and in the viewfinder. V- - Sony DCRHC21 | Operating Guide - Page 48
TV Use any of the connection as shown in the following illustration. Connect your camcorder to the wall outlet using the supplied AC Adaptor for this operation (p. 11). Refer also to the instruction manuals supplied with the devices to be connected. A/V OUT jack 1 (Yellow) (White) (Red) VCRs or - Sony DCRHC21 | Operating Guide - Page 49
for playback. Insert the recorded cassette. Slide the POWER switch down to turn on the PLAY/EDIT lamp. 4 Start the playback on your camcorder, and record it on the VCR. Refer to the operating instructions supplied with your recording device for details. 5 When the dubbing is finished, stop your - Sony DCRHC21 | Operating Guide - Page 50
recorded on another device with a 4ch microphone (4CH MIC REC). - When the tape is recorded in a TV color system other than that of your camcorder. - When your camcorder is connected via an i.LINK cable. - On blank sections of the tape. - When the write-protect tab of the cassette is set to SAVE - Sony DCRHC21 | Operating Guide - Page 51
balance returns to the default setting in about 5 minutes after the battery pack or other power sources have been disconnected. Dubbing/Editing • To on your camcorder. The sound may deteriorate when you dub audio on a tape recorded on other camcorders (including other (DCR-HC21) camcorders). To - Sony DCRHC21 | Operating Guide - Page 52
Camcorder 1 2 3 4 5 Bottom 6 Accessory shoe • Remove the shoe cover when you use an accessory. • The accessory shoe has a safety device for fixing the installed accessory securely. To connect an accessory an accessory, loosen the screw, and then press down and pull out the accessory. (USB) jack - Sony DCRHC21 | Operating Guide - Page 53
a computer. • The CD-ROM (supplied) includes the following software. - USB Driver - "First Step Guide" - ImageMixer VCD2 - Picture Package Ver.1.5 Viewing video and pictures on a computer You can view the pictures copied from your camcorder by selecting from thumbnails. Still images and movies are - Sony DCRHC21 | Operating Guide - Page 54
About "First Step Guide" "First Step Guide" is an instruction manual you can refer to on your computer. This "First Step Guide" describes basic operations, from initial hookup of your camcorder and computer and making settings, to general operation the first time you use the software stored on the - Sony DCRHC21 | Operating Guide - Page 55
VCD2) Macintosh computer: ImageMixer VCD2 For the details on the software, refer to "First Step Guide." Installing on a Windows computer Log on as Administrators for installation for Windows 2000/Windows XP. 1 Confirm that your camcorder is not connected to the computer. 2 Turn on the computer - Sony DCRHC21 | Operating Guide - Page 56
with the InstallShield Wizard. In such a case, manually copy "First Step Guide" to your computer according to the message instructions. 5 Select the language for the application to be installed, then click [Next]. 8 Select where to save the software, then click [Next]. 9 Click [Install] on the - Sony DCRHC21 | Operating Guide - Page 57
to install the "First Step Guide." Using a Computer 12 Click [Next], then follow the on-screen instructions to install ImageMixer VCD2. 14 Make Package Menu] and [Picture Package Menu destination Folder] (and "First Step Guide," if installed by steps 11-12) appear on the desktop. 15 Remove the - Sony DCRHC21 | Operating Guide - Page 58
1 Confirm that your camcorder is not connected to the computer. 2 Turn on the computer. Close all applications running on the computer before installing the software. 3 Place the CD-ROM in the disc drive of your computer. 4 Double-click CD-ROM icon. 5 Copy [FirstStepGuide.pdf], stored in the desired - Sony DCRHC21 | Operating Guide - Page 59
Guide" is not installed automatically. Starting up on a Macintosh computer Double-click "FirstStepGuide.pdf". For inquires about this software Pixela User Support Center Pixela Home Page Windows Package by Sony Corporation would download it from the Adobe Systems web page: http://www.adobe.com/ 59 - Sony DCRHC21 | Operating Guide - Page 60
camcorder to a Sony VAIO series computer* that supports a USB cable. 60 * Note that you need a Sony VAIO DVD Ver.1.2" (Sony original software) or later installed Windows XP user. 1 Turn on the computer. Quit all applications running with an i.LINK. 2 Prepare the power source for your camcorder - Sony DCRHC21 | Operating Guide - Page 61
insert the connector forcibly, it may be damaged, and causes a malfunction of your camcorder. • For details, see "First Step Guide." 5 Touch DVD] [PAGE2] [BURN . "Click to DVD" starts up and the on-screen instructions appear on your computer. 6 Place a writable DVD in the disc drive of the - Sony DCRHC21 | Operating Guide - Page 62
a date before the recording date of the later images. - When normal and wide size pictures are recorded on the same tape. • You cannot operate your camcorder in the following situations: - While playing back a tape - When "Click to DVD" is started up from the computer 62 - Sony DCRHC21 | Operating Guide - Page 63
If you run into any problems using your camcorder, use the following table to troubleshoot the problem. If the problem persists, remove the power source and contact your Sony dealer. Overall operations/Easy Handycam The power does not turn on. • The battery pack is discharged, running low - Sony DCRHC21 | Operating Guide - Page 64
(p. 10). The CHG (charge) lamp flashes while the battery pack is being charged. • Attach the battery pack to the camcorder correctly. If the problem persists, disconnect the AC Adaptor from the wall outlet and contact your Sony dealer. The battery pack may be damaged. The power turns off frequently - Sony DCRHC21 | Operating Guide - Page 65
Troubleshooting An unknown indicator appears on the screen. • Refer to the indicator list (p. 74). The picture remains on the LCD screen. • This occurs if you disconnect the AC Adaptor from the wall outlet or remove the battery Cassette Memory. • This camcorder does not support Cassette Memory, so - Sony DCRHC21 | Operating Guide - Page 66
• The tape is stuck to the drum due to moisture condensation. Remove the cassette and leave your camcorder for at least 1 hour, then re-insert the cassette (p. 82). You cannot record a smooth transition • The recording conditions are not suitable for auto focus. Adjust the focus manually (p. 32). 66 - Sony DCRHC21 | Operating Guide - Page 67
does not function. • The BACK LIGHT function is canceled when you set [EXPOSURE] to [MANUAL] (p. 33) or select [SPOT METER] (p. 32). • The BACK LIGHT function does not work during Easy Handycam operation. A vertical band appears when recording candlelight or electric light in the dark. • This - Sony DCRHC21 | Operating Guide - Page 68
. • The tape was recorded in a TV color system other than that of your camcorder (NTSC). This is not a malfunction (p. 77). is displayed on the screen. • The may not function properly. • Insert a new battery. Insert a battery into the battery holder with the +/- polarities correctly matching the +/- - Sony DCRHC21 | Operating Guide - Page 69
Menu Troubleshooting Menu items are grayed out. • You cannot select grayed items in the that the A/V connecting cable is connected to the input jack of another device for dubbing a picture from your camcorder. New sound added to a recorded tape is not heard. • Adjust [AUDIO MIX] from the [ST1] - Sony DCRHC21 | Operating Guide - Page 70
has been registered incorrectly as the computer was connected to your camcorder before the installation of the USB driver was completed. Follow the procedure below to install the USB driver correctly. For Windows 98/Windows 98SE/Windows Me When copying or playing the pictures on a tape using - Sony DCRHC21 | Operating Guide - Page 71
-click [Driver]. 5 Double-click [Setup.exe]. • Deleting anything other than [USB Audio Device], [USB Device], [USB Composite Device], [? Sony Handycam] and [? Sony DSC] may cause a malfunction of your computer. For Windows 2000 Log on as Administrator. 1 Check that your camcorder is connected - Sony DCRHC21 | Operating Guide - Page 72
-click [Driver]. 5 Double-click [Setup.exe]. • Deleting anything other than [USB Composite Device], [USB Audio Device], [USB Device], [? Sony Handycam] and [? Sony DSC] may cause a malfunction of your computer. There is no sound when the camcorder is connected to the Windows computer via a USB cable - Sony DCRHC21 | Operating Guide - Page 73
Troubleshooting 2 Adjust the slider in the (-) direction on [Select video quality]. 3 Follow the on-screen instructions, click [Next], then click [Done]. Picture Package does not function correctly. • Close Picture Package, then restart the computer. An error message appears while operating Picture - Sony DCRHC21 | Operating Guide - Page 74
the cassette. Press RESET (p. 23), and operate your camcorder again. E:61: / E:62: • Contact your Sony dealer or local authorized Sony service facility. Inform them of the 5-digit code, which starts from "E." (Battery level warning) • The battery pack is nearly used up. • Depending on the - Sony DCRHC21 | Operating Guide - Page 75
the instructions. Battery Use the " InfoLITHIUM" battery pack. (p. 79) Battery level is low. • Change the battery (p. 10, 79) Old battery. Use . (p. 82) Cannot start Easy Handycam / Cannot cancel Easy Handycam. ( p. 63) Cannot start Easy Handycam with USB connected Continued 75 Troubleshooting - Sony DCRHC21 | Operating Guide - Page 76
cannot start the Easy Handycam settings while the USB cable is connected. Disconnect the USB cable from your camcorder first. USB invalid during Easy Handycam • You cannot connect the USB cable during Easy Handycam. Touch . HDV recorded tape. Cannot playback. • Your camcorder cannot play back this - Sony DCRHC21 | Operating Guide - Page 77
the (OTHERS) menu, then set the time difference (p. 46). AC-L25A/L25B [a] [b] On TV color systems Your camcorder is an NTSC systembased camcorder. If you want to view the playback picture on a TV, it must be an NTSC system based TV (see the following list) with an AUDIO/VIDEO input jack. System - Sony DCRHC21 | Operating Guide - Page 78
you cannot copy it to a tape in another video camera connected to your camcorder. When you record You cannot record software on your camcorder that contains copyright control signals for copyright protection of software. [Cannot record due to copyright protection.] appears on the LCD screen, or on - Sony DCRHC21 | Operating Guide - Page 79
time in minutes. With an AC Adaptor/charger (optional), the remaining battery time and charging time appear. To charge the battery pack • Be sure to charge the battery pack before you start using your camcorder. • We recommend charging the battery pack in an ambient temperature of between 10 - Sony DCRHC21 | Operating Guide - Page 80
battery time is shortened considerably, a probable cause is that the battery pack has reached the end of its life. Please buy a new battery pack. • The battery to the operating instructions of the device to be connected. • data transport bus proposed by Sony, and is a trademark approved - Sony DCRHC21 | Operating Guide - Page 81
(battery pack) or DC 8.4 V (AC Adaptor). • For DC or AC operation, use the accessories recommended in these operating instructions. • Do not let your camcorder get wet, for example, from rain or sea water. If your camcorder gets wet, it may malfunction. Sometimes this malfunction cannot be repaired - Sony DCRHC21 | Operating Guide - Page 82
. • If the battery electrolytic liquid has leaked, - consult your local authorized Sony service facility. - wash off any liquid that may have contacted your skin - if any liquid gets in your eyes, wash with plenty of water and consult a doctor. When not using your camcorder for a long time - Sony DCRHC21 | Operating Guide - Page 83
about once a month to keep it in optimum state for a long time. To charge the pre-installed rechargeable battery Your camcorder has a pre-installed rechargeable battery to retain the date, time, and other settings even when the POWER switch is set to OFF (CHG). The pre-installed rechargeable - Sony DCRHC21 | Operating Guide - Page 84
batteries according to the manufacturer's instructions. • A button-type lithium battery (CR2025) is used in the Remote Commander. Do not use batteries other than the CR2025. • When the lithium battery case, replace the battery with a Sony CR2025 lithium battery. Use of another battery may present a - Sony DCRHC21 | Operating Guide - Page 85
Minimum illumination 2 rotary heads, Helical scanning system Rotary heads, PCM system Quantization: 12 bits (Fs 32 kHz, stereo 1, stereo 2), 16 bits (Fs 48 kHz, stereo) NTSC color, EIA standards Mini DV cassette with the mark printed SP: Approx. 18.81 mm/s LP: Approx. 12.56 mm/s SP: 60 min LP: 90 - Sony DCRHC21 | Operating Guide - Page 86
Input/Output connectors Audio/Video output USB jack LANC jack DV input/output 10-pin connector Video signal: 1 Vp Operating temperature Storage temperature Dimensions (approx.) Mass (approx.) Supplied accessories DC 7.2 V (battery pack) DC 8.4 V (AC Adaptor) During camera recording using - Sony DCRHC21 | Operating Guide - Page 87
42 E EASY button 18 Easy Handycam 18 EDITSEARCH 26, 42 END SCH (END SEARCH 26 EXPOSURE 33, 69 F FADER 33 First Step Guide 53, 59 Fixing the exposure Hifi SOUND 43 Holding the camcorder......... 13 I Icon ...... See Display indicators INDOOR 34 "InfoLITHIUM" battery pack 79 Infrared port 22 - Sony DCRHC21 | Operating Guide - Page 88
battery 84 LP (Long Play 45 M Macintosh 54, 57 Maintenance 81 Main sound 43 MANUAL 22 N.S.LIGHT (NightShot Light 42 NTSC 77 O ONE PUSH 34 Picture Search 21 Pixela user support center .... 59 Playback 21 review 26 REC START/STOP 20 REMAIN 45 Remaining battery Software 55 SOLARIZE 40 SP - Sony DCRHC21 | Operating Guide - Page 89
Transmitter 28 Tripod 23 TV 30, 48 TV color systems 77 U USB jack 52 USB STREAM 45 USB Streaming 45 Using abroad 77 V VCR SET menu 43 VF B.L. 69 Wide angle 22 WIDE DISP (Wide display 44 WIDE SEL (Wide select 42 Windows 54, 55 WORLD TIME 46 Wrist strap 84 Write-protect tab 78 Z Zero - Sony DCRHC21 | Operating Guide - Page 90
a trademark of Sony Corporation. • i.LINK and are trademarks of Sony Corporation. • Picture Package is a trademark of Sony Corporation. • is a trademark. • Microsoft, Windows, and Windows Media are trademarks companies. Furthermore, TM and "®" are not mentioned in each case in this manual. 90 - Sony DCRHC21 | Operating Guide - Page 91
- Sony DCRHC21 | Operating Guide - Page 92
Printed on 100% recycled paper using VOC (Volatile Organic Compound)-free vegetable oil based ink. Printed in Japan
-
 1
1 -
 2
2 -
 3
3 -
 4
4 -
 5
5 -
 6
6 -
 7
7 -
8
-
9
-
10
-
11
-
12
-
13
-
14
-
15
-
16
-
17
-
18
-
19
-
20
-
21
-
22
-
23
-
24
-
25
-
26
-
27
-
28
-
29
-
30
-
31
-
32
-
33
-
34
-
35
-
36
-
37
-
38
-
39
-
40
-
41
-
42
-
43
-
44
-
45
-
46
-
47
-
48
-
49
-
50
-
51
-
52
-
53
-
54
-
55
-
56
-
57
-
58
-
59
-
60
-
61
-
62
-
63
-
64
-
65
-
66
-
67
-
68
-
69
-
70
-
71
-
72
-
73
-
74
-
75
-
76
-
77
-
78
-
79
-
80
-
81
-
82
-
83
-
84
-
85
-
86
-
87
-
88
-
89
-
90
-
91
-
92
 |
 |

Digital Video Camera Recorder
Operating Guide
DCR-HC21
2-584-905-
11
(1)
Getting Started
Using the Menu
Dubbing/Editing
Using a Computer
Troubleshooting
Additional Information
© 2005 Sony Corporation
Recording/
Playback
31
48
53
63
77
9
18