Sony DCRHC21 Operating Guide - Page 61
To cancel the operation
 |
UPC - 027242669819
View all Sony DCRHC21 manuals
Add to My Manuals
Save this manual to your list of manuals |
Page 61 highlights
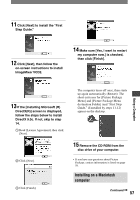
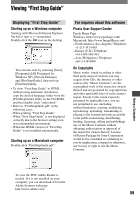
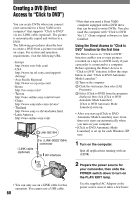
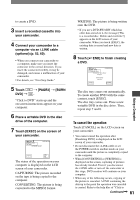
to create a DVD. 3 Insert a recorded cassette into your camcorder. 4 Connect your camcorder to a computer via an i.LINK cable (optional) (p. 52, 60). • When you connect your camcorder to a computer, make sure you insert the connector in the correct direction. If you insert the connector forcibly, it may be damaged, and causes a malfunction of your camcorder. • For details, see "First Step Guide." 5 Touch DVD] [PAGE2] [BURN . "Click to DVD" starts up and the on-screen instructions appear on your computer. 6 Place a writable DVD in the disc drive of the computer. 7 Touch [EXEC] on the screen of your camcorder. 60min 0:00:00:00 BURN DVD START CREATE DVD? EXEC CANCEL The status of the operation on your computer is displayed on the LCD screen of your camcorder. CAPTURING: The picture recorded on the tape is being copied to the computer. CONVERTING: The picture is being converted to the MPEG2 format. WRITING: The picture is being written onto the DVD. • If you use a DVD-RW/+RW which has other data stored on it, the message [This is a recorded disc. Delete and overwrite?] appears on the LCD screen of your camcorder. When you touch [EXEC], the existing data is erased and new data is written. 8 Touch [ END] to finish creating a DVD. 60min 0:00:00:00 BURN DVD COMPLETED Create another copy? Disctray opens. EXEC END The disc tray comes out automatically. To create another DVD with the same content, touch [EXEC]. The disc tray comes out. Place a new writable DVD in the disc drive. Then, repeat step 7 and 8. To cancel the operation Touch [CANCEL] on the LCD screen on your camcorder. • You cannot cancel the operation after [Finalizing DVD.] is displayed on the LCD screen of your camcorder. • Do not disconnect the i.LINK cable or set the POWER switch to another mode on your camcorder until the picture is completely copied to the computer. • When [CONVERTING] or [WRITING] is displayed on the screen, capturing of pictures has already finished. Even if you disconnect the i.LINK cable or turn off the camcorder at this stage, DVD creation will continue on your computer. • When any of the following occurs, copying of the picture is canceled. A DVD containing the data up to the point the operation was canceled is created. Refer to the help files of "Click to Continued 61 Using a Computer
-
 1
1 -
2
-
3
-
4
-
5
-
6
-
7
-
8
-
9
-
10
-
11
-
12
-
13
-
14
-
15
-
16
-
17
-
18
-
19
-
20
-
21
-
22
-
23
-
24
-
25
-
26
-
27
-
28
-
29
-
30
-
31
-
32
-
33
-
34
-
35
-
36
-
37
-
38
-
39
-
40
-
41
-
42
-
43
-
44
-
45
-
46
-
47
-
48
-
49
-
50
-
51
-
52
-
53
-
54
-
55
-
 56
56 -
 57
57 -
 58
58 -
 59
59 -
 60
60 -
 61
61 -
 62
62 -
 63
63 -
 64
64 -
 65
65 -
 66
66 -
67
-
68
-
69
-
70
-
71
-
72
-
73
-
74
-
75
-
76
-
77
-
78
-
79
-
80
-
81
-
82
-
83
-
84
-
85
-
86
-
87
-
88
-
89
-
90
-
91
-
92
 |
 |