Sony SLT-A37M User Manual - Page 97
Bulb
 |
View all Sony SLT-A37M manuals
Add to My Manuals
Save this manual to your list of manuals |
Page 97 highlights
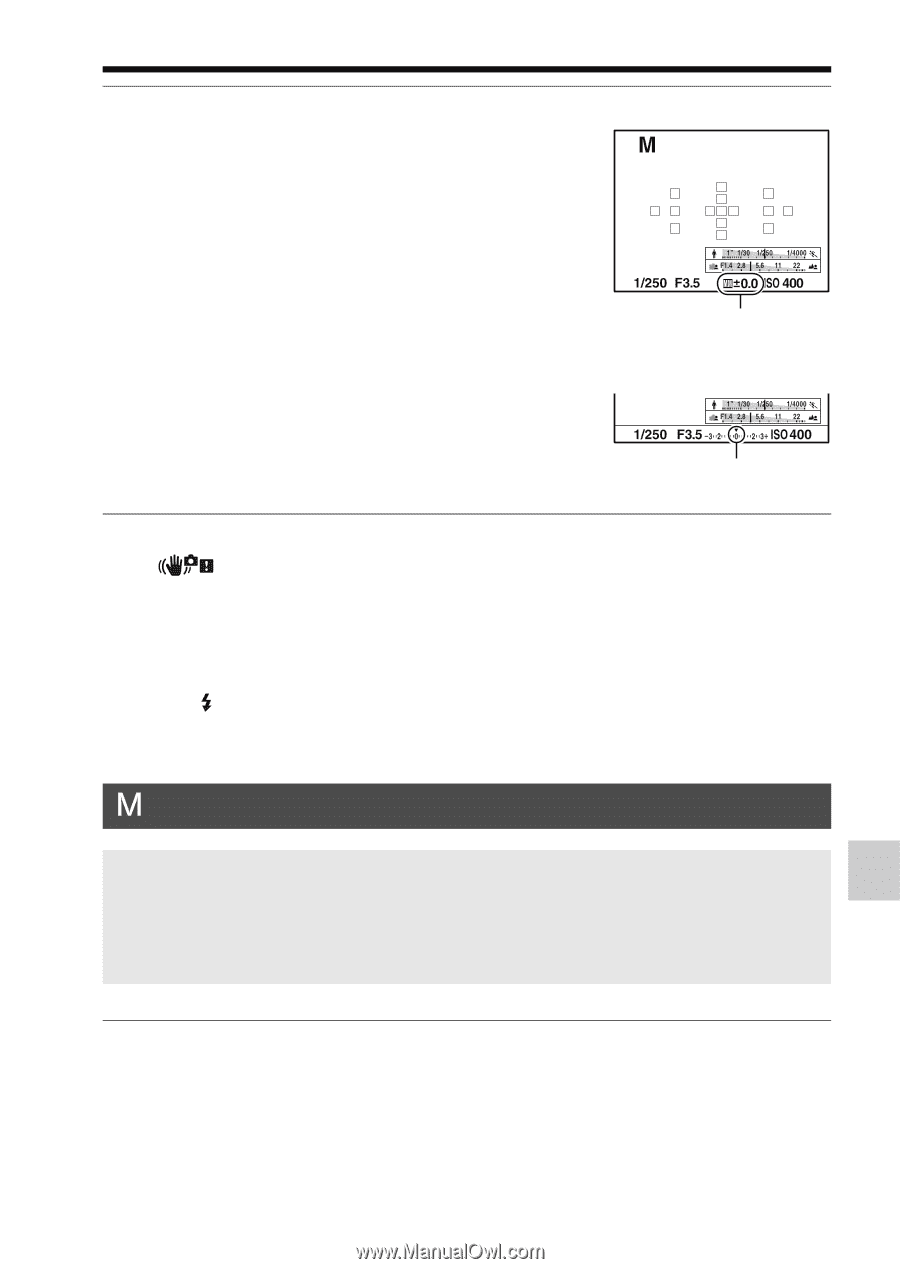
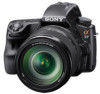
Shooting (Advanced operations) 3 Shoot the image after the exposure is set. • Check the exposure value using Metered Manual*. Toward +: Images become brighter. Toward -: Images become darker. * When the camera is in M mode, it will show an under or over compensation value based on the correct exposure. • In viewfinder mode, check the exposure value using the EV scale. Selecting the shooting mode LCD screen Exposure value The screen in the viewfinder Standard exposure Notes • The (Camera shake warning) indicator is not indicated in manual exposure mode. • When the mode dial is set to M, the ISO setting [AUTO] is set to [100]. In M mode, the ISO setting [AUTO] is not available. Set the ISO sensitivity as necessary (page 126). • Press the button when you shoot with the flash. However, the flash range differs according to the aperture value. When you shoot with the flash, check the flash range in "Specifications." BULB This mode is suitable for z Shooting trails of light, such as fireworks. z Shooting trails of stars. 1 Set the mode dial to M. 97
-
 1
1 -
2
-
3
-
4
-
5
-
6
-
7
-
8
-
9
-
10
-
11
-
12
-
13
-
14
-
15
-
16
-
17
-
18
-
19
-
20
-
21
-
22
-
23
-
24
-
25
-
26
-
27
-
28
-
29
-
30
-
31
-
32
-
33
-
34
-
35
-
36
-
37
-
38
-
39
-
40
-
41
-
42
-
43
-
44
-
45
-
46
-
47
-
48
-
49
-
50
-
51
-
52
-
53
-
54
-
55
-
56
-
57
-
58
-
59
-
60
-
61
-
62
-
63
-
64
-
65
-
66
-
67
-
68
-
69
-
70
-
71
-
72
-
73
-
74
-
75
-
76
-
77
-
78
-
79
-
80
-
81
-
82
-
83
-
84
-
85
-
86
-
87
-
88
-
89
-
90
-
91
-
 92
92 -
 93
93 -
 94
94 -
 95
95 -
 96
96 -
 97
97 -
 98
98 -
 99
99 -
 100
100 -
 101
101 -
 102
102 -
103
-
104
-
105
-
106
-
107
-
108
-
109
-
110
-
111
-
112
-
113
-
114
-
115
-
116
-
117
-
118
-
119
-
120
-
121
-
122
-
123
-
124
-
125
-
126
-
127
-
128
-
129
-
130
-
131
-
132
-
133
-
134
-
135
-
136
-
137
-
138
-
139
-
140
-
141
-
142
-
143
-
144
-
145
-
146
-
147
-
148
-
149
-
150
-
151
-
152
-
153
-
154
-
155
-
156
-
157
-
158
-
159
-
160
-
161
-
162
-
163
-
164
-
165
-
166
-
167
-
168
-
169
-
170
-
171
-
172
-
173
-
174
-
175
-
176
-
177
-
178
-
179
-
180
-
181
-
182
-
183
-
184
-
185
-
186
-
187
-
188
-
189
-
190
-
191
-
192
-
193
-
194
-
195
-
196
-
197
-
198
-
199
-
200
-
201
-
202
-
203
-
204
-
205
-
206
-
207
-
208
-
209
 |
 |