Sony STR-DA5300ES Operating Instructions (Large File - 21.32 MB)
Sony STR-DA5300ES - Multi Channel Av Receiver Manual
 |
View all Sony STR-DA5300ES manuals
Add to My Manuals
Save this manual to your list of manuals |
Sony STR-DA5300ES manual content summary:
- Sony STR-DA5300ES | Operating Instructions (Large File - 21.32 MB) - Page 1
-668-11(2) Multi Channel AV Receiver Operating Instructions GB Mode d'emploi FR Owner's Record The model and serial numbers are located on the rear of the unit. Record the serial number in the space provided below. Refer to them whenever you call upon your Sony dealer regarding this product - Sony STR-DA5300ES | Operating Instructions (Large File - 21.32 MB) - Page 2
in the event of trouble. Batteries or batteries installed apparatus and maintenance (servicing) instructions in the receiver is connected. - Consult the dealer or an experienced radio/TV technician for help. CAUTION You are cautioned that any changes or modification not expressly approved in this manual - Sony STR-DA5300ES | Operating Instructions (Large File - 21.32 MB) - Page 3
About This Manual • The instructions in this manual are for model STR-DA5300ES. Check your model number by looking at the lower right corner of the front panel. • The instructions in this manual describe the controls on the supplied remote. You can also use the controls on the receiver if they have - Sony STR-DA5300ES | Operating Instructions (Large File - 21.32 MB) - Page 4
parts 6 1: Installing speakers 16 2: Connecting speakers 18 3: Connecting the monitor 20 4a: Connecting the audio components ........22 4b: Connecting the video components .......27 5: Connecting the antennas (aerials 38 6: Preparing the receiver and the remote ....39 7: Operating the receiver - Sony STR-DA5300ES | Operating Instructions (Large File - 21.32 MB) - Page 5
Clearing all the contents of the remote's memory 134 Additional Information Glossary 135 Precautions 138 Troubleshooting 139 Specifications 143 Index 146 5GB - Sony STR-DA5300ES | Operating Instructions (Large File - 21.32 MB) - Page 6
location of parts Front panel To remove the cover Press PUSH. When you remove the cover, keep it out of reach from children. Status of the POWER button Off The receiver is turned off (initial setting). Press POWER to turn the receiver on. You cannot turn the receiver on using the remote. On/Standby - Sony STR-DA5300ES | Operating Instructions (Large File - 21.32 MB) - Page 7
Switch to OFF, A, B, (OFF/A/B/A+B) A+B of the front speakers (page 46). P VIDEO 3 IN/ Connect to a portable PORTABLE AV audio/video component IN jacks such as a camcorder or video game. Q MULTI CHANNEL DECODING lamp Lights up when multichannel audio signals are decoded. continued 7GB - Sony STR-DA5300ES | Operating Instructions (Large File - 21.32 MB) - Page 8
Name R INPUT SELECTOR S MASTER VOLUME Function Turn to select the input source to play back. To select the input source for zone 2 or zone 3, press ZONE/ SELECT (qa) to select zone 2 or zone 3 first ("ZONE 2 INPUT" or "ZONE 3 INPUT" appears on the display), then turn INPUT SELECTOR to select the - Sony STR-DA5300ES | Operating Instructions (Large File - 21.32 MB) - Page 9
IN jacks Connect to a DVD player, Super Audio CD player, etc. The COAXIAL jack provides a better quality sound (page 20, 22, 23, 31, 32). image and the sound are output to TV or a projector (page 20, 28). B Control jack for Sony equipment and other external components IR REMOTE Connect an IR - Sony STR-DA5300ES | Operating Instructions (Large File - 21.32 MB) - Page 10
you connect the MONITOR VIDEO OUT jack to a TV (page 20). You can operate this receiver using a GUI (Graphical User Interface) (page 41). MULTI CHANNEL INPUT jacks Connect to a Super Audio CD player or DVD player with an analog audio jack for 7.1 channel or 5.1 channel sound (page 22, 25). PRE - Sony STR-DA5300ES | Operating Instructions (Large File - 21.32 MB) - Page 11
commander You can use the supplied remote RM-AAL008 to operate the receiver and to control the Sony audio/video components that the remote is assigned to operate (page 127). RM-AAL008 Name A AV ?/1 (on/ standby) B ?/1 (on/ standby) C Input buttons D ZONE 2 ZONE 3 E AMP F MUSIC G MOVIE Function - Sony STR-DA5300ES | Operating Instructions (Large File - 21.32 MB) - Page 12
numbers of the CD player, DVD player, Bluray Disc Player or MD deck. Press 0/10 to select track number 10. - select channel numbers select items from option menus for receiver and DVD player, Blu-ray Disc to display the menu to operate the audio/video components. SCREEN/ DSPL CONTROL Press SHIFT - Sony STR-DA5300ES | Operating Instructions (Large File - 21.32 MB) - Page 13
be changed as follows. EXT VIDEO t ZONE 2 VIDEO t OFF. You can swap the and the duration which the receiver turns off automatically (page 106 turn off the sound temporarily. Press the button again to restore the sound. T MASTER menu while the menu or on-screen guide of the VCR, DVD player, or - Sony STR-DA5300ES | Operating Instructions (Large File - 21.32 MB) - Page 14
of the VCR, satellite tuner, CD player or MD deck. - channel numbers of the Digital CATV terminal. D.TUNING Y 2CH/ A.DIRECT Z A.F.D. Press to enter direct tuning mode (page 83, 88). Press to select sound field (page 62) or to switch the audio of the selected input to analog signal without any - Sony STR-DA5300ES | Operating Instructions (Large File - 21.32 MB) - Page 15
Press to display the menu to operate the receiver. G DMPORT Press to operate the component to turn off the sound temporarily. Press the button again to restore the sound. K RETURN/ EXIT window. The image will be changed as follows. EXT VIDEO t ZONE 2 VIDEO t OFF. You can swap the position of the - Sony STR-DA5300ES | Operating Instructions (Large File - 21.32 MB) - Page 16
1: Installing speakers This receiver allows you to use a 7.1 channel system (7 speakers and one sub woofer). Enjoying a 5.1/7.1 channel system To fully enjoy theater-like multi-channel surround sound requires five speakers (two front speakers, a center speaker, and two surround speakers) and a sub - Sony STR-DA5300ES | Operating Instructions (Large File - 21.32 MB) - Page 17
Getting Started Tips • The angle A should be the same. • When you connect a 6.1 channel speaker system, place the surround back speaker behind the seating position. • Since the sub woofer does not emit highly directional signals, you can place it wherever you want. 17GB - Sony STR-DA5300ES | Operating Instructions (Large File - 21.32 MB) - Page 18
connecting cords, make sure to disconnect the AC power cord (mains lead). H G F E B B FRONT SPEAKERS B terminals a) A B B D C B A A Monaural audio cord (not supplied) B Speaker cords (not supplied) AFront speaker A (L) BFront speaker A (R) CCenter speaker DSub wooferb) ESurround back - Sony STR-DA5300ES | Operating Instructions (Large File - 21.32 MB) - Page 19
to standby mode automatically based on the level of the input signal to a sub woofer, then sound may not be output. c) If you connect only one surround back speaker, connect it to the SURROUND BACK SPEAKERS L terminals. Notes • When you connect all the speakers with a nominal impedance of 8 ohms or - Sony STR-DA5300ES | Operating Instructions (Large File - 21.32 MB) - Page 20
to a TV. You can operate this receiver using a GUI (Graphical User Interface). It is not necessary to connect all the cables. Connect audio and video cords according to the jacks of your components. Audio signals TV monitor Video signals A B C D E F A Optical digital cord (not supplied - Sony STR-DA5300ES | Operating Instructions (Large File - 21.32 MB) - Page 21
the antenna (aerial) farther away from the receiver. Tips • The receiver has a video conversion function. For details, see "Notes on converting video signals" (page 36). • The sound of the TV is output from the speakers connected to the receiver if you connect the audio output jack of the TV and the - Sony STR-DA5300ES | Operating Instructions (Large File - 21.32 MB) - Page 22
player With digital audio output With multi-channel audio output With analog audio output only MD player With digital audio output With analog audio output only Tape deck, Analog disc turntable Page 23 25 26 23 26 26 Audio input/output jacks to be connected The sound quality depends on the - Sony STR-DA5300ES | Operating Instructions (Large File - 21.32 MB) - Page 23
MEDIA PORT adapter MD deck Super Audio CD player, CD player A B B C A Optical digital cord (not supplied) B Audio cord (not supplied) C Coaxial adapter after removing the cord when cords are connected to the COMPONENT VIDEO jack. - Remove the DIGITAL MEDIA PORT adapter by squeezing the - Sony STR-DA5300ES | Operating Instructions (Large File - 21.32 MB) - Page 24
Audio CD player • No sound is output when playing a Super Audio CD on a Super Audio CD player connected to only the COAXIAL SA-CD/ CD IN jack on this receiver. When you play a Super Audio CD, connect the player to the MULTI CHANNEL INPUT or SA-CD/CD IN jacks. Refer to the operating instructions - Sony STR-DA5300ES | Operating Instructions (Large File - 21.32 MB) - Page 25
Getting Started Connecting components with multi-channel output jacks If your DVD or Super Audio CD player is equipped with multi-channel output jacks, you can connect them to the MULTI CHANNEL INPUT jacks of this receiver to enjoy multichannel sound. Alternatively, the multichannel input jacks can - Sony STR-DA5300ES | Operating Instructions (Large File - 21.32 MB) - Page 26
following illustration shows how to connect a component with analog jacks, such as tape deck, turntable, etc. Super Audio CD player, CD player Tape deck A A A A MD deck Turntable A Audio cord (not supplied) Notes • If your turntable has a ground (earth) wire, connect it to the (U) SIGNAL - Sony STR-DA5300ES | Operating Instructions (Large File - 21.32 MB) - Page 27
Getting Started 4b: Connecting the video components How to hook up your components This section describes how to hook up your components to this receiver. Before you begin, refer to "Component to be connected" below for the pages which describe how to connect each component. After hooking up all - Sony STR-DA5300ES | Operating Instructions (Large File - 21.32 MB) - Page 28
up to 8 channels can be received with this receiver using the HDMI jack. • Analog video signals input to the VIDEO jack, S VIDEO jack, or COMPONENT VIDEO jacks can be output as HDMI signals. Audio signals are not output from an HDMI OUT jack when the image is converted. • This receiver supports DSD - Sony STR-DA5300ES | Operating Instructions (Large File - 21.32 MB) - Page 29
Getting Started DVD player Audio/video signals A Satellite tuner Audio/video signals A Blu-ray Disc Player, PS3™, hard disk recorder Audio/video signals A A HDMI cable (not supplied) A Audio/video signals TV monitor, projector, etc. continued 29GB - Sony STR-DA5300ES | Operating Instructions (Large File - 21.32 MB) - Page 30
setup of the connected component if an image is poor or the sound does not come out of a component connected via the HDMI cable. • Sound may be interrupted when the sampling frequency, the number of channels or audio format of audio output signals from the playback component is switched. • When the - Sony STR-DA5300ES | Operating Instructions (Large File - 21.32 MB) - Page 31
to connect all the cables. Connect audio and video cords according to the jacks of your components. Notes • To output multi-channel digital audio, set the digital audio output setting on the DVD player, Blu-ray Disc Player. Refer to the operating instructions supplied with the DVD player, Blu - Sony STR-DA5300ES | Operating Instructions (Large File - 21.32 MB) - Page 32
to the jacks of your components. Audio signals Satellite tuner, CATV system Video signals A B C D E A Optical digital cord (not supplied) B Audio cord (not supplied) C Component video cord (not supplied) D S video cord (not supplied) E Video cord (not supplied) Note Before connecting - Sony STR-DA5300ES | Operating Instructions (Large File - 21.32 MB) - Page 33
to the jacks of your components. Audio signals DVD recorder, VCR Video signals A B C To the VIDEO 3 IN/PORTABLE AV IN jacks (Front panel) Camcorder, B D video game A Audio cord (not supplied) B S video cord (not supplied) C Video cord (not supplied) D Audio/video cord (not supplied) Note - Sony STR-DA5300ES | Operating Instructions (Large File - 21.32 MB) - Page 34
receiver via the MONITOR VIDEO OUT jack as shown in the illustration. • Video signals can be output as HDMI video, component video and S video signals. • S video signals can be output as HDMI video, component video and video signals. • Component video signals can be output as HDMI video, S video - Sony STR-DA5300ES | Operating Instructions (Large File - 21.32 MB) - Page 35
table of the receiver Refer to "In the video input/output conversion table classified by the menu settings" (page 37) on the conversion function of images. Output Signals Input Signals OUTPUT jack HDMI OUT INPUT jack HDMI IN 1/2/3/4/5/6 f A COMPONENT a VIDEO IN B S VIDEO IN C a VIDEO IN - Sony STR-DA5300ES | Operating Instructions (Large File - 21.32 MB) - Page 36
jack is converted up to 1080p. • COMPONENT VIDEO MONITOR OUT jacks have restrictions on resolution when the resolution of video signals protected by copyright Set "Resolution" to "DIRECT" in the Video settings menu when receiving a signal that supports Closed Captions. Use the same kind of cords - Sony STR-DA5300ES | Operating Instructions (Large File - 21.32 MB) - Page 37
DIRECT AUTO (initial setting) 480i/576i 480p/576p 720p, 1080i 1080p Input signals Component video S video Video Component video S video Video Component video S video Video Component video S video Video Component video S video Video Component video S video Video HDMI OUT jack X X X aa) ac) ac) ac - Sony STR-DA5300ES | Operating Instructions (Large File - 21.32 MB) - Page 38
) * The shape of the connector varies depending on the area. Notes • To prevent noise pickup, keep the AM loop antenna (aerial) away from the receiver and other components. • Be sure to fully extend the FM wire antenna (aerial). • After connecting the FM wire antenna (aerial), keep it as horizontal - Sony STR-DA5300ES | Operating Instructions (Large File - 21.32 MB) - Page 39
procedure can also be used to return settings you have made to their factory defaults. 1,2 2,3 2,3 1 Press POWER to turn off the receiver. 2 Hold down POWER while pressing TONE MODE and DMPORT to turn on the receiver. 3 Release the TONE MODE and DMPORT after a few seconds. After "MEMORY CLEARING - Sony STR-DA5300ES | Operating Instructions (Large File - 21.32 MB) - Page 40
control. Observe the correct polarity when installing batteries. You can switch the command mode (AV SYSTEM 1 or AV SYSTEM 2) of the receiver and the remote. If both the receiver and the other Sony component respond to the same remote command, switch the command mode of either the component or the - Sony STR-DA5300ES | Operating Instructions (Large File - 21.32 MB) - Page 41
you press 1, the command mode is set to AV SYSTEM 1. When you press 2, the command mode is set to AV SYSTEM 2. 3 Press ENTER when the RM SET a paper clip. To switch the command mode of the RM-AAU016 remote 7: Operating the receiver using the GUI (Graphical User Interface) By using the GUI menu, - Sony STR-DA5300ES | Operating Instructions (Large File - 21.32 MB) - Page 42
to the receiver. For details on each input, see "Selecting a component" (page 53). Music You can listen to the music from an audio component connected and "Adjusting the speaker settings manually" (page 74). Surround You can use the Surround settings menu to select the sound field you want for your - Sony STR-DA5300ES | Operating Instructions (Large File - 21.32 MB) - Page 43
. 1 Make sure that the AMP button is lit. If it is not lit, or "GUI MODE" is not displayed in the display window of the receiver, follow the steps given in "Displaying the GUI menu on the TV screen" (page 41). 6 Press or b to enter the menu item. 7 Repeat steps 3 to - Sony STR-DA5300ES | Operating Instructions (Large File - 21.32 MB) - Page 44
AMP button is lit. If it is not lit, or "GUI MODE" is not displayed in the display window of the receiver, follow the steps given in "7: Operating the receiver using the GUI (Graphical User Interface)" (page 41). 2 Press V/v repeatedly to select "Settings," then press or b. The Settings menu list - Sony STR-DA5300ES | Operating Instructions (Large File - 21.32 MB) - Page 45
on the speakers you are using, then press . Notes • If you are not sure of the impedances of the speakers, refer to the operating instructions supplied with your speakers. (This information is often on the back of the speaker.) • When you connect all speakers with a normal impedance of 8 ohms - Sony STR-DA5300ES | Operating Instructions (Large File - 21.32 MB) - Page 46
B terminals (parallel connection). No audio signals are output from any speaker also to "Quick Setup Guide" supplied with the receiver. Before you perform the auto receiver and the microphone. • During the measurement, the sound that comes out of the speakers is very loud. The volume of the sound - Sony STR-DA5300ES | Operating Instructions (Large File - 21.32 MB) - Page 47
case, the distance value shown on the display may differ from the actual distance value. However, there will be no problems even if you continue to use the receiver with that value. Performing auto calibration The auto calibration function allows you to measure the following: • Speaker connectionsa - Sony STR-DA5300ES | Operating Instructions (Large File - 21.32 MB) - Page 48
a) This receiver corrects signals by analog downmix processing only for the center speaker and sub woofer when the multi-channel input is selected. The correction is invalid for other speakers. b) The measurement result is not utilized when the multi-channel input is selected. c) • Signals with a - Sony STR-DA5300ES | Operating Instructions (Large File - 21.32 MB) - Page 49
sounds and the measurement result appears on the TV screen. Note You cannot measure the speaker height of the surround speakers and the surround back speakers. Set the position of the surround speakers from "Position" in the Speaker settings menu. Tips • Operations other than turning the receiver - Sony STR-DA5300ES | Operating Instructions (Large File - 21.32 MB) - Page 50
remote one that matches that of the Sony listening room standard. Front Reference not utilized in the following cases. - The multi-channel input is selected. - "2ch Analog Direct" is being used. a sampling frequency of more than 96 kHz are being received. Tip The size of a speaker (LARGE/SMALL) is - Sony STR-DA5300ES | Operating Instructions (Large File - 21.32 MB) - Page 51
sound that can be measured. Try to perform the measurement when the environment is quiet enough to allow proper measurement. Warning 42 The volume of the receiver No speakers are connected. •Code 31 1 Press , then follow the instructions from step 1 of "Performing auto calibration." •Code 32, 33, - Sony STR-DA5300ES | Operating Instructions (Large File - 21.32 MB) - Page 52
the measurement results for polarity may vary. However, there will be no problems even if you continue to use the receiver with that value. To set auto calibration items more precisely (Enhanced . • Name Input You can rename the position number; for details, refer to "Naming inputs" (page 98). 52GB - Sony STR-DA5300ES | Operating Instructions (Large File - 21.32 MB) - Page 53
component connected to the PHONO, the MULTI CHANNEL INPUT, the TV, the TAPE/CD-R, receiver or the RM-AAU016 remote. Selected input Components that can be played back VIDEO 1, 2 VCR, etc., connected to the VIDEO 1 or VIDEO 2 jack. VIDEO 3 Video camera and TV game, etc., connected to the VIDEO - Sony STR-DA5300ES | Operating Instructions (Large File - 21.32 MB) - Page 54
. To activate the muting function Press MUTING on the remote. To cancel, press MUTING on the remote again or turn MASTER VOLUME clockwise to raise the volume. Even if you turn off the receiver, the muting function works when you turn the receiver on again. To avoid damaging your speakers Before you - Sony STR-DA5300ES | Operating Instructions (Large File - 21.32 MB) - Page 55
• The operation is described for a Sony Super Audio CD player. • Refer to the operating instructions supplied with the Super Audio CD player or CD player. z You can select the sound field to suit the music. Refer to page 67 for details. Recommended sound fields: Classical: D.Concert Hall Jazz: Jazz - Sony STR-DA5300ES | Operating Instructions (Large File - 21.32 MB) - Page 56
• Be sure the sound source corresponds to the multichannel format (the MULTI CHANNEL DECODING lamp on the front panel lights up during playback). • Be sure this receiver is connected to the DVD player, Blu-ray Disc Player via a digital connection. • Be sure the digital audio output of the DVD player - Sony STR-DA5300ES | Operating Instructions (Large File - 21.32 MB) - Page 57
video games 2 3 6 6 3 VIDEO 3 IN/PORTABLE AV IN • Refer to the operating instructions supplied with the TV and video game. 1 Turn on the TV and video game. 2 Turn on the receiver. 3 Press INPUT SELECTOR to select "VIDEO 3*." You can also use INPUT SELECTOR on this receiver to select "VIDEO - Sony STR-DA5300ES | Operating Instructions (Large File - 21.32 MB) - Page 58
6 6 3 • Refer to the operating instructions supplied with the TV and VCR. 1 Turn on the VCR. 2 Turn on the receiver. 3 Press INPUT SELECTOR to select "VIDEO 1*." You can also use INPUT SELECTOR on this receiver to select "VIDEO 1*." * When you connect VCR to the VIDEO 1 jack. An example of the - Sony STR-DA5300ES | Operating Instructions (Large File - 21.32 MB) - Page 59
adjusting the parameters, see "7: Operating the receiver using the GUI (Graphical User Interface)" (page 41). Audio settings menu parameters x A/V Sync (Synchronizes audio and video output) Lets you delay the output of audio to minimize the time gap between audio output and visual display. You can - Sony STR-DA5300ES | Operating Instructions (Large File - 21.32 MB) - Page 60
, such as the number of channels, and the sampling frequency, etc. When the TV has stereo speakers, the sound output from the receiver is also stereo as that of the TV, even if you play multi-channel source. • When you connect the receiver to a video component (projector, etc.), sound may not be - Sony STR-DA5300ES | Operating Instructions (Large File - 21.32 MB) - Page 61
connected to the receiver. The multi-channel sound can be played back as it is. Note Audio signals are not output from the TV's speakers when HDMI Audio is set to saver function for the GUI menu on the TV connected to the receiver. • ON When there has been no operation attempted for 15 minutes - Sony STR-DA5300ES | Operating Instructions (Large File - 21.32 MB) - Page 62
mode x 2ch Stereo The receiver outputs the sound from the front left/right speakers only. There is no sound from the sub woofer. Standard 2 channel stereo sources completely bypass the sound field processing and multichannel surround formats are downmixed to 2 channel. Note No sound is output from - Sony STR-DA5300ES | Operating Instructions (Large File - 21.32 MB) - Page 63
audio formats. Audio format Dolby Digital Connection of the playback component and Maximum number the receiver of channels COAXIAL/OPTICAL HDMI 5.1ch a a Dolby Digital EX 6.1ch a a Dolby Digital Plus a) Dolby TrueHD a) 7.1ch 7.1ch × a × a Enjoying Surround Sound DTS DTS-ES - Sony STR-DA5300ES | Operating Instructions (Large File - 21.32 MB) - Page 64
component and Maximum number the receiver of channels COAXIAL/OPTICAL HDMI 5.1ch × a Multi channel Linear PCM a) 7.1ch × a a)Audio signals are output in another format if the playback component does not correspond to the format. For details, refer to the operating instructions of the - Sony STR-DA5300ES | Operating Instructions (Large File - 21.32 MB) - Page 65
PLIIx Music* PLIIx Game* Neo:6 Cinema Neo:6 Music Multi Stereo Neural-THX Multi-channel Effect audio after decoding (Detecting automatically) Presets the sound as it was recorded/encoded without adding any surround effects. 4-channel signals Performs Dolby Pro Logic decoding. The source recorded - Sony STR-DA5300ES | Operating Instructions (Large File - 21.32 MB) - Page 66
Mode" in the Surround settings menu becomes invalid. When you select decoding modes other than Dolby Pro Logic IIx, multi-channel sound (being encoded) is output. • Neural-THX is effective when multi-channel signals are input. If you connect a sub woofer This receiver will generate a low frequency - Sony STR-DA5300ES | Operating Instructions (Large File - 21.32 MB) - Page 67
sound characteristics of the Sony Pictures Entertainment scoring stage. This mode is ideal for watching musicals or films where orchestra music is featured in the soundtrack. Creates many virtual speakers from a single pair of actual surround speakers. Uses 3D sound imaging to reproduce the sound - Sony STR-DA5300ES | Operating Instructions (Large File - 21.32 MB) - Page 68
Stereo" mode or A.F.D. mode is selected. Standard 2 channel stereo sources completely bypass the sound field processing and multi-channel surround formats are downmixed to 2 channels kHz. • If you set up the sound field effect while the receiver is receiving signals with a sampling frequency of more - Sony STR-DA5300ES | Operating Instructions (Large File - 21.32 MB) - Page 69
advanced adjustments. 3 While monitoring the sound, adjust the selected parameter using V/v and . Enjoying Surround Sound 2-3 For details, see following menu adjust the distribution of the center channel signal, generated through the Dolby Pro Logic II decoding, to the left/right speakers - Sony STR-DA5300ES | Operating Instructions (Large File - 21.32 MB) - Page 70
between the front channels and the surround channels. x Panorama Mode Lets you perform further adjustments for Dolby Pro Logic II and IIx Music mode decoding. You can set this parameter only when A.F.D. mode is set to "PLII Music" or "PLIIx Music." • ON Lets you enjoy surround sound by spreading the - Sony STR-DA5300ES | Operating Instructions (Large File - 21.32 MB) - Page 71
Mode," then press . 5 Press V/v repeatedly to select the surround back decoding 1 mode, then press . Enjoying Surround Sound 2-5 1 Make sure that the AMP button is lit. If it is not lit, or "GUI MODE" is not displayed in the display window of the receiver, follow the steps in "7: Operating the - Sony STR-DA5300ES | Operating Instructions (Large File - 21.32 MB) - Page 72
• This function does not work in the following cases. - The multi-channel input is selected. - The sound field for music or movies is selected. • If surround back decoding processing is being performed while the receiver is receiving signals with a sampling frequency of more than 48 kHz, the signals - Sony STR-DA5300ES | Operating Instructions (Large File - 21.32 MB) - Page 73
channel input is selected. - Dolby TrueHD signals with a sampling frequency of more than 96 kHz are being received. • If the NIGHT MODE function is turned on while the receiver is receiving is automatically set to "MAX." 1 Enjoying Surround Sound 2 1 Press AMP. Receiver operation is enabled. 73GB - Sony STR-DA5300ES | Operating Instructions (Large File - 21.32 MB) - Page 74
"GUI MODE" is not displayed in the display window of the receiver, follow the steps given in "7: Operating the receiver using the GUI (Graphical User Interface)" (page 41). 74GB Note When one of the sound fields for music is selected, no sound is output from the sub woofer if all the speakers are - Sony STR-DA5300ES | Operating Instructions (Large File - 21.32 MB) - Page 75
signals, or if the front or surround speakers are set to "SMALL," the sound field for movie is selected, or "Portable Audio" is selected. x Distance (Distance LARGE." • SMALL If the sound is distorted, or you feel a lack of surround effects when using multi-channel surround sound, select "SMALL" to - Sony STR-DA5300ES | Operating Instructions (Large File - 21.32 MB) - Page 76
, we recommend that you play back multi-channel surround encoded software and select the setting that provides a good sense of spaciousness and that best succeeds in forming a cohesive space between the surround sound from the surround speakers and the sound of the front speakers. If you are - Sony STR-DA5300ES | Operating Instructions (Large File - 21.32 MB) - Page 77
AMP button is lit. If it is not lit, or "GUI MODE" is not displayed in the display window of the receiver, follow the steps given in "7: Operating the receiver using the GUI (Graphical User Interface)" (page 41). 2 Press V/v repeatedly to select "Settings," then press or b. The Settings menu list - Sony STR-DA5300ES | Operating Instructions (Large File - 21.32 MB) - Page 78
on them slightly. • The speaker cords may have the short-circuit problem. When a test tone is output from a different speaker than the speaker Phase Audio • OFF • L/R, L/C, C/R, R/SL, R/SR, SR/SL, SR/ SBR, SBR/SBL, SR/SB, SBL/SL, SB/SL, SL/L, L/SR Lets you output front 2 channel source sound ( - Sony STR-DA5300ES | Operating Instructions (Large File - 21.32 MB) - Page 79
"ZONE 2." When you select "ZONE 2," the input to the SUR BACK jacks of the MULTI CHANNEL INPUT is invalid. Note Set "Sur Back Assign" to "OFF," then connect the surround back speakers to this receiver when you want to change the connection from a bi-amplifier connection or a zone 2 connection to - Sony STR-DA5300ES | Operating Instructions (Large File - 21.32 MB) - Page 80
settings, and apply them. These settings are applied to all sound fields and for each speaker. Bass Treble Level (dB) channel input is selected. - Dolby TrueHD signals with a sampling frequency of more than 96 kHz are being received. • If the equalizer is adjusted while the receiver is receiving - Sony STR-DA5300ES | Operating Instructions (Large File - 21.32 MB) - Page 81
Press V/v repeatedly to select the preset number that you want to register as the number to store the equalizer adjustment, then press the front speaker bass and treble level with TONE MODE and TONE on the receiver. 7 Press to enter the parameter. Clearing stored equalizer settings 1 Press OPTIONS, - Sony STR-DA5300ES | Operating Instructions (Large File - 21.32 MB) - Page 82
press . 1 2-4 4 Press V/v. Press V to scan from low to high, press v to scan from high to low. The receiver stops scanning whenever a station is received. In case of poor FM stereo reception 1 Press OPTIONS. 2 Press V/v to select "FM Mode," then press . 3 Press V/v to select "MONO," then press - Sony STR-DA5300ES | Operating Instructions (Large File - 21.32 MB) - Page 83
AMP button is lit. If it is not lit, or "GUI MODE" is not displayed in the display window of the receiver, follow the steps given in "7: Operating the receiver using the GUI (Graphical User Interface)" (page 41). 2 Press V/v repeatedly to select "FM" or "AM," then press or b. 3 Press V/v to select - Sony STR-DA5300ES | Operating Instructions (Large File - 21.32 MB) - Page 84
in the display window of the receiver, follow the steps given in "7: Operating the receiver using the GUI (Graphical User Interface stereo reception, switch the FM reception mode (page 82). 4 Press OPTIONS. 5 Press V/v to select "Memory," then press to enter. 6 Press V/v to select a preset number - Sony STR-DA5300ES | Operating Instructions (Large File - 21.32 MB) - Page 85
is available for XM radio receivers by calling 1800-XMRADIO (1-800-967-2346). For a full listing of the XM commercial-free channels and advertising supported channels, visit lineup.xmradio.com. Subscriptions subject to Customer Agreement available at xmradio.com. XM service only available in the 48 - Sony STR-DA5300ES | Operating Instructions (Large File - 21.32 MB) - Page 86
Tuner to your Sirius Ready home audio system. You are then ready to up noise. Checking the XM Radio ID or SIRIUS ID number 1 2-3 3 To connect to the XM jack Before operating locations around your home to see where the best reception will be received. Most XM customers place the antenna in a - Sony STR-DA5300ES | Operating Instructions (Large File - 21.32 MB) - Page 87
. XM Radio ID Sirius ID You can also check the XM Radio ID and Sirius ID using the display on the receiver. Selecting a channel by Category Mode You can select a channel from one category or all the categories. 3 Press OPTIONS, then press V/v repeatedly to select "Radio ID" or "Sirius ID," then - Sony STR-DA5300ES | Operating Instructions (Large File - 21.32 MB) - Page 88
by inputting the channel number directly 1 5 2, 4,6 3 SIRIUS When the "Preset Mode" screen is displayed, press OPTIONS, then press V/ v repeatedly to select "Category Mode." 4 Press V/v to select the channel, then press . The selected channel is being received. The channel information is displayed - Sony STR-DA5300ES | Operating Instructions (Large File - 21.32 MB) - Page 89
when you purchase the receiver. The selected channel is registered as the preset channel you selected in step 3. 7 Repeat steps 3 to 6 to preset another channel. To select the preset channels 1 Repeat steps 1 and 2 of "Presetting the channels". 2 Press V/v to select the preset number from the preset - Sony STR-DA5300ES | Operating Instructions (Large File - 21.32 MB) - Page 90
Operating the receiver using the GUI (Graphical User Interface)" (page 41). 2 Press V/v repeatedly to select "SIRIUS," then press or b. 3 Select a channel you want to lock using Category Tuning 90GB "The channel has been locked." appears and the Parental Lock is set. To delete the numbers you have - Sony STR-DA5300ES | Operating Instructions (Large File - 21.32 MB) - Page 91
. 5 Enter your 4-digit lock code using the number buttons. "The channel has been unlocked." appears and the channel is unlocked. Notes • When you select a channel using Category Tuning, locked channels are skipped. • When the receiver is reset to the factory settings, the lock code returns to the - Sony STR-DA5300ES | Operating Instructions (Large File - 21.32 MB) - Page 92
an invalid channel number. The channel to be tuned-in is void due to the change by the broadcast service, or the receiving condition is not good. Locked The selected channel is locked. - Channel Subscription Updated The subscription information has been - updated. Updating Channels xx - Sony STR-DA5300ES | Operating Instructions (Large File - 21.32 MB) - Page 93
The SiriusConnect Home tuner firmware is being updated. There is no text information in the channel. Remedies - This is not an error. The text information may not be displayed depending on the system condition, for example, right after the system has received a channel. Tuner Operations 93GB - Sony STR-DA5300ES | Operating Instructions (Large File - 21.32 MB) - Page 94
Other Operations Converting analog video input signals This receiver allows you to convert the resolution of analog video input signals. SHIFT RESOLUTION Using the DIGITAL MEDIA PORT adapter The DIGITAL MEDIA PORT adapter is for enjoying sound from a portable audio source or computer. By connecting - Sony STR-DA5300ES | Operating Instructions (Large File - 21.32 MB) - Page 95
and TDM-NC1. The list of tracks will be displayed on the GUI screen of the receiver. You can select a track you want and play back it on each GUI screen. is not displayed, see the operating instructions supplied with component for details on operating that component. continued 95GB Other Operations - Sony STR-DA5300ES | Operating Instructions (Large File - 21.32 MB) - Page 96
Audiobooks > Audiobook For details on operating the adapter using the adapter GUI menu, refer to the operating instructions supplied with the adapter you are using. To operate the TDM-iP1 using the iPod menu Make sure PORT adapter using the play mode buttons on the remote of the receiver. 96GB - Sony STR-DA5300ES | Operating Instructions (Large File - 21.32 MB) - Page 97
Go backward/forward Press m/M.** * When a TDM-iP1 is connected, the receiver enters pause mode when x is pressed. ** Fast-backward/forward while pressing . No Device There is no device connected to the adapter. No Audio No audio file was found. Loading The data is being read. No Server* - Sony STR-DA5300ES | Operating Instructions (Large File - 21.32 MB) - Page 98
Naming inputs You can enter a name of up to 8 characters for inputs and display it. This is convenient for labeling the jacks with the names of the connected components. 4 Press V/v/B/b to select a character, then press . 5 Press [Finish] to enter the name. The name you entered is registered. To - Sony STR-DA5300ES | Operating Instructions (Large File - 21.32 MB) - Page 99
. Select an input mode other than the HDMI input, satellite tuner and DIGITAL MEDIA PORT adapter then set the audio input mode. • When "2ch Analog Direct" is being used, or the multi-channel input is selected, audio input is set to "Analog." You cannot select other modes. Other Operations 3 99GB - Sony STR-DA5300ES | Operating Instructions (Large File - 21.32 MB) - Page 100
Enjoying the sound/ images from other inputs You can reassign video and/or audio signals to another input. Example) Connect the OPTICAL OUT jack of the DVD player to the OPTICAL VIDEO 1 IN jack of this receiver when you want to input the only digital optical audio signals from the DVD player. - Sony STR-DA5300ES | Operating Instructions (Large File - 21.32 MB) - Page 101
the input source to the coaxial input jacks on the receiver. • When you assign the digital audio input, the INPUT MODE setting may change automatically. • more than one digital audio input to the same input. • You cannot reassign more than one component video input to the same input. Other - Sony STR-DA5300ES | Operating Instructions (Large File - 21.32 MB) - Page 102
will change as follows. Input name you selected t Original input name t Sound field type t Volume... Tip You cannot switch the display while "GUI cancel the GUI display mode. FM and AM band Station name t Frequency t Sound field type t Volume... Index name appears only when you have assigned one to - Sony STR-DA5300ES | Operating Instructions (Large File - 21.32 MB) - Page 103
Back Left Surround Back Right Surround Back (the surround back components obtained by 6.1 channel decoding) Example: Recording format (Front/ Surround): 3/2.1 Output channel: Surround speakers are set to "NO." Sound Field: A.F.D. AUTO SW L C R SL SR Lights up when the receiver is decoding - Sony STR-DA5300ES | Operating Instructions (Large File - 21.32 MB) - Page 104
"Auto." Lights up when the receiver recognizes a component connected via an COAXIAL jack. Lights up when the receiver is decoding Dolby TrueHD. Lights up . Lights up when the receiver is decoding DTS-HD Master Audio. Name O D.RANGE P Frequency Effects) channel and the L.F.E. channel signal is - Sony STR-DA5300ES | Operating Instructions (Large File - 21.32 MB) - Page 105
is activated. wl SB DEC Lights up when surround back sound decoding is activated. e; DISCRETE Lights up when DTS-ES Discrete decoding is activated. ea DSD Lights up when the receiver is receiving DSD (Direct Stream Digital) signals (page 28). es Tuner indicators Lights up when using the - Sony STR-DA5300ES | Operating Instructions (Large File - 21.32 MB) - Page 106
to turn off automatically at a specified time. When sleep timer is being used, "SLEEP" lights up. Tip To check the remaining time before the receiver turns off, press SLEEP. The remaining time appears on the display. If you press SLEEP again, the sleep timer will be changed. SHIFT SLEEP Press - Sony STR-DA5300ES | Operating Instructions (Large File - 21.32 MB) - Page 107
You can record from a video/audio component using the receiver. Refer to the operating instructions supplied with your recording component. 1 Recording onto a MiniDisc or audio tape You can record onto a MiniDisc or audio tape using the receiver. See the operating instructions supplied with your MD - Sony STR-DA5300ES | Operating Instructions (Large File - 21.32 MB) - Page 108
2/ZONE 3 operations) You can enjoy images and sounds from a component connected to the receiver in a zone (zone 2 or zone 3) • Switching the output source for the ZONE 2 or ZONE 3 OUT jacks. • Switching the Sony receiver's power on or off in zone 2 or zone 3. Before using the zone 2/zone 3 function - Sony STR-DA5300ES | Operating Instructions (Large File - 21.32 MB) - Page 109
1:Zone 2 connections 1 Outputs sound from speakers in zone 2 using the SURROUND BACK SPEAKERS terminals of the receiver. Main zone Zone 2 STR-DA5300ES A C B TV monitor Other Operations ZONE 2 VIDEO OUT D D SURROUND BACK SPEAKERS RM-AAL008 A Audio component B Video component C IR repeater - Sony STR-DA5300ES | Operating Instructions (Large File - 21.32 MB) - Page 110
2:Zone 3 connections Main room STR-DA5300ES A C B ZONE 3 AUDIO OUT A Audio component B Video component C IR repeater (not supplied) D Sony Amplifier/Receiver E Speakers Zone 3 E E D C RM-AAL008 110GB - Sony STR-DA5300ES | Operating Instructions (Large File - 21.32 MB) - Page 111
output signals to the zone 2/zone 3 audio/video signals, then press . "Main" (this receiver) is always selected. If you do not change the setting, proceed to step 7. Other Operations 1 6 Press V/v to select, "ON" or "OFF," then press . 3-7 2 1 Make sure - Sony STR-DA5300ES | Operating Instructions (Large File - 21.32 MB) - Page 112
You can operate the receiver without pointing the remote toward the IR repeater of the receiver if you connect an IR repeater (not supplied) to the IR REMOTE jack. Use an IR repeater when you install the receiver in a place where signals from the remote cannot reach. STR-DA5300ES IR repeater (not - Sony STR-DA5300ES | Operating Instructions (Large File - 21.32 MB) - Page 113
jacks on the Hi (or Lo) side of the front speakers to the SURROUND BACK SPEAKERS terminals. Make sure that metal fittings of Hi/Lo attached to the have been removed from the speakers. Not doing so may cause a malfunction of the receiver. To set up speakers Set "Sur Back Assign" to "BI-AMP" in the - Sony STR-DA5300ES | Operating Instructions (Large File - 21.32 MB) - Page 114
, etc.) jack on the receiver to the appropriate CONTROL S jack on the respective component. Refer to the operating instructions supplied with your TV, satellite receiver Example TV VCR Tuner Receiver Remote The remote sensor on this receiver receives remote codes the same way as the remote - Sony STR-DA5300ES | Operating Instructions (Large File - 21.32 MB) - Page 115
Operating without connecting to the TV You can operate this receiver using the display even if you do not use a GUI when a TV monitor is not connected. Press SHIFT, then press MENU to display "DISPLAY" in - Sony STR-DA5300ES | Operating Instructions (Large File - 21.32 MB) - Page 116
L/C, C/R, R/SL, R/SR, SR/SL, OFF SR/SBR, SBR/SBL, SBL/SL, SL/L, L/SR PHASE AUDIO [xxxxxxx] OFF, L/C, C/R, R/SL, R/SR, SR/SL, OFF SR/SBR, SBR/SBL, SBL/SL, SL ] -20.0dB to +10.0dB (0.5dB step) 0dB SURROUND L [xxx.x dB] -20.0dB to +10.0dB (0.5dB step) 0dB SURROUND R [xxx.x dB] -20.0dB to +10.0dB - Sony STR-DA5300ES | Operating Instructions (Large File - 21.32 MB) - Page 117
SP PATTERN [xxxxx] 2/0 to 3/4.1 3/4.1 SUB WOOFER [xxx] NO, YES YES FRONT SP [xxxxx] SMALL, LARGE LARGE CENTER SP [xxxxx] NO, SMALL, LARGE LARGE SURROUND SP [xxxxx] NO, SMALL, LARGE LARGE SUR BACK SP [xxxxxx] NO, SINGLE, DUAL DUAL BI-AMP [xxx] OFF, ON OFF ZONE 2 SP [xxx] OFF - Sony STR-DA5300ES | Operating Instructions (Large File - 21.32 MB) - Page 118
SOUND FIELD SELECT ? SB DECODING [xxxx] OFF, AUTO, ON SB DEC MODE [xxxxxxx] DDEX, PLIIx MV, PLIIx MS EFFECT LEVEL [xxx%] 20% to 120% (5% step) CENTER WIDTH [x] 0 to 3 to 7 (8 step) DIMENSION CLEAR [xxx] YES, NO FM MODE [xxxxxx] MONO, STEREO NAME IN ? FMxx PARENTAL LOCK [xxx] ON, OFF - Sony STR-DA5300ES | Operating Instructions (Large File - 21.32 MB) - Page 119
576p, AUTO 720p, 1080i, 1080p COMPONENT V. ASSIGN ? VIDEO 1 c [xxxxxxxx] NONE, VIDEO1 to 3, DVD/BD, SAT/ DVD/BD c [xxxxxxxx] CATV, TAPE/CDR, MD/DAT, SA-CD/ CD, MULTI IN SAT/CATV c [xxxxxxxx] VIDEO1 DVD/BD SAT/CATV HDMI Settings HDMI CONTROL [xxx] OFF, ON OFF HDMI AUDIO [xxxxxx] AMP, TV+AMP - Sony STR-DA5300ES | Operating Instructions (Large File - 21.32 MB) - Page 120
SPEAKERS switch of the receiver, or connect headphones. Note You cannot measure the speaker height of the surround speakers and the surround back speakers. Set this the measurement result. When the measurement ends, a beep sounds and the measurement result appears on the display. Measurement Display - Sony STR-DA5300ES | Operating Instructions (Large File - 21.32 MB) - Page 121
frequency characteristics to a set that matches that of the Sony listening room standard. Adjusts the characteristics of all the problems even if you continue to use the receiver with that value. Selecting a sound field type For details on each sound field type, see "Enjoying a pre-programmed sound - Sony STR-DA5300ES | Operating Instructions (Large File - 21.32 MB) - Page 122
number. 30 FM and 30 AM preset numbers are available. If "MEMORY" disappears before you select the preset number SIRIUS Radio service, refer receiver. 2 Press TUNING + or TUNING - to select channel 0. You can also press TUNING MODE on the receiver to select "AUTO," then turn TUNING to select channel - Sony STR-DA5300ES | Operating Instructions (Large File - 21.32 MB) - Page 123
specified category is selected. 4 Press TUNING + or TUNING - to select the channel. You can also press TUNING MODE on the receiver to select "AUTO," then turn TUNING to select the channel. Selecting a channel number directly (Direct tuning) 1 After selecting satellite tuner, press D.TUNING. 2 Press - Sony STR-DA5300ES | Operating Instructions (Large File - 21.32 MB) - Page 124
on the main receiver (this receiver). 2 Press ZONE 2 or ZONE 3. The remote switches to zone 2 mode or zone 3 mode. 3 Turn on the amplifier in zone 2 or zone 3. 4 Press INPUT SELECTOR on the remote to select the source signals you want to output. For zone 2, analog video and audio signals are output - Sony STR-DA5300ES | Operating Instructions (Large File - 21.32 MB) - Page 125
Operating each component using the remote When you program the remote to control the following Sony or non-Sony components, you can use the buttons on the remote that are marked with circles. Note, however, that some buttons may not operate your component. If you want to change the contents of - Sony STR-DA5300ES | Operating Instructions (Large File - 21.32 MB) - Page 126
Video Digital Digital DSS, Tape deck DAT CD Tuner Receiver DIGITAL player, Disc CD CATV satellite/ BST A/B deck player, MEDIA DVD/ Player player, terminal terrestrial MD PORT VHS LD (UC) receiver deck device Button combo player (EURO) AV ?/1, zz z z z - Sony STR-DA5300ES | Operating Instructions (Large File - 21.32 MB) - Page 127
than Sony is connected to the VIDEO 2 IN jacks on the receiver. Before you begin, note that: - You cannot change the settings of PHONO. - The remote can SET UP and the input button light up. Note For a TV remote code value, only numbers in the 500's are valid. 4 Press ENTER. Once the numeric - Sony STR-DA5300ES | Operating Instructions (Large File - 21.32 MB) - Page 128
input buttons on this remote may not be available when used with your particular component. To control a CD player Maker SONY DENON JVC KENWOOD MAGNAVOX player Maker SONY PIONEER Code(s) 601, 602, 603 606 To control a video CD player Maker SONY Code(s) 605 To control a VCR Maker SONY AIWA* - Sony STR-DA5300ES | Operating Instructions (Large File - 21.32 MB) - Page 129
Sony instead. To control a DVD player Maker SONY Maker SONY Code(s) 403 To control a TV Maker SONY DAEWOO a satellite tuner or cable box Maker SONY JERROLD/G.I. PANASONIC RCA S. ATLANTA Code(s) 801 SONY Code(s) 002, 003, 004, 005 To control a hard disc recorder Maker SONY Code(s) 307 - Sony STR-DA5300ES | Operating Instructions (Large File - 21.32 MB) - Page 130
To control a PSX Maker SONY Code(s) 313, 314, 315 Performing several commands in sequence automatically (Macro Play) The Macro Play function lets you link several commands in a sequential order as a single command. The remote provides 2 macro lists (MACRO 1 and MACRO 2). You can specify up to 20 - Sony STR-DA5300ES | Operating Instructions (Large File - 21.32 MB) - Page 131
. To cancel programming Press RM SET UP. Also, not pressing any button for 60 seconds cancels the settings. The previous command remains valid. Using the Remote continued 131GB - Sony STR-DA5300ES | Operating Instructions (Large File - 21.32 MB) - Page 132
to learn the code using the learning function. Note When setting up the receiver to learn the remote command modes, replace the batteries with new ones. 1,6 1 2 Example for assigning numeric button 1 to VIDEO 1 of the remote: 1 Press TV while pressing RM SET UP. The RM SET UP button lights up - Sony STR-DA5300ES | Operating Instructions (Large File - 21.32 MB) - Page 133
(button 1 in the example) you want to use as the VIDEO 1 button. The input button you selected in step 2 lights up. (The RM SET UP button remains lit.) 4 Point the remote code receiver section of the remote toward the receiver/transmitter on the remote control to be learned from. While the second - Sony STR-DA5300ES | Operating Instructions (Large File - 21.32 MB) - Page 134
Clearing all the contents of the remote's memory AV ?/1 ?/1 MASTER VOL - 1 Press and hold MASTER VOL - first, then press ?/1, then press AV ?/1. The RM SET UP button flashes three times. 2 Release MASTER VOL -. All the contents of the remote's memory (i.e., all the programmed data) are cleared. - Sony STR-DA5300ES | Operating Instructions (Large File - 21.32 MB) - Page 135
Dimensions," the virtual speaker technology, creates a virtual multisurround environment with actual speakers up to 7.1 channels, and brings the surround sound jack. However, the number of colors which can be expressed by 1 pixel will be 36, etc., bits when the receiver corresponds to DeepColor. - Sony STR-DA5300ES | Operating Instructions (Large File - 21.32 MB) - Page 136
for DVD-video. The number of playback channels varies depending on the software. x DTS Digital Surround Digital audio encoding/decoding technology for theaters developed by DTS, Inc. It compresses audio less than Dolby Digital, delivering a higher quality sound reproduction. x DTS-ES Format for - Sony STR-DA5300ES | Operating Instructions (Large File - 21.32 MB) - Page 137
delivers the rich envelopment and discrete image detail of surround sound in a format 100% compatible with stereo. x PCM (Pulse Code Modulation) A method of converting analog audio to digital audio for easy enjoyment of digital sound. x Progressive A scanning method that draws all scanning lines - Sony STR-DA5300ES | Operating Instructions (Large File - 21.32 MB) - Page 138
, and is a trademark of Sony. xvYCC is an international standard for color space in video. This standard can express a wider color range than the currently used broadcast standard. Precautions On safety Should any solid object or liquid fall into the cabinet, unplug the receiver and have it checked - Sony STR-DA5300ES | Operating Instructions (Large File - 21.32 MB) - Page 139
If you experience any of the following difficulties while using the receiver, use this troubleshooting guide to help you remedy the problem. Should any problem persist, consult your nearest Sony dealer. Audio There is no sound, no matter which component is selected, or only a very low-level - Sony STR-DA5300ES | Operating Instructions (Large File - 21.32 MB) - Page 140
sound is output from the headphones. If only one channel is output from the headphones, the component may not be connected to the receiver . • Move your TV away from the audio components. • Make sure you have grounded sound, or only a very lowlevel sound is heard from the center/ surround/surround - Sony STR-DA5300ES | Operating Instructions (Large File - 21.32 MB) - Page 141
is selected properly on this receiver. • Check whether the input source of the software being played back corresponds to the multi-channel format. • Check whether the setup on the playback component is set to multi-channel sound. • Check to make sure the selected audio (digital) input jack is not - Sony STR-DA5300ES | Operating Instructions (Large File - 21.32 MB) - Page 142
the display. The system cannot receive satellite channels at all. • The receiving condition is not good. Move the antenna to the place where the condition is good. • Check that you subscribed to the desired satellite radio service (see page 85). Remote control The remote does not function. • Point - Sony STR-DA5300ES | Operating Instructions (Large File - 21.32 MB) - Page 143
of two numbers and a message. You can check the condition of the system by the message. Refer to the following table to solve the problem. If any problem persists, consult your nearest Sony dealer. PROTECTOR Irregular current is output to the speakers, or the upper panel of the receiver is covered - Sony STR-DA5300ES | Operating Instructions (Large File - 21.32 MB) - Page 144
20 kHz LPF) S/N: 96 dB (A, 20 kHz LPF) Outputs MD/DAT (REC OUT), VIDEO 1, ZONE 2, ZONE 3 (AUDIO OUT) Voltage:150mV Impedance: 1kohm FRONT L/R, CENTER, Voltage: 2V SURROUND L/R, Impedance: 1kohm SURROUND BACK L/R, SUB WOOFER EQUALIZER Gain levels ±10 dB, 1 dB step FM tuner section Tuning - Sony STR-DA5300ES | Operating Instructions (Large File - 21.32 MB) - Page 145
-232C Control" is set to "OFF") Dimensions 430 × 175 × 430 mm (width/height/depth) including projecting parts and controls Mass (Approx.) 16.0 kg Supplied accessories Operating Instructions (this manual) Quick Setup Guide (1) HDMI CONTROL Guide (1) GUI Menu List (1) Optimizer microphone ECM - Sony STR-DA5300ES | Operating Instructions (Large File - 21.32 MB) - Page 146
channel 62 2ch Analog Direct 62, 121 2ch Stereo Mode 62 4 Ω 45 5.1 channel 16 7.1 channel 16 8 Ω 45 A A.F.D. (mode) 65 A/V Sync 59, 119 AC power cord 39 AM 82, 102, 121 Audio 39 remote 134 Command mode 40 Connections antennas 38 audio components 22 146GB monitor 20 speakers 18 video components 27 - Sony STR-DA5300ES | Operating Instructions (Large File - 21.32 MB) - Page 147
, Movie, Music) 65 Position (Auto Calibration) 52, 116 Position (Surround Speakers) 75 Preset channels 89, 123 Preset Mode 89 Preset stations 84, 122 PROTECTOR 143 Q Quick Setup 48 R Radio ID 86, 118, 122 Recording 107 Remote 11-15, 40, 125-134 Resetting 39 Resolution 60, 94, 119 RS-232C Control 61 - Sony STR-DA5300ES | Operating Instructions (Large File - 21.32 MB) - Page 148
MODE 7, 39 Treble 7, 80, 118 Tuner 82 Tuner (Settings) 118 Tuning 82, 83, 84 U Up converting 34 V VCR 33, 58 Video (Settings) 60, 119 VIDEO 3 IN/PORTABLE AV IN jacks 33, 57 Video game 57 Virtual Speakers 70, 118 X XM Radio 85 Z Zone 12V Trigger 112, 119 ZONE 2 79, 108 ZONE 3 108 Zone Input - Sony STR-DA5300ES | Operating Instructions (Large File - 21.32 MB) - Page 149
Additional Information 149GB - Sony STR-DA5300ES | Operating Instructions (Large File - 21.32 MB) - Page 150
pas les piles avec les ordures ménagères. Débarassezvous en correctement comme des déchets chimiques. Notes sur le mode d'emploi • Les instructions de ce manuel couvrent le modèle STR-DA5300ES. Vérifiez le numéro de votre modèle en bas et à droite du panneau avant. • Dans ce manuel, les opérations - Sony STR-DA5300ES | Operating Instructions (Large File - 21.32 MB) - Page 151
autres pays. Toutes les autres marques et marques déposées appartiennent à leurs détenteurs respectifs. Dans ce manuel, les sigles ™ et ® ne sont pas spécifiés. Par la présente Sony Corporation déclare que l'ampli-tuner multicanal AV STR-DA5300ES est conforme aux exigences essentielles et aux autres - Sony STR-DA5300ES | Operating Instructions (Large File - 21.32 MB) - Page 152
Audio 62 Paramètres pour la vidéo (Menu de paramétrage Video 63 Paramètres pour HDMI (Menu HDMI) ......63 Paramètres pour le système (Menu de paramétrage System 64 Écoute du son surround MEDIA PORT 104 Attribution de noms à des entrées 108 Passage entre son numérique et analogique (INPUT MODE - Sony STR-DA5300ES | Operating Instructions (Large File - 21.32 MB) - Page 153
éprogrammés dans la télécommande 145 Effacement de tout le contenu de la mémoire de la télécommande 147 Informations complémentaires Glossaire 148 Précautions 151 Guide de dépannage 152 Spécifications 157 Index 159 5FR - Sony STR-DA5300ES | Operating Instructions (Large File - 21.32 MB) - Page 154
Mise en service Description et emplacement des pièces Panneau avant Pour retirer le cache Appuyez sur PUSH. Après avoir retiré le cache, gardez-le hors de portée - Sony STR-DA5300ES | Operating Instructions (Large File - 21.32 MB) - Page 155
en service Désignation Fonction A POWER Appuyez sur cette touche pour allumer ou éteindre l'ampli-tuner. B Prise AUTO CAL MIC Permet de brancher le microphone d'optimisation pour la fonction Digital Cinema Auto Calibration (page 49). C TONE MODE TONE Permet de régler FRONT/CENTER/ SURROUND - Sony STR-DA5300ES | Operating Instructions (Large File - 21.32 MB) - Page 156
Désignation Fonction P Prises VIDEO 3 Permet de raccorder un IN/PORTABLE appareil audio/vidéo AV IN portable tel qu'un caméscope ou une console de jeux vidéo. Q Témoin MULTI S'allume lors du CHANNEL décodage de signaux DECODING audio multicanal. R INPUT SELECTOR Tournez ce bouton pour - Sony STR-DA5300ES | Operating Instructions (Large File - 21.32 MB) - Page 157
en service A Section DIGITAL INPUT/OUTPUT Prises OPTICAL IN/ OUT Prises COAXIAL IN Permet de raccorder un lecteur DVD, un lecteur Super Audio CD, 21, 30). B Prise de commande pour appareils Sony et autres appareils externes Prises IR REMOTE IN/ OUT Permet de raccorder un répéteur infrarouge - Sony STR-DA5300ES | Operating Instructions (Large File - 21.32 MB) - Page 158
28). Prises MULTI CHANNEL INPUT Permettent de raccorder un lecteur Super Audio CD ou un lecteur DVD doté d'une prise audio analogique pour son 7.1 amplificateur de puissance externe. 10FR H Section VIDEO/AUDIO INPUT/ OUTPUT Prises AUDIO IN/OUT Prises VIDEO IN/OUT* Permet de raccorder un magné - Sony STR-DA5300ES | Operating Instructions (Large File - 21.32 MB) - Page 159
service Télécommande Vous pouvez utiliser la télécommande fournie RM-AAL008 pour commander l'ampli-tuner et des appareils audio/vidéo Sony pour lesquels la télécommande a été programmée (page 140). RM-AAL008 Désignation Fonction A AV programmées en usine pour commander des appareils Sony (page - Sony STR-DA5300ES | Operating Instructions (Large File - 21.32 MB) - Page 160
Appuyez sur cette touche pour numériques - mémoriser/rappeler des stations préréglées. - sélectionner les numéros de plage d'un lecteur CD, d'un lecteur MENU Appuyez sur cette touche pour afficher le menu de commande des appareils audio/vidéo. SCREEN/ DSPL CONTROL Appuyez sur SHIFT (wj), puis sur - Sony STR-DA5300ES | Operating Instructions (Large File - 21.32 MB) - Page 161
Mise en service Désignation Fonction Q être PIP (Picture in Picture). L'image changera comme suit : EXT VIDEO t ZONE 2 VIDEO t OFF. Vous pouvez échanger la position de l'écran principal et le menu lorsque le menu ou le guide à l'écran du magnétoscope, lecteur DVD ou tuner satellite est affich - Sony STR-DA5300ES | Operating Instructions (Large File - 21.32 MB) - Page 162
de la page 139. b)Ces touches (H, PRESET+) comportent un point tactile. Utilisez ce point tactile comme repère. Remarques • Certaines fonctions expliquées dans cette section peuvent être inopérantes sur certains modèles. • L'explication ci-dessus n'est donnée qu'à titre d'exemple. Pour certains - Sony STR-DA5300ES | Operating Instructions (Large File - 21.32 MB) - Page 163
Mise en service RM-AAU016 Cette télécommande n'est destinée qu'à commander l'ampli-tuner. Vous pouvez contrôler les fonctions principales de l'amplituner en utilisant cette télécommande grâce à - Sony STR-DA5300ES | Operating Instructions (Large File - 21.32 MB) - Page 164
Désignation M PIP Fonction Appuyez sur PIP pour commuter l'image de la fenêtre PIP (Picture in Picture). L'image changera comme suit : EXT VIDEO t ZONE 2 VIDEO t OFF. Vous pouvez échanger la position de l'écran principal et de la fenêtre PIP (échanger) en appuyant sur (4). Vous pouvez aussi changer - Sony STR-DA5300ES | Operating Instructions (Large File - 21.32 MB) - Page 165
Mise en service 1: Installation des enceintes Cet ampli-tuner vous permet d'utiliser un système 7.1 canaux (7 enceintes et un subwoofer). Utilisation d'un système 5.1/7.1 canaux Pour tirer pleinement parti du son surround cinéma multicanal, vous devez utiliser cinq enceintes (deux enceintes avant, - Sony STR-DA5300ES | Operating Instructions (Large File - 21.32 MB) - Page 166
Conseils • Les angles A doivent être identiques. • Dans le cas d'un système 6.1 canaux, placez l'enceinte surround arrière derrière la position du siège. • Vous pouvez placer le subwoofer où vous le désirez car il n'émet pas de signaux très directionnels. 18FR - Sony STR-DA5300ES | Operating Instructions (Large File - 21.32 MB) - Page 167
B D C B A A Cordon audio mono (non fourni) B Cordons d'enceintes (non fournis) AEnceinte avant A (G) BEnceinte avant A (D) CEnceinte centrale DSubwooferb) EEnceinte surround arrière (G)c) FEnceinte surround arrière (D)c) GEnceinte surround (G) HEnceinte surround (D) a) Si vous disposez d'une - Sony STR-DA5300ES | Operating Instructions (Large File - 21.32 MB) - Page 168
d'un certain seuil et il n'y a alors plus de son. c) Si vous ne raccordez qu'une enceinte surround arrière, raccordez-la aux bornes SURROUND BACK SPEAKERS L. Remarques • Lorsque toutes les enceintes raccordées ont une impédance nominale égale ou supérieure à 8 ohms, placez « Impedance » dans le menu - Sony STR-DA5300ES | Operating Instructions (Large File - 21.32 MB) - Page 169
en service 3: Raccordement de l'écran Vous pouvez visionner l'image de l'entrée sélectionnée lorsque vous raccordez la prise MONITOR VIDEO OUT tous les câbles. Raccordez les cordons audio et vidéo correspondant aux prises de vos appareils. Signaux audio Écran de téléviseur Signaux vidéo A - Sony STR-DA5300ES | Operating Instructions (Large File - 21.32 MB) - Page 170
qu'un écran de téléviseur ou un projecteur à la prise MONITOR VIDEO OUT de l'ampli-tuner. Il se peut que vous ne puissiez pas enregistrer le son du téléviseur par les enceintes connectées à l'ampli-tuner. Dans cette configuration, si la prise de sortie audio du téléviseur peut être commutée entre « - Sony STR-DA5300ES | Operating Instructions (Large File - 21.32 MB) - Page 171
Mise en service 4a: Raccordement des appareils audio Comment raccorder vos appareils Cette section décrit comment raccorder n'attachez pas des cordons optiques numériques. Conseil Toutes les prises audio numériques sont compatibles avec des fréquences d'échantillonnage de 32 kHz, 44,1 kHz, 48 - Sony STR-DA5300ES | Operating Instructions (Large File - 21.32 MB) - Page 172
PORT Platine MD Lecteur Super Audio CD, lecteur CD A B B C A Cordon optique numérique (non fourni) B Cordon audio (non fourni) C Cordon rétiré le cordon si des cordons sont branchés sur la prise COMPONENT VIDEO. - Retirez l'adaptateur DIGITAL MEDIA PORT en appuyant sur les côtés du - Sony STR-DA5300ES | Operating Instructions (Large File - 21.32 MB) - Page 173
'à la prise COAXIAL SA-CD/CD IN de cet amplituner. Pour la lecture d'un Super Audio CD, raccordez le lecteur aux prises MULTI CHANNEL INPUT ou SA-CD/CD IN. Consultez le mode d'emploi du lecteur Super Audio CD. • Raccordez un lecteur qui peut émettre des signaux DSD depuis la prise HDMI vers - Sony STR-DA5300ES | Operating Instructions (Large File - 21.32 MB) - Page 174
Raccordement d'appareils dotés de prises de sortie multicanal Si votre lecteur DVD ou lecteur Super Audio CD comporte des prises de sortie multicanal, vous pouvez les raccorder aux prises MULTI CHANNEL INPUT de cet ampli-tuner pour bénéficier du son multicanal. Vous pouvez également utiliser les - Sony STR-DA5300ES | Operating Instructions (Large File - 21.32 MB) - Page 175
DVD et lecteurs Super Audio CD ne comportent pas de prises SURROUND BACK. • Lorsque « Sur Back Assign » est placé sur « BIAMP » ou « ZONE 2 » dans le menu de paramétrage Speaker, l'entrée aux prises SUR BACK n'est pas valide. • Les signaux d'entrée audio des prises MULTI CHANNEL INPUT ne sont émis - Sony STR-DA5300ES | Operating Instructions (Large File - 21.32 MB) - Page 176
doté de prises analogiques tel qu'une platine-cassette, une platine tourne-disque, etc. Lecteur Super Audio CD, lecteur CD Platine-cassette A A A A Platine MD Platine tourne-disque A Cordon audio (non fourni) Remarques • Si votre platine tourne-disque comporte un fil de terre, raccordez-le - Sony STR-DA5300ES | Operating Instructions (Large File - 21.32 MB) - Page 177
Mise en service 4b: Raccordement des appareils vidéo Comment raccorder vos appareils Cette section décrit comment raccorder vos appareils à cet ampli-tuner. Avant de commencer, consultez le tableau « - Sony STR-DA5300ES | Operating Instructions (Large File - 21.32 MB) - Page 178
la prise VIDEO, à la prise S VIDEO, ou à la prises COMPONENT VIDEO peuvent être émis comme des signaux HDMI. Les signaux audio ne Audio (DTS-HD Master Audio, Dolby TrueHD), DeepColor et xvYCC, étendues en HDMI ver1.3. • Cet ampli-tuner prend en charge la fonction HDMI CONTROL. Consultez le « Guide - Sony STR-DA5300ES | Operating Instructions (Large File - 21.32 MB) - Page 179
Mise en service Lecteur DVD Signaux audio/ vidéo A Tuner satellite Signaux audio/ vidéo A Lecteur Blu-ray Disc, PS3™, enregistreur à disque dur Signaux audio/ vidéo A A Câble HDMI (non fourni) A Signaux audio/ vidéo Écran de téléviseur, projecteur, etc. suite 31FR - Sony STR-DA5300ES | Operating Instructions (Large File - 21.32 MB) - Page 180
émis que par la prise HDMI OUT. Le signal vidéo reçu ne peut être émis ni par les prises VIDEO OUT ou S VIDEO OUT, ni par les prises MONITOR VIDEO OUT. • Les signaux audio et vidéo de l'entrée HDMI ne sont pas émis de la prise HDMI OUT lorsque le menu de l'ampli-tuner - Sony STR-DA5300ES | Operating Instructions (Large File - 21.32 MB) - Page 181
Mise en service Raccordement d'un lecteur DVD ou d'un lecteur Blu-ray Disc L'illustration suivante indique comment raccorder un lecteur DVD ou un lecteur Bluray Disc. Il n'est pas nécessaire de raccorder tous les câbles. Raccordez les cordons audio et vidéo correspondant aux prises de vos appareils - Sony STR-DA5300ES | Operating Instructions (Large File - 21.32 MB) - Page 182
un tuner satellite ou un system CATV. Il n'est pas nécessaire de raccorder tous les câbles. Raccordez les cordons audio et vidéo correspondant aux prises de vos appareils. Signaux audio Tuner satellite, système CATV Signaux vidéo A B C D E A Cordon optique numérique (non fourni) B Cordon - Sony STR-DA5300ES | Operating Instructions (Large File - 21.32 MB) - Page 183
n'est pas nécessaire de raccorder tous les câbles. Raccordez les cordons audio et vidéo correspondant aux prises de vos appareils. Signaux audio Enregistreur DVD, magnétoscope Signaux vidéo A B C Vers les prises VIDEO 3 IN/ PORTABLE AV IN (panneau avant) Caméscope, B D console de jeux vid - Sony STR-DA5300ES | Operating Instructions (Large File - 21.32 MB) - Page 184
signal vidéo peut être émis après le raccordement de l'ampli-tuner par la prise MONITOR VIDEO OUT comme sur l'illustration. • Les signaux vidéo peuvent être émis après avoir été vidéo, voir « Tableau de conversion des entrées/sorties vidéo classées selon le paramétrage du menu » (page 39). 36FR - Sony STR-DA5300ES | Operating Instructions (Large File - 21.32 MB) - Page 185
entrées/sorties vidéo classées selon le paramétrage du menu » (page 39) à propos de la fonction de conversion d'images. Signaux de sortie Signaux d'entrée Prise OUTPUT HDMI OUT Prise INPUT HDMI IN 1/2/3/4/5/6 f A COMPONENT a VIDEO IN B S VIDEO IN C a VIDEO IN D a COMPONENT VIDEO MONITOR - Sony STR-DA5300ES | Operating Instructions (Large File - 21.32 MB) - Page 186
la prise HDMI OUT est convertie jusqu'à 1080p. • Les prises COMPONENT VIDEO MONITOR OUT comportent des restrictions de résolution trage Video pour émettre les signaux vidéo depuis les prises MONITOR VIDEO OUT, MONITOR S VIDEO OUT, COMPONENT VIDEO MONITOR OUT lorsque les deux sont raccordées. Pour - Sony STR-DA5300ES | Operating Instructions (Large File - 21.32 MB) - Page 187
Mise en service Tableau de conversion des entrées/sorties vidéo classées selon le paramétrage du menu Pour plus d'informations sur les paramètres du menu « Resolution », voir « Paramètres pour la vidéo (Menu de paramétrage Video) » (page 63) et concernant l'utilisation, voir « Conversion de signaux - Sony STR-DA5300ES | Operating Instructions (Large File - 21.32 MB) - Page 188
5: Raccordement des antennes Raccordez l'antenne cadre AM et l'antenne fil FM fournies. Antenne fil FM (fournie) Antenne cadre AM (fournie) * La forme du connecteur peut différer selon les zones. Remarques • Pour empêcher les parasites, placez l'antenne cadre AM à l'écart de l'ampli-tuner et des - Sony STR-DA5300ES | Operating Instructions (Large File - 21.32 MB) - Page 189
Mise en service 6: Préparation de l'amplituner et de la télécommande Branchement du cordon d'alimentation secteur Branchez une extrémité du cordon d'alimentation secteur fourni à la borne AC - Sony STR-DA5300ES | Operating Instructions (Large File - 21.32 MB) - Page 190
ou très humide. • N'utilisez pas une pile neuve avec des piles usagées. • N'utilisez pas des piles au manganèse avec des piles d'un autre changer le mode de commande (AV SYSTEM 1 ou AV SYSTEM 2) de l'ampli-tuner et de la télécommande. Si l'ampli-tuner et l'autre appareil Sony répondent à la même - Sony STR-DA5300ES | Operating Instructions (Large File - 21.32 MB) - Page 191
Mise en service Pour changer le mode de commande de la télécommande RM-AAL008 Pour touche RM SET UP. Lorsque vous appuyez sur 1, le mode de commande AV SYSTEM 1 est sélectionné. Lorsque vous appuyez sur 2, le mode de commande AV SYSTEM 2 est sélectionné. 3 Appuyez sur ENTER lorsque la touche RM - Sony STR-DA5300ES | Operating Instructions (Large File - 21.32 MB) - Page 192
. Input Permet de sélectionner l'entrée à l'amplituner. Pour plus d'informations sur les entrées, voir « Sélection d'un appareil » (page 56). Music Vous permet d'écouter la musique d'un appareil audio raccordé à l'adaptateur DIGITAL MEDIA PORT. Pour plus d'informations sur la fonction de musique - Sony STR-DA5300ES | Operating Instructions (Large File - 21.32 MB) - Page 193
service d'enceintes » (page 79). Surround Vous pouvez utiliser le menu de paramétrage Surround pour sélectionner le champ sonore Audio Pour plus d'informations sur le réglage du son à l'aide du menu de paramétrage Audio, voir « Paramètres pour l'audio (Menu de paramétrage Audio) » (page 62). Video - Sony STR-DA5300ES | Operating Instructions (Large File - 21.32 MB) - Page 194
la touche AMP est allumée. Si elle n'est pas allumée ou si « GUI MODE » n'apparaît pas sur l'afficheur de l'ampli-tuner, suivez les étapes données dans « Affichage du menu GUI sur l'écran du téléviseur » (page 44). 2 Appuyez plusieurs fois sur MENU pour afficher le menu GUI sur l'écran du téléviseur - Sony STR-DA5300ES | Operating Instructions (Large File - 21.32 MB) - Page 195
service 8: Réglage des enceintes Sélection de l'impédance des enceintes Sélectionnez l'impédance correspondant à celle des enceintes utilisées » n'apparaît pas sur l'afficheur de l'ampli-tuner, suivez les étapes données dans « 7: Utilisation de l'ampli-tuner à l'aide de GUI (Graphical User Interface - Sony STR-DA5300ES | Operating Instructions (Large File - 21.32 MB) - Page 196
de 8 ohms ou plus. - Lorsque les enceintes raccordées dans une configuration « A » et « B » es aux bornes FRONT SPEAKERS A. B Les enceintes raccordées aux bornes FRONT SPEAKERS B. A+B Les deux paires d'enceintes raccordées aux bornes FRONT SPEAKERS A et B (en parallèle). OFF Aucun signal audio - Sony STR-DA5300ES | Operating Instructions (Large File - 21.32 MB) - Page 197
Mise en service 9: Calibrage automatique aux réglages appropriés (Auto Calibration) La fonction DCAC de la distance entre votre position d'écoute et chaque enceinte. Consultez également le « Guide d'installation rapide » fourni avec l'ampli-tuner. Remarques • La fonction de calibrage automatique - Sony STR-DA5300ES | Operating Instructions (Large File - 21.32 MB) - Page 198
la touche AMP est allumée. Si elle n'est pas allumée ou si « GUI MODE » n'apparaît pas sur l'afficheur de l'ampli-tuner, suivez les étapes données dans « 7: Utilisation de l'ampli-tuner à l'aide de GUI (Graphical User Interface) » (page 44). 50FR - Sony STR-DA5300ES | Operating Instructions (Large File - 21.32 MB) - Page 199
glez la position des enceintes surround depuis « Position » dans le menu de paramétrage Speaker. Conseils • Les opérations autres que la mise sous ou hors tension de l'ampli-tuner sont désactivées pendant la mesure. • Il tres de configuration des SPEAKERS ou raccordez un casque. 51FR Mise en service - Sony STR-DA5300ES | Operating Instructions (Large File - 21.32 MB) - Page 200
apparaît sur l'écran du téléviseur même si les enceintes sont correctement connectées. Ceci est dû aux spécifications des enceintes. Dans un tel cas, vous (« Yes ») ou non (« No ») l'avertissement. Suivez les instructions affichées sur l'écran du téléviseur lorsque vous sélectionnez « Yes ». Pour - Sony STR-DA5300ES | Operating Instructions (Large File - 21.32 MB) - Page 201
Mise en service Paramètre Explication Full Flat Rend la mesure de fréquence de chaque enceinte plane. Engineer Sélectionne des caractéristiques de fréquence correspondant aux normes d'un auditorium Sony. Front Reference Règle les caractéristiques de toutes les enceintes sur celles des - Sony STR-DA5300ES | Operating Instructions (Large File - 21.32 MB) - Page 202
surround arrière sont raccordées alors que des enceintes surround ne le sont pas. Raccordez la (les) enceinte(s) surround aux bornes SURROUND. • L'enceinte surround arrière n'est raccordée qu'aux bornes SURROUND Code 31 1 Appuyez sur , puis suivez les instructions depuis l'étape 1 de « Exécution du - Sony STR-DA5300ES | Operating Instructions (Large File - 21.32 MB) - Page 203
Mise en service Si vous sélectionnez « WRN CHECK » Si un avertissement sur le résultat de mesure est présent, des informations détaillées sont affichées. Appuyez sur pour revenir à l'étape 1 de « Vérification/sauvegarde des résultats de mesure » (page 52). Conseil Les résultats de mesure pour la - Sony STR-DA5300ES | Operating Instructions (Large File - 21.32 MB) - Page 204
é aux prises PHONO, MULTI CHANNEL INPUT, TV, TAPE/ CD VIDEO 3. DVD/BD Lecteur DVD, lecteur Blu-ray Disc, etc., raccordé à la prise DVD/BD. SAT/CATV Tuner satellite, etc., raccordé à la prise SAT/CATV. MD/DAT Platine MD ou DAT, etc., raccordée à la prise MD/DAT. SA-CD/CD Lecteur Super Audio - Sony STR-DA5300ES | Operating Instructions (Large File - 21.32 MB) - Page 205
Lecture 3 Appuyez sur MASTER VOL +/- pour régler le volume du son. Vous pouvez également utiliser MASTER VOLUME sur l'ampli-tuner. Conseils • Vous pouvez ajuster le son de manière différente en fonction de la vitesse à laquelle vous tournezle bouton MASTER VOLUME. Pour monter ou baisser rapidement - Sony STR-DA5300ES | Operating Instructions (Large File - 21.32 MB) - Page 206
La procédure est décrite pour un lecteur Super Audio CD Sony. • Consultez le mode d'emploi du lecteur Super Audio CD ou du lecteur CD. z Vous pouvez sélectionner Concert « live » : Live Concert, Stadium 1 Allumez le lecteur Super Audio CD ou le lecteur CD, puis placez le disque sur le plateau. 2 - Sony STR-DA5300ES | Operating Instructions (Large File - 21.32 MB) - Page 207
que la source de son est en format multicanal (le témoin MULTI CHANNEL DECODING s'allume sur le panneau avant pendant la lecture). • Assurez-vous que ray Disc par une liaison numérique. • Assurez-vous que la sortie audio numérique du lecteur DVD ou du lecteur Blu-ray Disc est correctement - Sony STR-DA5300ES | Operating Instructions (Large File - 21.32 MB) - Page 208
3* ». Vous pouvez également utiliser INPUT SELECTOR sur l'ampli-tuner pour sélectionner « VIDEO 3* ». * Lorsque la console de jeux vidéo est raccordée à la prise VIDEO 3 IN/PORTABLE AV IN du panneau avant. Exemple d'affichage 4 Sélectionnez la source d'entrée du téléviseur de façon que l'image - Sony STR-DA5300ES | Operating Instructions (Large File - 21.32 MB) - Page 209
1* ». Vous pouvez également utiliser INPUT SELECTOR sur l'ampli-tuner pour sélectionner « VIDEO 1* ». * Lorsque le magnétoscope est raccordé à la prise VIDEO 1. Exemple d'affichage 4 Sélectionnez la source d'entrée du téléviseur de façon que l'image du magnétoscope soit affichée. 5 Commencez la - Sony STR-DA5300ES | Operating Instructions (Large File - 21.32 MB) - Page 210
est émis. • MAIN+SUB Le son mixé de la langue principale et de la langue auxiliaire est émis. x Decode Priority (Priorité au décodage d'une entrée audio numérique) Permet de spécifier le mode d'entrée du signal numérique reçu aux prises DIGITAL IN ou HDMI IN. • PCM Lorsque des signaux - Sony STR-DA5300ES | Operating Instructions (Large File - 21.32 MB) - Page 211
du menu de paramétrage Video x Resolution (Conversion de signaux 1080p Pour plus d'informations sur les entrées, voir « Tableau de conversion des entrées/sorties vidéo classées Audio » peut changer automatiquement. x HDMI Audio (Paramétrage de l'entrée audio HDMI) Permet de spécifier les signaux audio - Sony STR-DA5300ES | Operating Instructions (Large File - 21.32 MB) - Page 212
émis que par les haut-parleurs raccordés à l'ampli-tuner. Le son multicanal peut être lu tel quel. Remarque Les signaux audio ne sont pas émis des hautparleurs du téléviseur lorsque HDMI Audio se trouve sur « AMP ». x HDMI SW Level Permet de régler le niveau du subwoofer sur 0 dB ou +10 dB quand - Sony STR-DA5300ES | Operating Instructions (Large File - 21.32 MB) - Page 213
« Surround », puis appuyez sur ou b. 5 Appuyez plusieurs fois sur V/v pour sélectionner « Sound Field surround multicanal (DVD, etc.). 2 Assurez-vous que la touche AMP est allumée. Si elle n'est pas allumée ou si « GUI MODE » n'apparaît pas sur l'afficheur de l'ampli-tuner, suivez les étapes données - Sony STR-DA5300ES | Operating Instructions (Large File - 21.32 MB) - Page 214
au subwoofer. Le son stéréo 2 canaux ordinaire n'est soumis à aucun traitement du champ sonore et le son surround multicanal est remixé en format stéréo 2 canaux (downmix). Remarque En mode 2ch stereo, aucun son n'est émis par le subwoofer. Pour écouter des sources stéréo 2 canaux par les enceintes - Sony STR-DA5300ES | Operating Instructions (Large File - 21.32 MB) - Page 215
Écoute du son surround Lorsque vous raccordez des lecteurs Blu-ray Disc et d'autres lecteurs HD de nouvelle génération Cet ampli-tuner prend en charge les formats audio suivants. Format audio Dolby Digital Raccordement de l'appareil lecteur à l'ampli- Nombre maximal tuner de canaux COAXIAL/ - Sony STR-DA5300ES | Operating Instructions (Large File - 21.32 MB) - Page 216
Raccordement de l'appareil lecteur à l'ampli- Nombre maximal tuner de canaux COAXIAL/OPTICAL HDMI 5.1ch × a PCM linéaire multicanal a) 7.1ch × a a)Les signaux audio sont émis dans un autre format si l'appareil lecteur ne correspond pas au format. Pour plus de détails, consultez le mode - Sony STR-DA5300ES | Operating Instructions (Large File - 21.32 MB) - Page 217
Stereo Neural-THX (Détection automatique) Prérègle le son tel qu'il a été enregistré/encodé sans lui ajouter d'effet surround Dolby Surround. Dolby Surround. Ce surround 5.1, il est désormais capable de délivrer une image en son surround 7.1 de 360° à partir d'un contenu encodé en NeuralTHX® Surround - Sony STR-DA5300ES | Operating Instructions (Large File - 21.32 MB) - Page 218
multicanal, seul le décodage Dolby Pro Logic IIx est actif. Le réglage de « SB Decoding » et « SB Dec Mode » dans le menu de paramétrage Surround devient alors invalide. Si vous sélectionnez un mode de décodage autre que Dolby Pro Logic IIx, un son multicanal (encodé) est émis. • Neural-THX est - Sony STR-DA5300ES | Operating Instructions (Large File - 21.32 MB) - Page 219
Dimension DCS D.Concert Hall A D.Concert Hall B Church Jazz Club Live Concert Stadium Sports Portable Audio de Sony Pictures Entertainment de Sony Pictures surround réelles. Utilise la reproduction sonore 3D reproduction sonore 3D pour reproduire les audio portable. Ce mode est idé - Sony STR-DA5300ES | Operating Instructions (Large File - 21.32 MB) - Page 220
avant sont émis par les prises MULTI CHANNEL INPUT. * Vous pouvez sélectionner ce surround sont réglées sur « SMALL », le champ sonore pour films est sélectionné ou si « Portable Audio Cinema Sound s'allume sur l'affichage. Pour désactiver l'effet surround pour MOVIE/MUSIC Sélectionnez « 2ch Stereo » - Sony STR-DA5300ES | Operating Instructions (Large File - 21.32 MB) - Page 221
le niveau d'effet, puis appuyez sur à l'étape 2. 2 Appuyez plusieurs fois sur V/v pour régler le niveau. Une valeur plus élevée accentue l'effet surround. Vous pouvez régler le niveau entre 20 et 120% par pas de 5%. 2 Appuyez sur b pour sélectionner « Custom Settings », puis appuyez sur . 73FR - Sony STR-DA5300ES | Operating Instructions (Large File - 21.32 MB) - Page 222
II vers les enceintes gauche/droite. x Dimension Control Permet d'effectuer d'autres réglages pour la différence entre les canaux avant et les canaux surround. x Panorama Mode Permet d'effectuer d'autres réglages pour EX. • ON Des enceintes virtuelles sont créées. • OFF La fonction est désactivée. - Sony STR-DA5300ES | Operating Instructions (Large File - 21.32 MB) - Page 223
Utilisation du mode de décodage du son surround arrière Le décodage du signal surround arrière enregistré en format Dolby Digital Surround EX, DTS-ES Matrix, DTS-ES Discrete 6.1, etc., permet de restituer le son surround tel que le réalisateur l'a voulu. 2 Appuyez plusieurs fois sur V/v pour - Sony STR-DA5300ES | Operating Instructions (Large File - 21.32 MB) - Page 224
Discrete 6.1 sont des signaux propres aux DVD et ne sont pas utilisés dans les salles de cinéma. e)Lorsque deux enceintes surround arrière sont raccordées, le canal de sortie émet des signaux 7.1 canaux. • ON L'option SB Dec Mode sélectionnée est appliquée aux décodage 5.1 canaux et 6.1 canaux - Sony STR-DA5300ES | Operating Instructions (Large File - 21.32 MB) - Page 225
appliqué si le mode d'enceintes sélectionné est 7.1 canaux dans les conditions suivantes : - un signal Dolby Digital Surround EX est reçu - « SB Decoding » se trouve sur « AUTO » Écoute du son surround à faible volume (NIGHT MODE) Cette fonction vous permet de recréer l'ambiance d'une salle de cin - Sony STR-DA5300ES | Operating Instructions (Large File - 21.32 MB) - Page 226
1 Appuyez sur AMP. La commande de l'ampli-tuner est activée. 2 Appuyez sur NIGHT MODE. La fonction NIGHT MODE est activée. Le NIGHT MODE bascule entre marche et arrêt en appuyant sur NIGHT MODE. Remarques • Cette fonction est inopérante lorsque : - L'entrée multicanal est sélectionnée. - Des signaux - Sony STR-DA5300ES | Operating Instructions (Large File - 21.32 MB) - Page 227
n'apparaît pas sur l'afficheur de l'ampli-tuner, suivez les étapes données Paramètres du menu Manual Setup x Level (Volume de l'enceinte) Vous pouvez régler le volume de chaque enceinte (centrale, surround gauche/droite, surround arrière gauche/droite, subwoofer). Vous pouvez régler le niveau entre - Sony STR-DA5300ES | Operating Instructions (Large File - 21.32 MB) - Page 228
si le signal d'entrée numérique contient des signaux L.F.E., ou si les enceintes avant ou surround sont réglées sur « SMALL », le champ sonore pour films est sélectionné ou si « Portable Audio » est sélectionné. x Distance (Distance de la position d'écoute à chaque enceinte) Vous pouvez régler la - Sony STR-DA5300ES | Operating Instructions (Large File - 21.32 MB) - Page 229
les autres champs sonores, la position des enceintes ne joue pas un rôle essentiel. Ces champs sonores ont été conçus en supposant que les enceintes surround sont positionnées derrière la position d'écoute, mais la représentation sonore reste cohérente même avec les enceintes - Sony STR-DA5300ES | Operating Instructions (Large File - 21.32 MB) - Page 230
est allumée. Si elle n'est pas allumée ou si « GUI MODE » n'apparaît pas sur l'afficheur de l'ampli-tuner, suivez les étapes données dans « 7: Utilisation de l'ampli-tuner à l'aide de GUI (Graphical User Interface) » (page 44). 2 Appuyez plusieurs fois sur V/v pour sélectionner « Settings », puis - Sony STR-DA5300ES | Operating Instructions (Large File - 21.32 MB) - Page 231
est allumée. Si elle n'est pas allumée ou si « GUI MODE » n'apparaît pas sur l'afficheur de l'ampli-tuner, suivez les étapes données dans « 7: Utilisation de l'ampli-tuner à l'aide de GUI (Graphical User Interface) » (page 44). 2 Appuyez plusieurs fois sur V/v pour sélectionner « Settings », puis - Sony STR-DA5300ES | Operating Instructions (Large File - 21.32 MB) - Page 232
peuvent ne pas s'afficher selon le réglage de la configuration des enceintes. x Phase Audio • OFF • L/R, L/C, C/R, R/SL, R/SR, SR/SL, SR/ SBR CHANNEL INPUT. x Sur Back Assign (Paramètres de (des) enceinte(s) surround arrière) • OFF Sélectionnez « OFF » si vous n'avez pas raccordé d'enceintes surround - Sony STR-DA5300ES | Operating Instructions (Large File - 21.32 MB) - Page 233
de régler la fréquence de recouvrement des graves des enceintes qui ont été placées sur « SMALL » dans le menu de paramétrage Speaker. La fréquence DVD aux prises MULTI CHANNEL INPUT. Le niveau de subwoofer depuis les lecteurs DVD est de 10 dB inférieur à celui des lecteurs Super Audio CD. x D.Range - Sony STR-DA5300ES | Operating Instructions (Large File - 21.32 MB) - Page 234
est allumée. Si elle n'est pas allumée ou si « GUI MODE » n'apparaît pas sur l'afficheur de l'ampli-tuner, suivez les étapes données dans « 7: Utilisation de l'ampli-tuner à l'aide de GUI (Graphical User Interface) » (page 44). 2 Appuyez plusieurs fois sur V/v pour sélectionner « Settings », puis - Sony STR-DA5300ES | Operating Instructions (Large File - 21.32 MB) - Page 235
4 Appuyez plusieurs fois sur V/v pour sélectionner le numéro préréglé que vous souhaitez pour mémoriser le réglage de l'égaliseur, puis appuyez sur . L'écran de réglage de l'égaliseur s'affiche sur l'écran du téléviseur. 5 Sélectionnez l'enceinte que vous souhaitez régler à l'aide de B/b, puis - Sony STR-DA5300ES | Operating Instructions (Large File - 21.32 MB) - Page 236
Vous pouvez écouter des émissions FM et AM avec le tuner interne. Avant l'utilisation, assurez-vous que les antennes FM et AM ont été raccordées à l'ampli-tuner (page 40). Conseil L'intervalle d'accord pour l'accord direct est indiqué ci-dessous. • Gamme FM 100 kHz • Gamme AM 10 kHz* * L'intervalle - Sony STR-DA5300ES | Operating Instructions (Large File - 21.32 MB) - Page 237
AMP est allumée. Si elle n'est pas allumée ou si « GUI MODE » n'apparaît pas sur l'afficheur de l'ampli-tuner, suivez les étapes données dans « 7: Utilisation de l'ampli-tuner à l'aide de GUI (Graphical User Interface) » (page 44). 2 Appuyez plusieurs fois sur V/v pour sélectionner « FM » ou « AM - Sony STR-DA5300ES | Operating Instructions (Large File - 21.32 MB) - Page 238
AMP est allumée. Si elle n'est pas allumée ou si « GUI MODE » n'apparaît pas sur l'afficheur de l'ampli-tuner, suivez les étapes données dans « 7: Utilisation de l'ampli-tuner à l'aide de GUI (Graphical User Interface) » (page 44). 2 Appuyez plusieurs fois sur V/v pour sélectionner « FM » ou « AM - Sony STR-DA5300ES | Operating Instructions (Large File - 21.32 MB) - Page 239
une station préréglée comme suit : • Bande AM AM1 à AM30 • Bande FM FM1 à FM30 Pour attribuer des noms aux stations préréglées 1 Sélectionnez la station préréglée à laquelle vous voulez attribuer un nom. 2 Appuyez sur OPTIONS, puis sélectionnez « Name Input ». Pour plus d'informations sur - Sony STR-DA5300ES | Operating Instructions (Large File - 21.32 MB) - Page 240
abonnements soumis à un accord client sont disponibles sur xmradio.com. Le service XM est uniquement disponible dans les 48 états limitrophes des Etats-Unis , introduit le XM Mini-Tuner, raccordé le XM Dock à votre système audio XM Ready® et installé l'antenne, vous êtes prêt à vous abonner et - Sony STR-DA5300ES | Operating Instructions (Large File - 21.32 MB) - Page 241
de SIRIUS Satellite Radio Inc. Tous droits réservés. Pour vous abonner à SIRIUS Radio Satellite Achetez et raccordez un tuner SiriusConnect à votre système audio Sirius Ready. Vous êtes alors prêt à activer et à vous abonner à Sirius soit en appelant le 1.888.539.SIRIUS (7474) ou accédez à sirius - Sony STR-DA5300ES | Operating Instructions (Large File - 21.32 MB) - Page 242
est allumée. Si elle n'est pas allumée ou si « GUI MODE » n'apparaît pas sur l'afficheur de l'ampli-tuner, suivez les étapes données dans « 7: Utilisation de l'ampli-tuner à l'aide de GUI (Graphical User Interface) » (page 44). 2 Appuyez plusieurs fois sur V/v pour sélectionner « XM » ou « SIRIUS - Sony STR-DA5300ES | Operating Instructions (Large File - 21.32 MB) - Page 243
est allumée. Si elle n'est pas allumée ou si « GUI MODE » n'apparaît pas sur l'afficheur de l'ampli-tuner, suivez les étapes données dans « 7: Utilisation de l'ampli-tuner à l'aide de GUI (Graphical User Interface) » (page 44). 2 Appuyez plusieurs fois sur V/v pour sélectionner « XM » ou « SIRIUS - Sony STR-DA5300ES | Operating Instructions (Large File - 21.32 MB) - Page 244
la touche AMP est allumée. Si elle n'est pas allumée ou si « GUI MODE » n'apparaît pas sur l'afficheur de l'ampli-tuner, suivez les étapes données dans « 7: Utilisation de l'ampli-tuner à 96FR - Sony STR-DA5300ES | Operating Instructions (Large File - 21.32 MB) - Page 245
est allumée. Si elle n'est pas allumée ou si « GUI MODE » n'apparaît pas sur l'afficheur de l'ampli-tuner, suivez les étapes données dans « 7: Utilisation de l'ampli-tuner à l'aide de GUI (Graphical User Interface) » (page 44). 2 Appuyez plusieurs fois sur V/v pour sélectionner « XM » ou « SIRIUS - Sony STR-DA5300ES | Operating Instructions (Large File - 21.32 MB) - Page 246
AMP est allumée. Si elle n'est pas allumée ou si « GUI MODE » n'apparaît pas sur l'afficheur de l'ampli-tuner, suivez les étapes données dans « 7: Utilisation de l'ampli-tuner à l'aide de GUI (Graphical User Interface) » (page 44). 6 Saisissez votre code de verrouillage à 4 chiffres à l'aide des - Sony STR-DA5300ES | Operating Instructions (Large File - 21.32 MB) - Page 247
», puis appuyez sur . « Enter your 4-digit lock code. » s'affiche. 5 Saisissez votre code de verrouillage à 4 chiffres à l'aide des touches numérotées. « The channel has been unlocked. » s'affiche et le canal est déverrouillé. Remarques • Quand vous sélectionnez un canal à l'aide de la sélection des - Sony STR-DA5300ES | Operating Instructions (Large File - 21.32 MB) - Page 248
• Vous ne pouvez pas prérégler des canaux verrouillés. Si vous réglez un canal préréglé sur le Parental Lock, les informations préréglées pour ce canal reprennent leur valeur par défaut. • Vous ne pouvez pas régler le Parental Lock pour les canaux 0 et 184. 100FR - Sony STR-DA5300ES | Operating Instructions (Large File - 21.32 MB) - Page 249
canal audio sont Attendez que les informations ou le canal audio situation de l'antenne, voir les instructions fournies avec le tuner SiriusConnect. service de diffusion, ou les conditions ne réception ne sont pasbonnes. Locked Channel Le canal sélectionné est verrouillé. - Subscription Updated - Sony STR-DA5300ES | Operating Instructions (Large File - 21.32 MB) - Page 250
Message qui s'affiche Updating Channels xx% Completed (xx représentent des entiers) Firmware Updating ----- Explication Remèdes Les informations des canaux sont en - cours de mises à jour. Le programme interne du tuner - SiriusConnect est mis à jour. Il n'y a pas d'informations - Sony STR-DA5300ES | Operating Instructions (Large File - 21.32 MB) - Page 251
RESOLUTION plusieurs fois. A chaque pression sur la touche, la résolution des signaux émis change. Vous pouvez aussi utiliser « Resolution » dans le menu de paramétrage Video. SHIFT Autres opérations RESOLUTION 103FR - Sony STR-DA5300ES | Operating Instructions (Large File - 21.32 MB) - Page 252
prises d'entrée/sortie audio numériques » (page 24). Sony propose les adaptateurs DIGITAL MEDIA PORT suivants : • TDM-BT1 Bluetooth™ Wireless Audio Adapter • TDM- de l'ampli-tuner, suivez les étapes données dans « 7: Utilisation de l'ampli-tuner à l'aide de GUI (Graphical User Interface) » (page 44). - Sony STR-DA5300ES | Operating Instructions (Large File - 21.32 MB) - Page 253
2 Appuyez plusieurs fois sur MENU pour afficher le menu GUI sur l'écran du téléviseur. 3 Appuyez plusieurs fois sur V/v pour sélectionner « Music », puis appuyez sur ou b. « DMPORT » s'affiche à côté de « Music ». 4 Appuyez sur ou b. L'appareil raccordé à l'adaptateur DIGITAL MEDIA PORT est reconnu - Sony STR-DA5300ES | Operating Instructions (Large File - 21.32 MB) - Page 254
Pour utiliser le TDM-iP1 ou le TDM-NC1 à l'aide du menu de l'adaptateur Assurez-vous que « Adapter GUI » est sélectionné à l'étape 6 de « Sélection d'un écran d'utilisation pour commander l'appareil connecté à l'adaptateur DIGITAL MEDIA PORT » (page 104). Pour plus de détails sur l'utilisation de l' - Sony STR-DA5300ES | Operating Instructions (Large File - 21.32 MB) - Page 255
* No Item* Connecting* Configuring* Warning* Explication L'adaptateur n'est pas connecté. Il n'y a aucun appareil connecté à l'adaptateur. Aucun fichier audio trouvé. Les données sont en cours de lecture. Il n'y a pas de serveur connecté. Aucune plage trouvée. Aucune option trouvée. Connexion au - Sony STR-DA5300ES | Operating Instructions (Large File - 21.32 MB) - Page 256
saisir un nom de jusqu'à 8 caractères pour les entrées et l'afficher. Cette fonction est pratique pour attribuer aux prises aux options suivantes. • Position de calibrage automatique (page 49) • Entrées (page 56) • Stations préréglées (page 90) 2 Appuyez sur OPTIONS. 3 Sélectionnez « Name Input », - Sony STR-DA5300ES | Operating Instructions (Large File - 21.32 MB) - Page 257
analogiques sont sélectionnés. • Analog Spécifie les signaux audio analogiques reçus aux prises AUDIO IN (L/R). Remarques • Certains modes d'entrée audio ne peuvent pas être spécifiés pour certaines entrées. • Lorsque l'entrée HDMI, tuner satellite ou adaptateur DIGITAL MEDIA PORT est sélectionn - Sony STR-DA5300ES | Operating Instructions (Large File - 21.32 MB) - Page 258
/visionnage d'images d'autres entrées Vous pouvez réaffecter des signaux vidéo et/ ou audio à une autre entrée. Exemple) Raccordez la prise OPTICAL OUT du lecteur DVD à la prise OPTICAL VIDEO 1 IN de cet ampli-tuner lorsque vous voulez entrer seulement les signaux audio optique numérique du lecteur - Sony STR-DA5300ES | Operating Instructions (Large File - 21.32 MB) - Page 259
6 Sélectionnez les signaux audio et/ou vidéo que vous voulez affecter à l'entrée que vous avez sélectionnée à l'étape 4 à l'aide de V/v/B/b, puis appuyez sur . suite 111FR Autres opérations - Sony STR-DA5300ES | Operating Instructions (Large File - 21.32 MB) - Page 260
MODE sélectionnée change automatiquement. • Vous ne pouvez pas réaffecter plusieurs entrées HDMI à une même entrée. • Vous ne pouvez pas réaffecter plusieurs entrées audio numériques à une même entrée. • Vous ne pouvez pas réaffecter plusieurs entrées vidéo composantes à une même entrée. 112FR - Sony STR-DA5300ES | Operating Instructions (Large File - 21.32 MB) - Page 261
Changement des informations sur l'affichage Vous pouvez vérifier le champ sonore, etc., en changeant les informations sur l'affichage. Le nom d'index ne s'affiche que lorsque vous avez attribué un nom à la source d'entrée ou à la station préréglée. Le nom d'index ne s'affiche pas si seulement des - Sony STR-DA5300ES | Operating Instructions (Large File - 21.32 MB) - Page 262
Indicateurs sur l'affichage Désignation A SW Fonction S'allume quand le subwoofer est raccordé et que le signal audio est émis par la prise SUB WOOFER. Lorsque cet indicateur est allumé, l'ampli-tuner crée un signal de subwoofer d'après le signal L.F.E. (effet basses fré - Sony STR-DA5300ES | Operating Instructions (Large File - 21.32 MB) - Page 263
Surround arrière gauche Surround arrière droite Surround arrière (signal composantes surround arrière obtenu par le décodage 6.1 canaux) Exemple : Format d'enregistrement (Avant/Surround) : 3/2.1 Canal de sortie : Enceintes surround réglées code du DTS-HD Master Audio. S'allume lorsque la compression - Sony STR-DA5300ES | Operating Instructions (Large File - 21.32 MB) - Page 264
lorsque l'amplituner applique un traitement Dolby Pro Logic aux signaux des 2 canaux pour la sortie des signaux du canal central et des canaux surround. « ;PRO LOGIC II » s'allume aussi lorsque le décodeur Dolby Pro Logic II Movie/Music/ Game est activé. « ;PRO LOGIC IIx » s'allume aussi lorsque - Sony STR-DA5300ES | Operating Instructions (Large File - 21.32 MB) - Page 265
96/24 (96 kHz/24 bits). wk MATRIX S'allume lorsque le décodage DTS-ES Matrix est activé. wl SB DEC S'allume lorsque le décodage du son surround arrière est activé. e; DISCRETE S'allume lorsque le décodage DTS-ES Discrete est activé. ea DSD S'allume lorsque l'amplituner reçoit des signaux DSD - Sony STR-DA5300ES | Operating Instructions (Large File - 21.32 MB) - Page 266
Utilisation de la minuterie d'arrêt Vous pouvez programmer l'ampli-tuner pour qu'il s'éteigne automatiquement après la durée sélectionnée. SHIFT Appuyez sur SHIFT, puis sur SLEEP plusieurs fois. À chaque pression sur SLEEP, l'affichage change comme suit : Lorsque la minuterie d'arrêt est utilisée, - Sony STR-DA5300ES | Operating Instructions (Large File - 21.32 MB) - Page 267
CHANNEL INPUT ne sont pas émis. Pour enregistrer un son numérique Raccordez l'appareil lecteur à la prise d'entrée audio numérique (OPTICAL IN) et l'appareil enregistreur à la prise OPTICAL MD/DAT OUT. Enregistrement sur un support l'appareil enregistreur (VIDEO 1 ou VIDEO 2) pour l'enregistrement - Sony STR-DA5300ES | Operating Instructions (Large File - 21.32 MB) - Page 268
dans la zone 2 ou 3. Si vous utilisez un répéteur infrarouge (non fourni), vous pouvez également commander un appareil de la zone principale et un amplituner Sony de la zone 2 ou zone 3 depuis la zone 2 ou la zone 3. • Sélection de la source de sortie aux prises ZONE 2 ou ZONE 3 OUT. • Mise sous - Sony STR-DA5300ES | Operating Instructions (Large File - 21.32 MB) - Page 269
mis par les enceintes de la zone 2 via les bornes SURROUND BACK SPEAKERS de l'ampli-tuner. Zone principale Zone 2 STR-DA5300ES A C B Téléviseur écran Autres opérations ZONE 2 VIDEO OUT D D SURROUND BACK SPEAKERS RM-AAL008 A Appareil audio B Appareil vidéo C Répéteur infrarouge (non fourni - Sony STR-DA5300ES | Operating Instructions (Large File - 21.32 MB) - Page 270
2 : Raccordements pour la zone 3 Pièce principale STR-DA5300ES A C B ZONE 3 AUDIO OUT A Appareil audio B Appareil vidéo C Répéteur infrarouge (non fourni) D Amplificateur/ampli-tuner Sony E Enceintes Zone 3 E E D C RM-AAL008 122FR - Sony STR-DA5300ES | Operating Instructions (Large File - 21.32 MB) - Page 271
sur V/v pour sélectionner la zone vers laquelle vous désirez émettre les signaux audio/vidéo, puis appuyez sur . « Main » (cet ampli-tuner) est toujours » n'apparaît pas sur l'afficheur de l'ampli-tuner, suivez les étapes données dans « 7: Utilisation de l'ampli-tuner à l'aide de GUI (Graphical User - Sony STR-DA5300ES | Operating Instructions (Large File - 21.32 MB) - Page 272
vers la zone. Les signaux audio et vidéo sont émis vers la zone 2, seulement les signaux audio sont émis vers la ampli-tuner, appuyez en même temps sur ?/1 et AV ?/1 sur la télécommande RM-AAL008 (SYSTEM STANDBY). les signaux entrés sur les prises MULTI CHANNEL INPUT ne sont pas émis sur les prises - Sony STR-DA5300ES | Operating Instructions (Large File - 21.32 MB) - Page 273
à la prise IR REMOTE. Utilisez un répéteur infrarouge lorsque l'ampli-tuner est installé dans un endroit hors de portée des signaux de la télécommande. STR-DA5300ES Répéteur infrarouge (non fourni) Utilisation d'un raccordement biamplificateur Si vous n'utilisez pas d'enceintes surround arrière - Sony STR-DA5300ES | Operating Instructions (Large File - 21.32 MB) - Page 274
Le même signal émis des prises FRONT SPEAKERS A peut être émis des bornes SURROUND BACK SPEAKERS en réglant « Sur Back Assign » sur « BI-AMP ». Remarques téléviseur, tuner satellite, moniteur, lecteur DVD ou magnétoscope Sony compatible CONTROL S, utilisez un cordon de raccordement CONTROL S (non - Sony STR-DA5300ES | Operating Instructions (Large File - 21.32 MB) - Page 275
Si vous connectez la prise CONTROL S IN d'un autre appareil sur la prise CTRL S OUT de cet ampli-tuner Exemple Téléviseur Magné- Tuner toscope Ampli-tuner Utilisation sans raccordement au téléviseur Vous pouvez commander cet ampli-tuner à l'aide de l'affichage même si vous n'utilisez pas de GUI - Sony STR-DA5300ES | Operating Instructions (Large File - 21.32 MB) - Page 276
, L/C, C/R, R/SL, R/SR, SR/SL, SR/SBR, SBR/SBL, SBL/SL, SL/L, L/SR PHASE AUDIO [xxxxxxx] OFF, L/C, C/R, R/SL, R/SR, SR/SL, SR/SBR, SBR/SBL, SBL/SL, SL .x dB] -20,0dB à +10,0dB (pas de 0,5 dB) SURROUND L [xxx.x dB] -20,0dB à +10,0dB (pas de 0,5 dB) SURROUND R [xxx.x dB] -20,0dB à +10,0dB (pas de - Sony STR-DA5300ES | Operating Instructions (Large File - 21.32 MB) - Page 277
Settings SP PATTERN [xxxxx] 2/0 à 3/4,1 3/4,1 SUB WOOFER [xxx] NO, YES YES FRONT SP [xxxxx] SMALL, LARGE LARGE CENTER SP [xxxxx] NO, SMALL, LARGE LARGE SURROUND SP [xxxxx] NO, SMALL, LARGE LARGE SUR BACK SP [xxxxxx] NO, SINGLE, DUAL DUAL BI-AMP [xxx] OFF, ON OFF ZONE 2 SP [xxx - Sony STR-DA5300ES | Operating Instructions (Large File - 21.32 MB) - Page 278
SOUND FIELD SELECT ? SB DECODING [xxxx] OFF, AUTO, ON SB DEC MODE [xxxxxxx] DDEX, PLIIx MV, PLIIx MS EFFECT LEVEL [xxx%] 20% à 120% (pas de 5%) CENTER WIDTH [x] 0 à 3 à 7 (pas de 8) DIMENSION CLEAR [xxx] YES, NO FM MODE [xxxxxx] MONO, STEREO NAME IN ? FMxx PARENTAL LOCK [xxx] ON, OFF - Sony STR-DA5300ES | Operating Instructions (Large File - 21.32 MB) - Page 279
/576p, AUTO 720p, 1080i, 1080p COMPONENT V. ASSIGN ? VIDEO 1 c [xxxxxxxx] NONE, VIDEO1 à 3, DVD/BD, SAT/ DVD/BD c [xxxxxxxx] CATV, TAPE/CDR, MD/DAT, SA-CD/ CD, MULTI IN SAT/CATV c [xxxxxxxx] VIDEO1 DVD/BD SAT/CATV HDMI Settings HDMI CONTROL [xxx] OFF, ON OFF HDMI AUDIO [xxxxxx] AMP, TV+AMP - Sony STR-DA5300ES | Operating Instructions (Large File - 21.32 MB) - Page 280
des enceintes surround arrière. Réglez cette valeur par les paramètres « SP POSI. » dans le menu de paramétrage Speaker. Conseils • Les opérations autres que la mise sous ou hors tension de l'ampli-tuner sont désactivées pendant le calibrage automatique. • Il se peut que les mesures ne s'effectuent - Sony STR-DA5300ES | Operating Instructions (Large File - 21.32 MB) - Page 281
caractéristiques de fréquence correspondant aux normes d'un auditorium Sony. FRONT REF Règle les caractéristiques de toutes les de l'enceinte soient inversées. Pour certaines enceintes, toutefois, « OUT » apparaît sur l'afficheur même si les enceintes sont correctement connectées. Ceci est dû aux - Sony STR-DA5300ES | Operating Instructions (Large File - 21.32 MB) - Page 282
Écoute du son sans aucun réglage (ANALOG DIRECT) Appuyez sur 2CH/A.DIRECT. Vous pouvez également utiliser 2CH/ A.DIRECT sur l'ampli-tuner. Écoute de stations de radio FM/ AM Pour plus d'informations sur la fonction tuner, voir « Opérations du tuner » (page 88). Accord de stations de radio 1 Appuyez - Sony STR-DA5300ES | Operating Instructions (Large File - 21.32 MB) - Page 283
sur TUNING MODE de l'ampli-tuner pour sélectionner « PRESET », puis utiliser TUNING pour sélectionner les stations préréglées désirées. Écoute de la radio satellite Pour plus d'informations sur le service de radio XM/SIRIUS, voir « Écoute de la radio satellite » (page 92) dans « Opérations du tuner - Sony STR-DA5300ES | Operating Instructions (Large File - 21.32 MB) - Page 284
appuyer plusieurs fois sur TUNING MODE de l'ampli-tuner pour sélectionner « PRESET », puis utiliser TUNING pour sélectionner les stations préréglées désirées. Commande de l'émission vers la zone 2/zone 3 Pour plus d'informations sur les raccordements et paramètres de zone 2/zone 3, voir « Écoute - Sony STR-DA5300ES | Operating Instructions (Large File - 21.32 MB) - Page 285
audio analogiques sont émis. Lorsque vous sélectionnez SOURCE, les signaux de l'entrée actuelle sont émis. 5 Réglez le volume du son. • Dans le cas de l'illustration 1-1 ou 2 (page 121), vous ne pouvez régler le volume de l'enceinte surround sur ?/1 et AV ?/1 sur la MULTI CHANNEL INPUT ne sont - Sony STR-DA5300ES | Operating Instructions (Large File - 21.32 MB) - Page 286
à l'aide de la télécommande Si vous avez programmé la télécommande pour qu'elle commande les appareils Sony ou autres que Sony ci-dessous, vous pouvez utiliser les touches de la télécommande marquées d'un rond dans le tableau. Notez, toutefois, qu'il se peut que certaines touches ne commandent pas - Sony STR-DA5300ES | Operating Instructions (Large File - 21.32 MB) - Page 287
Tableau des touches utilisées pour commander chaque appareil Appareil Télévi combo Disc vidéo, numérique terrestre A/B platine MEDIA DVD/ lecteur (UC) numérique MD PORT Touche VHS LD (EURO) AV ?/1, z z z z zz z ?/1 (après avoir appuyé sur TV) zz zz Touches numériques z z z z z z - Sony STR-DA5300ES | Operating Instructions (Large File - 21.32 MB) - Page 288
dessous prend pour exemple un magnétoscope d'un fabricant autre que Sony qui est raccordé aux prises VIDEO 2 IN de l'ampli-tuner. Avant de commencer, notez que et dirigez la télécommande vers l'ampli-tuner. 1 2 3 4 1 Appuyez sur AV ?/1 tout en appuyant sur RM SET UP. La touche RM SET UP clignote. - Sony STR-DA5300ES | Operating Instructions (Large File - 21.32 MB) - Page 289
• Toutes les touches de source d'entrée de cette télécommande ne sont pas disponibles lorsqu'elles sont utilisées avec certains appareils. Pour commander un lecteur CD Fabricant SONY DENON JVC KENWOOD MAGNAVOX MARANTZ ONKYO PANASONIC PHILIPS PIONEER TECHNICS YAMAHA Code(s) 101, 102, 103 104, 123 - Sony STR-DA5300ES | Operating Instructions (Large File - 21.32 MB) - Page 290
749 751, 752 747, 755, 756 754 * Si un magnétoscope AIWA ne fonctionne pas avec un code AIWA, saisissez un code Sony. Pour commander un lecteur DVD Fabricant SONY PANASONIC PHILIPS PIONEER Code(s) 401, 402, 403 406, 408 407 409 142FR Fabricant TOSHIBA DENON Code(s) 404 405 Pour commander un - Sony STR-DA5300ES | Operating Instructions (Large File - 21.32 MB) - Page 291
(s) 002, 003, 004, 005 Pour commander un enregistreur à disque dur Fabricant SONY Code(s) 307, 308, 309 Pour commander un lecteur Blu-ray Disc Fabricant SONY Code(s) 310, 311, 312 Pour commander un PSX Fabricant SONY Code(s) 313, 314, 315 Exécution automatique d'une séquence de plusieurs - Sony STR-DA5300ES | Operating Instructions (Large File - 21.32 MB) - Page 292
indiqué ci-dessous. Appuyez sur Opérations à programmer H, x, X, M, m, ., > Exécute l'opération de la touche. La touche de Les entrées sont source d'entrée commutées. pendant plus de 1 seconde MACRO 1 ou MACRO 2 Un intervalle d'une seconde est créé. Pour créer un intervalle plus long, appuyez - Sony STR-DA5300ES | Operating Instructions (Large File - 21.32 MB) - Page 293
. 2 Appuyez sur RM SET UP. Les commandes mémorisées dans la macro sont effacées. Mémorisation de codes de télécommande n'ayant pas été pr fine, comme un trombone. 2 Appuyez sur la touche de source d'entrée (VIDEO 1 dans cet exemple) pour laquelle vous désirez utiliser la fonction d'apprentissage. La - Sony STR-DA5300ES | Operating Instructions (Large File - 21.32 MB) - Page 294
par apprentissage. Pour effacer le code appris 1 Appuyez sur TV tout en appuyant sur RM SET UP. 2 Appuyez sur la touche de source d'entrée (VIDEO 1 dans cet exemple) dont vous désirez effacer la programmation. La touche de source d'entrée clignote. (La touche RM SET UP reste allumée.) 3 Appuyez sur - Sony STR-DA5300ES | Operating Instructions (Large File - 21.32 MB) - Page 295
télécommande MASTER VOL - 1 D'abord, appuyez et maintenez enfoncé MASTER VOL -, puis appuyez sur ?/1, puis sur AV ?/1. La touche RM SET UP clignote trois fois. 2 Relâchez MASTER VOL -. Tout le contenu de la mémoire de la télécommande (c'est-à-dire toutes les données programmées) est effacé. 147FR - Sony STR-DA5300ES | Operating Instructions (Large File - 21.32 MB) - Page 296
Glossaire x Cinema Studio EX Véritable compilation de la technologie Digital Cinema Sound, ce mode de son surround offre le son d'un studio de doublage grâce à trois technologies : « Virtual Multi Dimensions », « Screen Depth Matching » et « Cinema Studio Reverberation ». La fonction « Virtual Multi - Sony STR-DA5300ES | Operating Instructions (Large File - 21.32 MB) - Page 297
efficacité pour délivrer davantage de canaux de son surround captivant pour des supports vidéo à haute définition. Son efficacité plus élevées possibles pour les DVD VIDEO. Le nombre de canaux de lecture dépend du contenu. x DTS Digital Surround Technologie d'encodage/décodage audio numérique pour - Sony STR-DA5300ES | Operating Instructions (Large File - 21.32 MB) - Page 298
DTS Digital Surround. Il existe deux sortes de DTSHD, DTS-HD High Resolution Audio et DTSHD Master Audio. DTS-HD High Resolution Audio possède . Toutes les lignes impaires sont d'abord tracées avec un espace entre les lignes. Les lignes paires sont ensuite tracées en remplissant les espaces. Le « i - Sony STR-DA5300ES | Operating Instructions (Large File - 21.32 MB) - Page 299
telles que les images DVD VIDEO ou HDTV. Les trois prises sont identifiées par un codage couleur vert, la norme xvYCC proposée par Sony, et est une marque de Sony. xvYCC est une norme internationale être remplacé que dans un centre de service après-vente qualifié. Accumulation de chaleur Cet ampli - Sony STR-DA5300ES | Operating Instructions (Large File - 21.32 MB) - Page 300
aéré pour éviter toute accumulation de chaleur et prolonger ainsi la durée de service. • Ne placez pas l'ampli-tuner près d'une source de chaleur ou l'ampli-tuner, utilisez ce guide pour le résoudre. Si le problème persiste, adressez-vous au revendeur Sony le plus proche. Audio Il n'y a pas de son - Sony STR-DA5300ES | Operating Instructions (Large File - 21.32 MB) - Page 301
2 canaux. • Assurez-vous que la prise d'entrée audio (numérique) sélectionnée n'est pas affectée à une pas utilisé. • Assurez-vous que la prise d'entrée audio (numérique) sélectionnée n'est pas affectée à une . • Éloignez le téléviseur des appareils audio. • Assurez-vous que vous avez relié - Sony STR-DA5300ES | Operating Instructions (Large File - 21.32 MB) - Page 302
es sur « LARGE » et que l'option « Neo:6 Cinema » ou « Neo:6 Music » est sélectionnée, il n'y a pas de son au subwoofer. L'effet surround page 56). Le témoin MULTI CHANNEL DECODING ne s'allume pas en multicanal. • Assurez-vous que la prise d'entrée audio (numérique) sélectionnée n'est pas affectée à - Sony STR-DA5300ES | Operating Instructions (Large File - 21.32 MB) - Page 303
composantes 480p ne sont pas reçus lorsque des signaux sont émis par la prise VIDEO. Veillez à ce que les signaux d'entrée soient des signaux vidéo composantes 480i • Aucune station n'a été préréglée ou les stations préréglées ont été effacées de la mémoire (lors d'une sélection des stations avec la - Sony STR-DA5300ES | Operating Instructions (Large File - 21.32 MB) - Page 304
où les conditions sont meilleures. • Vérifiez que vous êtres abonné au service de radio satellite souhaité (voir page 92). Télécommande La télécommande ne sur la télécommande. • Si vous avez programmé un appareil non Sony, il se peut que la télécommande ne fonctionne pas correctement pour certains - Sony STR-DA5300ES | Operating Instructions (Large File - 21.32 MB) - Page 305
MULTI CHANNEL INPUT, SA-CD/CD, MD/DAT, DVD/BD, TV, SAT/CATV, VIDEO 1/2/3 Courbe d'égalisation RIAA ±0,5 dB 10 Hz - 100 kHz ± 3 dB Entrées ( VIDEO 1, ZONE 2, ZONE 3 (AUDIO OUT) Tension : 150 mV Impédance : 1 kohm FRONT L/R, CENTER, Tension : 2 V SURROUND L/R, Impédance : 1 kohm SURROUND - Sony STR-DA5300ES | Operating Instructions (Large File - 21.32 MB) - Page 306
es/sorties Video : 1 Vc-c, 75 ohms COMPONENT VIDEO : Y : 1 Vc-c, 75 ohms PB/CB : 0,7 Vc-c, 75 ohms PR/CR : 0,7 Vc-c, 75 ohms Conversion directe du signal HD 80 MHz HDMI Video @50 Hz 1920 × 1080p@50 Hz 1920 × 1080p@24 Hz Généralités Dimensions Guide d'installation rapide (1) Guide - Sony STR-DA5300ES | Operating Instructions (Large File - 21.32 MB) - Page 307
62, 131 Accord automatique 88, 134 Affichage 114 AM 88, 113, 134 Audio (Settings) 62, 131 Auto Calibration 49, 128, 132 B Bass 7, 86 DIGITAL MEDIA PORT 7, 9, 15, 24, 104 Dimension Control 74, 130 Direct Tuning 89, 96, 134 DTS Neo:6 (Cinema, Music) 69 DTS-ES Discrete 76 Dual Mono 62, 131 E Effacer - Sony STR-DA5300ES | Operating Instructions (Large File - 21.32 MB) - Page 308
Surround Speakers) 81 Preset Mode 97 Prises HDMI 9, 30 Prises VIDEO 3 IN/PORTABLE AV IN 35, 60 PROTECTOR 156 Q Quick Setup 51 R Raccordements antennes 40 appareils audio 52, 128 Sélection de Sound Field 65, 133 Sélection des stations 88, 89, 90 Size 80 SMALL 80 Sound Field Setup 65 Speaker (Settings - Sony STR-DA5300ES | Operating Instructions (Large File - 21.32 MB) - Page 309
Sur Settings 130 Surround 65 System (Settings) 64, 131 T Télécommande 11-16, 42, 138-143 Témoin MULTI CHANNEL DECODING 59 Test Tone 83, 84, 128 TONE 7 TONE MODE 7, 41 Touche HDMI 7 Transcodage 36 Treble 7, 86, 130 Tuner 88 Tuner (Settings) 130 V Video (Settings) 63, 131 Virtual Speakers 74, 130 Z - Sony STR-DA5300ES | Operating Instructions (Large File - 21.32 MB) - Page 310
162FR
-
 1
1 -
 2
2 -
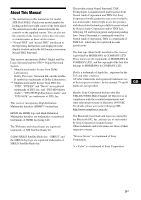 3
3 -
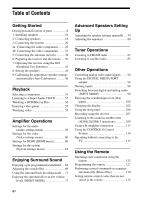 4
4 -
 5
5 -
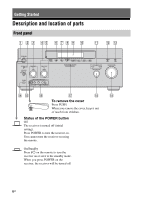 6
6 -
 7
7 -
8
-
9
-
10
-
11
-
12
-
13
-
14
-
15
-
16
-
17
-
18
-
19
-
20
-
21
-
22
-
23
-
24
-
25
-
26
-
27
-
28
-
29
-
30
-
31
-
32
-
33
-
34
-
35
-
36
-
37
-
38
-
39
-
40
-
41
-
42
-
43
-
44
-
45
-
46
-
47
-
48
-
49
-
50
-
51
-
52
-
53
-
54
-
55
-
56
-
57
-
58
-
59
-
60
-
61
-
62
-
63
-
64
-
65
-
66
-
67
-
68
-
69
-
70
-
71
-
72
-
73
-
74
-
75
-
76
-
77
-
78
-
79
-
80
-
81
-
82
-
83
-
84
-
85
-
86
-
87
-
88
-
89
-
90
-
91
-
92
-
93
-
94
-
95
-
96
-
97
-
98
-
99
-
100
-
101
-
102
-
103
-
104
-
105
-
106
-
107
-
108
-
109
-
110
-
111
-
112
-
113
-
114
-
115
-
116
-
117
-
118
-
119
-
120
-
121
-
122
-
123
-
124
-
125
-
126
-
127
-
128
-
129
-
130
-
131
-
132
-
133
-
134
-
135
-
136
-
137
-
138
-
139
-
140
-
141
-
142
-
143
-
144
-
145
-
146
-
147
-
148
-
149
-
150
-
151
-
152
-
153
-
154
-
155
-
156
-
157
-
158
-
159
-
160
-
161
-
162
-
163
-
164
-
165
-
166
-
167
-
168
-
169
-
170
-
171
-
172
-
173
-
174
-
175
-
176
-
177
-
178
-
179
-
180
-
181
-
182
-
183
-
184
-
185
-
186
-
187
-
188
-
189
-
190
-
191
-
192
-
193
-
194
-
195
-
196
-
197
-
198
-
199
-
200
-
201
-
202
-
203
-
204
-
205
-
206
-
207
-
208
-
209
-
210
-
211
-
212
-
213
-
214
-
215
-
216
-
217
-
218
-
219
-
220
-
221
-
222
-
223
-
224
-
225
-
226
-
227
-
228
-
229
-
230
-
231
-
232
-
233
-
234
-
235
-
236
-
237
-
238
-
239
-
240
-
241
-
242
-
243
-
244
-
245
-
246
-
247
-
248
-
249
-
250
-
251
-
252
-
253
-
254
-
255
-
256
-
257
-
258
-
259
-
260
-
261
-
262
-
263
-
264
-
265
-
266
-
267
-
268
-
269
-
270
-
271
-
272
-
273
-
274
-
275
-
276
-
277
-
278
-
279
-
280
-
281
-
282
-
283
-
284
-
285
-
286
-
287
-
288
-
289
-
290
-
291
-
292
-
293
-
294
-
295
-
296
-
297
-
298
-
299
-
300
-
301
-
302
-
303
-
304
-
305
-
306
-
307
-
308
-
309
-
310
 |
 |
Sony Corporation
Printed in Malaysia
©2007 Sony Corporation
3-209-668-
11
(2)
Multi Channel
AV Receiver
Operating Instructions
Mode d’emploi
Owner’s Record
The model and serial numbers are located on the rear of the unit. Record the
serial number in the space provided below. Refer to them whenever you call
upon your Sony dealer regarding this product.
Model No.
Serial No.
STR-DA5300ES
GB
FR