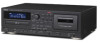
TEAC AD-850 AD-850 Owner s Manual - Page 16
Connections, LINE IN/OUT connectors, AC Power Cord, Notes on turning on or off the power
 |
View all TEAC AD-850 manuals
Add to My Manuals
Save this manual to your list of manuals |
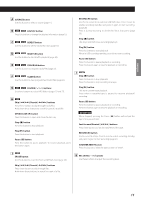
Page 16 highlights
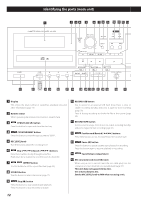
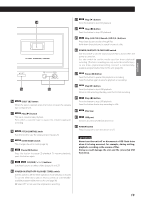
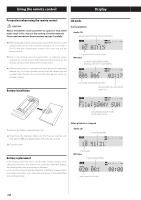
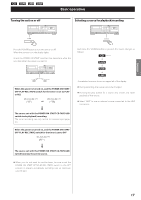
Connections VVComplete all other connections before turning the unit on. oo Read the instructions of each device that you intend to use with this unit. oo Be sure to connect each plug securely. Do not bundle connecting cables with power cords. Doing so could cause noise. AD-850 (back side) A LINE IN/OUT connectors These connectors transmit an analog 2-channel audio signal. Connect the components using the included RCA audio cables. Connect a stereo amplifier, mixer or other equipment to this unit's analog audio input and output connectors. Use the included RCA audio cables (or commercially-available ones) for connections. Connect this unit's R input connector to the R output connector of the audio output device, and this unit's L input connector to the L output connector of the other device. White (L) Red (R) This unit White (L) Red (R) Amplifier, etc. RCA audio cables LINE LINE OUT IN Amplifier Wall socket B AC Power Cord After all other connections are complete, connect the plug to an AC wall outlet. Be sure to connect the power cord to an AC outlet that supplies the correct voltage. Hold the power plug when plugging it into an outlet or unplugging it. Never pull or yank on the power cord. Tuner, etc. Example Speakers Notes on turning on or off the power When an amplifier is connected to the unit, turn on or off the power of the unit and the amplifier in the following sequence. When turning on the power 1. This unit 2. Amplifier When turning off the power 1. Amplifier 2. This unit 16
-
 1
1 -
2
-
3
-
4
-
5
-
6
-
7
-
8
-
9
-
10
-
 11
11 -
 12
12 -
 13
13 -
 14
14 -
 15
15 -
 16
16 -
 17
17 -
 18
18 -
 19
19 -
 20
20 -
 21
21 -
22
-
23
-
24
-
25
-
26
-
27
-
28
-
29
-
30
-
31
-
32
-
33
-
34
-
35
-
36
-
37
-
38
-
39
-
40
-
41
-
42
-
43
-
44
-
45
-
46
-
47
-
48
-
49
-
50
-
51
-
52
-
53
-
54
-
55
-
56
-
57
-
58
-
59
-
60
-
61
-
62
-
63
-
64
-
65
-
66
-
67
-
68
-
69
-
70
-
71
-
72
-
73
-
74
-
75
-
76
-
77
-
78
-
79
-
80
-
81
-
82
-
83
-
84
-
85
-
86
-
87
-
88
-
89
-
90
-
91
-
92
-
93
-
94
-
95
-
96
-
97
-
98
-
99
-
100
-
101
-
102
-
103
-
104
-
105
-
106
-
107
-
108
-
109
-
110
-
111
-
112
-
113
-
114
-
115
-
116
-
117
-
118
-
119
-
120
-
121
-
122
-
123
-
124
-
125
-
126
-
127
-
128
 |
 |
