TEAC AD-850 AD-850 Owner s Manual - Page 38
Automatic power saving function
 |
View all TEAC AD-850 manuals
Add to My Manuals
Save this manual to your list of manuals |
Page 38 highlights
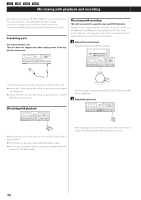
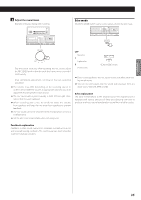
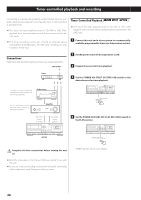
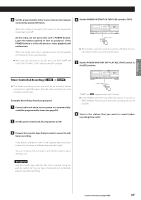
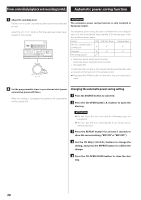
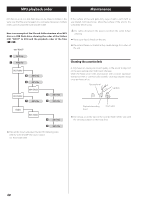
Timer-controlled playback and recording (contd.) Automatic power saving function 7 Adjust the recording level. Failure to do so could cause the recorded sound to be distorted or noisy. Adjust the REC LEVEL knob so that the peak level meter never exceeds 0 continuously. ATTENTION The automatic power saving function is only included in European models. The automatic power saving function is ON when this unit is shipped new, so it will automatically enter standby if 30 minutes pass under the conditions shown below. Status CD USB flash drive Cassette tape No disc , cassette tape or connection Stopped Recording paused - - Automatic power saving function active - Automatic power saving function not active / Not applicable To reactivate the unit after it has entered standby automatically, press any button on the main unit or the remote control. oo If pressing the POWER button on the main unit, you must press it twice. 8 Set the programmable timer to your desired start (power on) and stop (power off) times. When this setting is completed, the power to all components will be switched off. Changing the automatic power saving setting 1 Press the SOURCE button to select CD. 2 Press the CD OPEN/CLOSE (-) button to open the disc tray. ATTENTION oo Do not close the disc tray until the following steps are completed. oo The disc tray will close automatically if one minute passes without operation. 3 Press the REPEAT button for at least 5 seconds to show the current setting ("ERP ON" or "ERP OFF"). 4 Use the CD Skip (.//) buttons to change the setting, and press the REPEAT button to confirm the change. 5 Press the CD OPEN/CLOSE button to close the disc tray. 38
-
 1
1 -
2
-
3
-
4
-
5
-
6
-
7
-
8
-
9
-
10
-
11
-
12
-
13
-
14
-
15
-
16
-
17
-
18
-
19
-
20
-
21
-
22
-
23
-
24
-
25
-
26
-
27
-
28
-
29
-
30
-
31
-
32
-
 33
33 -
 34
34 -
 35
35 -
 36
36 -
 37
37 -
 38
38 -
 39
39 -
 40
40 -
 41
41 -
 42
42 -
 43
43 -
44
-
45
-
46
-
47
-
48
-
49
-
50
-
51
-
52
-
53
-
54
-
55
-
56
-
57
-
58
-
59
-
60
-
61
-
62
-
63
-
64
-
65
-
66
-
67
-
68
-
69
-
70
-
71
-
72
-
73
-
74
-
75
-
76
-
77
-
78
-
79
-
80
-
81
-
82
-
83
-
84
-
85
-
86
-
87
-
88
-
89
-
90
-
91
-
92
-
93
-
94
-
95
-
96
-
97
-
98
-
99
-
100
-
101
-
102
-
103
-
104
-
105
-
106
-
107
-
108
-
109
-
110
-
111
-
112
-
113
-
114
-
115
-
116
-
117
-
118
-
119
-
120
-
121
-
122
-
123
-
124
-
125
-
126
-
127
-
128
 |
 |
