TEAC SL-D920 SL-D920 Owner's Manual
TEAC SL-D920 Manual
 |
View all TEAC SL-D920 manuals
Add to My Manuals
Save this manual to your list of manuals |
TEAC SL-D920 manual content summary:
- TEAC SL-D920 | SL-D920 Owner's Manual - Page 1
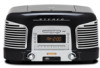
Z D01123020C SL-D920 STEREO CD RADIO OWNER'S MANUAL MODE D'EMPLOI MANUAL DEL USUARIO ENGLISH FRANÇAIS ESPAÑOL - TEAC SL-D920 | SL-D920 Owner's Manual - Page 2
an equilateral triangle is intended to alert the user to the presence of important operating and maintenance (servicing) instructions in the literature accompanying the appliance. 2) Keep these instructions. 3) Heed all warnings. 4) Follow all instructions. 5) Do not use this apparatus near water - TEAC SL-D920 | SL-D920 Owner's Manual - Page 3
OR MOISTURE. CAUTION < DO NOT REMOVE EXTERNAL CASES OR CABINETS TO EXPOSE THE ELECTRONICS. NO USER SERVICEABLE PARTS ARE WITHIN! < IF YOU ARE EXPERIENCING PROBLEMS WITH THIS PRODUCT, CONTACT TEAC FOR A SERVICE REFERRAL. DO NOT USE THE PRODUCT UNTIL IT HAS BEEN REPAIRED. This product is protected by - TEAC SL-D920 | SL-D920 Owner's Manual - Page 4
Contents Before Use Thank you for choosing TEAC. Read this manual carefully to get the best performance from this unit. Contents 4 Before Use 4 Discs 6 RESET Switch 7 Connections 8 Names of Controls 10 Remote Control 13 Basic Operation 14 Listening to a CD/MP3/WMA disc 15 Listening to MP3 - TEAC SL-D920 | SL-D920 Owner's Manual - Page 5
The unit will stabilize at the temperature of its surroundings. Information for users on the collection and disposal of old equipment and used batteries The and batteries, please contact your local municipality, your waste disposal service or the point of sale where you purchased the items. - TEAC SL-D920 | SL-D920 Owner's Manual - Page 6
TEAC Corporation and its subsidiaries cannot be responsible for any consequences or guarantee the quality of reproduction. If you experience problems sources such as radiators and heat-generating electrical devices. < Printable CD-R/CD-RW discs are not recommended because the label side might be - TEAC SL-D920 | SL-D920 Owner's Manual - Page 7
MP3/WMA compatibility This unit can play MP3/WMA files recorded on a CD-R, CD-RW disc, or USB memory. Refer the instruction manual of software when making an MP3 or a WMA file using a PC. < This unit can play back monaural and stereo MP3/WMA files that are in the MPEG-1 Audio Layer 3 format with - TEAC SL-D920 | SL-D920 Owner's Manual - Page 8
Connections A B C D E F 1 2 3 CAUTION < Turn off the power before making connections. < Read the instructions for each component that you intend to use with this unit. < Be sure to insert each plug securely. To prevent hum and noise, do not bundle the connection cords. 8 - TEAC SL-D920 | SL-D920 Owner's Manual - Page 9
can connect a portable audio player to this jack. Connect it to the audio output jack (LINE OUT or PHONES) of the player using the included stereo miniplug cable. When using the PHONES jack of an audio player, you must also adjust the volume of that audio player or you might hear - TEAC SL-D920 | SL-D920 Owner's Manual - Page 10
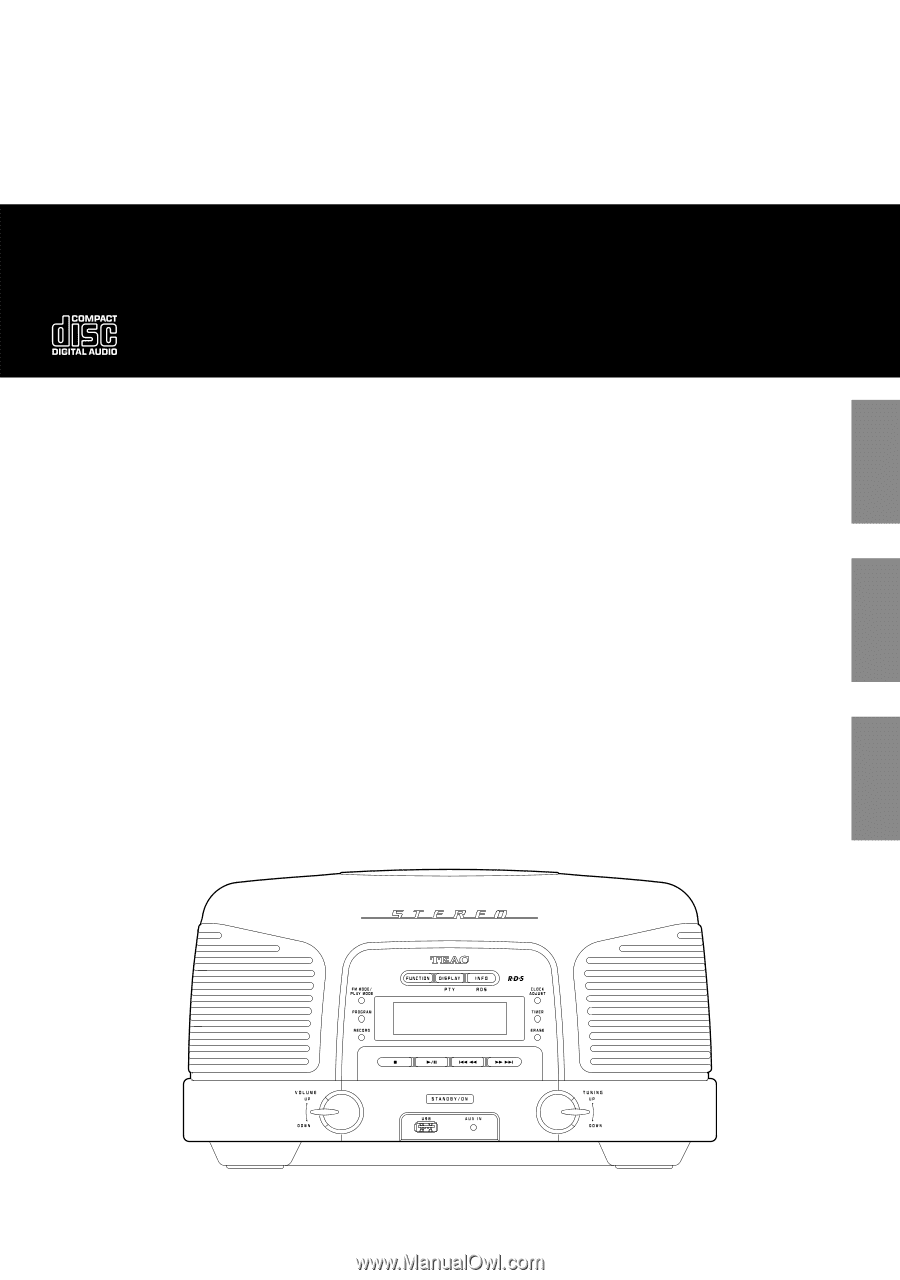
Names of Controls 1 TOP A CD B E FGH I JK FRONT L L T S R Q PO N M D G REMOTE CONTROL F T K M N C O S R 10 - TEAC SL-D920 | SL-D920 Owner's Manual - Page 11
FM MODE/PLAY MODE In FM TUNER mode, use this button to select stereo or mono. In CD or USB mode, use this button to select repeat, shuffle or intro point it toward here. F FUNCTION Use this button to select the source (TUNER, CD, AUX or USB). G DISPLAY Press this button to show the clock. H INFO/RDS - TEAC SL-D920 | SL-D920 Owner's Manual - Page 12
memory, use this button to select a folder on the disc or USB memory. X Number buttons Y BAND Use this button to switch between AM and FM radio bands. Z MUTING Use this button to mute the sound. 12 - TEAC SL-D920 | SL-D920 Owner's Manual - Page 13
ENGLISH Remote Control The included remote control allows the main unit to be operated from a distance. When operating the remote control, point it towards the remote sensor on the front panel of the unit. < Even if the remote control is operated within the effective range (5 m), remote control - TEAC SL-D920 | SL-D920 Owner's Manual - Page 14
Basic Operation 2 Dimmer You can change the brightness of the front panel display. 31 1 Press the STANDBY/ON switch to turn the unit on. Push the SNOOZE button to darken the display. Push it again to restore regular brightness. This function also works in standby mode. 2 Press the FUNCTION - TEAC SL-D920 | SL-D920 Owner's Manual - Page 15
disc 1 23 4 1 Press the FUNCTION button to select "CD". < It takes a few seconds for the unit to load the play time of the disc are displayed. < When no disc is loaded in the CD player, "NO DISC" is displayed. When a CD is loaded Total tracks Total playing time 2 Push the L mark on the cover to - TEAC SL-D920 | SL-D920 Owner's Manual - Page 16
Listening to MP3/WMAs (USB) Controlling playback (disc/USB) < Do NOT use high-capacity USB hard discs with this unit. INFO 1 Press the FUNCTION button to select "USB". 2 Plug your USB memory into the USB connector. < You can reverse steps 1 and 2 . Suspending playback temporarily (pausing) - TEAC SL-D920 | SL-D920 Owner's Manual - Page 17
ENGLISH Searching for a part of a track/file During playback, hold down a SKIP (. or /) button and release it when the desired part is found. Direct playback When the unit is stopped or playing back, you can use the number buttons on the remote control to select tracks/files. Press a number - TEAC SL-D920 | SL-D920 Owner's Manual - Page 18
USB memory. 4 2 3 5 < MP3/WMA files not stored in folders are treated as being in the "001" (root) folder. < Skip this step when playing an ordinary CD. Up to 32 tracks/files can be programmed in the desired order. Shuffle and Intro functions do not work during programmed playback. 1 Press the - TEAC SL-D920 | SL-D920 Owner's Manual - Page 19
or /) button and then press the PROGRAM button. To clear the program < When you press the FUNCTION button. < When you have programmed a CD, opening the disc compartment cover clears the programme contents. < When you have programmed USB memory, pulling out the memory clears the programme contents - TEAC SL-D920 | SL-D920 Owner's Manual - Page 20
press the PLAY/PAUSE (G/J) button to start playback. Each time the PLAY MODE button is pressed, the mode is changed in the following order: When a CD is loaded REPEAT REPEAT ALL (off ) INTRO SHUFFLE When an MP3/WMA disc or USB memory is loaded Repeat all the files in a folder (MP3 - TEAC SL-D920 | SL-D920 Owner's Manual - Page 21
Radio FM MODE button 2 1 Press the FUNCTION button to select "AM" or "FM". 2 Select the station you want to listen to (auto selection). Press this button to alternate between STEREO and MONO modes. STEREO FM stereo broadcasts are received in stereo, and the "STEREO automatically (manual selection) - TEAC SL-D920 | SL-D920 Owner's Manual - Page 22
Preset Tuning 4 Within 10 seconds, press the PROGRAM button. 1, 2, 3.... MP3/PRESET ( / ) You can store 20 FM and 20 AM stations as preset channels. If the power supply is interrupted and the battery dies, the settings kept in memory (clock, preset stations, timer setting) will be erased. The - TEAC SL-D920 | SL-D920 Owner's Manual - Page 23
1 The Radio Data System (RDS) is a broadcasting service that allows stations to send additional information along with regular radio programme signals. to cycle through the following RDS information display modes: PS (Programme Service name) When you select PS, the station's name will be displayed - TEAC SL-D920 | SL-D920 Owner's Manual - Page 24
NATION M: OLDIES: FOLK M: DOCUMENT: TEST ALARM: Brief announcements, events, public guides and medical assistance Sports related programmes Educational and cultural information. All kinds of radio to the AUX IN jack of this unit using a stereo mini-plug cable. 2 Press the FUNCTION button to select - TEAC SL-D920 | SL-D920 Owner's Manual - Page 25
unit. 2 Select the source to be recorded (CD, AM, FM, or AUX). < When the source is radio, tune in to a radio station you want to record. (page 21) < level, try recording first as a test. < If you want to record CD tracks in a programmed order, program the order of CD tracks as shown in page 18 and - TEAC SL-D920 | SL-D920 Owner's Manual - Page 26
Recording to USB 2 4 If you want to stop recording, press the RECORD button again. Deleting a file from USB ERASE < Only the RECORD button and the volume knob can be used while recording. The volume knob only affects the recorded level when recording from the AUX IN. < You cannot record to a USB - TEAC SL-D920 | SL-D920 Owner's Manual - Page 27
ENGLISH Setting the Clock CLOCK ADJ 4 Use the SKIP (.//) buttons to set the current hour. 1 The clock can be set both when the power is on and when the unit is in standby. 2 Press the CLOCK ADJ button for more than 2 seconds. "12 H" or "24 H" blinks on the display. If you want to change the - TEAC SL-D920 | SL-D920 Owner's Manual - Page 28
Setting the Timer 1 TIMER 3 Use the SKIP (.//) buttons to set the minute, and then press the TIMER button. You can set the timer that can be used to play or record at the specified time. Set the clock before setting the timer. 1 Press and hold the TIMER button for more than 2 seconds. "ON" is - TEAC SL-D920 | SL-D920 Owner's Manual - Page 29
press the TIMER button. 9 Prepare the playback source. If the source is set to "CD", load a CD. If the source is set to "USB", plug a USB memory into the USB is set to "TUNER", tune in to a station. < If the source is set to "CD" but no disc is loaded, or if the source is set to "USB" but no USB - TEAC SL-D920 | SL-D920 Owner's Manual - Page 30
.50 MHz to 108.00 MHz Frequency Range (AM 522 kHz to 1629 kHz CD PLAYER Section Frequency Response 20 Hz to 20 kHz (±1 dB) Wow and Flutter (AAA) x 2 Battery for memory back-up (CR2032) x 1 Stereo mini-plug cable x 1 Owner's Manual (this document) x 1 Warranty card x 1 < Design and specifications - TEAC SL-D920 | SL-D920 Owner's Manual - Page 31
Troubleshooting ENGLISH If you have problems with your system, read this section and try to solve the problem yourself before calling your dealer or TEAC service blinking, press the MUTING button. (If "CD" or "USB" is selected, press the . Though the broadcast is in stereo, it sounds mono e Press - TEAC SL-D920 | SL-D920 Owner's Manual - Page 32
TEAC de base 42 Écoute d'un CD/disque MP3/WMA 43 Écoute intros 48 Écoute de la radio 49 Syntonisation préréglée (preset 50 support USB 54 Réglage de l'horloge 55 Réglage de la minuterie 56 Caractéristiques techniques 58 Guide , consultez votre revendeur ou le service après-vente. < Quand vous - TEAC SL-D920 | SL-D920 Owner's Manual - Page 33
des informations plus détaillées sur la mise au rebut et le recyclage de vos anciens appareils et batteries, veuillez contacter votre mairie, le service de traitement des ordures ou le magasin dans lequel vous avez acheté le produit. Information sur la mise au rebut dans d'autres pays extérieurs - TEAC SL-D920 | SL-D920 Owner's Manual - Page 34
. < Les disques protégés contre la copie et les disques ne se conformant pas à la norme CD peuvent ne pas être correctement lus par cet appareil. Si vous utilisez de tels disques dans cette unité, TEAC Corporation et ses filiales ne pourront être tenues pour responsables des conséquences quelles qu - TEAC SL-D920 | SL-D920 Owner's Manual - Page 35
Commutateur RESET Compatibilité MP3/WMA Cet appareil peut lire les fichiers MP3/WMA enregistrés sur CD-R, CD-RW ou mémoire USB. Reportez-vous au mode d'emploi du logiciel quand vous créez un fichier MP3 ou WMA à l'aide d'un ordinateur. < Cet appareil - TEAC SL-D920 | SL-D920 Owner's Manual - Page 36
Raccordements A B C D E F 1 2 3 ATTENTION < Coupez l'alimentation avant de faire les raccordements. < Lisez les modes d'emploi de tous les éléments que vous comptez employer avec cet appareil. < Assurez vous que chaque fiche est bien enfoncée. Pour éviter tout ronflement ou bruit parasite, - TEAC SL-D920 | SL-D920 Owner's Manual - Page 37
FRANÇAIS A PHONES Pour bénéficier d'une écoute privée, insérez la fiche d'un casque d'écoute dans cette prise et réglez le volume à l'aide du bouton VOLUME. 1. Desserrez la vis de blocage. 2. Appuyez sur l'autre extrémité du couvercle pour ouvrir le compartiment. B Prise USB Cette prise sert à - TEAC SL-D920 | SL-D920 Owner's Manual - Page 38
Nom des commandes 1 DESSUS A CD B E FGH I JK AVANT L L T S R Q PO N M D G TÉLÉCOMMANDE F T K M N C O S R 38 - TEAC SL-D920 | SL-D920 Owner's Manual - Page 39
, utilisez cette touche pour sélectionner stéréo ou mono. En mode CD ou USB, utilisez cette touche pour sélectionner la lecture en boucle, à l'appareil. R STANDBY/ON Appuyez sur cet cette touche pour mettre l'appareil en service ou en veille (standby). S VOLUME Tournez ce bouton à droite et à gauche - TEAC SL-D920 | SL-D920 Owner's Manual - Page 40
numériques Y BAND Utilisez cette touche pour alterner entre les bandes radio AM et FM. En mode CD ou USB, utilisez cette touche pour arrêter la lecture. Z En mode TUNER, utilisez ces touches pour sélectionner des stations. En mode CD ou USB, appuyez sur ces touches pour sauter d'un fichier/piste à - TEAC SL-D920 | SL-D920 Owner's Manual - Page 41
Télécommande La télécommande fournie permet la commande à distance de cet appareil. Pour utiliser la télécommande, pointez-la vers le capteur de télécommande en face avant de l'appareil. < Même si la télécommande est employée à portée de fonctionnement (5 m), la commande à distance peut être - TEAC SL-D920 | SL-D920 Owner's Manual - Page 42
Fonctionnement de base 2 Atténuateur de luminosité (Dimmer) Vous pouvez changer la luminosité de l'écran de face avant. 31 1 Appuyez sur la touche STANDBY/ON pour allumer l'appareil. Appuyez sur la touche SNOOZE pour assombrir l'écran. Appuyez à nouveau pour retrouver une luminosité normale. - TEAC SL-D920 | SL-D920 Owner's Manual - Page 43
. Attendez que le nombre total de fichiers/pistes du disque soit affiché. < S'il n'y a pas de disque chargé dans le lecteur de CD, "NO DISC" est affiché. Si un CD audio est chargé Total de pistes Durée totale de lecture 2 Appuyez sur le symbole L du couvercle pour ouvrir le compartiment du disque - TEAC SL-D920 | SL-D920 Owner's Manual - Page 44
Écoute de MP3/WMA (USB) Contrôle de la lecture (disque/USB) < N'employez PAS de disques durs USB haute capacité INFO avec cet appareil. 1 Appuyez sur la touche FUNCTION pour sélectionner "USB". 2 Branchez votre mémoire USB dans le connecteur USB. < Vous pouvez inverser les étapes 1 et 2 . - TEAC SL-D920 | SL-D920 Owner's Manual - Page 45
Recherche d'un passage de piste/fichier Durant la lecture, tenez enfoncée une touche de saut (. ou /) et relâchez-la une fois le passage désiré atteint. Lecture directe À l'arrêt ou en lecture, vous pouvez utiliser les touches numériques de la télécommande pour sélectionner les fichiers/pistes. - TEAC SL-D920 | SL-D920 Owner's Manual - Page 46
fichiers MP3/WMA enregistrés en dehors des dossiers sont considérés comme appartenant au dossier "001" (racine ou "root"). < Sautez cette étape si vous lisez un CD audio ordinaire. < Quand la lecture de tous les fichiers/pistes programmés est terminée, ou si l'on appuie deux fois sur la touche STOP - TEAC SL-D920 | SL-D920 Owner's Manual - Page 47
appuyez sur la touche PROGRAM. Pour effacer le programme < Appuyer sur la touche FUNCTION efface le contenu du programme. < Si vous avez programmé un CD, ouvrir le compartiment du disque efface le contenu du programme. < Si vous avez programmé une mémoire USB, retirer la mémoire efface le contenu - TEAC SL-D920 | SL-D920 Owner's Manual - Page 48
démarre dans le mode de lecture sélectionné. Chaque fois que l'on appuie sur la touche PLAY MODE, le mode change selon l'ordre suivant : Si un CD audio est chargé REPEAT REPEAT ALL (off ) INTRO SHUFFLE Si un disque MP3/WMA ou une mémoire USB est chargé REPEAT REPEAT ALL REPEAT FOLDER - TEAC SL-D920 | SL-D920 Owner's Manual - Page 49
FM MODE 1 Écoute de la radio Touche FM MODE 2 1 Appuyez sur la touche FUNCTION pour sélectionner "AM" ou "FM". 2 Sélectionnez la station que vous souhaitez écouter (sélection automatique). Appuyez sur cette touche pour alterner entre les modes STEREO et MONO. STEREO Les émissions stéréo FM sont - TEAC SL-D920 | SL-D920 Owner's Manual - Page 50
Syntonisation préréglée (preset) 1, 2, 3.... 4 Dans les 10 secondes, appuyez sur la touche PROGRAM. MP3/PRESET ( / ) Vous pouvez mémoriser (prérégler) 20 stations FM et 20 stations AM. Si l'alimentation électrique est coupée et si la pile de sauvegarde se décharge, tous les réglages conservés en - TEAC SL-D920 | SL-D920 Owner's Manual - Page 51
RDS RDS (recherche PTY) 2 Le système RDS (Radio Data System) est un service de diffusion qui permet aux stations d'envoyer des informations supplémentaires en même temps que le programme radio normal. 12 Le RDS ne fonctionne sur la bande FM qu'en Europe. 1 Réglez-vous sur une station FM RDS ( - TEAC SL-D920 | SL-D920 Owner's Manual - Page 52
informations et sujets du jour tels que prévisions météo, guides du consommateur et assistance médicale SPORT : émissions sportives l'âge d'or de la musique FOLK M : musique folk DOCUMENT : documentaires TEST ALARM : avis d'alerte ou de catastrophe naturelle 52 1 Reliez la prise PHONES - TEAC SL-D920 | SL-D920 Owner's Manual - Page 53
enregistrer sur la mémoire USB sous forme de fichiers MP3 un CD, une émission de radio ou un appareil externe. 1 Connectez la mémoire USB au d'enregistrement approprié, faites un premier test d'enregistrement. < Si vous voulez enregistrer les pistes d'un CD dans un ordre programmé, programmez cet - TEAC SL-D920 | SL-D920 Owner's Manual - Page 54
Enregistrement sur USB 2 Suppression d'un fichier sur support USB 4 Si vous voulez arrêter l'enregistrement, appuyez à nouveau sur la touche RECORD. ERASE < Seuls la touche RECORD et le bouton de volume peuvent être - TEAC SL-D920 | SL-D920 Owner's Manual - Page 55
glage de l'horloge CLOCK ADJ 4 Utilisez les touches de saut (.//) pour régler l'heure. 1 L'horloge peut être réglée aussi bien quand l'appareil est en service que quand il est en veille. 2 Appuyez sur la touche CLOCK ADJUST durant plus de 2 secondes. "12 H" ou "24 H" clignote dans l'afficheur. Si - TEAC SL-D920 | SL-D920 Owner's Manual - Page 56
Réglage de la minuterie 1 TIMER 3 Utilisez les touches de saut (.//) pour régler les minutes, puis appuyez sur la touche TIMER. Vous pouvez régler la minuterie pour lire ou enregistrer à une heure spécifique. Réglez l'horloge avant la minuterie. 1 Maintenez pressée la touche TIMER pendant plus de - TEAC SL-D920 | SL-D920 Owner's Manual - Page 57
éparez la source de lecture. Minuterie de lecture Si la source est réglée sur "CD", chargez un disque. Si la source est réglée sur "USB", branchez une mémoire "FM" ou "AM", réglez une station. < Si la source est réglée sur "CD" mais qu'aucun disque n'est chargé, ou si la source est réglée sur "USB" - TEAC SL-D920 | SL-D920 Owner's Manual - Page 58
(syntoniseur) Plage de fréquences (FM 87,50 MHz à 108,00 MHz Plage de fréquences (AM 522 kHz à 1 629 kHz Section LECTEUR DE CD Réponse en fréquence 20 Hz à 20 kHz (±1 dB) Pleurage et scintillement Non mesurable L'indicateur TIMER apparaît, et l'appareil s'allumera et s'éteindra chaque jour - TEAC SL-D920 | SL-D920 Owner's Manual - Page 59
Guide de dépannage Si vous avez des problèmes avec votre système, lisez cette section et essayez de résoudre vous-même le problème avant d'appeler votre revendeur ou le service après-vente TEAC clairage près de l'appareil, éteignez-le. Lecteur de CD Pas de lecture e Chargez un disque, sa face sé - TEAC SL-D920 | SL-D920 Owner's Manual - Page 60
por elegir TEAC. Lea este manual atentamente para su distribuidor o con un servicio técnico autorizado. Escuchar la radio 77 Sintonizar presintonías 78 RDS 79 RDS (búsqueda PTY la bandeja del disco cuando no esté usando el reproductor de CD. Antes de grabar 81 Grabar en un USB 81 Borrar un - TEAC SL-D920 | SL-D920 Owner's Manual - Page 61
Mantenimiento Si la superficie de esta unidad se ensucia, límpiela con un paño suave o use un líquido limpiador neutro diluido. Deje secar la superficie de la unidad completamente antes de usarla. No use disolvente, bencina o alcohol, ya que pueden dañar la superficie de la unidad. Advertencia sobre - TEAC SL-D920 | SL-D920 Owner's Manual - Page 62
< Los discos protegidos contra copia, y otros discos que no cumplan los estándares de los CDs pueden no reproducirse correctamente en este reproductor. Si utiliza dichos discos en esta unidad, TEAC Corporation y sus subsidiarias no se responsabilizan de las consecuencias ni garantizan la calidad de - TEAC SL-D920 | SL-D920 Owner's Manual - Page 63
Interruptor de reinicialización RESET Compatibilidad MP3/WMA Esta unidad puede reproducir archivos MP3/WMA grabados en un disco CD-R o CD-RW o en una memoria USB. Remítase al manual de instrucciones del software cuando cree un archivo MP3 o WMA usando un PC. < Esta unidad puede reproducir archivos - TEAC SL-D920 | SL-D920 Owner's Manual - Page 64
Conexiones A B C D E F 1 2 3 PRECAUCIÓN < Apague la corriente antes de hacer las conexiones. < Lea las instrucciones de cada uno de los componentes que pretenda utilizar con esta unidad. < Asegúrese de insertar bien todos los conectores. Para evitar ruido y zumbidos, no agrupe los cables - TEAC SL-D920 | SL-D920 Owner's Manual - Page 65
A PHONES Para una escucha privada, conecte los auriculares a este conector y ajuste el volumen usando el control VOLUME. Instalación de la pila 1. Afloje el tornillo de fijación. 2. Empuje el otro extremo de la tapa para abrir el compartimento. B Terminal USB Este terminal es para conectar una - TEAC SL-D920 | SL-D920 Owner's Manual - Page 66
Nombres de los controles 1 PARTE SUPERIOR A CD B E FGH I JK FRONTAL L L T S R Q PO N M D G MANDO A DISTANCIA F T K M N C O S R 66 - TEAC SL-D920 | SL-D920 Owner's Manual - Page 67
durante unos 5 minutos. Utilice este botón para cambiar el brillo de la pantalla. C PROGRAM En modo de CD o USB, utilice este botón para programar pistas/archivos. En modo de sintonizador de radio, utilice este botón para almacenar en la memoria los canales de presintonías. D FM MODE/PLAY MODE En - TEAC SL-D920 | SL-D920 Owner's Manual - Page 68
este botón para seleccionar una carpeta del disco o de la memoria USB. X Botones numéricos Y BAND Use este botón para alternar entre las bandas de radio AM y FM. En el modo de CD o USB, utilice este botón para detener la reproducción. Z MUTING Utilice este botón para silenciar el sonido. 68 - TEAC SL-D920 | SL-D920 Owner's Manual - Page 69
Mando a distancia El mando a distancia suministrado permite manejar la unidad desde la distancia. Cuando utilice el mando a distancia, oriéntelo hacia el sensor de control remoto del panel frontal de la unidad. < Incluso aunque el mando a distancia se utilice dentro de su alcance de efectividad (5 - TEAC SL-D920 | SL-D920 Owner's Manual - Page 70
Funcionamiento básico 2 Atenuador de pantalla Se puede cambiar la intensidad de brillo de la pantalla del panel frontal. 31 1 Pulse el botón STANDBY/ON para encender la unidad. Pulse el botón SNOOZE para oscurecer la pantalla. Púlselo otra vez para restablecer el brillo normal. Esta función - TEAC SL-D920 | SL-D920 Owner's Manual - Page 71
número total del pistas/archivos del disco aparezcan en pantalla. < Cuando no hay ningún disco cargado en el reproductor de CD, en la pantalla aparece "NO DISC". Cuando hay un CD de audio cargado Pistas totales Tiempo total de reproducción 2 Presione sobre el símbolo L de la tapa para abrir el - TEAC SL-D920 | SL-D920 Owner's Manual - Page 72
Escuchar MP3/WMA (USB) Controlar la reproducción (disco/USB) < NO utilice discos duros USB de alta capacidad con esta unidad. INFO 1 Pulse el botón FUNCTION para seleccionar "USB". 2 Conecte la memoria USB en el terminal USB. < Se pueden invertir los pasos 1 y 2 . Suspender la reproducción - TEAC SL-D920 | SL-D920 Owner's Manual - Page 73
Buscar una parte de una pista/archivo Durante la reproducción, mantenga pulsado un botón de SALTO (. o /) y suéltelo cuando haya encontrado la parte. Reproducción directa Cuando la unidad está parada o reproduciendo, usted puede usar los botones numéricos del mando a distancia para seleccionar - TEAC SL-D920 | SL-D920 Owner's Manual - Page 74
MP3/WMA no almacenados en carpetas son tratados como si estuvieran en la carpeta raíz 3 5 (root) "001". < Sáltese este paso cuando reproduzca un CD normal. Se pueden programar hasta un total de 32 pistas/archivos en el orden deseado. Las funciones de Reproducción Aleatoria (Shuffle) y Reproducci - TEAC SL-D920 | SL-D920 Owner's Manual - Page 75
pulse el botón PROGRAM. Cómo borrar el programa < Pulsando el botón FUNCTION se borra el contenido de la programación. < Cuando se ha programado un CD, el hecho de abrir la tapa del compartimento de disco borra el contenido de la programación. < Cuando se ha programado una memoria USB, al quitar - TEAC SL-D920 | SL-D920 Owner's Manual - Page 76
modo de reproducción seleccionado. Cada vez que se pulsa el botón PLAY MODE se cambia el modo en el siguiente orden: Cuando hay cargado un CD de audio REPEAT REPEAT ALL (desac.) INTRO SHUFFLE Cuando hay cargado un disco MP3/WMA o una memoria USB REPEAT REPEAT ALL REPEAT FOLDER (desac.) INTRO - TEAC SL-D920 | SL-D920 Owner's Manual - Page 77
radio Botón FM MODE 2 1 Pulse el botón FUNCTION para seleccionar "AM" o "FM". 2 Seleccione la emisora que desee escuchar (selección automática). Pulse este botón para alternar entre los modos STEREO y MONO. STEREO pueden sintonizar automáticamente (selección manual) Gire el mando TUNING hacia - TEAC SL-D920 | SL-D920 Owner's Manual - Page 78
Sintonización de presintonías 1, 2, 3.... 4 En los siguientes 10 segundos, pulse el botón PROGRAM. MP3/PRESET ( / ) Se pueden almacenar hasta 20 emisoras de FM y 20 de AM como canales presintonizados. Si se interrumpe el suministro de corriente y la pila de respaldo se gasta, los ajustes - TEAC SL-D920 | SL-D920 Owner's Manual - Page 79
(tipo de programa) Cuando se selecciona PTY, en pantalla aparece el tipo de programa. Si no hay datos PTY, aparecerá "NO PTY". RT (texto por radio) Cuando se selecciona RT, en pantalla se mostrarán hasta 64 caracteres de información transmitidos por la emisora. Si no hay datos RT, aparecerá "NO TEXT - TEAC SL-D920 | SL-D920 Owner's Manual - Page 80
CLASSICS: OTHER M: WEATHER: FINANCE: CHILDREN: SOCIAL: RELIGION: PHONE IN: TRAVEL: LEISURE: JAZZ: COUNTRY: NATION M: OLDIES: FOLK M: DOCUMENT: TEST ALARM: noticias breves, convocatorias, opinión pública, informes, situaciones reales Información diversa que no sean noticias, incluyendo sugerencias - TEAC SL-D920 | SL-D920 Owner's Manual - Page 81
en la memoria USB mediante un ordenador. No se puede comprobar la capacidad libre con esta unidad. RECORD Se puede grabar un CD, una emisión de radio o desde una dispositivo externo en un dispositivo de memoria USB, resultando archivos MP3. 1 Conecte el dispositivo de memoria USB al puerto USB - TEAC SL-D920 | SL-D920 Owner's Manual - Page 82
Grabar en un USB 2 4 Si quiere parar de grabar, puse el botón RECORD otra vez. Borrar un archivo de un USB ERASE < Durante la grabación solamente se pueden usar el botón RECORD y el control de volumen. El control de volumen sólo afecta al nivel de grabación cuando se graba desde AUX IN. < No se - TEAC SL-D920 | SL-D920 Owner's Manual - Page 83
Ajustar el reloj CLOCK ADJ 4 Use los botones de SALTO (.//) para ajustar el valor de las horas. 1 El reloj se puede ajustar tanto si la unidad está encendida como si está en modo de reposo (standby). 2 Pulse el botón CLOCK ADJUST durante más de 2 segundos. "12 H" o "24 H" parpadeará en la - TEAC SL-D920 | SL-D920 Owner's Manual - Page 84
Ajustar el temporizador 1 TIMER 3 Use los botones de SALTO (.//) para ajustar los minutos y después pulse el botón TIMER. Usted puede ajustar el temporizador, que le servirá para reproducir o grabar a la hora especificada. Ajuste el reloj antes de ajustar el temporizador. 1 Pulse y mantenga - TEAC SL-D920 | SL-D920 Owner's Manual - Page 85
de reproducción. < Temporizador de reproducción: Si la fuente está puesta en "CD", cargue CD. Si la fuente está puesta en "USB", conecte una memoria USB en hay ninguna memoria USB conectada, el temporizador usará el sintonizador de radio en su lugar como fuente de reproducción. < AUX no puede ser - TEAC SL-D920 | SL-D920 Owner's Manual - Page 86
Rango de frecuencias (AM 522 kHz a 1.629 kHz Sección del REPRODUCTOR DE CD Respuesta de frecuencias 20 Hz a 20 kHz (±1 dB) Lloro y centelleo Inapreciable para la memoria (CR2032) x 1 Cable con mini-conector estéreo x 1 Manual del usuario (este documento) x 1 Tarjeta de garantía x 1 < El dise - TEAC SL-D920 | SL-D920 Owner's Manual - Page 87
mismo antes de llamar a su distribuidor o a un servicio técnico TEAC. General No hay corriente e Compruebe la conexión a la corriente. Compruebe Si hay una luz demasiado intensa cerca de la unidad, apáguela. Reproductor de CD No se puede reproducir e Cargue un disco con la cara de la etiqueta hacia - TEAC SL-D920 | SL-D920 Owner's Manual - Page 88
TEAC AMERICA, INC. TEAC CANADA LTD. TEAC MEXICO, S.A. DE C.V. TEAC UK LTD. TEAC EUROPE GMBH 1-47 Ochiai, Tama-shi, Tokyo 206-8530 Japan Phone: (042) 356-9156 7733 Telegraph Road, Montebello, California 90640 U.S.A. Phone: (323) 726-0303 5939 Wallace Street, Mississauga, Ontario L4Z 1Z8, Canada
-
 1
1 -
 2
2 -
 3
3 -
 4
4 -
 5
5 -
 6
6 -
 7
7 -
8
-
9
-
10
-
11
-
12
-
13
-
14
-
15
-
16
-
17
-
18
-
19
-
20
-
21
-
22
-
23
-
24
-
25
-
26
-
27
-
28
-
29
-
30
-
31
-
32
-
33
-
34
-
35
-
36
-
37
-
38
-
39
-
40
-
41
-
42
-
43
-
44
-
45
-
46
-
47
-
48
-
49
-
50
-
51
-
52
-
53
-
54
-
55
-
56
-
57
-
58
-
59
-
60
-
61
-
62
-
63
-
64
-
65
-
66
-
67
-
68
-
69
-
70
-
71
-
72
-
73
-
74
-
75
-
76
-
77
-
78
-
79
-
80
-
81
-
82
-
83
-
84
-
85
-
86
-
87
-
88
 |
 |
ESPAÑOL
ENGLISH
FRANÇAIS
D01123020C
SL-D920
STEREO CD RADIO
Z
OWNER’S MANUAL
MODE D'EMPLOI
MANUAL DEL USUARIO