TRENDnet TEW-731BR User's Guide
TRENDnet TEW-731BR Manual
 |
View all TRENDnet TEW-731BR manuals
Add to My Manuals
Save this manual to your list of manuals |
TRENDnet TEW-731BR manual content summary:
- TRENDnet TEW-731BR | User's Guide - Page 1
i - TRENDnet TEW-731BR | User's Guide - Page 2
installation. This equipment generates, uses and can radiate radio frequency energy and, if not installed and used in accordance with the instructions and are firmware programmed at the factory to match the intended destination. The firmware setting is not accessible by the end user. Europe - - TRENDnet TEW-731BR | User's Guide - Page 3
supplying public access to telecommunications and/or network services. This device may not be used for setting up outdoor radio links in France and in some areas the RF output power may be limited to 10 mW EIRP in the frequency range of 2454 - 2483.5 MHz. For detailed information the end-user should - TRENDnet TEW-731BR | User's Guide - Page 4
[Finnish] 1999/5/EY oleellisten vaatimusten ja sitä koskevien direktiivin muiden ehtojen mukainen. Svenska Härmed intygar TRENDnet att denna TEW-731BR står I överensstämmelse med [Swedish] de väsentliga egenskapskrav och övriga relevanta bestämmelser som framgår av direktiv 1999/5/EG. iv - TRENDnet TEW-731BR | User's Guide - Page 5
Canada radiation exposure limits set forth for an uncontrolled environment. This equipment should be installed and operated with minimum appareils radio exempts de licence. Son fonctionnement est sujet aux deux conditions suivantes: (1) le dispositif ne doit pas produire de brouillage préjudiciable, - TRENDnet TEW-731BR | User's Guide - Page 6
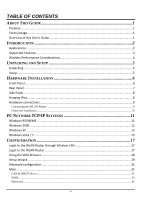
the WLAN Router ...9 Check the installation...10 PC NETWORK TCP/IP SETTINGS 11 Windows 95/98/ME ...11 Windows 2000 ...12 Windows XP ...13 Windows Vista / 7 ...15 CONFIGURATION 17 Login to the WLAN Router through Wireless LAN 17 Login to the WLAN Router...17 Using the Web Browser...18 Setup Wizard - TRENDnet TEW-731BR | User's Guide - Page 7
Time ...42 Dynamic DNS...43 Wireless ...44 Basic...44 Security ...46 Advanced ...50 Wi-Fi Protected Setup...51 Status ...52 Device Information ...52 Log ...54 Log Setting...55 Statistic...57 Wireless ...57 Routing...58 Static ...58 Dynamic...59 Routing Table ...60 Access ...61 Filters ...61 Virtual - TRENDnet TEW-731BR | User's Guide - Page 8
Router" refers to your TEW-731BR 300Mbps Wireless N Home Router. Overview of this User's Guide Introduction. Describes the TEW-731BR 300Mbps Wireless N Home Router and its features. Unpacking and Setup. Helps you get started with the basic installation of the TEW731BR 300Mbps Wireless N Home Router - TRENDnet TEW-731BR | User's Guide - Page 9
. Thus, there is a need to share one public IP address over a single Internet connection to link the home with the Internet. The scarcity of IP addresses and using a shared Internet connection through an Internet sharing device can solve high network access costs. All linked computers can make full - TRENDnet TEW-731BR | User's Guide - Page 10
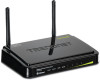
IP, Static IP, PPPoE, PPTP, L2TP connection types High-speed data rates up to 300Mbps using an IEEE 802.11n connection 2 fixed external antennas support high speed performance and great coverage with MIMO technology Network Address Translation (NAT) firewall Wi-Fi Protected Setup (WPS - TRENDnet TEW-731BR | User's Guide - Page 11
to a minimum. Each obstruction can reduce the range of a wireless device. Position the wireless devices in a manner that will minimize the wireless devices. If you are still experiencing low or no signal consider repositioning the wireless devices or installing additional access points. The use - TRENDnet TEW-731BR | User's Guide - Page 12
unpacking and setup information for the TEW-731BR 300Mbps Wireless N Home Router. Unpacking Open the box of the TEW-731BR 300Mbps Wireless N Home Router and carefully unpack it. The box should contain the following items: TEW-731BR 300Mbps Wireless N Home Router CD-Rom (User's Guide) Multi - TRENDnet TEW-731BR | User's Guide - Page 13
figure below shows the front panel of the TEW-731BR 300Mbps Wireless N Home Router. Front Panel POWER This indicator lights green when the hub is receives power, otherwise it is off. Status This indicator blinking green means the WLAN Router is working successfully. Otherwise, this indicator always - TRENDnet TEW-731BR | User's Guide - Page 14
to this power jack RESET Use a pin-shaped item to push to reset this device to factory default settings (Hold for 15 seconds and release). It will be a useful tool when the manager forgot the password to login, and needs to restore the device back to default settings. POWER SWITCH Use the power on - TRENDnet TEW-731BR | User's Guide - Page 15
Side Panel The figure below shows the side panel of the TEW-731BR 300Mbps Wireless N Home Router. Side Panel WPS Push and hold this button for 3 seconds and release it to initiate the Wi-Fi Protected Setup process. Hanging Way User can mount the device on a wall. Mount the Nylon screw anchors into - TRENDnet TEW-731BR | User's Guide - Page 16
the Ethernet port of the xDSL or Cable modem. 3. Use another network cable to connect to the Ethernet card on the computer system; the other end of the cable connects to the LAN port of the WLAN Router. Since the IEEE 802.11b/g/n Wireless Home Router has four ports, you can connect up to four - TRENDnet TEW-731BR | User's Guide - Page 17
Check the installation The control LEDs of the WLAN Router are clearly visible and the status of the network link can be seen instantly: 1. With the power source on, once the device is connected to the broadband modem, the Power, Status, LAN, WLAN and WAN port LEDs of the WLAN Router will light up - TRENDnet TEW-731BR | User's Guide - Page 18
the "Network neighborhood" icon found on the desktop. 2. Click the right mouse button and a context menu will be show. 3. Select "Properties" to enter the TCP/IP setting screen. 4. Select "Obtain an IP address automatically" on the "IP address" field. 5. Select "Disable DNS" in the "DNS" field. 11 - TRENDnet TEW-731BR | User's Guide - Page 19
. Select "Properties" to enter the TCP/IP setting window. 1. In the "Local area network status" window, click on "Properties." 2. In the "Local area network connection" window, first select TCP/IP setting and then select "Properties." 3. Set both "IP address" and "DNS" to Automatic configuration. 12 - TRENDnet TEW-731BR | User's Guide - Page 20
Windows XP Point the cursor and click the right button on the "My Network Place" icon. Select "properties" to enter the TCP/IP setting window. 1. Click "Start" button, and click on "Control Panel". 2. Click on "Network and Internet Connections" and click on "Network Connections". Note: In Classic, - TRENDnet TEW-731BR | User's Guide - Page 21
4. Click on "Internet Protocol (TCP/IP)" and click on "Properties". 5. Set "IP address" to "Obtain an IP address automatically." 6. Set "DNS" to "Obtain DNS server address automatically." 14 - TRENDnet TEW-731BR | User's Guide - Page 22
" button. Right click on "Network" and select "Properties". 2. Window Vista: Click on "Manage Network Connections. Windows 7: Click on "Change adapter settings". 3. Right click "Local Area Connection" and select "Properties". Click on "Internet Protocol Version 4 (TCP/IPv4)" and click "Properties - TRENDnet TEW-731BR | User's Guide - Page 23
4. Set "IP address" to "Obtain an IP address automatically." 5. Set "DNS" to "Obtain DNS server address automatically." 16 - TRENDnet TEW-731BR | User's Guide - Page 24
/g/n mixed mode Channel bandwidth: 20Mhz Security: Disabled Login to the WLAN Router Before you configure this device, note that when the WLAN Router, make sure the host PC must be set on the IP subnet that can be accessed by the xDSL/Cable modem. For example, when the default network address of - TRENDnet TEW-731BR | User's Guide - Page 25
Using the Web Browser 1. Open Internet Explorer 6.0 or above Internet browser. 2. Enter IP address http://192.168.10.1 (the factory-default IP address setting) to the URL web address location. 3. When the following dialog box appears, enter the user name and password to login to the main - TRENDnet TEW-731BR | User's Guide - Page 26
to get the wireless Router configuration ready to run in 6 easy steps by clicking on` the "Wizard" button on the function menu. The following screen will appear. Please click "Next" to continue. Step 1: Set your new password Setting the new admin password of the WLAN Router. Please click "Next - TRENDnet TEW-731BR | User's Guide - Page 27
and DHCP server Set user's IP address and mask. The default IP is 192.168.10.1. If the user chooses to enable DHCP, please click "Enable". DHCP enabled is able to automatically assign IP addresses. Please assign the range of IP addresses in the fields of "Range start" and "Range end". Please click - TRENDnet TEW-731BR | User's Guide - Page 28
Step 4: Set Internet connection The WLAN Router will attempt to auto detect your Internet Connection. Obtain IP automatically (DHCP client): If the user has enabled DHCP server, choose "Obtain IP automatically (DHCP client)" to have the WLAN Router assign IP addresses automatically. 21 - TRENDnet TEW-731BR | User's Guide - Page 29
Fixed IP Address: If the Internet Service Provider (ISP) assigns a fixed IP address, choose this option and enter the assigned WAN IP Address, WAN Subnet Mask, WAN Gateway Address and DNS Server Addresses for the WLAN Router. 22 - TRENDnet TEW-731BR | User's Guide - Page 30
PPPoE to obtain IP automatically: If connecting to the Internet using a PPPoE (Dial-up xDSL) connection, and the ISP provides a User Name and Password, then choose this option and enter the required information. 23 - TRENDnet TEW-731BR | User's Guide - Page 31
PPPoE with a fixed IP address: If connecting to the Internet using a PPPoE (Dial-up xDSL) connection and the ISP provides a User Name, Password and a Fixed IP Address, choose this option and enter the required information. 24 - TRENDnet TEW-731BR | User's Guide - Page 32
PPTP: If connecting to the Internet using a PPTP (Dial-up xDSL) connection, enter your IP, Subnet Mask, Gateway, Server IP, PPTP Account and PPTP Password. 25 - TRENDnet TEW-731BR | User's Guide - Page 33
L2TP: If connecting to the Internet using a L2TP (Dial-up xDSL) connection and the ISP provides a Server IP, Account and Password information, choose this option and enter the required information. 26 - TRENDnet TEW-731BR | User's Guide - Page 34
Russia PPPoE (Russia): If connecting to the Internet using a Russia PPPoE connection, the ISP will provide a User Name, Password, and a Fixed or Dynamic IP address. Choose this option and enter the required information. 27 - TRENDnet TEW-731BR | User's Guide - Page 35
Russia PPTP (Russia): If connecting to the Internet using a Russia PPTP connection, the ISP will provide either a Fixed or Dynamic IP, Subnet Mask, Gateway, Server IP, PPTP Account and PPTP Password. Choose this option and enter the required information. 28 - TRENDnet TEW-731BR | User's Guide - Page 36
Russia L2TP (Russia): If connecting to the Internet using a Russia L2TP connection, the ISP will provide either a Fixed or Dynamic IP, Subnet Mask, Gateway, Server IP, L2TP Account and L2TP Password. Choose this option and enter the required information. 29 - TRENDnet TEW-731BR | User's Guide - Page 37
the WLAN Router. Step 6: Setup completed The Setup wizard is now completed. The new settings will be effective after the WLAN Router restarts. Please click "Restart" to reboot the WLAN Router. If user does not want to make any changes, please click "Exit" to quit without any changes. User also can - TRENDnet TEW-731BR | User's Guide - Page 38
to configure the LAN & DHCP Server, set WAN parameters, create Administrator and User passwords, and set the local time, time zone, and dynamic DNS. LAN & DHCP Server This page allows the user to configure LAN and DHCP properties, such as the host name, IP address, subnet mask, and domain name. LAN - TRENDnet TEW-731BR | User's Guide - Page 39
. The host name is required by some ISPs. The default host name is "TEW-731BR". IP Address: This is the IP address of the WLAN Router. The default IP address is 192.168.10.1. Subnet Mask: Type the subnet mask for the WLAN Router in the text box. The default subnet mask is 255.255.255.0. DHCP Server - TRENDnet TEW-731BR | User's Guide - Page 40
DHCP client, Fixed IP, PPPoE, PPTP, L2TP, or Russia PPPoE/PPTP/L2TP from the drop-down list. WAN IP: Select whether user wants to specify an IP address manually, or want DHCP to obtain an IP address automatically. When Specify IP is selected, type the IP address, subnet mask, and default gateway - TRENDnet TEW-731BR | User's Guide - Page 41
client)" to have the router assign IP addresses automatically. WAN IP Address: Select whether user wants to specify an IP address manually, or want DHCP to obtain an IP address automatically. When Specify IP is selected, type the IP address, subnet mask, and default gateway in the text boxes. User - TRENDnet TEW-731BR | User's Guide - Page 42
the user name provided by ISP. Password: Enter the password provided by ISP. Retype Password: Enter the password again. DNS: Enter the IP address of specified DNS server here, default value 0.0.0.0 is get the DNS settings from ISP. Auto-reconnect: Select the connection type for Always-on, Manual or - TRENDnet TEW-731BR | User's Guide - Page 43
PPTP/L2TP with Dynamic IP If connected to the Internet using a PPTP/L2TP (Dial-up xDSL) with dynamic IP connection, enter the your Server IP, PPTP/L2TP Account and PPTP/L2TP Password, if your ISP has provided you with a DNS IP address, enter it in the DNS field, otherwise, leave it zero. 36 - TRENDnet TEW-731BR | User's Guide - Page 44
PPTP/L2TP with Static IP If connected to the Internet using a PPTP/L2TP (Dial-up xDSL) with static IP connection, enter the your IP Address, Subnet Mask, Gateway IP address, DNS IP address, Server IP address, PPTP Account and PPTP Password. 37 - TRENDnet TEW-731BR | User's Guide - Page 45
Russia PPPoE (Russia): If connecting to the Internet using a Russia PPPoE connection, the ISP will provide a User Name, Password, and a Fixed or Dynamic IP address and the WAN physical setting. Choose this option and enter the required information. 38 - TRENDnet TEW-731BR | User's Guide - Page 46
Russia PPTP (Russia): If connecting to the Internet using a Russia PPTP connection, the ISP will provide either a Fixed or Dynamic IP, Subnet Mask, Gateway, Server IP, PPTP Account and PPTP Password. Choose this option and enter the required information. 39 - TRENDnet TEW-731BR | User's Guide - Page 47
Russia L2TP (Russia): If connecting to the Internet using a Russia L2TP connection, the ISP will provide either a Fixed or Dynamic IP, Subnet Mask, Gateway, Server IP, L2TP Account and L2TP Password. Choose this option and enter the required information. 40 - TRENDnet TEW-731BR | User's Guide - Page 48
This screen enables users to set administrative and user passwords. These passwords are used to gain access to the WLAN Router interface. Administrator: Type the password the Administrator will use to log into the system. The password must be typed again for confirmation. The Administrator can - TRENDnet TEW-731BR | User's Guide - Page 49
through the SNTP Server. Specify the NTP domain name or IP address in the text box and click Apply. Set the time: Manually setting the WLAN Router system time, press the Set Time button to update the system time. Daylight Saving: Enables users to enable or disable daylight saving time. When enabled - TRENDnet TEW-731BR | User's Guide - Page 50
the DDNS server with your current Public IP address when you are online. First, you need to register your preferred DNS with the DDNS provider. Then, please select the DDNS address in the Server Address and fill the related information in the below fields: Host Name, User Name and Password. 43 - TRENDnet TEW-731BR | User's Guide - Page 51
match the channel selected here in order for the wireless device to access the LAN and WAN via the WLAN Router. 802.11 Mode: Select one of the following: 2.4Ghz 802.11b/g/n mixed - Select if you are using a mix of 802.11n, 11g, and 11b wireless clients. 2.4Ghz 802.11b/g mixed - Select if you are - TRENDnet TEW-731BR | User's Guide - Page 52
is the default setting. Select this option if you are not using any 802.11n wireless clients. Auto 20/40 MHz - Select this option if you are using both 802.11n and non802.11n wireless devices. SSID Broadcast: While SSID Broadcast is enabled, all wireless clients will be able to view the WLAN Router - TRENDnet TEW-731BR | User's Guide - Page 53
WEP: Open System and Shared Key requires the user to set a WEP key to exchange data with other wireless clients that have the same WEP key. Mode: Select the key type: ASCII or HEX WEP Key: Select the level of encryption from the drop-down list. The WLAN Router supports, 64 and 128-bit encryption. 46 - TRENDnet TEW-731BR | User's Guide - Page 54
13 characters Key 1: Enables users to create WEP keys with WPS enabled. Manually enter a set of values for Key 1. Key 1 ~ Key 4: Enables users to create up to 4 different WEP keys with WPS disabled. Manually enter a set of values for each key. Select a key to use by clicking the radio button - TRENDnet TEW-731BR | User's Guide - Page 55
above screen is shown. Please set the length of the encryption key and the parameters for the RADIUS server. Cipher Type: Select the cipher type for TKIP or AES encryption, Selected Auto for auto detects the cipher type. RADIUS Server 1/2: 1. Enter the IP address, Port used and Shared Secret by the - TRENDnet TEW-731BR | User's Guide - Page 56
WPA/WPA2/WPA-Auto Security with PSK If WPA, WPA2 or WPA-Auto PSK is selected, the above screen is shown. Please set the length of the encryption key. Cipher Type: Select the cipher type for TKIP or AES encryption, Selected Auto for auto detects the cipher type. - TRENDnet TEW-731BR | User's Guide - Page 57
Type the beacon interval in the text box. User can specify a value from 25 to 1000. The default beacon interval is 100. RTS Threshold: Type 1500 and 2346 until packet transfer rates are minimized. (NOTE: set this fragmentation threshold value may diminish system performance.) DTIM Interval: Type - TRENDnet TEW-731BR | User's Guide - Page 58
Setup) function Status: Display the status (Un-configured State/Configured State) information of WPS. Self-PIN Number: Display the current PIN number of the WLAN Router. Client PIN Number: Type Client's PIN number the client uses to negotiate with the WLAN Router via WPS connection. It is only used - TRENDnet TEW-731BR | User's Guide - Page 59
Status This selection enables users to view the status of the WLAN Router LAN, WAN and Wireless connections, and view logs and statistics pertaining to connections and packet transfers. Device Information This screen enables users to view the WLAN Router's LAN, Wireless and WAN configurations. 52 - TRENDnet TEW-731BR | User's Guide - Page 60
. After updating the firmware in Tools - Firmware, check this to ensure that the firmware was successfully updated. WAN: This section displays the WAN interface configuration including the MAC address, Connection status, DHCP client status, IP address, Subnet mask, Default gateway, and DNS. Wireless - TRENDnet TEW-731BR | User's Guide - Page 61
Log This screen enables users to view a running log of Router system statistics, events, and activities. The log displays up to 200 entries. Older entries are overwritten by new entries. The Log screen commands are as - TRENDnet TEW-731BR | User's Guide - Page 62
This screen enables users to set Router Log parameters. SMTP Authentication: Selected the Enabled if the SMTP server need for authentication, fill in account name and password in SMTP Account field and SMTP Password field. SMTP Account: If the SMTP Authentication enabled, fill in the SMTP account - TRENDnet TEW-731BR | User's Guide - Page 63
time specified to send it, it will be sent regardless. Syslog Server: Type the IP address of the Syslog Server if user wants the WLAN Router to listen and receive incoming Syslog messages. Log Type: Enables users to select what items will be included in the log: System Activity: Displays information - TRENDnet TEW-731BR | User's Guide - Page 64
ports (in bytes per second). Wireless This screen enables users to view information about wireless devices that are connected to the WLAN Router. Connected Time: Displays the time duration of wireless clients connection to the WLAN Router. MAC Address: Displays the wireless client's MAC address. 57 - TRENDnet TEW-731BR | User's Guide - Page 65
set how the WLAN Router forwards data: Static and Dynamic. Routing Table enables users to view the information created by the WLAN Router that displays the network interconnection topology. Static It enables users to create static routes to other IP networks through next hop routers. Network Address - TRENDnet TEW-731BR | User's Guide - Page 66
users to enable RIPv1 or RIPv2 (Routing Information Protocol) on all of the router interfaces, to transmit and/or receive RIP information to and from other routers also using the RIP protocol. This allows the router to dynamically learn routes and exchange route information of other IP networks - TRENDnet TEW-731BR | User's Guide - Page 67
Routing Table This screen enables users to view the routing table of the WLAN Router. The routing table is a database created by the WLAN Router that displays the network interconnection topology. Network Address: Displays the destination network IP address. Network Mask: Displays the destination - TRENDnet TEW-731BR | User's Guide - Page 68
This page enables you to define access restrictions, set up protocol and IP filters, create virtual servers, define access for special applications such as games, and set firewall rules. Filters Using filters to deny or allow the users to access to the internet. Three types of filters can be select - TRENDnet TEW-731BR | User's Guide - Page 69
allow computers with MAC address listed in the MAC Table. Deny: Computers in the MAC Table are denied access to the router, access to your wired/wireless local network (LAN/WLAN), and Internet access. MAC Table: Use this section to create a user profile which internet access is denied or allowed - TRENDnet TEW-731BR | User's Guide - Page 70
Name: Type the name of the user to be permitted/denied access. MAC Address: Type the MAC address of the user's network interface. Add: Click to add the user to the list at the bottom of the page. Update: Click to update information for the user, if you have changed any of the fields. Delete: Select - TRENDnet TEW-731BR | User's Guide - Page 71
add the specified domains in the text box. Disable: Disable the Domain/URL Blocking function. Allow: Allow users to access all domains except "Domains List". Deny: Deny users to access all domains except "Domains List". Domains List: List Domain/URL you will Denied or Allowed. Delete: Select - TRENDnet TEW-731BR | User's Guide - Page 72
minimum and maximum IP address range filter; all IP addresses falling within the range are not allowed accessing internet. The IP filter profiles are listed disable the IP address filter. Name: Type the name of the user to be denied access. Protocol: Select a protocol (TCP or UDP) to use for the virtual - TRENDnet TEW-731BR | User's Guide - Page 73
: Type the IP range. IP addresses falling between this value and the Range End are not allowed to access the Internet. Add: Click to add the IP range to the table at the bottom of the screen. Update: Click to update information for the range if you have selected a list item and have made changes - TRENDnet TEW-731BR | User's Guide - Page 74
Virtual Server This screen enables user to create a virtual server via the WLAN Router. If the WLAN Router is set as a virtual server, remote users requesting Web or FTP services through the WAN are directed to local servers in the LAN. The WLAN Router redirects the request via the protocol and port - TRENDnet TEW-731BR | User's Guide - Page 75
be used to provide access to the virtual server. LAN Server: Type the LAN IP address that will be assigned to the virtual server. Add: Click to add the virtual server to the table at the bottom of the screen. Update: Click to update information for the virtual server if the user has selected - TRENDnet TEW-731BR | User's Guide - Page 76
, users will be able to connect to the application via the WLAN Router's WAN connection. Click "Disabled" on a profile to prevent users from accessing the the user has legitimate access to the application. Protocol: Select the protocol (TCP, UDP, or * for TCP+UDP) that can be used to access the - TRENDnet TEW-731BR | User's Guide - Page 77
the WLAN Router and associated security settings. Note: Any clients added to the DMZ exposes the clients to security risks such as viruses and unauthorized access. Enable: Click to enable or disable the DMZ. DMZ Host IP: Type a host IP address for the DMZ. The computer with this IP address acts as - TRENDnet TEW-731BR | User's Guide - Page 78
users to set up the firewall. The WLAN Router provides basic firewall functions, by filtering all the packets that enter the WLAN Router using a set is applied to. ● IP Range Start: Type the start IP address that the rule is applied to. ● IP Range End: Type the end IP address that the rule is applied - TRENDnet TEW-731BR | User's Guide - Page 79
the end IP address that the rule is applied to. ● Protocol: Select the protocol (TCP, UDP, or ICMP) of the destination. ● Port Range: Select the port range. Add: Click to add the rule profile to the table at the bottom of the screen. Update: Click to update information for the rule if the user has - TRENDnet TEW-731BR | User's Guide - Page 80
users to set up the SNMP and Remote Management features. SNMP (Simple Network Management Protocol) This screen allows you to enable and configure SNMP (Simple Network Management Protocol) on the router. Using SNMP, notification messages or SNMP Traps (router status Type the IP address of the - TRENDnet TEW-731BR | User's Guide - Page 81
through the WAN via a Web browser. A user name and password are required to perform remote management. HTTP: Enables users to set up HTTP access of the Port number, and Remote IP Range for remote management. Allow to Ping WAN Port: Type a range of Router IP addresses that can be pinged from remote - TRENDnet TEW-731BR | User's Guide - Page 82
for further analysis and troubleshooting. Packet captures allow you to see the detailed data and information inside data packets. You will need a third party packet capture application in order to open and view the packet capture files download from the router. Network Interface: Click the drop - TRENDnet TEW-731BR | User's Guide - Page 83
Tools This page enables users to restart the system, save and load different settings as profiles, restore factory default settings, run a setup wizard to configure WLAN Router settings, upgrade the firmware, and ping remote IP addresses. Restart Click "Restart" to restart the system in the event - TRENDnet TEW-731BR | User's Guide - Page 84
save it to disk. Click "Browse" and go to the location of the downloaded firmware file. Select the file and click "Upgrade" to update the firmware to the latest release. Ping Test The ping test enables users to determine whether an IP address or host is present on the Internet. Type the host name or - TRENDnet TEW-731BR | User's Guide - Page 85
-MDIX ports Enables Wi-Fi Protected Setup (WPS) function Dynamic IP, Static (Fixed) IP, PPPoE, PPTP, L2TP UPnP IGD 1.0 compliant DMZ host & Virtual Servers Static or WAN assigned DNS servers; 3 verified services for DDNS Up to 3 external trap receivers MAC Address Filter, Domain/URL Filter, Protocol - TRENDnet TEW-731BR | User's Guide - Page 86
contact the point-ofpurchase for their return policies. TRENDnet shall not be responsible for any software, firmware, information, or memory data of customer contained in, stored on, or integrated with any products returned to TRENDnet pursuant to any warranty. There are no user serviceable parts - TRENDnet TEW-731BR | User's Guide - Page 87
.com/gpl or http://www.trendnet.com Download section and look for the desired TRENDnet product to access to the GPL Code or LGPL Code. These codes are distributed WITHOUT WARRANTY and are subject to the copyrights of the developers. TRENDnet does not provide technical support for these codes. Please - TRENDnet TEW-731BR | User's Guide - Page 88
81
-
 1
1 -
 2
2 -
 3
3 -
 4
4 -
 5
5 -
 6
6 -
 7
7 -
8
-
9
-
10
-
11
-
12
-
13
-
14
-
15
-
16
-
17
-
18
-
19
-
20
-
21
-
22
-
23
-
24
-
25
-
26
-
27
-
28
-
29
-
30
-
31
-
32
-
33
-
34
-
35
-
36
-
37
-
38
-
39
-
40
-
41
-
42
-
43
-
44
-
45
-
46
-
47
-
48
-
49
-
50
-
51
-
52
-
53
-
54
-
55
-
56
-
57
-
58
-
59
-
60
-
61
-
62
-
63
-
64
-
65
-
66
-
67
-
68
-
69
-
70
-
71
-
72
-
73
-
74
-
75
-
76
-
77
-
78
-
79
-
80
-
81
-
82
-
83
-
84
-
85
-
86
-
87
-
88
 |
 |

i