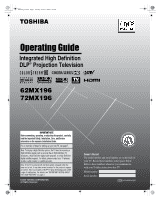
Toshiba 72MX196 Operating Guide
Toshiba 72MX196 - 72" Rear Projection TV Manual
 |
UPC - 022265251492
View all Toshiba 72MX196 manuals
Add to My Manuals
Save this manual to your list of manuals |
Toshiba 72MX196 manual content summary:
- Toshiba 72MX196 | Operating Guide - Page 1
to appear on-screen. This is a property of DLP® TV lamp technology and is NOT a sign of malfunction. For details, see "IMPORTANT NOTICE ABOUT HOT LAMP RESTART" on page 3. © 2006 TOSHIBA CORPORATION All Rights Reserved RICA CONSUMER PR O 14001 FILE No. A96 Owner's Record The model number and serial - Toshiba 72MX196 | Operating Guide - Page 2
to this equipment not expressly approved by Toshiba could void the user's authority to operate this equipment. Important notes about your DLP® projection TV 1) The light source for this TV is a projection lamp unit with a limited service life. When the lamp wears out, the picture may become dark - Toshiba 72MX196 | Operating Guide - Page 3
ARE NOT IN ANY WAY LIABLE FOR THE ACCURACY OR AVAILABILITY OF THE PROGRAM SCHEDULE INFORMATION OR OTHER DATA IN THE TV GUIDE ON SCREEN SYSTEM AND CANNOT GUARANTEE SERVICE AVAILABILITY IN YOUR AREA. IN NO EVENT SHALL GEMSTAR-TV GUIDE INTERNATIONAL, INC. AND/OR ITS RELATED AFFILIATES BE LIABLE FOR - Toshiba 72MX196 | Operating Guide - Page 4
27, 2006 1:43 PM Contents FCC Declaration of Conformity Compliance Statement (Part 15 2 Important notes about your DLP® projection TV 2 Trademark Information 3 Chapter 1: Introduction 6 Welcome to Toshiba 6 Features of your new TV 6 Overview of steps for installing, setting up, and using your - Toshiba 72MX196 | Operating Guide - Page 5
mail from the TV 78 Modifying an existing recording or reminder 78 Chapter 8: Troubleshooting 79 General troubleshooting 79 Home network troubleshooting 81 LED indications 83 Chapter 9: Appendix 84 Lamp unit replacement and care 84 Replacing the lamp unit (User-replaceable component 84 When - Toshiba 72MX196 | Operating Guide - Page 6
! Use this TV only with the TOSHIBA TV stand listed in the "Specifications" section of this manual. Use with other stands may result in instability, causing possible injury or death. Welcome to Toshiba Thank you for purchasing this Toshiba TV, one of the most innovative DLP® projection TVs on the - Toshiba 72MX196 | Operating Guide - Page 7
TV Guide On Screen™ Interactive Program Guide. • Read "Important notes about your DLP® projection TV" (- page 2). • Place the TV on the applicable optional TV stand listed in the "Specifications" section (if available for this TV model) or on a sturdy, level, stable surface that can safely support - Toshiba 72MX196 | Operating Guide - Page 8
close an on-screen menu. 10 GUIDE - Press to access the TV Guide On Screen™ program guide (- TV Guide On Screen™ Interactive Program Guide). 11 VIDEO-2 IN - The side panel A/V connections are referred to as "VIDEO 2" and include standard A/V inputs plus an optional S-video input. 8 MX196 (E/F) Web - Toshiba 72MX196 | Operating Guide - Page 9
, ColorStream or PC (- "Selecting the video input source to view," page 32). • When the MP3 Audio Player is active (- page 69). 5 PC IN - For connecting audio and video from a personal computer to use the TV screen as the display for the PC (- Installation Guide). 6 IR OUT - For controlling infrared - Toshiba 72MX196 | Operating Guide - Page 10
-Definition Multimedia Interface inputs receive digital audio and uncompressed digital video from an HDMI device or uncompressed digital video from a DVI TV Guide On Screen™ recording features (- Installation Guide). 10 Digital Audio OUT - Optical audio output in Dolby* Digital or PCM (pulse-code - Toshiba 72MX196 | Operating Guide - Page 11
TV remote sensor. Make sure there are no obstructions between the remote control and the TV. Point remote control toward remote sensor on front of TV range becomes reduced, replace batteries with new ones. • When necessary to replace batteries in the remote control, always replace both batteries with - Toshiba 72MX196 | Operating Guide - Page 12
a list of the buttons that operate the TV Guide On Screen™ system, see the separate TV Guide On Screen™ Interactive Program Guide. Note: The error message "Not Available" may appear if you press a key for a function that is not available. 1 LIGHT illuminates the keypad for five seconds. The MODE - Toshiba 72MX196 | Operating Guide - Page 13
is not available for analog channels.) (- pages 43-44.) Also can be used to select the TV mode to view one program while recording another. 24 POP opens the POP double-window (- page 40) or locks/unlocks the TV Guide On Screen™ video window (- TV Guide On Screen™ Interactive Program Guide). 25 - Toshiba 72MX196 | Operating Guide - Page 14
remote control Remote Control functional key chart REMOTE CONTROL KEY Toshiba TV (TV) CABLE SAT (satellite) MODE SELECT LIGHT SLEEP POWER 1 2 3 4 5 6 7 8 9 0 100/-/+10 INPUT PIC SIZE MENU FAV BROWSER/ SET UP THINC/ TOP MENU TV GUIDE INFO ENTER B b C3 #c EXIT/ DVD CLEAR PAGE +/- VOL +/- Remote - Toshiba 72MX196 | Operating Guide - Page 15
, 2006 1:43 PM Chapter 2: Using the remote control REMOTE Toshiba TV CONTROL KEY (TV) CH RTN/ DVD RTN RECALL MUTE SLOW SKIP z SKIP Z REW PAUSE/STEP PLAY FF C.CAPTION TV/VCR DISC/AM/FM STOP REC CH B b POP FREEZE Previous channel On-screen display Sound mute Slow FWD* Slow REW* DAY+ DAY- Rewind - Toshiba 72MX196 | Operating Guide - Page 16
Audio receiver MODE SELECT Device mode control after programming TV Toshiba TV CABLE/SAT DVD VCR/PVR Multi-brand video/audio devices AUX 1 AUX 2 Note: Although your new TV's remote control includes codes for many devices, it may not include codes for some or all of the features on certain - Toshiba 72MX196 | Operating Guide - Page 17
three times. The remote control will begin to cycle through the available codes again. If no key is pressed within 10 seconds during programming, control features not related to "Device code setup" and resets the volume lock to the "TV" device mode. To reset the remote control: While holding down - Toshiba 72MX196 | Operating Guide - Page 18
2006 1:43 PM Multi-brand remote control device codes TVs Brand Toshiba Code 1524 Cable boxes Brand ABC Americast Bell South Fisher Funai Gateway GE Go Video GoVision GoldStar GPX Gradiente Greenhill Grundig Harman/Kardon Hitachi Hiteker iLo Initial Integra Jaton Code 0641 0695, 0770, 1089 - Toshiba 72MX196 | Operating Guide - Page 19
Technics Technosonic Techwood Theta Digita Toshiba Tredex Urban Concepts US Logic 1064, 1226 0522 0490, 0539, 0545 0872 0503, 0591, 0741, 0869 1265 Code 1972 0048, 0209, 0479 0000 0278 0000, 0037, 0124 0041, 0061, 0175 Funai Garrard Gateway GE Go Video GoldStar Gradiente Harley Davidson Harman - Toshiba 72MX196 | Operating Guide - Page 20
Toshiba Totevision Touch Unitech Vector Vector Research Video Concepts Videomagic Videosonic Viewsonic Villain Voodoo Wards White Westinghouse XR-1000 Yamaha Zenith ZT Group PVRs Brand ABS Alienware CyberPower Dell Direc TV , 0039, 0209, 0479, 1139 1972 Code 1972 1972 1972 1972 0739 1972 1972 - Toshiba 72MX196 | Operating Guide - Page 21
Integra JVC Kenwood Krell Linn Magnavox Marantz MCS MGA Miro Mission Mitsubishi Code 0234 0124, 0157 0156 0157 0170 0420 0029, 0303 0157, 0299 Sanyo Sharp Sherwood Sonic Frontiers Sony Sugden TAG McLaren Tascam Teac Technics Toshiba Victor Wards Yamaha 0420 0019, 0299 0234 0170 0157 0101, 0102, - Toshiba 72MX196 | Operating Guide - Page 22
] S [Opens the Input Labeling menu] S English/French/Spanish S [Opens the Channel Browser Setup menu] S Off/On S [Opens the Edit Rating Limits menu] S [Opens the Channels block menu] S Off/Video/Video+ S Off/On S Off/30 Min/60 Min/90 Min/120 Min S [Opens the New PIN Code entry screen] S [Opens the - Toshiba 72MX196 | Operating Guide - Page 23
mail Scheduling Setup Home File Server Setup Software Upgrade Option S [Opens the Input Configuration menu] S ANT1 S [Scans for new channels on ANT1] menu] S [Opens the Software Upgrade menu] TV Guide On Screen™ Setup Start S [Opens the TV Guide On Screen™ Setup menu] Time and Date Start Setup - Toshiba 72MX196 | Operating Guide - Page 24
Browser Favorites Browser TV Guide On Screen Navigate ENTER Select EXIT Exit * Toshiba Home Interactive Network TV control panel to move in the corresponding direction in the menu. • Press T to save your menu settings or select a highlighted item. (A highlighted menu item appears in a different color - Toshiba 72MX196 | Operating Guide - Page 25
"grayed out") in some instances (for example, if a cable box is connected to the ANT 1 input or if one of the VIDEO modes is the current input during TV Guide On Screen™ setup). Terrestrial Input Configuration Channel Program Channel Add/Delete Signal Meter Navigate ENTER Select CH RTN Back EXIT - Toshiba 72MX196 | Operating Guide - Page 26
TV's memory). To remove an antenna source channel from the memory, you must manually delete it. • To tune the TV TV service lineup changes significantly. • If you have a CableCARD™ inserted, channel programming for the ANT 1 input (or highlight Abort in the on-screen display and press T). When channel - Toshiba 72MX196 | Operating Guide - Page 27
TV Manually adding and deleting channels in the channel memory After automatically programming channels into the channel memory, you can manually 2 Reset Cancel Done Note: This action applies to the current antenna input only. To delete/add channels on the other input, highlight the other input and - Toshiba 72MX196 | Operating Guide - Page 28
system can provide accurate time and date information. It is recommended you set up TV Guide On Screen first and use it to obtain the time and date. Manual TV Guide On Screen Cancel If you have already set up the TV Guide On Screen™ system, or if you have not set up the time, the Time and Date - Toshiba 72MX196 | Operating Guide - Page 29
Installation Guide. Note: Connecting your TV directly to the Audio/Video output of your set-top box may provide a more vivid picture. After the CableCARD™ is inserted, a CableCARD™ option appears in the Applications menu, with informational screens provided by your digital CableCARD™ service (see - Toshiba 72MX196 | Operating Guide - Page 30
signal meter for the ANT 1 and ANT 2 digital TV input sources only. To view the digital signal meter: 1 Press TV again. See "Important Notice about Hot Lamp Restart," below. If Quick Restart is set to On and you turn off the TV, the following will occur for a few minutes: • The screen (lamp) lights - Toshiba 72MX196 | Operating Guide - Page 31
information. System Information Sun Jan 1, 2006 12:12:19am Product Information Brand: Toshiba Model: 62MX196 System Information Software Version 2.2.34.0 Mar 1 2006 - 11:05:49 FW: 24 Done Done To close the screen and return to the Installation menu: Highlight Done and press T. To return to - Toshiba 72MX196 | Operating Guide - Page 32
June 27, 2006 1:43 PM Chapter 5: Using the TV's features Selecting the video input source to view The video inputs available to view will be determined by the input terminals you used to connect your devices (see the Installation Guide). To select the video input source to view: 1 Press + on the - Toshiba 72MX196 | Operating Guide - Page 33
Reset and press T. Input labeling example: The screen below left shows the default Input Selection screen (with none of the inputs labeled as a specific device). The screen below right is an example of how you could label the inputs if you connected a DVD player to VIDEO 1, Cable TV to VIDEO - Toshiba 72MX196 | Operating Guide - Page 34
defaults, highlight Reset and press T. Satellite Box is configured from the TV Guide setup. To open the Channel Inputs, or Favorites) 5 Current input 6 Current antenna type (cable or TV) 7 Active channel number 8 Channel call letters (if available) 9 Resolution To toggle among the available - Toshiba 72MX196 | Operating Guide - Page 35
but you must press T to tune the TV to the highlighted item. 2 Press O to close the Channel Browser™. Adding and clearing channels and inputs in the History List 1 ANT 1 Satellite.. Video 2 ClrStrmHD1 __ ClrStrmHD2 __ HDMI 1 Channel Browser Inputs ANT 1 CABLE 4 AAA 480i Adding channels and - Toshiba 72MX196 | Operating Guide - Page 36
If you press R from a non-antenna input, the TV will return to the last-viewed ANT input and channel. Switching between two channels using the TV to the channel you want to program into the R button. 2 Press and hold R for about 2 seconds until the message "Channel Memorized" appears on-screen. The - Toshiba 72MX196 | Operating Guide - Page 37
Done and press T. Theater Settings Picture Size Picture Scroll Cinema Mode Auto Aspect Ratio Reset Natural -- Film On Done Note: Full picture size may not be available for some program formats (it will be "grayed out" in the Picture Size screen). Using these functions to change the picture size - Toshiba 72MX196 | Operating Guide - Page 38
input. To set the scroll settings: 1 Press Y and open the Video menu. 2 Highlight Theater Settings and press T. Video Picture -10 to +20. Theater Settings Picture Size Picture Scroll Cinema Mode Auto Aspect Ratio TheaterWide 2 -5 Film On Reset Done 6 To save the new settings, highlight Done and - Toshiba 72MX196 | Operating Guide - Page 39
from a DVD player connected to the VIDEO 1, VIDEO 2, ColorStream HD-1, ColorStream HD-2 (component video), or HDMI input on the TV, smoother motion can be obtained by setting the Cinema Mode to Film. To set the Cinema Mode to Film: 1 Press Y and open the Video menu. 2 Highlight Theater Settings and - Toshiba 72MX196 | Operating Guide - Page 40
Using the TV's features Using the POP features Using the POP double-window feature The POP (picture-out-picture) double-window feature splits the screen into The message "Not Available" will appear If you try to open the POP double-window when the Input Lock feature is in Video or Video+ mode. To - Toshiba 72MX196 | Operating Guide - Page 41
the moving picture, press B again (or any other button). Note: • The FREEZE feature is not available when the POP double-window is open. If you press B, the message "Not available from current video mode" will appear. • If the TV is left in FREEZE mode for more than 15 minutes, the FREEZE mode will - Toshiba 72MX196 | Operating Guide - Page 42
Video menu. 2 Highlight Picture Settings and press T. 3 In the Mode field, select the picture mode you prefer. Picture Settings Mode Contrast Brightness Color Tint Sharpness Reset the TV to High Bright mode, and chose Reset in item 4 above, the TV will default to Low Power mode. To set the TV back - Toshiba 72MX196 | Operating Guide - Page 43
screen display of the dialogue, narration, and sound effects of TV programs and videos that are closed captioned (usually marked "CC" in program guides). • Text-An on-screen by changing the background color, text size, type, edge, and color. Note: • This feature is available for digital channels only - Toshiba 72MX196 | Operating Guide - Page 44
the selected service is not available, the next available service will be used instead. To select digital closed captions: 1 Press Y and open the Applications menu. 2 Highlight Digital CC/Audio Selector and press T. Applications Picture Viewer Audio Player Channel Browser TV Guide On Screen Digital - Toshiba 72MX196 | Operating Guide - Page 45
is not available when the TV is in VIDEO mode. To TV stations that offer it. For example, a station might broadcast another language as a second audio program. If you have SAP on, you will see the current program on the screen Audio Settings Bass Treble Balance StableSound Reset 100 100 0 Off Done - Toshiba 72MX196 | Operating Guide - Page 46
T. To revert to the factory defaults, highlight Reset and press T. Note: The RESET function returns your audio adjustments to the following factory the Optical Audio Out terminal on the TV (- "Connecting a digital audio system" in the Installation Guide). To select the optical audio output format - Toshiba 72MX196 | Operating Guide - Page 47
the Locks menu icon. 2 Press b to display the PIN code entering screen. 3 Enter your four-digit PIN code and press T. 4 Press b to highlight New PIN Code and press T. Locks Enable Rating Blocking Off Edit Rating Limits Channels Block Input Lock Off Front Panel Lock Off Game Timer Off New - Toshiba 72MX196 | Operating Guide - Page 48
can be downloaded. To download the additional rating system (if available): 1 Press Y and highlight the Locks menu icon. 2 Press b to display the PIN code entering screen. 3 Enter your four-digit PIN code and press T. 4 Press b to highlight Enable Rating Blocking. 5 Press c and b to select On, and - Toshiba 72MX196 | Operating Guide - Page 49
menu icon. 2 Press b to display the PIN code entering screen. 3 Enter your four-digit PIN code and press T (- page 47). 4 Press b to highlight Channels Block and then press T. Locks Enable Rating Blocking Off Edit Rating Limits Channels Block Input Lock Off Front Panel Lock Off Game Timer - Toshiba 72MX196 | Operating Guide - Page 50
the PIN code entering screen. 3 Enter your four-digit PIN code and press T. 4 Press b to highlight Input Lock and press c. Locks Enable Rating Blocking Off Edit Rating Limits Channels Block Input Lock Off Front Panel Lock Off Game Timer Off New PIN Code Off Video Video + Navigate ENTER - Toshiba 72MX196 | Operating Guide - Page 51
When the GameTimer is activated, the TV enters Input Lock mode and locks out the input source for the video game device. To set the GameTimer™: 1 Press Y and highlight the Locks menu icon. 2 Press b to display the PIN code entering screen. 3 Enter your four-digit PIN code and press T. 4 Press b to - Toshiba 72MX196 | Operating Guide - Page 52
the DAY field, press C or c to select the recurrence (weekends, weekdays, every day, etc). On/Off Timer Turn TV ON: Day Time (HH:MM) TV ON Duration: Weekends 0 9 : 0 0 AM 30 Minutes Reset Cancel Done 4 Press b to highlight the Time field, and then use the Number buttons to enter the time you - Toshiba 72MX196 | Operating Guide - Page 53
a PC on the TV screen. The PC must be connected to the TV's PC IN terminals (- Installation Guide). The PC Settings PC settings: 1 Repeatedly press + to select PC input mode (- "Selecting the video input source to view" page 32). 2 Press Y Clock Reset 0 0 0 0 0 0 Done Note: The screen is disrupted - Toshiba 72MX196 | Operating Guide - Page 54
rating status • Picture size • Video resolution • Lamp mode (appears only if the TV is in High Bright mode) STEREO NC-17 Sleep Timer: 18 min. Game Timer: 28 min. Lamp High Bright Natural 480i 5:32 pm ANT 1 CABLE 81-1 Sample RECALL screen To close the RECALL screen: Press E again. The TV - Toshiba 72MX196 | Operating Guide - Page 55
Reduction Color Temperature Lamp Mode Vertical Edge Enhancer Color Management GCaomloer Maondeagement Reset High Auto Low Cool Low Power Middle ANT 1 Off Done Note: • If the current input is ANT 1, ANT 2, VIDEO 1, or VIDEO 2, the menu will display the text "CableClear." The available selections - Toshiba 72MX196 | Operating Guide - Page 56
Chapter 6: Using the TV's advanced features Using MPEG the MPEG noise reduction level: 1 Press Y and open the Video menu. 2 Highlight Advanced Picture Settings and press T. 3 Press Noise Reduction Color Temperature Lamp Mode Vertical Edge Enhancer Color Management GCaomloer Maondeagement Reset High - Toshiba 72MX196 | Operating Guide - Page 57
Color Management GCaomloer Maondeagement Reset High Auto Low Cool Low Power Middle ANT 1 Off Done 4 To save the new settings, highlight Done and press T. To revert to the factory defaults, highlight Reset and press T. Note: If you set the lamp mode to Low Power, each time you turn on the TV - Toshiba 72MX196 | Operating Guide - Page 58
Temperature Lamp Mode Vertical Edge Enhancer Color Management Game Mode Reset Video 1 High Auto Low Cool Low Power Middle On Done To turn off Game Mode: Select Off in step 3 above, change the video input, or turn the TV off and then on again. You can change the video input in any of the following - Toshiba 72MX196 | Operating Guide - Page 59
Settings WOW: SRS 3D WOW: SRS Focus WOW: SRS TruBass Dolby Virtual SRS TruSurround Reset Off Off High On Done • WOW: SRS 3D - To turn the surround sound TruSurround feature allows you to enjoy virtual surround sound from the TV's speakers. To turn on the Dolby Virtual/SRS TruSurround feature: - Toshiba 72MX196 | Operating Guide - Page 60
TV to your home network 1 Connect the TV to your home network via the TV's RJ-45 (Ethernet) port. See the Installation Guide for connection instructions. 2 If you want to use file sharing only and do not have Internet service manually setting Toshiba TV and router might have compatibility problems - Toshiba 72MX196 | Operating Guide - Page 61
is not successful, the following screen will appear: a) Make sure all cables for your home network are securely connected. b) Make sure your home network is set up properly. See the Installation Guide for TV connection information. Also consult the owner's manuals for your other components. c) Make - Toshiba 72MX196 | Operating Guide - Page 62
to input the Resetting Manually setting up the network address." For home network troubleshooting tips, see Chapter 8. 62 C. Setting up file sharing on your PC Compatible operating systems The following operating systems are compatible for file sharing with the TV: • Microsoft® Windows® XP Service - Toshiba 72MX196 | Operating Guide - Page 63
"Share this folder." 3 In the Permissions window for the selected folder: a) Click "Add..." and then select the user to be given sharing privileges.* *This user must match the user stored in the TV's "Home File Server Setup" menu. b) Click to check "Allow" next to "Full Control." c) Click "Apply - Toshiba 72MX196 | Operating Guide - Page 64
a) Click "Add..." and then select the user to be given sharing privileges.* *This user must match the user stored in the TV's "Home File Server Setup" menu. b) D, "Setting up file sharing on the TV," on the next page. For home network troubleshooting tips, see Chapter 8. MX196 (E/F) Web 213:276 - Toshiba 72MX196 | Operating Guide - Page 65
User Name and then press T to open the on-screen keyboard for that field. b. Enter the User Name for your PC using the on-screen keyboard. See "Using the on-screen keyboard," at right. Note: The User want to view/play on the TV. Note: Make sure you your Toshiba customer service representative - Toshiba 72MX196 | Operating Guide - Page 66
or shared files with this TV. Toshiba will not compensate for any lost data or recording(s) caused by the use of such PCs or data. • The technical criteria set out in this Guide are meant as a guide only. • You must obtain any required permission from copyright owners to download or use copyrighted - Toshiba 72MX196 | Operating Guide - Page 67
. 3 Highlight Picture Viewer and press T. Applications Picture Viewer Audio Player Channel Browser TV Guide On Screen Digital CC/Audio Selector CableCARD Navigate ENTER Select CH RTN Back EXIT Exit If the network is available, it will retrieve the JPEG picture list via the network. 4 Press B or - Toshiba 72MX196 | Operating Guide - Page 68
in Native Resolution mode (6MB), a warning message will display. To close the Picture Viewer: Press O to close the Picture Viewer and return to the regular TV screen. During the slide show: • To stop on an image during the slide show, press T. • To resume the slide show, press T again. • To rotate - Toshiba 72MX196 | Operating Guide - Page 69
. 3 Highlight Audio Player and press T. Applications Picture Viewer Audio Player Channel Browser TV Guide On Screen Digital CC/Audio Selector CableCARD Navigate ENTER Select CH RTN Back EXIT Exit If the network is available, the TV will retrieve the MP3 file through the network. 4 Press B or b to - Toshiba 72MX196 | Operating Guide - Page 70
instructions in sections A and B (- page 60), before proceeding. • Before you can schedule recordings, the time and date in the TV Guide On Screen feature must be set (- "Setting the time and date" on page 28). Required information and services recorded. • Toshiba is not network troubleshooting tips, - Toshiba 72MX196 | Operating Guide - Page 71
, you must first set up the TV Guide On Screen™ system. E-mail scheduling will not be available unless the TV Guide On Screen™ system is fully operational. See the separate TV Guide On Screen™ Interactive Program Guide for details on setting up the TV Guide On Screen™ system. If you experience any - Toshiba 72MX196 | Operating Guide - Page 72
72 buttons to highlight the Advanced button on the screen and press T. Another E-mail Scheduling Setup number: Denotes the port number used by the user's SMTP (outgoing mail) server. This is ") are provided for your TV e-mail scheduler. SSL and TLS are currently not supported. Basic 3 Enter the data - Toshiba 72MX196 | Operating Guide - Page 73
to the TV using the "HELP request e-mail" format (- page 78). • Make sure the TV Guide On Screen™ system manually set up the network address). • Make sure all cables are connected properly and securely. • Check your router hardware/settings to make sure your Internet service is currently available - Toshiba 72MX196 | Operating Guide - Page 74
security code, etc.). "Incoming Mail Server" field Use the on-screen keyboard to enter the incoming (POP3) mail server that hosts the TV's e-mail account. Note: The TV does not support encrypted table on the next page. For home network troubleshooting tips, see Chapter 8. 74 MX196 (E/F) Web 213:276 - Toshiba 72MX196 | Operating Guide - Page 75
ON Enter ID The TV will only accept e-mails TV from receiving or sending unwanted e-mails (including e-mails that contain information about the programs the TV is set to record), it is recommended that you not change these settings unless you need to diagnose a problem or deal with a unique user - Toshiba 72MX196 | Operating Guide - Page 76
Guide for various VCR connection examples). E-mail parameters Note: Some e-mail clients automatically insert e-mail signatures, which the TV to the TV will be deleted eventually. Note: • Toshiba is not TV To send a request e-mail to the TV: 1 Format the e-mail following according to the instructions - Toshiba 72MX196 | Operating Guide - Page 77
06/10/2005 START TIME 7 PM DURATION 2H15M TYPE RECORD Sample ADD request e-mail to schedule a new reminder: To: [TV's email address] [Subject can be left blank] ID MYID1234* cmd add input cb ch 4 date 7-4 start 8:30pm dur 1hr type remind GET request e-mail When you send a GET request e-mail to - Toshiba 72MX196 | Operating Guide - Page 78
the "ID Required" field to Off) • COMMAND DELETE • INPUT [name of input] • CHANNEL [channel number of recording or reminder] • FAILED - NO DEVICE AVAILABLE. Make sure you have a recording device connected to the TV and that all cables troubleshooting tips, see Chapter 8. 78 MX196 (E/F) Web 213:276 - Toshiba 72MX196 | Operating Guide - Page 79
. For details, see "IMPORTANT NOTICE ABOUT HOT LAMP RESTART" (- page 3). Picture problems General picture problems • Check the antenna/cable connections (- Installation Guide). • Press + on the remote control or TV and select a valid video input source (- page 32). If no device is connected - Toshiba 72MX196 | Operating Guide - Page 80
is nonstandard (- page 43). Rating blocking (V-Chip) problems • If you forget your PIN code: While the PIN code entering screen is displayed, press E four times within 5 seconds. The PIN code you previously stored will be cleared (- page 47). • The V-Chip feature is available for the U.S. V-Chip - Toshiba 72MX196 | Operating Guide - Page 81
1:43 PM Chapter 8: Troubleshooting Recording problems • If you use the TV's remote control to start recording, you will not be able to change inputs (- page 32) or open the POP window (- page 40). If you attempt to do so, the message "Not Available While Recording" will appear on-screen. • If you - Toshiba 72MX196 | Operating Guide - Page 82
(- Installation Guide). • The DHCP service is not enabled on the router, or no router is present. Refer to your router's documentation for instructions on enabling DHCP. If you do not have a router, you must manually set up the network address (- page 61). • Internet service is not available. Check - Toshiba 72MX196 | Operating Guide - Page 83
, or dusty. Turn ON the TV again. - "Color wheel stopped." "Temperature warning." - If, after trying the solution, the problem still exists: • In the U.S., call TACP Consumer Solutions at 1-800-631-3811. • In Canada, locate the nearest Toshiba authorized service depot by directing your web browser - Toshiba 72MX196 | Operating Guide - Page 84
consumer electronics dealer. In Canada Locate a Toshiba parts distributor by visiting www.toshiba.ca. Click "Home Entertainment" and then click "Support." Always replace the lamp unit with the model currently recommended by Toshiba. The correct lamp replacement part number is located on the serial - Toshiba 72MX196 | Operating Guide - Page 85
damage may result from directly viewing the light produced by this lamp. Always turn off the TV and unplug the power cord before opening the lamp unit door. 2 STOP! Allow the lamp to cool for at least one (1) hour before replacing it. 4 Using a manual Phillips screwdriver, loosen the two screws on - Toshiba 72MX196 | Operating Guide - Page 86
steps 1-9, the problem still exists: • In the U.S., call TACP Consumer Solutions at 1-800-631-3811. • In Canada, locate the nearest Toshiba authorized service depot by directing your web browser to www.toshiba.ca; click "Home Entertainment," and then click "Support." Disposing of the used lamp unit - Toshiba 72MX196 | Operating Guide - Page 87
) Supplied Accessories • Remote control with two size "AA" alkaline batteries • Dual-wand IR blaster cable • Installation Guide • Operating Guide (this book) • TV Guide On Screen™ Interactive Program Guide Optional Stands 62MX196: ST 6296 72MX196: ST 7296 * Encrypted channels can be viewed on this - Toshiba 72MX196 | Operating Guide - Page 88
, after following all of the operating instructions in this manual and reviewing the section entitled "Troubleshooting," you find that service is needed: (1) To find the nearest TACP Authorized Service Station, visit TACP's website at www.tacp.toshiba.com/service or contact TACP's Consumer Solution - Toshiba 72MX196 | Operating Guide - Page 89
'S OPTION, REPAIR OR REPLACE A DEFECTIVE PART WITH A NEW OR REFURBISHED PART WITHOUT CHARGE TO YOU. ON-SITE SERVICE ONLY APPLIES WITHIN 100 KILOMETERS OF AN AUTHORIZED TCL SERVICE DEPOT. Owner's Manual and Product Registration Read this owner's manual thoroughly before operating this DLP® television - Toshiba 72MX196 | Operating Guide - Page 90
code. A copy of the LGPL source code in this product may be obtained by contacting Toshiba software developed by the OpenSSL Project for use in the OpenSSL attribution as the author of the parts of the library used. This available version or derivative of this code cannot be changed, i.e. this code - Toshiba 72MX196 | Operating Guide - Page 91
74 INPUT button 32 Input lock feature 50 Internet service provider 60 J JPEG 66 L Labeling video input 32 Lamp mode 57 Lamp unit replacement 84 Language selection 25 Last mode memory feature 54 LED indications 83 LOCKS menu Channels, blocking 49 Enable rating blocking 48 New PIN code 47 - Toshiba 72MX196 | Operating Guide - Page 92
MX196_EN.book Page 92 Tuesday, June 27, 2006 1:43 PM Notes 92 MX196 (E/F) Web 213:276 - Toshiba 72MX196 | Operating Guide - Page 93
MX196_EN.book Page 93 Tuesday, June 27, 2006 1:43 PM Notes 93 MX196 (E/F) Web 213:276 - Toshiba 72MX196 | Operating Guide - Page 94
MX196_EN.book Page 94 Tuesday, June 27, 2006 1:43 PM Notes 94 MX196 (E/F) Web 213:276 - Toshiba 72MX196 | Operating Guide - Page 95
MX196_EN.book Page 95 Tuesday, June 27, 2006 1:43 PM Notes 95 MX196 (E/F) Web 213:276 - Toshiba 72MX196 | Operating Guide - Page 96
, Cinema Series, ColorStream, StableSound, and TheaterWide are registered trademarks of Toshiba America Consumer Products, L.L.C. Channel Browser, GameTimer, SurfLock, THINC, and Quick Restart are trademarks of Toshiba America Consumer Products, L.L.C. Digital Light Processing®, DLP® and the DLP
-
 1
1 -
 2
2 -
 3
3 -
 4
4 -
 5
5 -
 6
6 -
 7
7 -
8
-
9
-
10
-
11
-
12
-
13
-
14
-
15
-
16
-
17
-
18
-
19
-
20
-
21
-
22
-
23
-
24
-
25
-
26
-
27
-
28
-
29
-
30
-
31
-
32
-
33
-
34
-
35
-
36
-
37
-
38
-
39
-
40
-
41
-
42
-
43
-
44
-
45
-
46
-
47
-
48
-
49
-
50
-
51
-
52
-
53
-
54
-
55
-
56
-
57
-
58
-
59
-
60
-
61
-
62
-
63
-
64
-
65
-
66
-
67
-
68
-
69
-
70
-
71
-
72
-
73
-
74
-
75
-
76
-
77
-
78
-
79
-
80
-
81
-
82
-
83
-
84
-
85
-
86
-
87
-
88
-
89
-
90
-
91
-
92
-
93
-
94
-
95
-
96
 |
 |
HIGH
-DEFINITION TELEVISION
62MX196
72MX196
I
S
O
1
4
0
0
1
F
I
L
E
N
o
.
A
9
6
4
5
T
O
S
H
I
B
A
A
M
E
R
I
C
A
C
O
N
S
U
M
E
R
P
R
O
D
U
C
T
S
,
L
.
L
.
C
.
YC/N
VX1A00010200
Integrated High Definition
DLP
®
Projection Television
© 2006 TOSHIBA CORPORATION
All Rights Reserved
Owner’s Record
The model number and serial number are on the back of
your TV. Record these numbers in the spaces below.
Refer to these numbers whenever you communicate
with your Toshiba dealer about this TV.
Model number:
Serial number:
For an overview of steps for setting up your new TV, see page 7.
Note: If the TV is powered off and then quickly on again when the
lamp unit is hot, it may take several minutes for the picture to appear
on-screen. This is a property of DLP
®
TV lamp technology and is NOT
a sign of malfunction. For details, see "IMPORTANT NOTICE ABOUT
HOT LAMP RESTART" on page 3.
Note: To display a High Definition picture, the TV must be receiving a
High Definition signal (such as an over-the-air High Definition TV
broadcast, a High Definition digital cable program, or a High Definition
digital satellite program). For details, please contact your TV antenna
installer, cable provider, or satellite provider.
IMPORTANT NOTE
Before connecting, operating, or adjusting this product, carefully
read the Important Safety, Installation, Care, and Service
information in the separate
Installation Guide
.
MX196_EN.book
Page 1
Tuesday, June 27, 2006
1:43 PM