Toshiba MV13K2 Owners Manual - Page 18
Set/tr, Enter
 |
View all Toshiba MV13K2 manuals
Add to My Manuals
Save this manual to your list of manuals |
Page 18 highlights
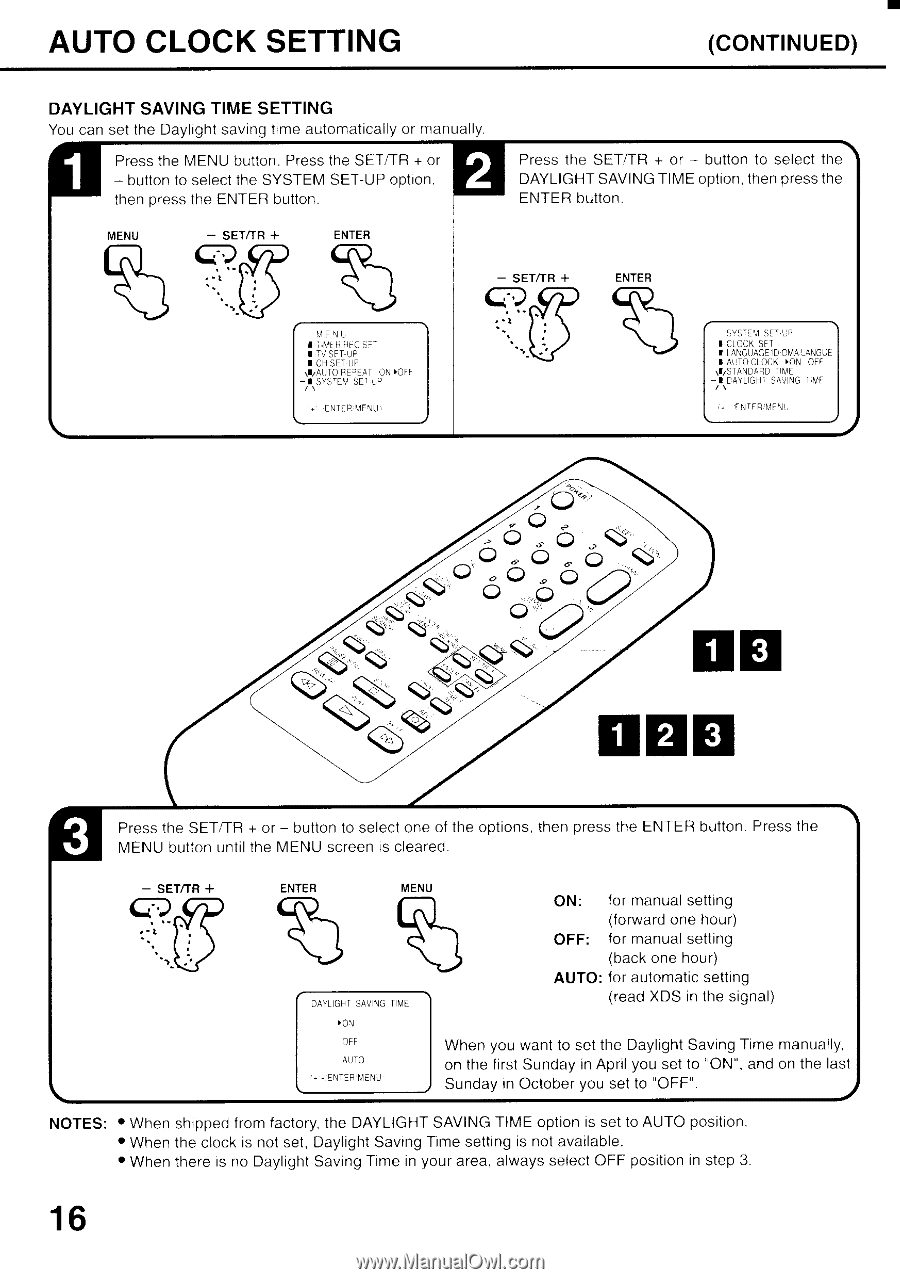
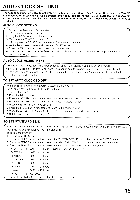
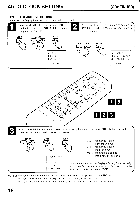
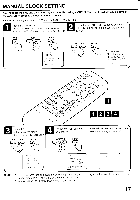
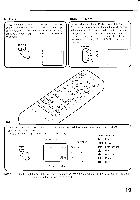
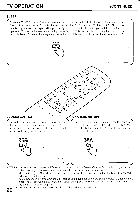
AUTO CLOCK SETTING (CONTINUED) DAYLIGHT SAVING TIME SETTING You can set the Daylight saving time automatically or manually. Press the MENU button. Press the SET/TR + or - button to select the SYSTEM SET-UP option. then press the ENTER button. MENU - SET/TR + ENTER Press the SET/TR + or - button to select the, DAYLIGHT SAVING TIME option, then press the ENTER button. • - SET/TR + ENTER SF NU I Ty I 7 HFC SFT-UP I CH SET-UP .,AUTO REPEAT ON NOF F -N SYSr EM SE, AP ESTCP MENU .,N•STEM SET-UP I CLOCK SET I I ANGUAGE'IDOMA,LAK:3UE AUTO CLOCK NON OFF NI/STANDARD FINE -I CAYLIGH, SAVING 14,1f I 0 0o C) 0 0 0 00 000 Press the SET/TR + or - button to select one of the options, then press the ENTER button. Press the MENU button until the MENU screen is cleared. - SET/TR + c 7.) ENTER MENU DAYLIGHT SAVING TIME ON: for manual setting (forward one hour) OFF: for manual setting (back one hour) AUTO: for automatic setting (read XDS in the signal) NON OFF AUTO - ENTER MENU When you want to set the Daylight Saving Time manually, on the first Sunday in April you set to "ON", and on the last Sunday in October you set to ''OFF". NOTES: • When shipped from factory, the DAYLIGHT SAVING TIME option is set to AUTO position. • When the clock is not set, Daylight Saving Time setting is not available. • When there is no Daylight Saving Time in your area, always select OFF position in step 3. 16
-
 1
1 -
2
-
3
-
4
-
5
-
6
-
7
-
8
-
9
-
10
-
11
-
12
-
 13
13 -
 14
14 -
 15
15 -
 16
16 -
 17
17 -
 18
18 -
 19
19 -
 20
20 -
 21
21 -
 22
22 -
 23
23 -
24
-
25
-
26
-
27
-
28
-
29
-
30
-
31
-
32
-
33
-
34
-
35
-
36
-
37
-
38
-
39
-
40
-
41
-
42
-
43
-
44
-
45
-
46
-
47
-
48
-
49
-
50
-
51
-
52
-
53
-
54
-
55
-
56
-
57
-
58
 |
 |