Uniden BCD325P2 Owners Manual - Page 19
Connecting The Usb Cable, Turning On The Scanner And Setting The Squelch - programming software
 |
View all Uniden BCD325P2 manuals
Add to My Manuals
Save this manual to your list of manuals |
Page 19 highlights
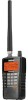
When battery icon flashes and the scanner beeps every 15 seconds, replace or recharge the batteries. The scanner has a built-in circuit that lets you recharge rechargeable batteries while they are in the scanner. When the scanner is turned on, the scanner will not charge the batteries. When the scanner is turned off, the scanner will charge the batteries. Plug the USB cable into the scanner when the scanner is off and "Battery Charge" - "Start Charging? Yes = "E"/ No = "." will display. Press E/yes. The scanner displays "Normal Charging" and charges the batteries according to the "Set Charge Time" setting. When charging is finished "Charge Complete" will be displayed. Note that the charge is controlled strictly by a timer. It is impossible to detect the charge state of cells charged at the low rate the scanner uses or when cells are charged in series. CONNECTING THE USB CABLE The USB jack is located under the rubber flap on the right side. The serial mode may be used for serial control and programming the scanner when using software from 3rd party developers. The USB cable can also power the scanner when the batteries are removed. Plug the USB cable into the scanner with no batteries and "No Battery" will display. Press and hold to turn on the scanner. Press again to turn the backlight on. TURNING ON THE SCANNER AND SETTING THE SQUELCH Note: this applies to a fresh scanner right out of the box or one that has been reset. Press and hold for about 2 seconds to turn on the scanner. The scanner should start scanning one of the preprogrammed systems after the welcome screen disappears. If the screen is too dark, press to turn on the backlight. Press Hold. Press the scroll control to display the volume level. Turn the scroll control (within 10 seconds) to adjust the volume. Press the scroll control again to close the volume level (or let it disappear after 10 seconds). Press Func then press the scroll control to display the squelch level. Turn the scroll control counter-clockwise all the way then clockwise until the noise stops, then one notch more. Press the scroll control to close the squelch level. Right away you may want to check these settings in the 'Settings' menu. Set Backlight, Adjust Key Beep, and Adjust Contrast. 19
-
 1
1 -
2
-
3
-
4
-
5
-
6
-
7
-
8
-
9
-
10
-
11
-
12
-
13
-
 14
14 -
 15
15 -
 16
16 -
 17
17 -
 18
18 -
 19
19 -
 20
20 -
 21
21 -
 22
22 -
 23
23 -
 24
24 -
25
-
26
-
27
-
28
-
29
-
30
-
31
-
32
-
33
-
34
-
35
-
36
-
37
-
38
-
39
-
40
-
41
-
42
-
43
-
44
-
45
-
46
-
47
-
48
-
49
-
50
-
51
-
52
-
53
-
54
-
55
-
56
-
57
-
58
-
59
-
60
-
61
-
62
-
63
-
64
-
65
-
66
-
67
-
68
-
69
-
70
-
71
-
72
-
73
-
74
-
75
-
76
-
77
-
78
-
79
-
80
-
81
-
82
-
83
-
84
-
85
-
86
-
87
-
88
-
89
-
90
-
91
-
92
-
93
-
94
-
95
-
96
-
97
-
98
-
99
-
100
-
101
-
102
-
103
-
104
-
105
-
106
-
107
-
108
-
109
-
110
-
111
-
112
-
113
-
114
-
115
-
116
-
117
-
118
-
119
-
120
-
121
-
122
-
123
-
124
-
125
-
126
-
127
-
128
-
129
-
130
-
131
-
132
 |
 |
