ViewSonic PJ755D Service Manual
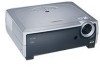
ViewSonic PJ755D - 2600 Lumens DLP Projector Manual
 |
UPC - 766907071917
View all ViewSonic PJ755D manuals
Add to My Manuals
Save this manual to your list of manuals |
ViewSonic PJ755D manual content summary:
- ViewSonic PJ755D | Service Manual - Page 1
Service Manual ViewSonic PJ755D-1 Model No. VS10412 XGA Portable DLP Projector (PJ755D-1_SM Rev. 1a Nov. 2004) ViewSonic“ 381 Brea Canyon Road, Walnut, California 91789 USA - (800) 888-8583 - ViewSonic PJ755D | Service Manual - Page 2
, in any form or by any means, electronic, mechanical, magnetic, optical, chemical, manual or otherwise, without the prior written permission of ViewSonic Corporation. Disclaimer ViewSonic makes no representations or warranties, either expressed or implied, with respect to the contents hereof and - ViewSonic PJ755D | Service Manual - Page 3
This manual is prepared for the maintenance service for PJ755D 0.7" XGA DMD Projector. Maintenance procedures described in this manual are intended to isolate faulty parts and replace them in the field. It also aims to serve as a guide in procuring replacement parts for this product. This manual is - ViewSonic PJ755D | Service Manual - Page 4
Keypad Board 2-2 Disassemble Main Board Module, Wind Tunnel Module and Fan Guider Module 2-4 Disassemble Lamp Driver Module, LVPS Module and Axial Fan 92*25 Module 2-5 Disassemble Color Wheel, Photo Sensor Board, Optical Engine Module and Blower Fan 60*25 Module 2-7 Disassemble Rear Cover - ViewSonic PJ755D | Service Manual - Page 5
Chapter 6 DDC Key-in Procedure Equipment Needed Setup Procedure EDID Upgrade Procedure Appendix A Exploded Overview Appendix B Serial Number System Definition Reader's Response 6-1 6-1 6-2 6-4 7-1 7-1 7-12 7-12 7-13 iii PJ755D - ViewSonic PJ755D | Service Manual - Page 6
of single panel, 250 watt long life lamp. The manual gives you a brief description of basic technical information to help in service and main taining the product. Your customers will appreciate the quick response time when you immediately identify problems that occur with our products. We expect - ViewSonic PJ755D | Service Manual - Page 7
type - Philips 250 watt UHP lamp, dimmable to 200 watt Lamp life - 1500 hours min, 50% survival rate (Normal Mode) - 2500 hours min, 50% survival rate (Econo Mode) Projectionlens - f = 28 mm ~ 33.6 mm, F/2.4 ~ 2.6, 1.2X Manual - 1080i, 720p, 576i/p, 480i/p ViewSonic Corporation 1-2 PJ755D - ViewSonic PJ755D | Service Manual - Page 8
, Under 23+/-2OC; Econo mode ) Altitude -Operating 0~2,500 ft, for 5°C~35°C 2,500~5,000 ft, for 5°C~30°C 5,000~10,000 ft, for 5°C~25°C -Storage 0~40,000ft ViewSonic Corporation 1-3 PJ755D - ViewSonic PJ755D | Service Manual - Page 9
1-6 Compatible Modes Analog ViewSonic Corporation 1-4 PJ755D - ViewSonic PJ755D | Service Manual - Page 10
ViewSonic Corporation 1-5 PJ755D - ViewSonic PJ755D | Service Manual - Page 11
Digital ViewSonic Corporation 1-6 PJ755D - ViewSonic PJ755D | Service Manual - Page 12
Lamp Module and Elevator Foot Step1: Turntheunittothebottomside.RemoveLampCoverandunscrewthreescrewstopull out Lamp Module. Lamp Cover Lamp Module Step2: UnscrewtwoscrewstodetachElevatorFootfromBottomHousing. Lift it up and then unscrew the screw ViewSonic Corporation Elevator Foot 2-1 PJ755D - ViewSonic PJ755D | Service Manual - Page 13
2-2 Disassemble Top Cover and Keypad Board Step1: Unscreweightscrewsandthenturntheunittothetopside. Step2: DisconnecttwoconnectorstoremoveTopCover. Top Cover ViewSonic Corporation 2-2 PJ755D - ViewSonic PJ755D | Service Manual - Page 14
Step3: Unscrewfourscrewstoremovethekeypadboard,keypadbutton,IRcoverandLEDlens. Keypad Board Keypad Button IR Cover LED Lens ViewSonic Corporation 2-3 PJ755D - ViewSonic PJ755D | Service Manual - Page 15
2-3 Disassemble Main Board Module, Wind Tunnel Module and Fan Guider Module Step1: Unplugthirteen connectorsandunscrewfourscrewsofthemainboard. Step2: UnscrewsixhexscrewsoftherearcovertoremoveMainBoard. ViewSonic Corporation Main Board Module 2-4 PJ755D - ViewSonic PJ755D | Service Manual - Page 16
five screwstoremovethewindtunnelmoduleandfanguidermodule. Fan Guider Module Wind Tunnel Module 2-4 Disassemble Lamp Driver Module, LVPS Module and Axial Fan 92x25 Module Step1: Unscrew six screwsandunplugonewiretoremovethelampdrivermodule. ViewSonic Corporation Lamp Driver Module 2-5 PJ755D - ViewSonic PJ755D | Service Manual - Page 17
Step2: Unscrew four screws. Step3: Pull up LVPS Module, unplug the wire and unscrew one screw to detach EMI Ground Plate from LVPS Module. LVPS EMI Ground Plate Step4: UnscrewtwoscrewstoremoveAxialFan92x25Module. ViewSonic Corporation Axial Fan 92x25 Module 2-6 PJ755D - ViewSonic PJ755D | Service Manual - Page 18
and Blower Fan 60x25 Module Step1: UnscrewfivescrewstoremoveColorWheel. Color Wheel and Photo Sensor Board Step2: UnscrewonescrewtoreomoveColorWheelandPhotoSensorBoard. Photo Sensor Board Color Wheel Step3: UnscrewsixscrewstoremoveEngineModulefromBottomHousing. ViewSonic Corporation 2-7 PJ755D - ViewSonic PJ755D | Service Manual - Page 19
Fan 60x25 Module from Optical Engine Module and then detach Blower Fan 60x25 from the Silicon Rubber. DMD Board DMD Chip Insulation Mylar Bracket Plate ViewSonic Corporation Blower Fan 60x25 Silicon Rubber 2-8 PJ755D - ViewSonic PJ755D | Service Manual - Page 20
. Rear Cover Step3: UnscrewsixscrewstoremoveBlowerFan50x20,ElevatorShadingMylarandThermalSensorBoard. Step4: UnscrewtwoscrewstoremoveInterruptSwitchModule. Thermal Sensor Board Blower Fan 50x20 Elevator Shading Mylar Interrupt Switch Module ViewSonic Corporation 2-9 PJ755D - ViewSonic PJ755D | Service Manual - Page 21
Step5: Pulltheelevatorupfirstandthenpressthebuttontoremovetheelevatormodule. 1 2 ViewSonic Corporation 2-10 PJ755D - ViewSonic PJ755D | Service Manual - Page 22
Chapter 3 Troubleshooting 3-1 Equipment Needed - PJ755DProjector - VESAVGACable/VESADVICable - PC(PersonalComputer)withanaloganddigitalsignaloutput. - DVD player with PAL / SECAM) - HDTV Tuner or Source (480i/p, 576i/p, 720p, 1080i) - PJ755DRemoteController ViewSonic Corporation 3-1 PJ755D - ViewSonic PJ755D | Service Manual - Page 23
image displayed without color abnormal issue when you input the signal with other ports. - Check Photo Sensor BD if the image displayed with color flicking issue. Judge - Adjust Brightness-R/G/B. *Note1 - Adjust Color Wheel index delay. *Note2 - Change Main Board. ViewSonic Corporation 3-2 PJ755D - ViewSonic PJ755D | Service Manual - Page 24
: Enter “Engineer Mode” fisrt and choose “Engineer Mode 1” to adjust “Color Wheel Index” 3.) The image displayed with picture noise issue. - Press “SOURCE” is clean. - Replace the lamp if the brightness is less than spec. Judge - Change the Optical Engine Module. ViewSonic Corporation 3-3 PJ755D - ViewSonic PJ755D | Service Manual - Page 25
- Change Main Board. C. Audio Troubleshooting 1.) No Sound Output. - Check if remote controller. - Replace a new remote controller if there is OSD menu showing on the screen when you press the menu button on the keypad. Judge - Change Main Board or Keypad Board. ViewSonic Corporation 3-4 PJ755D - ViewSonic PJ755D | Service Manual - Page 26
Chapter 4 Function Test and Alignment Procedure 4-1 Product - PJ755D 4-2 Test Equipment - IBMPCwithXGAresolution(ColorVideoSignal&PatternGenerator) - DVDplayerwithcomponentvideo(Y, procedure for entering Engineer Mode: Press power “Up”, “Down”, “Right” button. ViewSonic Corporation 4-1 PJ755D - ViewSonic PJ755D | Service Manual - Page 27
4-4 Test Display Modes & Pattern 4-4.1 Compatible Modes - Analog ViewSonic Corporation 4-2 PJ755D - ViewSonic PJ755D | Service Manual - Page 28
- Digital ViewSonic Corporation 4-3 PJ755D - ViewSonic PJ755D | Service Manual - Page 29
Color Full problem appear with Blue 60 pattern. Figure 7,10 Text Pattern The text in the corner should be clear after adjust the focus ring. Figure 11 Horz. And Vert. position of video Boundary Frame should be adjustable to be the screen frame. Figure 12 ViewSonic Corporation 4-4 PJ755D - ViewSonic PJ755D | Service Manual - Page 30
Figure 2.Gray Scale Pattern ViewSonic Corporation 4-5 PJ755D - ViewSonic PJ755D | Service Manual - Page 31
ViewSonic Corporation 4-6 PJ755D - ViewSonic PJ755D | Service Manual - Page 32
- Video & Audio Signal ViewSonic Corporation 4-7 PJ755D - ViewSonic PJ755D | Service Manual - Page 33
.(60%Minimum) 2. Ifnot,pleasereturntheunittorepairarea. - Deadpixel(Brightpixel) Test Signal:1024 x 768 @ 75Hz Test Pattern:Full black pattern 1. Pleasecheckandensuretheunitisunderthespec. 2. Ifnot,pleasereturntheunittorepairarea. ViewSonic Corporation 4-8 PJ755D - ViewSonic PJ755D | Service Manual - Page 34
Test Signal:1024 x 768 @ 75Hz Test Pattern:Boundary frame pattern 1. Pleasecheckandensuretheunitisunderthespec.(Thehorizontalandvertical position of image should be adjustable to be the screen frame.) 2. Ifnot,pleasereturntheunittorepairarea. ViewSonic Corporation 4-9 PJ755D - ViewSonic PJ755D | Service Manual - Page 35
or image abnormal issue. 2. Ifnot,pleasereturntheunittorepairarea. - Audio 1. Pleasecheckandensurethefunctionofaudioisworkaswell. (Volume,Treble,Bass,Mute) 2. Ifnot,pleasereturntheunittorepairarea. ViewSonic Corporation 4-10 PJ755D - ViewSonic PJ755D | Service Manual - Page 36
.exe - PWSDK.inf - Romcode.hex Hardware : - Power Cord - Cable RS232 To Mini Din 3Pin (P/N: 42.86301.001-A) - PC or Laptop - PJ755D Projector P/N: 42.86301.001-A 5-2 Hardware Setup Procedure 1. ConnectingRS232CablebetweenPCandPJ755DProjector. 2. ConnectingPowerCord. RS232 Cable Mini Din 3pin Port - ViewSonic PJ755D | Service Manual - Page 37
5-3 Firmware Program Installation Procedure Step1. Executethe"FlashUpgrader.exe"program. Step2. Click ”Choose” to get the file directory ViewSonic Corporation 5-2 PJ755D - ViewSonic PJ755D | Service Manual - Page 38
Step3. Select file and open it. Step4. Select Connection to “Serial”, COM Port to “Right COM” and Baud Rate to “115200”. ViewSonic Corporation 5-3 P755D - ViewSonic PJ755D | Service Manual - Page 39
Flash” to start the firmware upgrade procedure and keep press the projector’s power button immediately until download “gui.hex” to 10%. Notice: The Lamp and Temp LEDs are red and Power LED is green. ” can be found on the upper-right corner of Engineer Mode menu. ViewSonic Corporation 5-4 PJ755D - ViewSonic PJ755D | Service Manual - Page 40
(P/N: 80.00001.001) (Fixture 1 or Fixture 2) - DFP to DVI Cable - Power Adapter - RS-232 Cable - VGACable - Power Cord - PJ755D Software - EDIDprogram - VIEWSONIC_PJ755D_EDID_A.INI - Window 98/ME/NT/XP EDID Fixture P/N:80.00001.001 DFP to DVI Cable P/N: 42.81702.001 RS-232 Cable P/N: 42. - ViewSonic PJ755D | Service Manual - Page 41
sure the JP1and JP5 are closed and JP2 is open. Connect P2 of the fixture with VGA Port of PJ755D by the VGA Cable. Connect P3 of the fixture with DVI Port of PJ755D by the DFP to DVI cable. Connect P4 of the fixture with COM Port of PC by the - ViewSonic PJ755D | Service Manual - Page 42
the JP3 is closed (short) and JP4 is open. Connect P2 of the fixture with VGA Port of PJ755D by the VGA Cable. Connect P3 of the fixture with DVI Port of PJ755D by the DVI cable. Connect P1 of the fixture with COM Port of PC by the RS232 Cable. JP3 - ViewSonic PJ755D | Service Manual - Page 43
6-3 EDID Upgrade Procedure Step1. Execute“EDID”program Step2. Press “Mode” button. ViewSonic Corporation 6-4 PJ755D - ViewSonic PJ755D | Service Manual - Page 44
” button. Step4. Press port setting button. Setting the right COM port. Note: If you only upgrade VGA, the power cord should be connected to the projector, but for the DVI upgrade only, it is not necessary. Note ViewSonic Corporation 6-5 PJ755D - ViewSonic PJ755D | Service Manual - Page 45
Step5. Key-in S/N to the blank beside Barcode and press the “Write” button. Pls refer to Appendix B for S/N format. Barcode “Write” Button Step6. Press “OK” button. ViewSonic Corporation 6-6 PJ755D - ViewSonic PJ755D | Service Manual - Page 46
Step7. Press “OK” button. Step8. After finishing the above action, “OK” message will appear on the screen. This means the EDID is successfully written in. ViewSonic Corporation 6-7 PJ755D - ViewSonic PJ755D | Service Manual - Page 47
Step9. Methods to check S/N: For digital mode, choose “Digital”, check “Trans”, and then press “Read”. Read Digital Trans Step10. The messages of “OK” and the “Digital Values” will show. ViewSonic Corporation 6-8 Digital Values PJ755D - ViewSonic PJ755D | Service Manual - Page 48
Step11. For analog mode, choose “Analog”, check “Trans”, and then press “Read”. Read Analog Trans Step12. The messages of “OK” and the “Analog Values” will show. Analog Values ViewSonic Corporation 6-9 PJ755D - ViewSonic PJ755D | Service Manual - Page 49
Appendix A Exploded Overview ViewSonic Corporation 7-1 PJ755D - ViewSonic PJ755D | Service Manual - Page 50
ViewSonic Corporation 7-2 PJ755D - ViewSonic PJ755D | Service Manual - Page 51
ViewSonic Corporation 7-3 PJ755D - ViewSonic PJ755D | Service Manual - Page 52
ViewSonic Corporation 7-4 PJ755D - ViewSonic PJ755D | Service Manual - Page 53
ViewSonic Corporation 7-5 PJ755D - ViewSonic PJ755D | Service Manual - Page 54
ViewSonic Corporation 7-6 PJ755D - ViewSonic PJ755D | Service Manual - Page 55
ViewSonic Corporation 7-7 PJ755D - ViewSonic PJ755D | Service Manual - Page 56
ViewSonic Corporation 7-8 PJ755D - ViewSonic PJ755D | Service Manual - Page 57
ViewSonic Corporation 7-9 PJ755D - ViewSonic PJ755D | Service Manual - Page 58
ViewSonic Corporation 7-10 PJ755D - ViewSonic PJ755D | Service Manual - Page 59
ViewSonic Corporation 7-11 PJ755D - ViewSonic PJ755D | Service Manual - Page 60
ID Code 2 : Last two digits of manufacturing year 3 : Manufacturing week 4 : Sequence number EX: PDH044200007 This label "PDH044200007" represents Worldwide Model for Projector PJ755D, "04" means the unit was made in 2004 year. "42" means the unit was made on week 42. "00007" means the sequence - ViewSonic PJ755D | Service Manual - Page 61
opinions for reference. Assessment: A. What do you think about the content after reading PJ755D Service Manual? Unit 1. Introduction 2. Disassembly Procedure 3. Troubleshooting 4. Function Test & Alignment Procedure 5. Firmware Upgrade Procedure 6. DDC key-in Procedure 7. Appendix Excellent
-
 1
1 -
 2
2 -
 3
3 -
 4
4 -
 5
5 -
 6
6 -
 7
7 -
8
-
9
-
10
-
11
-
12
-
13
-
14
-
15
-
16
-
17
-
18
-
19
-
20
-
21
-
22
-
23
-
24
-
25
-
26
-
27
-
28
-
29
-
30
-
31
-
32
-
33
-
34
-
35
-
36
-
37
-
38
-
39
-
40
-
41
-
42
-
43
-
44
-
45
-
46
-
47
-
48
-
49
-
50
-
51
-
52
-
53
-
54
-
55
-
56
-
57
-
58
-
59
-
60
-
61
 |
 |

Model No.
VS10412
XGA Portable DLP Projector
Service Manual
ViewSonic
PJ755D
-1
ViewSonic
381 Brea Canyon Road, Walnut, California 91789 USA - (800) 888-8583
(
PJ755D-1
_
SM
Rev. 1
a
Nov.
200
4
)