Vtech VH6212 User Manual - Page 16
Windows 7 / Windows 8 / Windows 10 system, Hardware and Sound
 |
View all Vtech VH6212 manuals
Add to My Manuals
Save this manual to your list of manuals |
Page 16 highlights
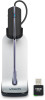
Getting started PC mode - Connect to a computer 3. After you have installed the VTech Control, check to make sure the audio setting is properly configured in your Windows system. If you have installed Skype and/or Skype for Business and want to use them with your headset, make sure the audio settings are configured correctly in the programs as well. a) Audio settings in Microsoft® Windows® (Windows 7 / Windows 8 / Windows 10) system: i. Click Start menu and choose Control Panel. ii. Click Hardware and Sound and then click Manage audio devices under the Sound menu. iii. Click the Playback tab and make sure VTech Headset is set as the default speaker. iv. Click the Recording tab and make sure VTech Headset is set as the default microphone. b) Audio settings in Skype (Skype 7.1-7.40): i. Launch the Skype program. ii. Click on Tools, then Options. iii. Click on Audio settings. iv. Make sure VTech Headset is selected under the speakers and microphone settings. Notes • The VTech Control does not support the App versions of Skype, including both mobile APP and desktop APP. • The VTech Control supports Skype version 7.1-7.40. Later versions of Skype are not supported by VTech Control for remote headset call control. • After the installation of VTech Control, Skype will prompt a message "VTechControl. exe is requesting access to Skype". Choose Allow Access to connect your Skype to VTech Control. Windows® is a registered trademark of Microsoft Corporation. 11
-
 1
1 -
2
-
3
-
4
-
5
-
6
-
7
-
8
-
9
-
10
-
 11
11 -
 12
12 -
 13
13 -
 14
14 -
 15
15 -
 16
16 -
 17
17 -
 18
18 -
 19
19 -
 20
20 -
 21
21 -
22
-
23
-
24
-
25
-
26
-
27
-
28
-
29
-
30
-
31
-
32
-
33
-
34
-
35
-
36
-
37
-
38
-
39
-
40
-
41
-
42
-
43
-
44
-
45
-
46
-
47
-
48
-
49
-
50
-
51
-
52
-
53
-
54
 |
 |
