Weider Pro 450 English Manual - Page 11
Warning, Adjustments - weight bench manual
 |
View all Weider Pro 450 manuals
Add to My Manuals
Save this manual to your list of manuals |
Page 11 highlights
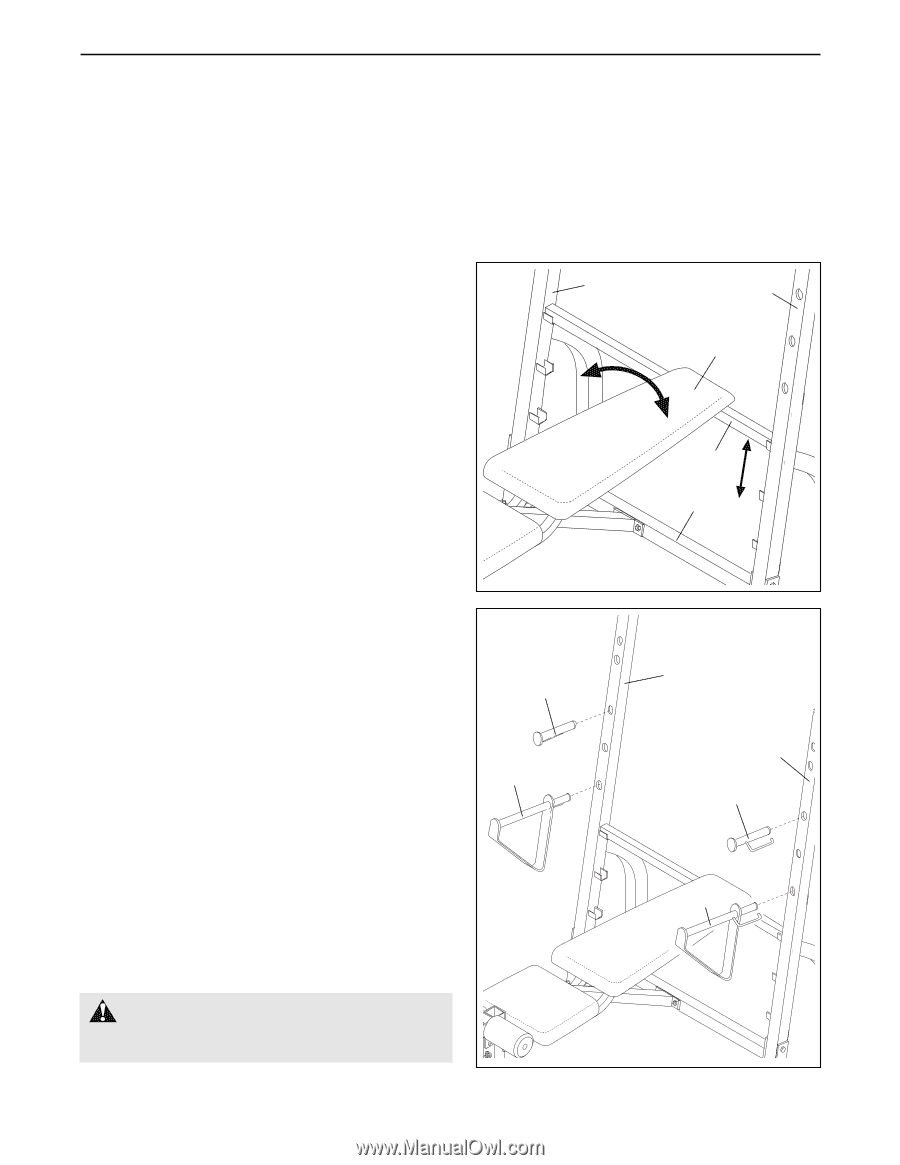
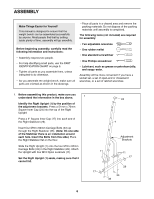
ADJUSTMENTS This section explains how to adjust the weight bench. See the EXERCISE GUIDELINES on page 14 for important information on how to get the most benefit from your exercise program. Also, refer to the accompanying exercise guide to see the correct form for each exercise. Make sure all parts are properly tightened each time you use the weight bench. Replace any worn parts immediately. The weight bench can be cleaned with a damp cloth and a mild, non-abrasive detergent. Do not use solvents. ADJUSTING THE BACKREST The Backrest (15) can be set to four different positions: a level position, two decline positions and an incline position. To change the position of the Backrest (15), move the Adjustment Tube (29) to a different set of adjustment brackets in the Uprights (1, 37) and rest the Backrest on the Adjustment Tube. To set the Backrest to the lowest decline position, remove the Adjustment Tube and rest the Backrest directly on the Crossbar (20). 1 37 15 29 20 USING THE WEIGHT RESTS AND SAFETY SPOTTERS Before beginning an exercise, insert the Weight Rests (21, 46) and the Safety Spotters (41, 45) into the holes in the Uprights (1, 37) that are best suited for the exercise. The selected holes should be at the lowest point to which you want your barbell to go during the exercise. Note: Make sure that the locking clips are hooked around the Uprights. Important: The Safety Spotters (41, 45) are designed to be safety devices. Their primary function is to minimize the risk of injury if the barbell is dropped during standing exercises. The Safety Spotters are deliberately designed to bend when hit with a barbell loaded with heavy weights. This minimizes the risk of the barbell bouncing off the Safety Spotters and causing injury to the user. If you accidentally bend the Safety Spotters, please call our Customer Service Department (see the front cover of this manual) to order replacement Safety Spotters. WARNING: Always set both weight rests and both safety spotters at the same height. 21 41 11 1 37 46 45
-
 1
1 -
2
-
3
-
4
-
5
-
 6
6 -
 7
7 -
 8
8 -
 9
9 -
 10
10 -
 11
11 -
 12
12 -
 13
13 -
 14
14 -
 15
15 -
 16
16 -
17
-
18
 |
 |