Western Digital WDBACG0030HCH User Manual
Western Digital WDBACG0030HCH Manual
 |
View all Western Digital WDBACG0030HCH manuals
Add to My Manuals
Save this manual to your list of manuals |
Western Digital WDBACG0030HCH manual content summary:
- Western Digital WDBACG0030HCH | User Manual - Page 1
External Desktop My Book®Live™ User Manual - Western Digital WDBACG0030HCH | User Manual - Page 2
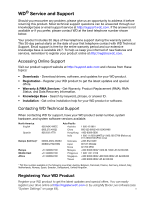
, Norway, Spain, Sweden, Switzerland, United Kingdom. Registering Your WD Product Register your WD product to get the latest updates and special offers. You can easily register your drive online at http://register.wdc.com or by using My Book Live software (see "System Settings" on page 64). ii - Western Digital WDBACG0030HCH | User Manual - Page 3
(Windows only 51 Exiting WD SmartWare Safely (Windows only 51 Opening Shares 51 Launching the My Book Live Dashboard 52 Mapping the Drive (Windows only 53 Creating a Shortcut to the Public Share (Windows only 53 Viewing Drive Properties 54 MY BOOK LIVE USER MANUAL TABLE OF CONTENTS - iii - Western Digital WDBACG0030HCH | User Manual - Page 4
Accessing the Learning Center 57 Uninstalling the WD Quick View Icon 57 6 Using the My Book Live Dashboard 58 Launching the My Book Live Dashboard 58 Starting the My Book Live Dashboard 59 Understanding Dashboard Components 60 Obtaining Customer Support 61 What Can I Do Now 63 7 Configuring - Western Digital WDBACG0030HCH | User Manual - Page 5
the My Book Live 129 Specific Problems and Corrective Actions 130 14 Regulatory and Warranty Information 133 Regulatory Compliance 133 Obtaining Service 134 Limited Warranty 135 GNU General Public License ("GPL 135 Glossary 136 Index 139 MY BOOK LIVE USER MANUAL TABLE OF CONTENTS - Western Digital WDBACG0030HCH | User Manual - Page 6
this product from the wall outlet and refer servicing to qualified service personnel under the following conditions: - When the power cord or plug is damaged or frayed. - If liquid has been spilled on the product. - If the product has been exposed to rain or water. MY BOOK LIVE 1 USER MANUAL - Western Digital WDBACG0030HCH | User Manual - Page 7
the device. Also, write the purchase date and other notes such as your operating system and version. This information is necessary for setup and technical support. Serial Number: Model Number: Purchase Date: System and Software Notes: MY BOOK LIVE 2 USER MANUAL - Western Digital WDBACG0030HCH | User Manual - Page 8
with an 800 MHz CPU for maximum performance to power all your applications from streaming to remote access. Designed around the most recent advances in Ethernet chip technology, this product delivers best-in-class read speeds faster than traditional USB 2.0 drives. MY BOOK LIVE 3 USER MANUAL - Western Digital WDBACG0030HCH | User Manual - Page 9
includes iTunes server support so you show off photos stored on your My Book Live personal cloud storage. WD Photos mobile app-Take a photo or video Book Live personal cloud storage „ Ethernet cable „ AC power adapter „ Installation and software CD „ Quick Install Guide MY BOOK LIVE 4 USER MANUAL - Western Digital WDBACG0030HCH | User Manual - Page 10
PRODUCT OVERVIEW My Book Live Home network drive AC adapter* Ethernet cable Installation CD with application software and user manual Quick Install Guide Global AC Adapter Configurations MY BOOK LIVE 5 USER MANUAL - Western Digital WDBACG0030HCH | User Manual - Page 11
by this product „ Firefox 3.6 and later on supported Windows and Mac platforms Local Network Router/switch or direct connect (Gigabit recommended to maximize performance.) Wide Area Network Broadband Internet connection for remote access using WD 2go and WD Photos. MY BOOK LIVE 6 USER MANUAL - Western Digital WDBACG0030HCH | User Manual - Page 12
) Height: 6.5 in (164.0 mm) Weight: 2.2 lb (1.01 kg) Input voltage: 100V to 240V AC Input frequency: 50 to 60 Hz Output voltage: 12V DC, 1.5A Power supply: 18W Operating temperature: 5 to 35 °C (41 to 95 °F) Non-operating temperature: -20 to 65°C (-4 to 149 °F) MY BOOK LIVE 7 USER MANUAL - Western Digital WDBACG0030HCH | User Manual - Page 13
information. Connects the device to an AC adapter and the power outlet. Kensington security slot For drive security, the device is equipped with a security slot that supports a standard Kensington security cable. Visit http://www.kensington.com/ for more information. MY BOOK LIVE 8 USER MANUAL - Western Digital WDBACG0030HCH | User Manual - Page 14
Mac) What Can I Do Now? Connecting the Drive to Your Network It is easy to set up the My Book Live drive -- all you have to do is connect it to your home or small office network. LEDs on the other end of the Ethernet cable directly into a router or network switch port. MY BOOK LIVE 9 USER MANUAL - Western Digital WDBACG0030HCH | User Manual - Page 15
adapter into the power supply socket on the back of the drive. 4. Plug the power adapter into a power outlet. The unit powers up automatically. Important: Wait for the My Book Live drive to finish powering is in HDD standby mode. Firmware is currently being updated. MY BOOK LIVE 10 USER MANUAL - Western Digital WDBACG0030HCH | User Manual - Page 16
with Removable Storage. 2. Double-click the CD, and then double-click Setup.exe to display the My Book Live Welcome screen. Using Mac Leopard/Snow Leopard Double-click the My Book Live CD, and then double-click Setup.exe to display the My Book Live Welcome screen. MY BOOK LIVE 11 USER MANUAL - Western Digital WDBACG0030HCH | User Manual - Page 17
the Welcome screen, the Administrator: „ Discovers and assigns a letter to the My Book Live drive on the network. „ Installs WD Quick View for easy access to the drive, drive status, and other options. , providing assistance with connecting your drive to the network. MY BOOK LIVE 12 USER MANUAL - Western Digital WDBACG0030HCH | User Manual - Page 18
, select your My Book Live from the Drive Name drop-down list. The screen displays a default description in Drive Description. Note: You can change the name and description later when you configure the drive using the My Book Live dashboard (see "General" on page 65). MY BOOK LIVE 13 USER MANUAL - Western Digital WDBACG0030HCH | User Manual - Page 19
screen closes. To close without changing the drive letter, click the arrow at the bottom right of the table (or press Enter or Esc). MY BOOK LIVE 14 USER MANUAL - Western Digital WDBACG0030HCH | User Manual - Page 20
WD Quick View installs the WD Quick View icon in the Windows system tray or in the Mac OS X menu bar, so that you can perform important functions such as launching WD SmartWare or checking drive status quickly. „ The Windows icon is blue . „ The Mac icon is black . MY BOOK LIVE 15 USER MANUAL - Western Digital WDBACG0030HCH | User Manual - Page 21
now displays the icon. For information on using WD Quick View, see "Managing Your Drive With WD Quick View" on page 49. Note: Once you install WD Quick View, you can upgrade it in a similar way. Instead of the Start Install button, a Start Upgrade button is available. MY BOOK LIVE 16 USER MANUAL - Western Digital WDBACG0030HCH | User Manual - Page 22
Next Steps screen: Note: Discovery must take place before Next Steps is available. Next Steps screen for Windows Next Steps screen for Mac OS X MY BOOK LIVE 17 USER MANUAL - Western Digital WDBACG0030HCH | User Manual - Page 23
Access photos and other files stored Click the Learn More button, and then continue with in your My Book Live's Public folder "Remote Access Settings" on page 74. and display them on an iPhone, iPad IPod touch "Playing/Streaming Videos, Photos, & Music" on page 116. MY BOOK LIVE 18 USER MANUAL - Western Digital WDBACG0030HCH | User Manual - Page 24
button. „ If the drive is found, the My Book Live Found screen appears. Continue with "Step 1: Discover the My Book Live Drive" on page 12. „ If the drive is not found, the Troubleshooting screen appears, offering more information about connecting the My Book Live: MY BOOK LIVE 19 USER MANUAL - Western Digital WDBACG0030HCH | User Manual - Page 25
for Answer ID 5679 in the WD Knowledge Base at http://support.wdc.com. Getting Started Without the CD (Windows 7/Vista & Mac) If you do not use the product CD for getting started and installing WD SmartWare (Windows only), you can still: „ Use your My Book Live as an external hard drive, dragging - Western Digital WDBACG0030HCH | User Manual - Page 26
software. If your operating system is 32-bit, click WD SmartWare Setup (x86). Otherwise click WD SmartWare Setup (x64). Launching the My Book Live Dashboard to Set Up Your Drive To access the My Book Live 3. Continue with "Understanding Dashboard Components" on page 60. MY BOOK LIVE 21 USER MANUAL - Western Digital WDBACG0030HCH | User Manual - Page 27
may want to use the other software files. 4. If you want to make a shared drive icon permanent on your desktop, create an alias. Following are two ways to do that: Note: Before creating an alias, click Finder > Preferences and make sure Connected Servers is checked. MY BOOK LIVE 22 USER MANUAL - Western Digital WDBACG0030HCH | User Manual - Page 28
. Using Bonjour to Find and Set up the Drive 1. Open Safari and click the bookmark icon: 2. Click Bonjour and then double-click your My Book Live drive to display the My Book Live dashboard home page. 3. Continue with "Understanding Dashboard Components" on page 60. MY BOOK LIVE 23 USER MANUAL - Western Digital WDBACG0030HCH | User Manual - Page 29
user manual contains information and instructions for setting up and using the drive. The most common activities are listed below: How do I . . . Back up my computer data to the My Book Live drive Restore my data from the My Book Live drive to my computer Set up auto-update of WD SmartWare Software - Western Digital WDBACG0030HCH | User Manual - Page 30
Using WD SmartWare WD SmartWare software is an easy-to-use tool that gives you the power to: „ Protect your data automatically-Automatic, continuous backup instantly makes a copy whenever you add or change a file. Note: Automatic backup protection is continuous as long as both your My Book Live and - Western Digital WDBACG0030HCH | User Manual - Page 31
Backup Options button to display the Backup Options screen: 2. Click the Start Install button to the right of WD SmartWare to display the Install WD SmartWare screen: 3. Click the License Agreement link to read the agreement, and then select the I accept check box. MY BOOK LIVE 26 USER MANUAL - Western Digital WDBACG0030HCH | User Manual - Page 32
you have installed it: „ WD SmartWare icon -In the Windows system tray, left- or right-click the WD Quick View icon to display the main menu, and then select WD SmartWare. -OR- „ Windows Explorer-Click Start or , and then click Programs > WD SmartWare > WD SmartWare. MY BOOK LIVE 27 USER MANUAL - Western Digital WDBACG0030HCH | User Manual - Page 33
you can configure the drive. „ Help-Provides quick access to Learning Center topics and links to online support services. The Learning Center topics provide more detail than the info/online help for each screen, but not as much as the WD SmartWare Software User Manual. MY BOOK LIVE 28 USER MANUAL - Western Digital WDBACG0030HCH | User Manual - Page 34
and back up each one to protect all of the data files on your computer. After performing a backup, the WD SmartWare software protects your files by backing up any: „ New file that is created on or copied to your hard drive „ Existing file that is changed in any way MY BOOK LIVE 29 USER MANUAL - Western Digital WDBACG0030HCH | User Manual - Page 35
up first from the internal drive selector box under your computer icon: b. If you have more than one My Book Live or other WD NAS drive connected to your network, select the one that you want to back up files to: 2. Click the Backup tab to display the Backup screen: MY BOOK LIVE 30 USER MANUAL - Western Digital WDBACG0030HCH | User Manual - Page 36
boxes and then click Apply Changes to create a custom backup plan and refresh the content gauge for your My Book Live drive. d. Click Start Backup to begin backing up all categories of files and skip to step 10 on View to open the backup by categories selection box. MY BOOK LIVE 31 USER MANUAL - Western Digital WDBACG0030HCH | User Manual - Page 37
hard drive: d. Click Apply Changes to create a custom backup plan and refresh the content gauge for your My Book Live drive. e. Click Start Backup to begin backing up all of files and folders and skip to step 10 on and then OK at the Switching Backup Plan prompt. MY BOOK LIVE 32 USER MANUAL - Western Digital WDBACG0030HCH | User Manual - Page 38
that the backup completed normally. „ If any files could not be backed up, the WD SmartWare software displays a: - Caution message indicating the number of files involved - View link that you can click to see a list of the files and the reasons they were not backed up MY BOOK LIVE 33 USER MANUAL - Western Digital WDBACG0030HCH | User Manual - Page 39
and: a. Click the Help tab. b. Click the WD Store link to view the Western Digital Online Store website. c. Click External Hard Drives and one. Retrieving Backups The WD SmartWare software makes it easy for you to retrieve files that your My Book Live drive has backed up MY BOOK LIVE 34 USER MANUAL - Western Digital WDBACG0030HCH | User Manual - Page 40
the drive on the Home screen, you can retrieve files or complete folders from your My Book Live drive. (For information on retrieving folders, see "Retrieving a Folder" on page 37.) backups from other computers. To retrieve files from a specific computer (volume): MY BOOK LIVE 35 USER MANUAL - Western Digital WDBACG0030HCH | User Manual - Page 41
the Apply button to save and implement the new retrieve folder. d. Click the Select Files button to display the Select content to retrieve... screen. MY BOOK LIVE 36 USER MANUAL - Western Digital WDBACG0030HCH | User Manual - Page 42
a folder, which may include multiple categories, in the retrieve files selection box, right-click the folder and choose Select folder in all content categories. MY BOOK LIVE 37 USER MANUAL - Western Digital WDBACG0030HCH | User Manual - Page 43
not have sufficient disk space to complete the retrieve. Customizing WD SmartWare Software The WD SmartWare software makes it easy for you to quickly customize its settings for files retrieved from your drive „ Automatically checking for WD SmartWare software updates MY BOOK LIVE 38 USER MANUAL - Western Digital WDBACG0030HCH | User Manual - Page 44
of each file. If you overwrite or delete a file by mistake, or want to see an earlier version of the file, the WD SmartWare software has a copy for you. Keeping more versions: „ Improves your ability to save/retrieve more versions of a file „ Consumes more disk space MY BOOK LIVE 39 USER MANUAL - Western Digital WDBACG0030HCH | User Manual - Page 45
. The WD SmartWare software works in Speed option. Specifying a Different Retrieve Folder When you start a retrieve, you can choose whether you want to store the retrieved files in either: „ Their original locations on your computer -OR„ A Retrieved Content folder MY BOOK LIVE 40 USER MANUAL - Western Digital WDBACG0030HCH | User Manual - Page 46
button to display the Set Preferences screen: 2. Select or clear the Automatically check for WD SmartWare software updates check box to enable or disable the Preferences option. If selected, WD SmartWare links you to the WD web page where the download is available. MY BOOK LIVE 41 USER MANUAL - Western Digital WDBACG0030HCH | User Manual - Page 47
If you choose not to use WD SmartWare software for backing up files to the My Book Live, you can use Windows Backup user name on the My Book Live. If no user name has been assigned, enter everyone as the username and any password (e.g., 1234). Click the OK button. 8. Follow the remaining instructions - Western Digital WDBACG0030HCH | User Manual - Page 48
Let Windows choose or select desired content and then click the Next button. 10. On the Review your backup settings screen, click the Save settings and run backup button. Using Apple Time Machine is your first time creating a backup, the following screen displays: MY BOOK LIVE 43 USER MANUAL - Western Digital WDBACG0030HCH | User Manual - Page 49
display the Time Machine Preferences screen: 3. Click Choose Backup Disk and select the My Book Live drive where you want the backups stored: 4. Click Use for Backup. A screen prompts for your user name and password. 5. Select Guest (default setting) and click Connect: MY BOOK LIVE 44 USER MANUAL - Western Digital WDBACG0030HCH | User Manual - Page 50
, it will resume automatically once the computer is available. If you change the name of the My Book Live, previously set Time Machine backups delay or fail. To fix the problem, resume backing up by re-selecting the drive in the Time Machine Preferences screen. MY BOOK LIVE 45 USER MANUAL - Western Digital WDBACG0030HCH | User Manual - Page 51
want to retrieve files and other items backed up on the My Book Live drive. For example, you may have lost a file, or you want to see files from a week ago. You can retrieve individual items, multiple items, shares, or if your system crashes, your entire hard drive. MY BOOK LIVE 46 USER MANUAL - Western Digital WDBACG0030HCH | User Manual - Page 52
Line Restore button 4. Select the item you want to restore, and click the Restore button at the bottom right to display the Copy message: MY BOOK LIVE 47 USER MANUAL - Western Digital WDBACG0030HCH | User Manual - Page 53
the word "backup." This is a protected folder that is automatically created and where all of your backups reside. It serves no purpose for users other than to store Time Machine backups. In fact, if you try to connect to it, you will get a "Connection Failed" message. MY BOOK LIVE 48 USER MANUAL - Western Digital WDBACG0030HCH | User Manual - Page 54
Options Windows 1. Right-or left-click the WD Quick View icon menu. in the system tray to display a 2. Move the pointer over or click to select your My Book Live drive and display a submenu: Figure 1. Windows WD Quick View menus 3. Select the desired option. MY BOOK LIVE 49 USER MANUAL - Western Digital WDBACG0030HCH | User Manual - Page 55
My Book Live to display a submenu: Figure 2. Mac OS X WD Quick View menus 3. Select the desired option. Checking Drive Status Windows Move the pointer over the WD Quick View name means the drive is experiencing a problem, such as an abnormally high temperature. MY BOOK LIVE 50 USER MANUAL - Western Digital WDBACG0030HCH | User Manual - Page 56
appears if you are running WD SmartWare.) Opening Shares You can use WD Quick View to open the drive's Public share and any private shares to which you have access permission. 1. Select Open on the WD Quick View submenu. Windows: The shares display in Windows Explorer: MY BOOK LIVE 51 USER MANUAL - Western Digital WDBACG0030HCH | User Manual - Page 57
For a Public share, if prompted for a user name and password, select Guest. Launching the My Book Live Dashboard Select Dashboard on the WD Quick View submenu to launch the application. The Welcome screen displays. (See "Using the My Book Live Dashboard" on page 58.) MY BOOK LIVE 52 USER MANUAL - Western Digital WDBACG0030HCH | User Manual - Page 58
Book Live username and password to reconnect the share, allowing it to be accessible again (until the next reboot). For more information on troubleshooting this problem Shortcut on the WD Quick View submenu. An icon representing the Public share displays on the desktop. MY BOOK LIVE 53 USER MANUAL - Western Digital WDBACG0030HCH | User Manual - Page 59
MANAGING YOUR DRIVE WITH WD QUICK VIEW Viewing Drive Properties Select Properties on the WD Quick View submenu to display the Properties screen: My Book Live Properties on Windows My Book Live Properties on Mac OS X MY BOOK LIVE 54 USER MANUAL - Western Digital WDBACG0030HCH | User Manual - Page 60
WD Support. WD Quick View Option An option on the WD Quick View submenu displays alerts such as: „ Drive is reaching maximum capacity. „ Drive is full and subsequent backups cannot take place. Displays every five minutes until space is made available. „ Updates are available. MY BOOK LIVE 55 USER - Western Digital WDBACG0030HCH | User Manual - Page 61
: 1. To display one or more alerts, select Alerts on the WD Quick View submenu. Multiple alerts are arranged chronologically. 2. To close the alert panel, click the Exit button. Figure 3. Alerts on Windows Figure 4. Alerts on Mac OS X 3. Click the OK button to close. MY BOOK LIVE 56 USER MANUAL - Western Digital WDBACG0030HCH | User Manual - Page 62
your Mac user name. 4. Enter your Mac password and click the OK button. 5. On the WD SmartWare Uninstall window, click the Uninstall button. 6. When a confirmation message displays, click the Exit button. The menu bar no longer contains the WD Quick View icon . MY BOOK LIVE 57 USER MANUAL - Western Digital WDBACG0030HCH | User Manual - Page 63
Live Dashboard Launching the My Book Live Dashboard Starting the My Book Live Dashboard Understanding Dashboard Components Obtaining Customer Support What Can I Do Now? Use the My Book Live dashboard to configure settings to manage the My Book Live as you prefer. For example, you can set up user - Western Digital WDBACG0030HCH | User Manual - Page 64
USING THE MY BOOK LIVE DASHBOARD Starting the My Book Live Dashboard The first time you access the My Book Live dashboard, the Default Language page displays: 1. Select the default language from the the navigation panel slides to the left and the selected page appears. MY BOOK LIVE 59 USER MANUAL - Western Digital WDBACG0030HCH | User Manual - Page 65
have not set a password. Roll the mouse over a link to display information about a page. Click to display the associated page. Provides links to product documentation, a user forum, FAQs, and a customer support contact form. MY BOOK LIVE 60 USER MANUAL - Western Digital WDBACG0030HCH | User Manual - Page 66
to the right of some items: * Not shown in screen example. Provides a brief explanation when you roll the mouse over the icon. Obtaining Customer Support To open the Support page: 1. Click the Support option in the navigation panel to display the Support page: MY BOOK LIVE 61 USER MANUAL - Western Digital WDBACG0030HCH | User Manual - Page 67
it to WD Customer Support. Obtaining Other Support „ To obtain the most recently updated user manual, click the Product Documentation link. „ To see answers to frequently asked questions and troubleshooting instructions, click the FAQs link. „ To participate in a forum about the My Book Live, click - Western Digital WDBACG0030HCH | User Manual - Page 68
the My Book Live dashboard. The following table provides shortcuts to instructions for some common tasks. How do I ... See ... Request assistance from Customer Support, Set up the drive on your network, Configure drive settings, Update My Book Live firmware, Create users, Change a user's password - Western Digital WDBACG0030HCH | User Manual - Page 69
, Alert & Event Notifications, and Energy Saver. To display or hide a section, click the arrow beside the section name or click the section name itself. MY BOOK LIVE 64 USER MANUAL - Western Digital WDBACG0030HCH | User Manual - Page 70
the drop-down list, select the language in which you want the My Book Live web pages to display. The default language is English. Serial Number Displays the WD-assigned number that identifies the specific unit. Usage Displays the storage capacity used and the total storage capacity. Warranty - Western Digital WDBACG0030HCH | User Manual - Page 71
check box to enable NTP service, which automatically synchronizes your firmware automatically or to manually check for an update file: A description, current version number, and date of last update of the My Book Live firmware display. Important: Wait for the My Book Live drive to finish powering - Western Digital WDBACG0030HCH | User Manual - Page 72
Update from File To update the firmware manually: 1. Contact WD Tech Support http://support.wdc.com for information on new firmware availability. 2. If a new firmware file is provided, save the file To delete an email address, click the Remove link to its right. MY BOOK LIVE 67 USER MANUAL - Western Digital WDBACG0030HCH | User Manual - Page 73
If the Hard Disk Sleep function is enabled, the hard drive goes into standby mode to save power after a designated period of inactivity. Hard Disk Sleep is enabled by default. To enable Hard Disk , enable FTP protocol for secure file transfer, and create a workgroup: MY BOOK LIVE 68 USER MANUAL - Western Digital WDBACG0030HCH | User Manual - Page 74
one computer to another through a network. FTP is disabled by default. 1. Select the Allow FTP check box to enable it: 2. Click the Save button. MY BOOK LIVE 69 USER MANUAL - Western Digital WDBACG0030HCH | User Manual - Page 75
file: Diagnostic Run diagnostic tests if you are having problems with your drive. The short test checks the drive for major performance problems. The result of a short drive test is a pass the drive fails the test, click the Customer Support button to get assistance. MY BOOK LIVE 70 USER MANUAL - Western Digital WDBACG0030HCH | User Manual - Page 76
, the "Complete Restore Finished" message displays, and the system reboots. Reboot/Shutdown You can safely reboot and shut down your My Book Live drive using two methods: „ Use the Reboot/Shut Down section of the Utilities screen (discussed in this section), -OR- MY BOOK LIVE 71 USER MANUAL - Western Digital WDBACG0030HCH | User Manual - Page 77
SETTINGS „ Use the WD Quick View icon (see "Safely Shutting Down" on page 55). If you are unable to shut down by either method, see "How do I safely shut down the My Book Live?" on page 131. green LED is solid before resuming work with the My Book Live drive. MY BOOK LIVE 72 USER MANUAL - Western Digital WDBACG0030HCH | User Manual - Page 78
to close the message. 4. When the LED on the front of the device is off, you can safely unplug your drive. 5. Close the browser. MY BOOK LIVE 73 USER MANUAL - Western Digital WDBACG0030HCH | User Manual - Page 79
and WD 2go mobile apps and set up remote and secure web access to stored files by means of the WD2go.com website. For instructions on setting up remote access on this page and then using the WD Photos and WD 2go, see "Accessing Your My Book Live Remotely" on page 98. MY BOOK LIVE 74 USER MANUAL - Western Digital WDBACG0030HCH | User Manual - Page 80
media in every room in your house. Note: TwonkyMedia and iTunes only work on your network. For instructions on configuring TwonkyMedia and iTunes settings on this page and then displaying or streaming media, see "Playing/Streaming Videos, Photos, & Music" on page 116. MY BOOK LIVE 75 USER MANUAL - Western Digital WDBACG0030HCH | User Manual - Page 81
view user details, create new users, grant a user access to existing shares, and create shares. Viewing Users 1. On the navigation panel, click Users to view a list of current users on the panel on the left, and links that display online Help in a panel on the right: MY BOOK LIVE 76 USER MANUAL - Western Digital WDBACG0030HCH | User Manual - Page 82
in a panel on the right. Creating a User The Administrator can create users and limit what shares they can access. Full access-Allows the user to read, write, and delete files on the share. Read-only access-Restricts the user to only viewing files on the share. MY BOOK LIVE 77 USER MANUAL - Western Digital WDBACG0030HCH | User Manual - Page 83
full access or the read-only access icon. For example, the new user may be given read-only access to the family's photos or Mom's videos (so he can't change, delete, or add to them), but full access to Projects, so he can add, edit, or delete project files. MY BOOK LIVE 78 USER MANUAL - Western Digital WDBACG0030HCH | User Manual - Page 84
Share Access section moves to the right panel: Creating a Private Share for a User 1. If you want to create a private share for the user, in the Share Access section on the right panel, click the Create new share button. A Create New Share box displays over the page: MY BOOK LIVE 79 USER MANUAL - Western Digital WDBACG0030HCH | User Manual - Page 85
user to display user details in the right column. 2. Click the Update Password button to display the following: 3. Enter the same password in both Password and Confirm Password; otherwise select the No Password check box.ith no double quotes 4. Click the Save button. MY BOOK LIVE 80 USER MANUAL - Western Digital WDBACG0030HCH | User Manual - Page 86
in the Share Access panel. 3. Click the Save button. Deleting a User You can delete all users except the Administrator. 1. In the User List, click the trash can icon to the right of the user's name. 2. In response to the confirmation message, click the Delete button. MY BOOK LIVE 81 USER MANUAL - Western Digital WDBACG0030HCH | User Manual - Page 87
a Share Opening a Share A share is an area on the My Book Live drive for storing files (similar to a folder or directory). Note: In this manual, we use the terms share and folder interchangeably. A share can be public so that all users can access the contents or private to limit access to selected - Western Digital WDBACG0030HCH | User Manual - Page 88
MANAGING SHARES Click a share to display share detail and user access information in the right panel. Creating a New Share You change or delete, you would assign read-only access to that user. 1. Click the Create New Share button above the Share Access list to display: MY BOOK LIVE 83 USER MANUAL - Western Digital WDBACG0030HCH | User Manual - Page 89
Description Media Serving User Access Assign a user to have any access to the share, make sure the + check box is blank. For example, the Administrator (Dad) and Mom have full access to the family videos, but Sally can only view the videos. 5. Click the Save button. MY BOOK LIVE 84 USER MANUAL - Western Digital WDBACG0030HCH | User Manual - Page 90
from the list to display share detail: 2. Click the Create new user button in the Share Access section on the right. A Create New User box displays over the screen: 3. Complete the information as you did in "Creating a User" on page 77. 4. Click the Save button. MY BOOK LIVE 85 USER MANUAL - Western Digital WDBACG0030HCH | User Manual - Page 91
Live dashboard. On Windows XP, for a private share, if the user's name and password are the same as for logging into the computer, a user name and password are not required. If they are not the same, visit http://support.wdc.com and see Knowledge Base Answer ID 5681. MY BOOK LIVE 86 USER MANUAL - Western Digital WDBACG0030HCH | User Manual - Page 92
folder on your drive. Mac OS X, Public and Private Shares 1. Open a Finder window and locate your My Book Live drive under the Shared heading in the side bar. 2. Double-click the drive to display the Public share and any private shares to which you have access. MY BOOK LIVE 87 USER MANUAL - Western Digital WDBACG0030HCH | User Manual - Page 93
backup, backup size, and backup type (WD SmartWare or Time Machine), and date of last backup. 2. If you would like some information about backing up your files using WD SmartWare, Time Machine, or Windows Backup, click the appropriate link in the panel on the right. MY BOOK LIVE 88 USER MANUAL - Western Digital WDBACG0030HCH | User Manual - Page 94
is a Safepoint? A safepoint is a snapshot of your My Book Live at a specific time stored on a compatible network-attached device such as another My Book Live. The safepoint is a collection of all of the data on your drive, including users, shares, WD SmartWare, Apple Time Machine, or Windows 7/Vista - Western Digital WDBACG0030HCH | User Manual - Page 95
is password protected, enter appropriate credentials. Important: If you create a safepoint with shares you wish to keep private, create the safepoint on a private share. MY BOOK LIVE 90 USER MANUAL - Western Digital WDBACG0030HCH | User Manual - Page 96
MANAGING COMPUTER BACKUPS AND SAFEPOINTS 5. To create a safepoint on the share immediately, click the Create Now button and complete the required fields. You may choose to enable auto-updates as well. MY BOOK LIVE 91 USER MANUAL - Western Digital WDBACG0030HCH | User Manual - Page 97
. Other factors such as what processes are running on the My Book Live and on the speed and availability of your target NAS have an effect on the speed. 6. To have the process run in the background, click the auto updates as well. Auto updates help keep your safepoint MY BOOK LIVE 92 USER MANUAL - Western Digital WDBACG0030HCH | User Manual - Page 98
MANAGING COMPUTER BACKUPS AND SAFEPOINTS up to date with the content on your My Book Live by copying changes since the last update. Important: Changes made while safepoint operations are in stored on another device, access the folder on the device where you stored it. MY BOOK LIVE 93 USER MANUAL - Western Digital WDBACG0030HCH | User Manual - Page 99
BACKUPS AND SAFEPOINTS Updating Safepoints You can update your Safepoints in two ways: manually or automatically. 1. To update your safepoint manually, go to the Manage section at the top of the page and click in progress are not guaranteed to be backed up immediately. MY BOOK LIVE 94 USER MANUAL - Western Digital WDBACG0030HCH | User Manual - Page 100
from a safepoint to a factoryfresh My Book Live or compatible Western Digital device. 1. Open the Recovery section: 2. Click the Discover button to display a list of available devices on your network: 3. Select a device to display the list of its available shares: MY BOOK LIVE 95 USER MANUAL - Western Digital WDBACG0030HCH | User Manual - Page 101
troubleshooting instructions appears. 6. If there are no errors, the recovery operation begins and a progress bar appears. Wait for the operation to finish. Your device restarts after the recovery operation and then can be used in place of your original My Book Live. MY BOOK LIVE 96 USER MANUAL - Western Digital WDBACG0030HCH | User Manual - Page 102
icon for your safepoint. „ If a safepoint develops errors, warning icons appear in the Manage section. Roll the cursor over the icons for more information. MY BOOK LIVE 97 USER MANUAL - Western Digital WDBACG0030HCH | User Manual - Page 103
. Mobilizing Your Files with WD 2go Mobile Apps WD 2go and WD Photos mobile apps bring your photos and files to your fingertips on your Apple iPhone, iPod touch, iPad, Android tablet, or Android smartphone. Requirements include: „ Western Digital My Book Live personal cloud storage connected to - Western Digital WDBACG0030HCH | User Manual - Page 104
Excel spreadsheets, and PowerPoint presentations. For more features and instructions on using the WD 2go mobile app, see its online Guide Me page and FAQs, or go to http://wd2go.wdc.com. Note: WD 2go brings your data from the My Book Live to your tablet, handset, or other portable devices using - Western Digital WDBACG0030HCH | User Manual - Page 105
videos. For more features and instructions for using WD Photos, see its online Guide Me page and Quick Tips, and go to http://wdphotos.wdc.com. Enabling Remote Access Use the Remote Access page of the My Book Live dashboard to enable you and other authorized users to access your files on the - Western Digital WDBACG0030HCH | User Manual - Page 106
allow direct connections whenever possible. Some networks do not support the UPnP protocol, which My Book Live uses for those configurations. If you desire a direct connection instead of a relay, consult your router operating guide to determine UPnP compatibility. Additionally, some ISPs implement - Western Digital WDBACG0030HCH | User Manual - Page 107
list, select a user. Listed users are those who have access rights to My Book Live shares. (See "Creating a User" on page 77.) Note: When you add access to a mobile device application such as WD Photos, the specified the time of request and can be used one time only. MY BOOK LIVE 102 USER MANUAL - Western Digital WDBACG0030HCH | User Manual - Page 108
Pictures subfolder in the Public share of your My Book Live drive. WD Photos lets you view photos in .jpg format only. To install WD Photos on your mobile device: 1. Download WD Photos from the Apple App Store or Android Market and install it on your mobile device. MY BOOK LIVE 103 USER MANUAL - Western Digital WDBACG0030HCH | User Manual - Page 109
the Select Device screen, which shows the types of NAS devices you can have. 4. Tap the My Book Live drive. 5. Enter the activation code you generated on your My Book Live's dashboard (see "Adding a Mobile Device Connection" on page 101) and tap the Activate button. MY BOOK LIVE 104 USER MANUAL - Western Digital WDBACG0030HCH | User Manual - Page 110
and then tap an album to display its photos. Note: If you have problems installing WD Photos, please visit http://websupport.wdc.com/rn/wdphotos.asp. For more features and instructions, see the app's online Guide Me page and tips, and go to http://wdphotos.wdc.com. MY BOOK LIVE 105 USER MANUAL - Western Digital WDBACG0030HCH | User Manual - Page 111
Connect Now to display a My Book Live drive. 4. Tap the My Book Live drive to display the Add Device screen. 5. Enter the activation code you generated on your My Book Live's dashboard (see "Adding a Mobile Device Connection" on page 101) and tap the Activate button. MY BOOK LIVE 106 USER MANUAL - Western Digital WDBACG0030HCH | User Manual - Page 112
Accessing Your My Book Live Remotely Codes are valid for 24 hours from the time of request and can be used one time only. 6. Tap your My Book Live drive to display its share(s). MY BOOK LIVE 107 USER MANUAL - Western Digital WDBACG0030HCH | User Manual - Page 113
Remotely 8. Tap a file to display its contents. Note: If you have problems installing WD 2go, please visit http://websupport.wdc.com/rn/wd2go.asp. For more features and instructions, see the app's online Guide Me page, FAQs, and tips, or go to http://wd2go.wdc.com. MY BOOK LIVE 108 USER MANUAL - Western Digital WDBACG0030HCH | User Manual - Page 114
Accessing Your My Book Live Remotely Setting Up Web Access Through WD 2go WD 2go gives you access to all the files in your personal cloud no matter where you are as Status must be Ready or Connected. 2. Navigate to the Web Access section of the Remote Access page. MY BOOK LIVE 109 USER MANUAL - Western Digital WDBACG0030HCH | User Manual - Page 115
account, the account retains that user's share access privileges. (For information on creating users, see "Creating a User" on page 77.) 5. A "Registration E-Mail Sent" message displays. Click the Close button. The user receives an email with further instructions. MY BOOK LIVE 110 USER MANUAL - Western Digital WDBACG0030HCH | User Manual - Page 116
Live Remotely 6. Click the Continue button to display your new account on the Account List. Note: If you need to resend the registration email, click resend email icon. Note: To remove a user's web access, click the trash can icon to the right of the account name. MY BOOK LIVE 111 USER MANUAL - Western Digital WDBACG0030HCH | User Manual - Page 117
using the associated email address and password from step 1. The screen displays your WD NAS device(s). 3. Select the My Book Live you would like to access. Depending on whether you have remotely accessed a share from this publisher check box. Click the Run button: MY BOOK LIVE 112 USER MANUAL - Western Digital WDBACG0030HCH | User Manual - Page 118
Accessing Your My Book Live Remotely On a Mac, if the following message appears, click the Allow button. 5. Once Java has successfully run, your accessible shares you want to access. Note: For Windows XP, if a reboot message displays, click the Reboot Now button. MY BOOK LIVE 113 USER MANUAL - Western Digital WDBACG0030HCH | User Manual - Page 119
Accessing Your My Book Live Remotely On a Mac, click the + Open in Finder button next to the share you want to access. 8. If a Java message asks you drive letter like any other mapped network drive. Opening the drive displays all of the folders and files in the share. MY BOOK LIVE 114 USER MANUAL - Western Digital WDBACG0030HCH | User Manual - Page 120
has access display. 1. If the person is not already a user of the My Book Live drive, create a new user (see "Creating a User" on page 77). 2. Create a web access account for the user (see page 109). The user receives an email providing instructions for using WD 2go. MY BOOK LIVE 115 USER MANUAL - Western Digital WDBACG0030HCH | User Manual - Page 121
(for example, Xbox 360™, PlayStation® 3, or DLNA® 1.5 Digital Media Adapters, such as WD TV™ Live HD) and media services such as iTunes. For more information, visit http:// www.twonkymedia.com. Media Server Settings The Media tab on the My Book Live dashboard enables you to define TwonkyMedia and - Western Digital WDBACG0030HCH | User Manual - Page 122
of Twonky software, the date and time your settings were updated, and the number of music tracks, pictures, and videos that were streamed. 8. For Twonky to look for only updated music, picture, and video files on your drive, click the Rescan button below the table. MY BOOK LIVE 117 USER MANUAL - Western Digital WDBACG0030HCH | User Manual - Page 123
place automatically. You only need to use the buttons if you are having a problem. iTunes With the iTunes Media Server, you or anyone connected to the My Book Live can use iTunes to play music files stored on it. This service creates a virtual music library on the device and treats it as an iTunes - Western Digital WDBACG0030HCH | User Manual - Page 124
rescan has been initiated" message displays, click the Close button. Media Types Supported Audio files 3GP AAC AC3 AIF ASF FLAC LPCM M4A M4B MP1 MP2 MP3 support playback of all these files. Please refer to your device's user manual to see which formats are supported. MY BOOK LIVE 119 USER MANUAL - Western Digital WDBACG0030HCH | User Manual - Page 125
other users „ Shared Videos-Stores video files you want to share with other users Important: Do not delete or change the name of the Shared Pictures folder, which is required by the WD Photos , your content will not display correctly through your digital media adapter. MY BOOK LIVE 120 USER MANUAL - Western Digital WDBACG0030HCH | User Manual - Page 126
/Windows 7) Note: Please go to the Microsoft Media Player support site for more information on using and updating your media player. To stream media using Windows Media Player 11 or 12 Library: 1. Click Control Panel > Network and Sharing Center. 2. Click Customize: MY BOOK LIVE 121 USER MANUAL - Western Digital WDBACG0030HCH | User Manual - Page 127
3. Select Private, and then click Next: PLAYING/STREAMING VIDEOS, PHOTOS, & MUSIC 4. Launch Windows Media Player (Start > All Programs > Windows Media Player): 5. Click Library > Media Sharing: MY BOOK LIVE 122 USER MANUAL - Western Digital WDBACG0030HCH | User Manual - Page 128
Live/Live Plus HD Media Player user guide for more specific instructions on connecting to the My Book Live and accessing and playing your media content. Note: My Book Live can obtain content from other WD NAS storage devices in a similar manner. 1. Connect My Book Live to your home network and power - Western Digital WDBACG0030HCH | User Manual - Page 129
/Live Plus to the home network: 4. Navigate to the Home screen, and select the icon for the media content you wish to access. It can be Music ,Video , or Photo . 5. Press / to select Media servers and press Enter: 6. Press / to select the My Book Live and press Enter: MY BOOK LIVE 124 USER MANUAL - Western Digital WDBACG0030HCH | User Manual - Page 130
360 support site for more information on using and updating your XBox 360. 1. Ensure that your Xbox 360 and My Book Live are powered on and connected to your local area network. 2. From the main Xbox user interface , scroll through to view and play your media content. MY BOOK LIVE 125 USER MANUAL - Western Digital WDBACG0030HCH | User Manual - Page 131
interface to establish connection so that your player can link to your My Book Live. Please refer to your player's user guide for specific instructions. DLNA Devices See specific DLNA media device user manuals for instructions on connecting a DLNA device to your local area network so you can access - Western Digital WDBACG0030HCH | User Manual - Page 132
stored on it. This service creates a virtual music library on the device and treats it as an iTunes repository, making it possible to stream media files from the My Book Live to Windows or Mac computers running iTunes. Media Types Supported The iTunes Media Server supports the following file types - Western Digital WDBACG0030HCH | User Manual - Page 133
the left pane. If you have copied music to the /Public/Shared Music folder or a video to/Public/Shared Videos, and it is in a format supported by iTunes, it should be listed in the right pane: 3. Double-click a media file to play it. MY BOOK LIVE 128 USER MANUAL - Western Digital WDBACG0030HCH | User Manual - Page 134
13 Troubleshooting First Steps Checklist Resetting the My Book Live Specific Problems and Corrective Actions For any issue, first ensure that you are using the latest firmware for My Book Live. See "Updates" on page 66 for update instructions. First Steps Checklist „ Is the power supply plugged - Western Digital WDBACG0030HCH | User Manual - Page 135
TROUBLESHOOTING Specific Problems and Corrective Actions The following contains specific problems that may arise during the use of the My Book Live. Possible solutions are listed for each problem. LEDs do not light up. „ Make sure the power 7. Click the Finish button. MY BOOK LIVE 130 USER MANUAL - Western Digital WDBACG0030HCH | User Manual - Page 136
to support the media format that you want to play. Refer to your digital media adapter's user manual for further information. „ Make sure the share containing your media content is enabled to serve that type of media. See "Creating a New Share" on page 83. How do I safely shut down the My Book Live - Western Digital WDBACG0030HCH | User Manual - Page 137
. If it does not turn green, please consult "Checking the Front Panel LED" on page 10. How do I upgrade from My Book Live 3.0 firmware to My Book Live 3.5 firmware? For instructions, search the Knowledge Base at http://support.wdc.com for Knowledge Base Answer 6742. MY BOOK LIVE 132 USER MANUAL - Western Digital WDBACG0030HCH | User Manual - Page 138
intended to be supplied by a listed limited power source, double insulated, or direct plug-in power unit marked "Class 2." CE Compliance for Europe Verified to comply with EN55022 for RF emission; EN-55024 for Generic Immunity, as applicable; and EN-60950 for Safety. MY BOOK LIVE 133 USER MANUAL - Western Digital WDBACG0030HCH | User Manual - Page 139
establish the period of warranty, check the warranty expiration (serial number required) via http://support.wdc.com. WD shall have no liability for lost data regardless of the cause, recovery of lost data, or data contained in any Product placed in its possession. MY BOOK LIVE 134 USER MANUAL - Western Digital WDBACG0030HCH | User Manual - Page 140
to any Open Source Software, is solely at your own risk. Western Digital is not responsible for any such modification or tampering. Western Digital will not support any product in which you have or have attempted to modify the Software supplied by Western Digital. MY BOOK LIVE 135 USER MANUAL - Western Digital WDBACG0030HCH | User Manual - Page 141
over Secure Socket Layer. A protocol that provides a more secure means of configuring your device than HTTP, but may affect the responsiveness of the user interface. All traffic between the managing computer and the My Book Live is encrypted. See also Protocol. MY BOOK LIVE 136 USER MANUAL - Western Digital WDBACG0030HCH | User Manual - Page 142
, providing a common connection to all devices on the network. Interface-A hardware or software protocol to manage the exchange of data between a device and a computer; the most devices using a cable or a plug. Ethernet ports, power ports, and USB ports are examples. MY BOOK LIVE 137 USER MANUAL - Western Digital WDBACG0030HCH | User Manual - Page 143
the computer or host can read but cannot modify. A computer can read instructions from ROM but cannot store data in ROM. Share-An area, similar platform that allows users to access shares through My Network Places. Mac OS X or later also supports the CIFS protocol. . MY BOOK LIVE 138 USER MANUAL - Western Digital WDBACG0030HCH | User Manual - Page 144
connecting and troubleshooting 19 WD 2go mobile app 106 WD Photos 103 WD Quick View 15 WD SmartWare software 26 iTunes media types supported 118, 127 overview 127 setting up 118 streaming audio 127 K KCC Notice (Korea) 134 L LAN configuration 69 requirements 6 Launching My Book Live Dashboard 21 - Western Digital WDBACG0030HCH | User Manual - Page 145
75, 116 Media storage 120 Mobile access adding a connection 101 setting up 101 Mobile apps 98 installing WD 2go 106 installing WD Photos 103 My Book Live backups list 88 changing user password 80 configuration settings 74 creating a share 83 date and time 65 deleting a share 86 deleting backups - Western Digital WDBACG0030HCH | User Manual - Page 146
up My Book Live 89 managing 97 recovering 95 updating 94 Safety compliance 133 instructions 1 Service, obtaining 134 Setting up mobile access 101 web access 109 Share 79 creating 83 creating a new user for 85 deleting 86 managing 82 opening 86 opening with WD SmartWare 51 user name and password - Western Digital WDBACG0030HCH | User Manual - Page 147
overview 25 pausing backups 40 setting auto update preferences 41 setting number of backup versions 39 setting retrieve folder 40 software settings 39 system files 29 WD TV Live/Live Plus HD Media Player 123 wd2go.com 112 Web access, enabling 109 Web browser compatibility 6 Windows Media Player 121 - Western Digital WDBACG0030HCH | User Manual - Page 148
specifications at any time without notice. Western Digital, WD, the WD logo, My Book, My Passport, and WD TV are registered trademarks in the U.S. and other countries; and My Book Live, WD SmartWare, WD GreenPower, WD 2go, WD Photos, WD TV Live, WD TV Live Plus are trademarks of Western Digital
-
 1
1 -
 2
2 -
 3
3 -
 4
4 -
 5
5 -
 6
6 -
 7
7 -
8
-
9
-
10
-
11
-
12
-
13
-
14
-
15
-
16
-
17
-
18
-
19
-
20
-
21
-
22
-
23
-
24
-
25
-
26
-
27
-
28
-
29
-
30
-
31
-
32
-
33
-
34
-
35
-
36
-
37
-
38
-
39
-
40
-
41
-
42
-
43
-
44
-
45
-
46
-
47
-
48
-
49
-
50
-
51
-
52
-
53
-
54
-
55
-
56
-
57
-
58
-
59
-
60
-
61
-
62
-
63
-
64
-
65
-
66
-
67
-
68
-
69
-
70
-
71
-
72
-
73
-
74
-
75
-
76
-
77
-
78
-
79
-
80
-
81
-
82
-
83
-
84
-
85
-
86
-
87
-
88
-
89
-
90
-
91
-
92
-
93
-
94
-
95
-
96
-
97
-
98
-
99
-
100
-
101
-
102
-
103
-
104
-
105
-
106
-
107
-
108
-
109
-
110
-
111
-
112
-
113
-
114
-
115
-
116
-
117
-
118
-
119
-
120
-
121
-
122
-
123
-
124
-
125
-
126
-
127
-
128
-
129
-
130
-
131
-
132
-
133
-
134
-
135
-
136
-
137
-
138
-
139
-
140
-
141
-
142
-
143
-
144
-
145
-
146
-
147
-
148
 |
 |
External
Desktop
My Book Live
User Manual
®
™