Western Digital WDBACG0030HCH User Manual - Page 14
Connecting the Drive and Getting Started, Connecting the Drive to Your Network
 |
View all Western Digital WDBACG0030HCH manuals
Add to My Manuals
Save this manual to your list of manuals |
Page 14 highlights
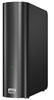
CONNECTING THE DRIVE AND GETTING STARTED 13 Connecting the Drive and Getting Started Connecting the Drive to Your Network Getting Started Using the CD (Windows and Mac) Getting Started Without the CD (Windows 7/Vista & Mac) What Can I Do Now? Connecting the Drive to Your Network It is easy to set up the My Book Live drive -- all you have to do is connect it to your home or small office network. LEDs on the front and the back of the drive let you know whether the connections are functioning properly. Note: For information about safely shutting down and disconnecting the drive, see "Safely Shutting Down" on page 55 or "Reboot/Shutdown" on page 71. Physically Connecting the Drive 4 2 1 3 Important: To avoid overheating, make sure the drive is upright as shown in the illustration above. . Follow the steps below to connect the My Book Live to a home or small office network. 1. Connect one end of the Ethernet cable into the Ethernet port located on the back of the drive. WARNING! To meet Class B emission standards, use the shielded Ethernet cable provided. 2. Connect the other end of the Ethernet cable directly into a router or network switch port. MY BOOK LIVE 9 USER MANUAL
-
 1
1 -
2
-
3
-
4
-
5
-
6
-
7
-
8
-
 9
9 -
 10
10 -
 11
11 -
 12
12 -
 13
13 -
 14
14 -
 15
15 -
 16
16 -
 17
17 -
 18
18 -
 19
19 -
20
-
21
-
22
-
23
-
24
-
25
-
26
-
27
-
28
-
29
-
30
-
31
-
32
-
33
-
34
-
35
-
36
-
37
-
38
-
39
-
40
-
41
-
42
-
43
-
44
-
45
-
46
-
47
-
48
-
49
-
50
-
51
-
52
-
53
-
54
-
55
-
56
-
57
-
58
-
59
-
60
-
61
-
62
-
63
-
64
-
65
-
66
-
67
-
68
-
69
-
70
-
71
-
72
-
73
-
74
-
75
-
76
-
77
-
78
-
79
-
80
-
81
-
82
-
83
-
84
-
85
-
86
-
87
-
88
-
89
-
90
-
91
-
92
-
93
-
94
-
95
-
96
-
97
-
98
-
99
-
100
-
101
-
102
-
103
-
104
-
105
-
106
-
107
-
108
-
109
-
110
-
111
-
112
-
113
-
114
-
115
-
116
-
117
-
118
-
119
-
120
-
121
-
122
-
123
-
124
-
125
-
126
-
127
-
128
-
129
-
130
-
131
-
132
-
133
-
134
-
135
-
136
-
137
-
138
-
139
-
140
-
141
-
142
-
143
-
144
-
145
-
146
-
147
-
148
 |
 |
