Yamaha AW4416 Additions And Changes In Version 1.2, 1.3 - Page 14
Changed procedure for deleting a Locate Point or Marker
 |
View all Yamaha AW4416 manuals
Add to My Manuals
Save this manual to your list of manuals |
Page 14 highlights
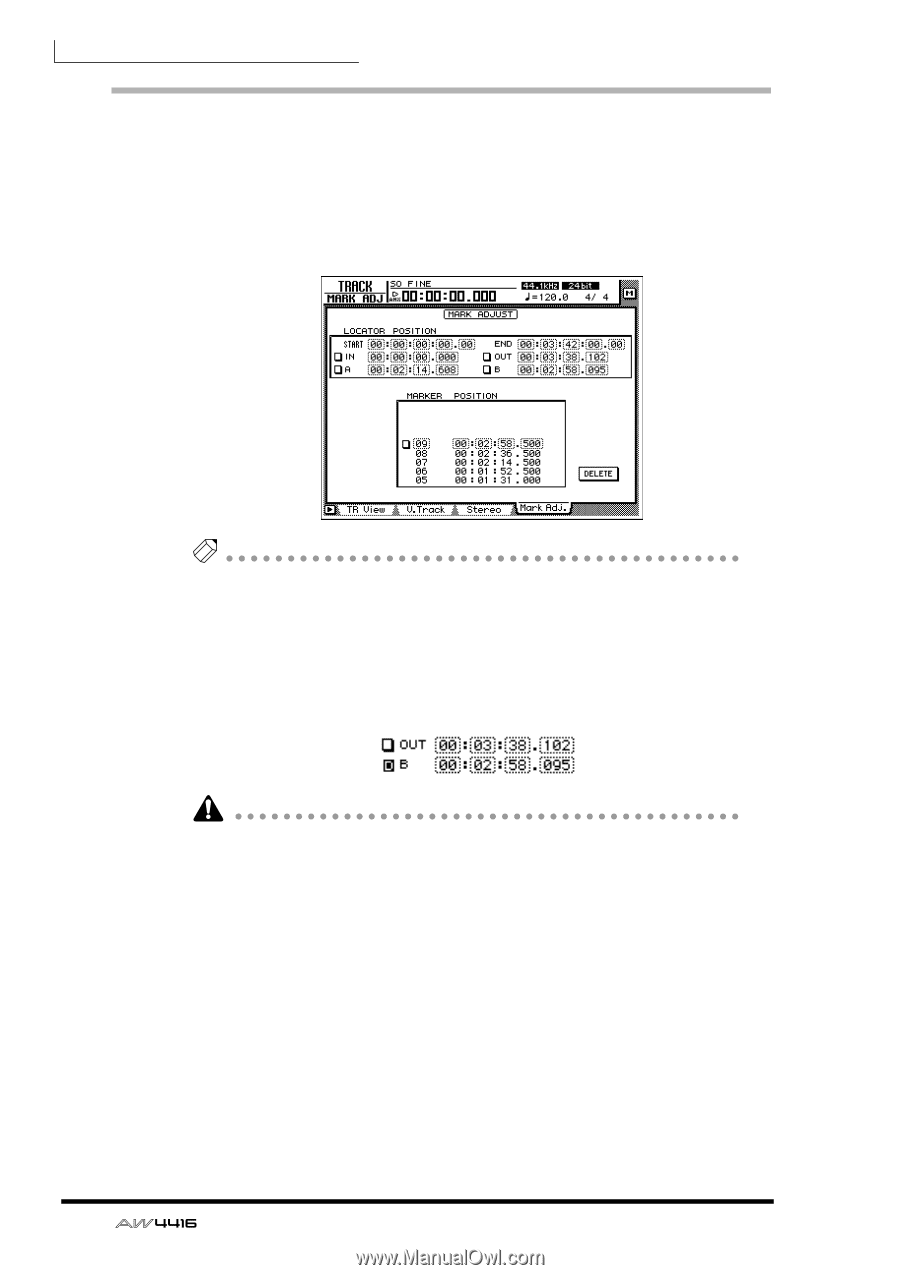
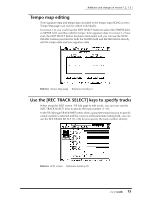
Additions and changes in version 1.2, 1.3 Changed procedure for deleting a Locate Point or Marker The procedure for deleting a locate point / marker in the TRACK screen Mark Adj. page has changed. The procedure is as follows. 1. In the RECORDER section, press the [TRACK] key → [F4] (Mark Adj.) key. The TRACK screen Mark Adj. page will appear. Tip • You can repeat step 2 to select multiple locate points. However, only one marker can be selected for deletion. • It is not possible to delete the start / end points. 2. Select the locate point / marker that you wish to delete, move the cursor to the button at the left of the display, and press the [ENTER] key. The "D" character will be displayed on the button. This indicates that the corresponding locate point / marker has been selected for deletion. The deletion procedure described on p.125 of the Operation Guide cannot be used in version 1.2. 3. Move the cursor to the DELETE button, and press the [ENTER] key. The locate point / marker you selected in step 1 will be deleted. If an in/out point or A/B point was deleted, the corresponding key ([IN]/[OUT] key or [A]/[B] key) will go dark. Refer to: Deleting a locate point → Operation Guide p.125 14
-
 1
1 -
2
-
3
-
4
-
5
-
6
-
7
-
8
-
 9
9 -
 10
10 -
 11
11 -
 12
12 -
 13
13 -
 14
14 -
 15
15 -
 16
16 -
 17
17 -
 18
18 -
 19
19 -
20
 |
 |