Yamaha AW4416 Additions And Changes In Version 1.2, 1.3 - Page 6
Writing audio data from a track to a WAV file, F1] TR Edit key. - computer recording
 |
View all Yamaha AW4416 manuals
Add to My Manuals
Save this manual to your list of manuals |
Page 6 highlights
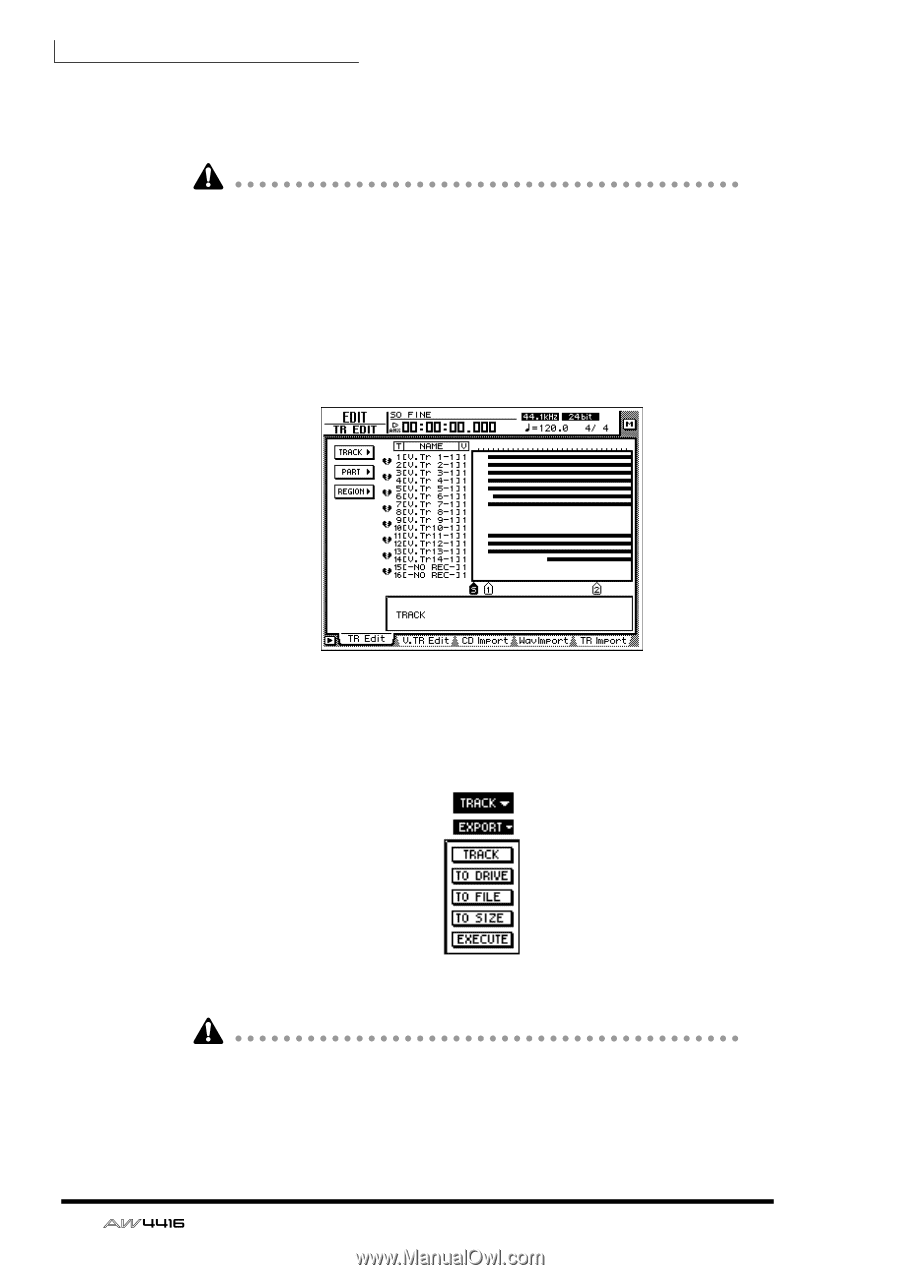
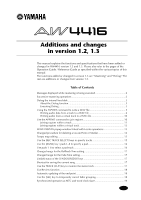
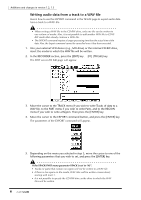
Additions and changes in version 1.2, 1.3 Ì Writing audio data from a track to a WAV file Here's how to use the EXPORT command in the TR Edit page to export audio data from a track to a WAV file. • When writing a WAV file to the CD-RW drive, only one file can be written to one volume of media. Also, it is not possible to add another WAV file to CD-R/ RW media that already contains a WAV file. • The EXPORT command requires a longer processing time than the actual time of the data. Also, the Export command cannot be cancelled once it has been executed. 1. Into your external SCSI device (e.g., MO drive) or the internal CD-RW drive, insert the media to which the WAV file will be written. 2. In the RECORDER section, press the [EDIT] key → [F1] (TR Edit) key. The EDIT screen TR Edit page will appear. 3. Move the cursor to the TRACK menu if you wish to write Tracks of data to a WAV file, to the PART menu if you wish to write Parts, and to the REGION menu if you wish to write a Region. Then press the [ENTER] key. 4. Move the cursor to the EXPORT command button, and press the [ENTER] key. The parameters of the EXPORT command will appear. 5. Depending on the menu you selected in step 3, move the cursor to one of the following parameters that you wish to set, and press the [ENTER] key. If the TRACK/PART menu parameter TRACK is set to "AL": • Tracks (or parts) that contain no region will not be written to a WAV file. • If there is free space on the media, WAV files will be written consecutively starting with track 1. • It is not possible to specify the CD-RW drive as the drive to which the WAV files will be written. 6
-
 1
1 -
 2
2 -
 3
3 -
 4
4 -
 5
5 -
 6
6 -
 7
7 -
 8
8 -
 9
9 -
 10
10 -
 11
11 -
 12
12 -
13
-
14
-
15
-
16
-
17
-
18
-
19
-
20
 |
 |