Yamaha AW4416 Additions And Changes In Version 1.2, 1.3 - Page 9
button, and press the [ENTER] key., Use the [DATA/JOG] dial to change the setting to 16 - operation guide
 |
View all Yamaha AW4416 manuals
Add to My Manuals
Save this manual to your list of manuals |
Page 9 highlights
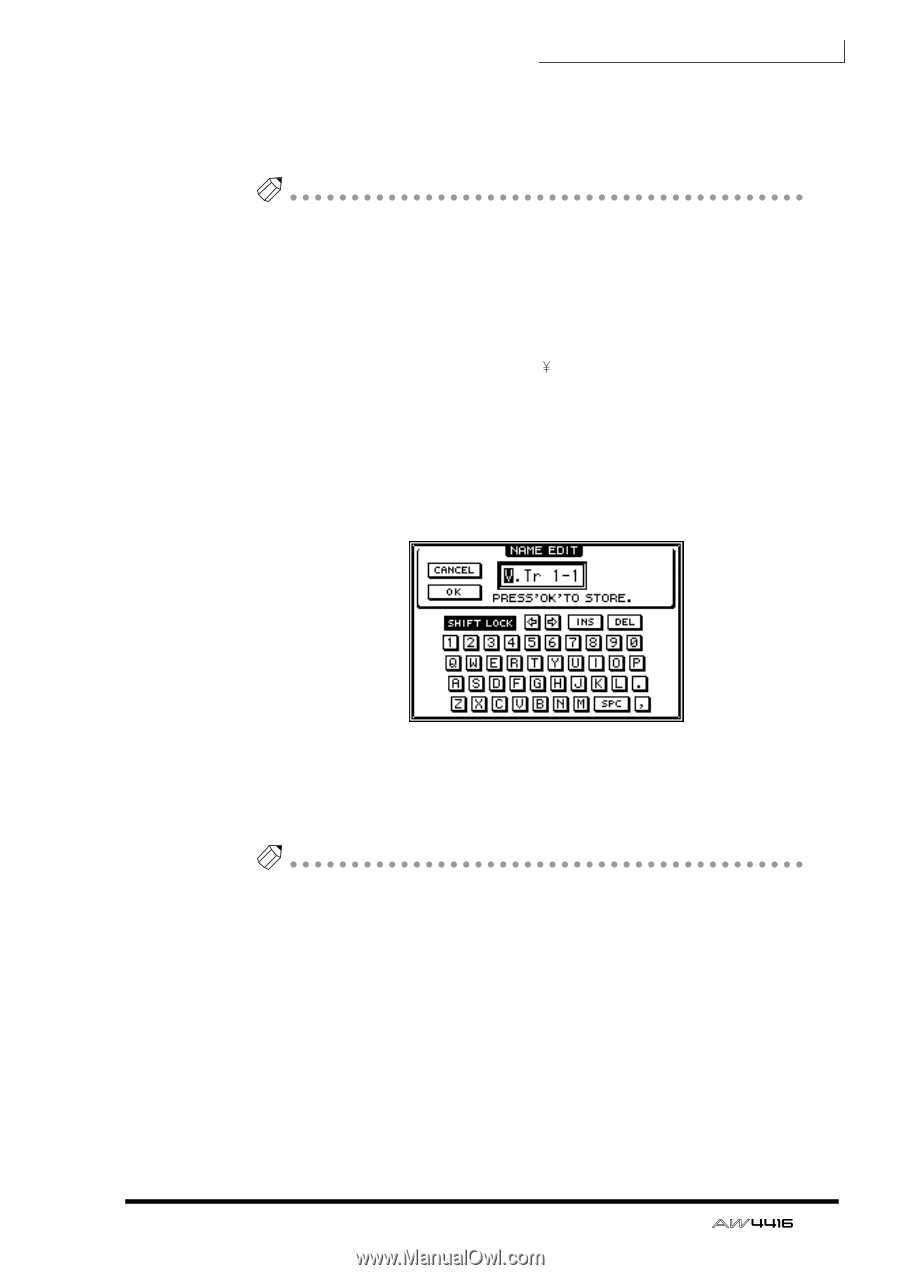
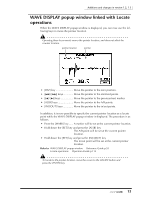
Additions and changes in version 1.2, 1.3 9. Move the cursor to the EXIT button, and press the [ENTER] key. The drive to which the WAV file will be written will be specified, and you will return to the screen for selecting the various parameters of the EXPORT command. Tip • For details on operations in the NAME EDIT popup window, refer to p.60 of the Operation Guide. • If you selected "AL" for the TRACK parameter, it is not possible to change the filename. • If you are writing to CD-R/RW media, the characters usable in the filename are limited to uppercase alphabet (A-Z), numerals (0-9), and the underscore character (_). If you input a space in the filename, it will be converted into an underscore character. If you are writing to media other than CD-R/RW, the filename may not contain the characters or a period (.) at the beginning of the name. These unusable characters will be converted to an underscore (_). Nor is it possible for the name to consist entirely of spaces. 10. If you wish to assign a desired filename to the WAV file, move the cursor to the TO FILE parameter button, and press the [ENTER] key. The NAME EDIT popup window will appear, allowing you to specify the filename of the WAV file. By default, the filename will be the name of the track or region you selected in step 6, plus .WAV. 11. When you have finished specifying the filename, move the cursor to the OK button, and press the [ENTER] key. 12. Use the [DATA/JOG] dial to change the setting to 16, and press the [ENTER] key. Tip If a file of the identical name already exists on the writing destination device, a popup window will appear, asking you whether you wish to overwrite it. If you wish to overwrite, move the cursor to the OK button. If you do not wish to overwrite, move the cursor to the CANCEL button. Then press the [ENTER] key. If you used the CANCEL button, you will return to the screen for setting parameters of the EXPORT command. Change the filename as necessary. 9
-
 1
1 -
2
-
3
-
 4
4 -
 5
5 -
 6
6 -
 7
7 -
 8
8 -
 9
9 -
 10
10 -
 11
11 -
 12
12 -
 13
13 -
 14
14 -
15
-
16
-
17
-
18
-
19
-
20
 |
 |